-
Posts
28,398 -
Joined
-
Last visited
-
Days Won
424
Content Type
Profiles
Forums
Events
Everything posted by robcat2075
-
If you're on a PC you've got Direct X. It would be tough to not have it. Tools>Options>Global>Realtime drivers. Try a much smaller image just to test and see what happens. And Make sure it's a targa.
-
If it isn't possible to turn off ambience on a sprite, you may have to resort to using a particle effect that is an actual 3d shape, meaning the new "water". I think those really exist inthe scene and can be shadowed. You'd have to experiment to get a particle setting that mimics what you were doing with sprites, presuming your sprite really was a blob, not a recognizable image.
-
It's possible you could recover some parts of it with a text editor, but you'd have to know what to look for. You could post it here and someone might try it. No guarantees. But really... you have an important project and never saved previous versions or a backup? Ouch. unlikely possibility... drag the .prj into A:M rather than "opening" it via the menu.
-
how big is your image in pixels? try switching OpneGLDirectX in your preferences.
-
In the model window... right-click>New>pose>percentage in the new "relationship" window that comes up repose the finger in the way you want it to be. Hopefully you have your pose slider window open too (ALT-4). It will highlight your new slider in RED at 100%. you can slide it to other values besides 100% if you want to set the finger in other specific ways at other values. close the "relationship"window when you are done. Now when you use your character in a chor or action you can use that pose slider to make something happen, I don't recommend using a pose slider for that sort of thing, but you certainly can do it.
-
post a screen shot of what you are doing. Just saying "it doesn't llok likw it does in the picture" isn't enough for us to go on.
-
Is the "cheekbone" area moving up and down with his jaw something you are doing or is that automatic? It's too active I think.
-
Quick answer...the modeling will be rather similar to any other character. -make a front and side drawing of the character to use as rotoscopes. -start modeling the features... eyes, nose, mouth.... follow thw same procedure as the tuts on normal characters. -when you're done, "toon rendering" will do a lot to get the flat shaded anime look. HAve you finished the tuts in TAoA:M yet? those will cover a lot of ground you will want to know.
-
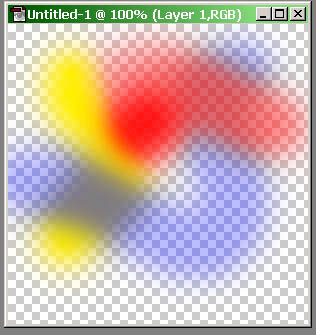
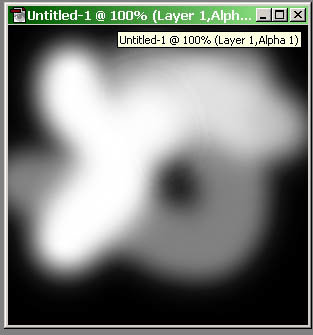
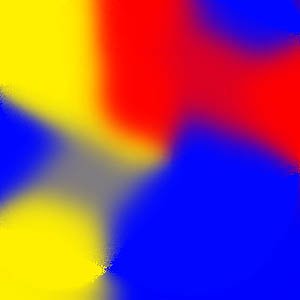
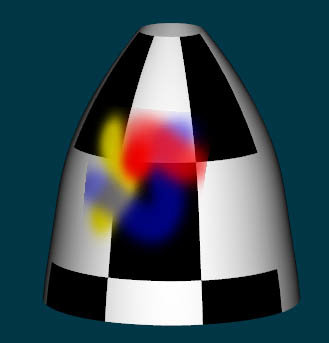
YOu can paint alpha channels by hand but for complex tranparencies like this, it won't do: The Flaming Pear plugin ("Solidify") is free on the web, ya just gotta find it. what it does is convert transparencies in photoshop layers into solid color. why do yo u want to do that? Because you can't just save a transparant layer as a targa and get an alpha in it that correctly represents the transparency. You need to load the transparency info of the visible layer and paint it into the alpha channel, then "solidify" the original image. THEN you can save a targa and it will work as a decal with the intended transparent effects. Gray fringes will result otherwise if you dont' do it that way. No fringes, even on pure white or pure black patches:
-
That's a photoshop process. Easy to do. Long to explain. You'll need the "Flaming Pear" plugins for PS. There's a thread around here somewhere on it...
-
glowingsprite.zipa sprite image created with an alpha channel that makes a hazy white fadeout surrounding the main image will look like a glow.
-
that's what it is there for.
-
I like the semi shadow puppet look! Keep going with it.
-
This is a big topic. A lot has to do with the codec you chose (or left on by default). You can choose a codec and settings while you are doing your other save settings. Generally you have to experiment with settings to find the right compromise between quality and size. "Animation" is largely uncompressed and will make large files. "Sorenson 3" will make smaller files. There are other choices. If you have a website you could put it on that and send them a link.
-
constrain (translation and rotation)the model to the camera.
-
"Intensity" in the properties for the light.
-
I don't know how the model was exported to OBJ, although there is an OBJ export plugin for maya. I just know I got the model in OBJ.
-
An OBJ derived from a well-made "Sub-D" model can have promise for importing to A:M. Typically, a lot of thinning out of unnecessary splines is needed and some resplining to substitute 5-pointers where 5-edge intersections were happening. I've done it once; it was a lot of work; but it was less work than merely using the imported OBJ as a reference and remodeling from scratch.
-
import a targa sequence, apply as rotoscope
-
A "swatch" woudl be some simple, mostly flat geometry with a decal on it. If you do get some long flowing hair to work well (like not pass thru the shoulders and all that) that will be good to see. I recall an article about "The Incredibles" saying that Violet having long hair was something they considered abandoning because it was so difficult to manage.
-

Pose verses Action for effect is there an advantage
robcat2075 replied to johnl3d's topic in Work In Progress / Sweatbox
The only way I can think of transferring a pose is to extract it from one .mdl file and paste it into another .mdl with a text editor. Haven't tried it and it would probably lend itself to poses on bones only. -
Basically start extrding and looping and extruding and looping. If your bow was one of those fancy bows wiht lots of curls the dup wizard would probably do it. but I dont think you need that. there's a plugin out there that will extrude anything along a spline. make one spline thatdoes the path of the ribbon, then extrude something flat along it.
-
There's a zillion things that make "realistic". Tell us more about what specific details disappoint you in these.
-
It does seem a bit bleak.
-

probably a question no one could help me out with but...
robcat2075 replied to Ravager's topic in New Users
You did a search for posts by you? You've only made 250. i fyou knew about when you posted them you could narrow the search results down.


