-
Posts
28,400 -
Joined
-
Last visited
-
Days Won
425
Content Type
Profiles
Forums
Events
Everything posted by robcat2075
-
reading your initial post a bit more... are you saying that the 1st cloth simulation no longer works after you subdivide the cloth? Even for the CPs that were there before? I'm not surprised, I'm going to guess that the identity of all the CPs has been jumbled by adding new ones to the same mesh. Maybe you could show your unsuccessful result and that would tell more.
-
I don't think you can combine two chors easily, but A:M has an editing capability that lets you put together clips you've already rendered. Non-Linear Editor
-
Wondering about a feature isn't a problem, but I just dont' see this one panning out. I know that there is no documented provision to do what you are proposing. And thinking it thru, i dont' see any benefit to be gained either in simulation time or successful results. Since the idea is to simplify by ignoring collisons in the second sim, you might as well stay with the low res mesh that ignores collisions between the original CPs anyway. All you're going to get is a higher res mesh that gave the appearance of only the accuracy of the lo-res mesh. I do not see it ever getting great results. Post a pic of what you are working on. Someone who knows cloth may have ideas.
-
that's still a lot of unresponsive points across the mesh. I'd say the likelyhood of them putting programming time in to this is about none. AM's simcloth is based on an open source Simcloth which likely had very thoughtful minds applied to the problem. What we see here is not someone's first stab at cloth sim but a very maturely developed process. I think if this were a useful optimization We'd probably see it already. I am not sure I know what you mean... are you referring to literally scaling up the size of the model and it's cloth in the choreography (wouldn't you have to scale up the whole world?) Yes, physically scale the cloth and the model it interacts with. In my case the cloth was part of the model file of the character that was wearing it. If the cloth has to interact with other models, this becomes more complicated to do, perhaps unfeasible. No guarantees. You may have other things besides inadequate collision distance going wrong. In which case increasing the collision distance still wont' appear to solve your problem.
-
I don't think that would get you much even if a 2nd sim were possible. The 2nd sim would be like small squares of cloth being moved by rigid chicken wire. In real cloth every point can exert a cascading effect on all the other points. In your cloth, the points that were simmed first would be like a barrier to that since they are moving on a predetermined path and not influenceable. also... suppose you simmed a 10 x 10 grid. that's 100 CPS double that to 20 x 20 and you'd have 300 more points to sim, which isn't a great improvement over the 400 that 20 x 20 would have been originally. I've had improved success with cloth by scaling my model about 5x and increasing the collision distance 5x before running the sim. then scaling the whole thing back down when it was done. Also, other people have had success deleting unnecessary collision creators, like the interior of an armpit. It's temporarily retired. If there are a new flurry of developments with cloth it might warrant a dedicated forum again.
-
an animated decal is like other decals but the image is an image sequence instead of one image. They have a sequence of numbers name001,tga name002.tga name003.tga... you name your images that way on Images in the PWS... Import>"Animation or Image Sequence" to import them as a sequence instead of as separate files you apply this to your model like any other decal.
-
That doesn't work here. The wrong pivot still stays wrong.
-
Actual interactivity like that would be beyond A:M's capability. (I suppose it might be POSSIBLE with some sort of wild combination of poses and expressions, but too much work to do ) But you could certainly paint some screen shots that go thru that sequence of events and apply those to a model of a computer screen as an animated decal.
-
Yup, you're right. Write that up as a bug for AMReports. For "steps to duplicate" you could put a link to your post. The misbehavior seems to be a bit different depending on whether you SHift-select the groups or Ctrl-select them.
-
Can you show a case where selecting more than one group or where copy/paste causes pivots to be lost? I can't make that happen.
-
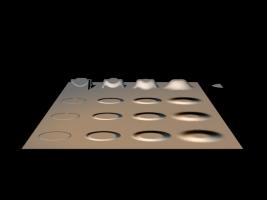
There is a problem with displacement maps. Only one will be recognized on any patch. Any others will be rendered as bump maps. this patch has the same map applied four times but only the first is actually being rendered as displacement.
-
I don't know much about flocking, but Steffen Gross has two multiple model placing plugins you might want to try "MMOP" and "Multiply" After you run the plugin you could delete any that happened to fall in bad places. I think they also offer options to randomly rotate the model.
-
Wow! looks impressive!
-
Welcome to A:M! Sounds like you have a great start!
-
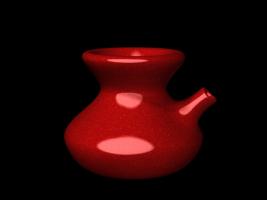
the flakes are by the "cellTurb" combiner. The clearcoat is the "Glossy"specular shader plugin .
-
looks great! The axle looks too thin.
-
an attempt at "Cars"-style clear coat, metal flake paint. (you have to full-size it to see the flakes) It doesn't "glitter" yet when the object turns so that will need some more R&D.
-
Sky color is in the camera properties, but I believe it always renders as black when Alpha channels are enabled.
-
select the ground, in the properties window turn "active" OFF. And do it on the first frame. All objects have this "Active" property.
-
scale % wont' help him, he needs explicit dimensions.
-
You'd have to eyeball physical dimensions with the rulers, or build the model using things like snap to grid and the CP properties for exact plaement. I recall Martin saying that CAD/CAM wasn't something A:M tried to do. A little experimenting reminded me that spline models are a bit harder to keep tabs on for things like exact dimensions
-
You can turn on the rulers. Also, the "pivot" property of any CP will give you a physical placement in your current units.
-
Very cool! that's a first class character.
-
Great treez guys. Looking at the way the leaves get distributed, it occurs to me that you could use this to make pretty good clouds. Use a foggier bitmap for the leaves and then hide the trunk. Anyone try that?
-
I'd suggest doing a small test each way and see if there is a difference


