-
Posts
28,389 -
Joined
-
Last visited
-
Days Won
422
Content Type
Profiles
Forums
Events
Everything posted by robcat2075
-
Sounds like a Blending mode problem, but hard to know without seeing it. Live Answer Time is coming up! Generically, to get all keyframes, you can set the Key Model filter and also set the transformation filters you need to capture, usually Skeletal Translations and Skeletal Rotations. Skeletal Scaling is rarely needed. If any Pose sliders are crucial to the moment you'll need Key Pose, too. Copy. Paste. Without seeing your case it's hard to say more. Live Answer Time is coming up!
-
I believe it sets the Action's "Length" value to the time of the last keyframe in the action.
-
I wish everyone a fine holiday!
-
The render times are identical? I'm very doubtful about this. I know that the difference between v15 and v19 is substantial. I can't run v13 in Windows 10 I would be curious to see results from the teapot benchmark. https://forums.hash.com/topic/36753-cpu-render-benchmark/#comment-316705 I dont' know anything about MDD, but a bug that can be duplicated can be reported. If you can show how valid input ( I don't know what a discrepancy is) creates invalid output that would be something that can be reported. That is a bit vague to act on or know how to direct you.
-
-
It is possible that those programs, separated by 15 years, have different ram-usage strategies or that the compiler that made them did. Which one renders faster? If 19 isn't rendering faster something is wrong. Is this preventing you from running other programs?
-
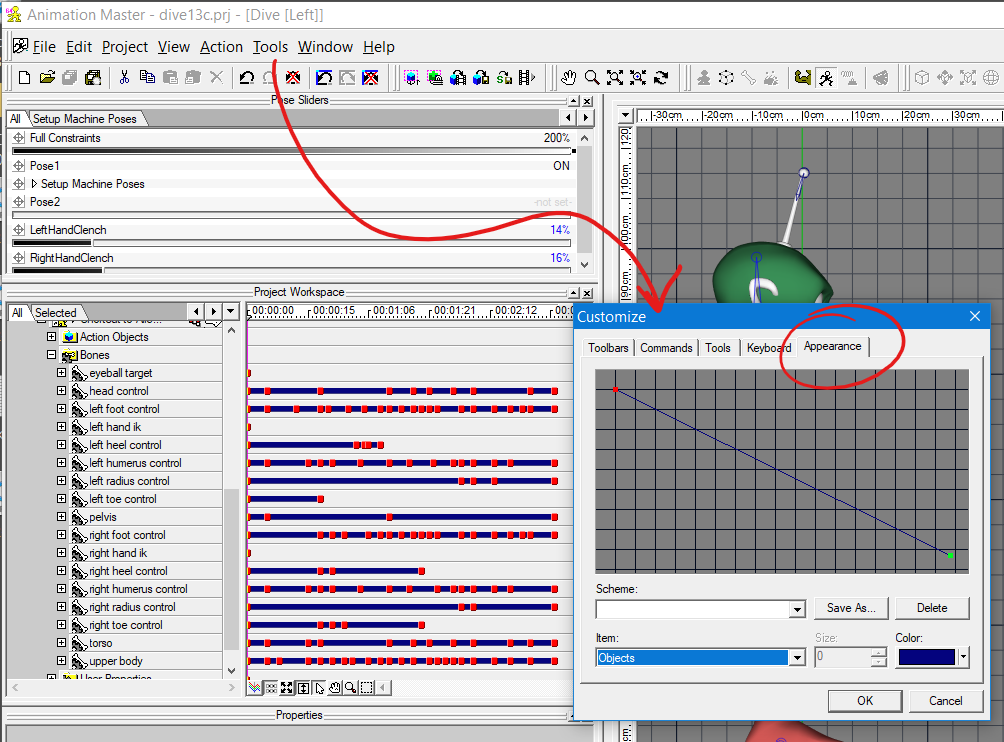
Something is wrong. I'm on Windows 10 and I am able set the color of animation channels in Tools>Customize>Appearance... And my windows don't have a curved border. The blue is a windows setting that can be changed in Windows Settings.
-
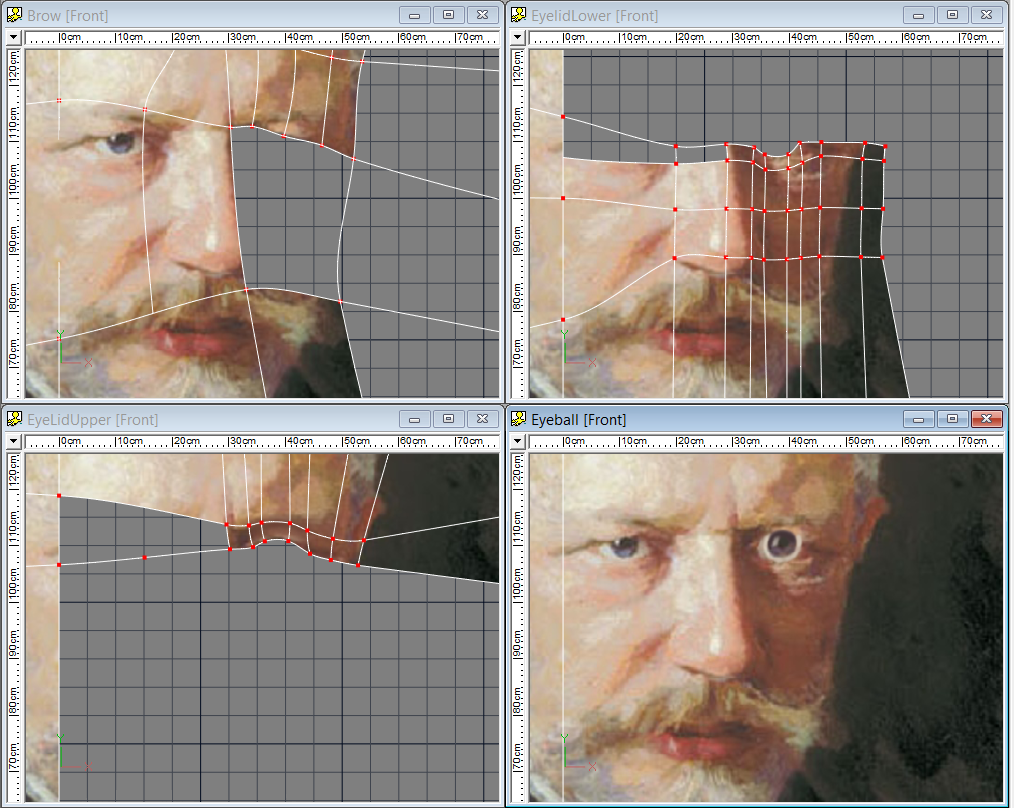
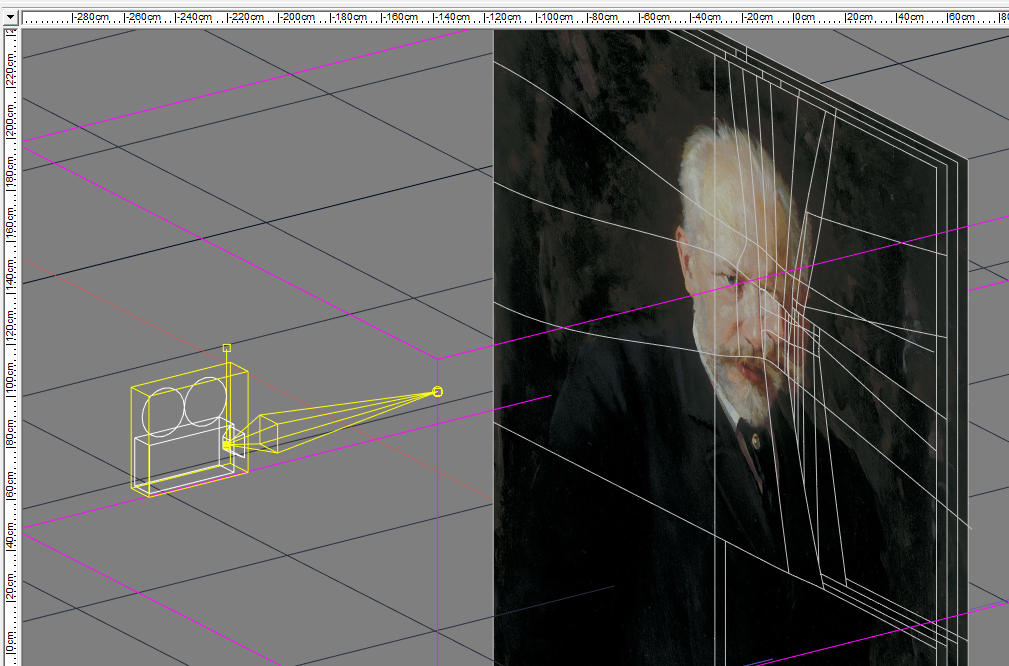
I was part of a trombone forum collaboration this year, the sort where everyone records their part individually and then it all gets edited together. Since we were playing a jazz arrangement of a Tchaikovsky piece I thought it would be cute to have him drop in at the very end and wink to the camera. It would work like this... (the bit of music in this demo is not our group, it's is previous recording of the piece) Alas, it didn't get used. But, of course it was done in A:M. I edited four versions of the painting... for the brow, the upper eyelid, the lower eyelid and the eyeball behind them. I added splines to outline the moving parts and did a muscle Pose to control each one individually. I stacked the layers in the Chor, animated the Pose sliders and shot them with an orthogonal camera.
- 1 reply
-
- 1
-

-
Those look good! I like the technique of compositing the characters into real-world images. Don't wait ten years to show us the next ones!
-

playing with 2005 AM stuff with Santa
robcat2075 replied to johnl3d's topic in Tinkering Gnome's Workshop
Santa has weird parties. -

Another 2005 AM character skating
robcat2075 replied to johnl3d's topic in Tinkering Gnome's Workshop
Aaiieeee.... -
I suggest you make an image of your Windows 7 OS drive in case you need to go back. And, of course, you've backed up all your data. Is this an in-place update... Windows does the update and keeps all your old programs installed? Maybe you won't need your A:M license rewritten, but i don't know.
-

"Why Does The Wind Blow?" old Sedan car 3D Model request
robcat2075 replied to JackDrama's topic in Characters
I found my copy of the Data.zip... I don't think that car is in it. -

"Why Does The Wind Blow?" old Sedan car 3D Model request
robcat2075 replied to JackDrama's topic in Characters
I have a 1995 Data CD that looks like it has that model on it... but it's broken If you haven't checked the zips on the ftp... do that. -

"Why Does The Wind Blow?" old Sedan car 3D Model request
robcat2075 replied to JackDrama's topic in Characters
Have you already looked in "Data.zip" at ftp.hash.com/pub/misc ? -

Cap Your Mo! Join the Summer Mo-Cap Challenge
robcat2075 replied to robcat2075's topic in Animation:Master
Still a few days left to cap your Mo! -
Quicktime is deprecated now as a security hazard but I still use it. It can load image sequences. Quicktime Pro (extra cost) can compress them in a variety of formats. It is the only player that can reliably step through video in single frames.
-
Yes, but I need to try that again before I write directions . For now... First, look in your frames folder and see what the last frame completed was. Then start NR and start a new job. Making the new job will be easier if you use the Preset you made for it initially. Set the frame range to start one frame later than the last completed frame. This will be dramatically easier if you have NetRender set to display time in frames instead of seconds:frames
-
Welcome back to A:M! Sorry to hear of the disruptions in your job! "105%" sounds sneaky....
-
I'll note that browsers no longer support ftp transfer. You'll need an ftp program like Filezilla to access Hash's ftp server where old installers are available... ftp.hash.com/pub/updates/windows
-
The space mouse compatibility goes back quite a way. Try some previous versions (v18, v17, etc) and see if you get the same results. Copy your master0.lic file from your v19 folder to your vXX version folder to enable it.
-
"Ease" is a parameter for path constraints only, AFAIK. However, you can keyframe a constraint's "Enforcement" in the Chor, I think.
-
Blending is intended to describe how two or more simultaneous Actions get combined but... it may be that during a transition Blend is a factor also. I have almost never used Action transitions so I'm not sure. This would be a thing to bring to Live Answer Time!
-
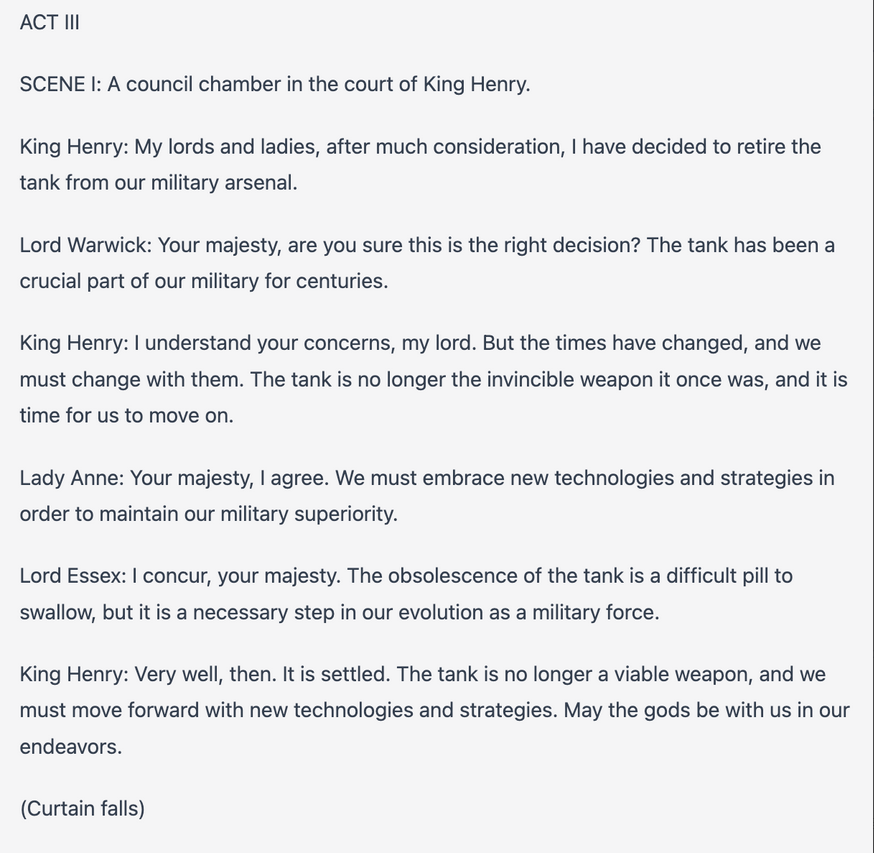
Seen on Twitter... An AI called gpt3chat was asked to "Write a Shakespeare play explaining the debate over the obsolescence of the tank"
-
Hi Jason! I've been a beta tester on a v19.5 for almost a year, the release of which is "real soon now" v19.5 wont' have dramatic new features, it's mostly about code changes for going forward... which implies there is a forward, a v20 sometime in the future. Yay!


