-
Posts
7,863 -
Joined
-
Last visited
-
Days Won
15
Content Type
Profiles
Forums
Events
Everything posted by NancyGormezano
-

BOOLEANS used to make a graphic FIREWORKS
NancyGormezano replied to John Bigboote's topic in Work In Progress / Sweatbox
fabulous!! - very creative solution - thanks -
dilemma it tis
-
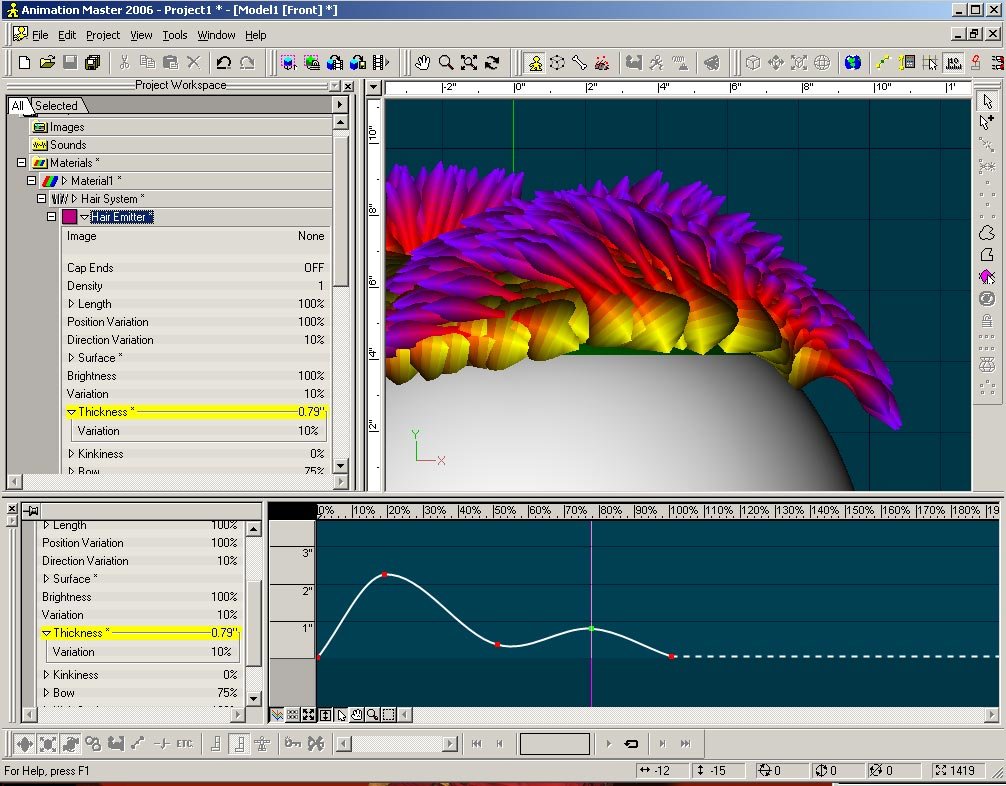
Hi Make sure you have the timeline open - & select thickness in the material The timeline should then show percentage (along the shaft of hair) for the horizontal axis - you may have to zoom to get it to show the appropriate range (0-100) - move to the percent along the timeline that you want to change thickness for & type it in
-
and don't forget the new liquids for blood splatter
-
That's a mighty sweet looking Pin-up Pig Ricky's got there. (made me laugh)
-
Ditto, Rodney: Awww - how cute. You do know of course, that Ricky the Rat shares DNA with Cow-a-Johnga ? It's great to see you paying tribute to Grandpa: http://www.hash.com/forums/index.php?s=&am...st&p=190034
-
Fabulous! (I had always wondered what the music track would be)...Excellent all around, put together wonderfully. Happy Holiday to you and all as well!
-
The ease property is located in the properties for the constrain to path constraint http://www.hash.com/forums/index.php?s=&am...st&p=254454
-
Actually A:M will do the math for you. Import the action into a project set for 30 fps (or whatever it was shot at) and then change the A:M project frame rate to 24. A:M will auto-magically realign the keyframes. No stretching/dragging of keyframes involved either. You might want to select "snap to frames" on all the keyframes - but that might not be necessary if you don't want to do any monkeying with the keyframes.
-
old & crappy? I'm old & crappy. That was great. Nice breakdown as well - very clear I hate you....I mean that in a good way, of course.
-
Turn off light buffers? and post effects ? I'm not that familiar with ver12 & stereo rendering - but if turning off light buffers & post effects doesn't help, then start turning off a variety of things including multipass, reflections to track down what might be causing the problem
-
After constraining your model to a path - pull down the property triangle for the constrain to path (or select show properties) to view the ease property - Set the ease value to be the percentage that the model travels along the path. Select the show bias handles - then adjust the rate of ease in & out as desired on the ease channel curve.
-
sweet little song - nice voice
-
hmmm...that is strange - It should work in director mode as well as skeletal mode but not bones mode. And it looks like there might be something funny that happens when switching modes - I noticed that if I went into bones mode and then switched back to director mode - that the pose slider wouldn't work anymore So Start a new choreography. Drag keekat in. select Keekat. and now try the pose slider. Should work. (what version 2006 of am are you using ? - should be the latest 13s -ish? (help/about to see version). And now you will ask where to get the latest version and I'm hoping someone will tell us)
-
hee hee - this is gonna be good
-
Uh-oh. Sounds like Sister Mary Dracula is still rumbling around in your poor lil head .... THWAP!
-
Hee hee - very good David! Love the extra eyeball aimers also - The Cross eyed look is soon to become the norm (for my stuff anyway). And how about the extra stops for the FACE on/off - (now goes to 4%) - I can see myself getting into even more trouble with 3 & 4. Just keeps getting mo' bettah
-

SimCloth used in another TV spot
NancyGormezano replied to John Bigboote's topic in Work In Progress / Sweatbox
very, very cute ribbons - well done. Now if you had only used sprites or newton dynamics so that the snow would gather on the furniture, and then freeze up with ice like fluids. That would totally convince me to buy from this store for sure. -
Neato - I can't wait to see this thing blasting poor ol' Thom with some colorful "paint ball" fluid tests.
-
It seems to me that some of the characters have too much of a limitation on eye movement. And I have also noticed (I think?) that on some characters, one can get greater eye movement if you use the master target rather than the eye aimer bone. I prefer a greater range of motion, more extreme for the eyes. Not sure if your new rig addresses this. But perhaps it was how the individual model was setup? and not a function of the rig.
-

How to add clouds or a textured background
NancyGormezano replied to Jentham2000's topic in New Users
If the surfaces are already decaled - and you extend (stretch) the grass/ground the decal will "stretch" with the surface. If it is too stretchy looking - then you can set a repeat for the decal (under the decal container in the model) or reapply the decal. -

How to add clouds or a textured background
NancyGormezano replied to Jentham2000's topic in New Users
To add a background (assuming the camera doesn't move during the shot) - right click on the camera in the chor and choose NEW, rotoscope - then select the image you want to use (either already loaded or browse for it with other). To extend the grass/sidewalk - you will have to alter the model ? - not sure I understand the question (since that was the obvious answer) -
very nice stuff - could work very nicely for making fluffy wispy clouds
-
Turn off stride length in the action (not in the chor) then repeat should show up in the chor. Verrrry nice footprints
-
So what color(s) are you today?


