NancyGormezano
-
Posts
7,863 -
Joined
-
Last visited
-
Days Won
15
Content Type
Profiles
Forums
Events
Everything posted by NancyGormezano
-
Nice Hat! Thank you so much - I can definitely see a use for it sometime in the future for me
-
Stian - THAT IS FABULOUS! You constantly amaze me.
-
In real life, it is true that predators have evolved to have their eyes facing forward (better for hunting, focusing), while their prey do have their eyes on the sides of their head (larger field of view, better to see movement, and the predators coming).
-
yup - yah sure, you betcha - that's a blinking light, alright
-
It wouldn't matter how long your action was (could make it 2 frames if you want with just 2 keyframes: 0 % ambiance & 100 % ambiance) - you would adjust the # of repeats, and the cycle length of the action after you dragged it into the chor. So if you wanted it to repeat every 10 frame, for 200 frames then set the cycle length to 10 - and the # of repeats =20. (200 frames total). Similarly, if you wanted a longer cycle & wanted it to repeat every 40 frames for 200 frames - then set cycle length to 40, repeat = 5 (total # frames = 200)
-
If you are really wanting to learn how to do expressions - then ignore the following: But perhaps do it in an action? then you can control the cycle time, and number of repeats for many different situations
-
wow. excellent.
-
This is so great Paul - Thanks for posting your work, its extremely helpful. The tartan skirt looks terrific. (and thank you Holmes as well for the written tutorial)
-
Pretty good alright. And maybe someone will believe me now...
-
Very Good! Definitely would vote for it, even without knowing who did it.
-
Ok - still not sure what's going on, and it may be something going on with your computer config? - so many questions that would need to be asked & investigated: pc? version A:M (stick to 13s,t for now)? QT vers?, compression settings? disk space? happen only on 1 project? accidently trying to save .mov to the CD? ....etc, etc...can you show us screen grabs? No, shouldn't have to change it in camera options menu ...like I said: procedure should be same as rendering to avi. As an experiment: Have you ever been able to create a .mov? if so rename it, (or delete it) and then try to render to origname.mov. I have noticed a problem similiar with specific chor's of mine that if a rendered tga sequence already exists for an animation, then I have to delete the tgas first before I can rerender it to samename tgas - or else each tga gets rendered looking like maybe some random frame of the sequence. So not sure this is same problem.
-
Wheeeeeeee....Love it That is GOOD. Love the camera angles, pacing, reactions, sounds, classy British accents (we Nu Yawkas think anything with a British accent is classy). Good storytelling - builds interest for the next segment - me want more. Ditto for the BIG smile on my face too. And in conclusion: Wheeeeeeeeeee (perfect sound for witch)
-
Not sure why you would be having a problem with .mov - should be a similar procedure as to avi: Render to file, select quicktime, set the name of file, choose the compression algorhythm (set) and set the values for compression or use default, What are your compression settings? Make sure you've set a range of frames to be rendered as well
-

14sweeper and material idea test
NancyGormezano replied to johnl3d's topic in Work In Progress / Sweatbox
very neat - I might also find a use for the technique in the Yoop Lonely sequence - thanks John -
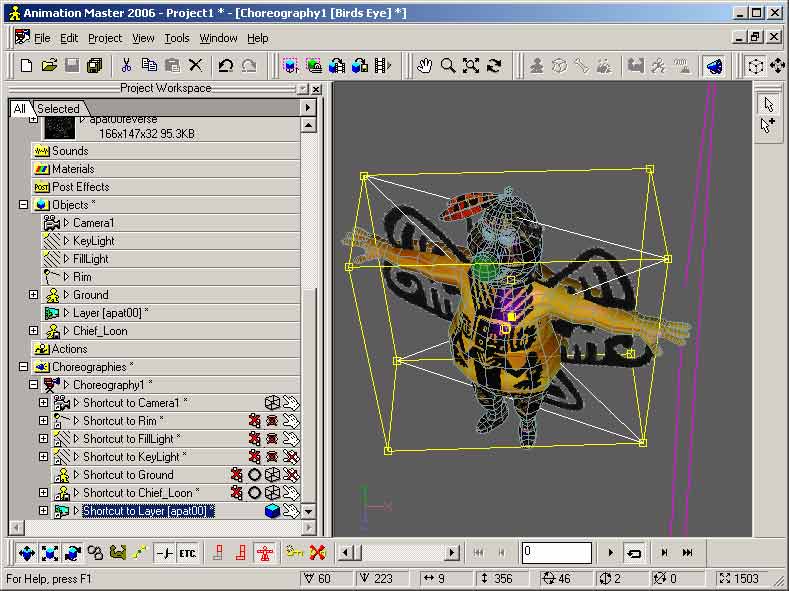
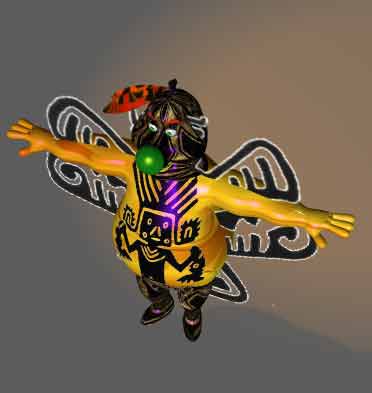
A layer is really just a special type model - ie, a 3D plane with an image projected onto its 1 face/patch. Other models can definitely be placed behind or in front of layers. Sometimes layers can be difficult to translate in the chor. Perhaps the layer is not positioned as to where you think it is? You can also scale and rotate layers. In my example - I've used an image for the layer that has an alpha channel. The alpha channel defines the wing (layer) shape, and coloring. However, you will not be able to "wrap" a layer around something - ie you can not manipulate it's cp's. Instead, you could just make a 1 (or more) patch model with the wing image as a cookie-cut type decal and then you can manipulate the wing model as you'd want. Not sure what you're going for - but if it's just a still you might be able to simulate a type of "photoshoppy" thing with layers - using alpha channels This doesn't sound like layers. This sounds like you are thinking about projecting a camera rotoscope image onto some models in your scene (eg a cube) - you would have to set the option for the model(s) to be a front projection target in the chor (as well as choosing a rotoscope for the camera)

-
Under the options for the layer (in the chor) - make it flat shaded - adjust the other options (cast shadow, receive shadow etc) as well according to your needs
-
Bob - Why not buy directly from Hash? - You'll be sure to get the latest. http://www.hash.com/store/
-
Hi Steven Sound to me like you need to set some keyframes for the leg that you don't want to move. For example - If bone A starts moving from frame 0 and completes movement at frame 10, and you want bone B to start moving at frame 10, then you need to set a key frame for bone B at frame 10 that is the same as it's position & orientation at frame 0, so that it won't move. Many ways to do this. Copy frame 0's keyframe & paste it at frame 10 for bone B. Or another alternate way is move to frame 10 & hit the make keyframe. Or assuming no channel for bone B has been setup yet, move to frame 10 - wiggle the bone - a channel and keyframe will be set up. Delete the keyframe (not the channels) for this bone, and then hit the make keyframe.
-
Looks truly terrific - you might try adding some hair to get irregular strokey type edges for the movie.
-
Truly gorgeous.
-
"Little Ditty" ... New Animation
NancyGormezano replied to wedgeeguy's topic in Work In Progress / Sweatbox
fabulous! great fun - a complete joy - congrats! -
Absolutely fabulous looking! - this interior as well as your other view of your church model : http://www.hash.com/forums/index.php?s=&am...st&p=225310 Love the economy of splines (don't let them beveling nuts get to you)
-
I didn't check your project, but just briefly tried a test myself. Paths can be a pain sometimes - there might be some funnies going on with chor ranges being reset, and which chor action the path constraints got set in, and it what order. Can be touchy... So because I'm lazy, & to avoid the hassle of figuring it out perhaps...there might be a workaround for your situation: 1) can you split this part of your animation into 2 separate chor files ? (not 2 chor actions). First chor has object on path 1 and then does the non path action. 2nd chor file has object moving on 2nd path or 2) 1 chor file where you have 1 path (that is actually the 2 paths combined with extra distance in the middle) - Manipulate the ease & enforcement values so that object follows path until reaches end of path part A (set ease value=end of part A, enforcement still 100) - then enforcement =0 -, probably will have to monkey with objects positioning to not see a blip, do the unpath part - then set enforcement =100 again, ease = some new number = start of path part B. And submit A:M report if you really think you have all the chor ranges, ease, enforcements, etc all correctly set.
-
sprites and cloth to make a simple splash
NancyGormezano replied to johnl3d's topic in Work In Progress / Sweatbox
tres bon monsieur moo -
sprites and cloth to make a simple splash
NancyGormezano replied to johnl3d's topic in Work In Progress / Sweatbox
excellent - but why is the ball being obscured? It looks like the cloth is transparent? or is that an illusion?