mtpeak2
Film-
Posts
5,719 -
Joined
-
Last visited
-
Days Won
1
Content Type
Profiles
Forums
Events
Everything posted by mtpeak2
-
Yes, but you'll have to take extra steps. Position the rig for the right side. Before you run the install rig plugin and assign cps to the bones, run the mirrorbones plugin first. This will mirror the install bones so you can adjust the other side. Then you can run the install rig plugin after you position the rig. You will have to manually assign the cps to the bones on both sides, the mirrorbones plugin won't work here.
-
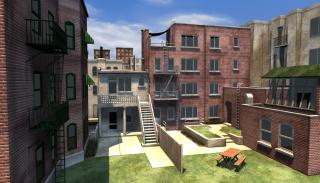
You should be rendering at 854x480 to setup the shot.
-
I was thinking more like this (which should already be set in the project), which is a bit lower than the shot Robert posted (which is also fine).
-
Well, what was wrong with the original camera view that most of my renders were from?
-
I don't know about an ideal camera viewpoint, but I'd certainly not pick that one. The right side of the set, in the image, has no detail, it was meant to be out of view. But if that view works for you, then so be it.
-
Hmm, that's the camera angle you want to use? You totally eleminate the building on the left and the alley way.
-
I just don't understand Modern Fashion
mtpeak2 replied to MJL's topic in Work In Progress / Sweatbox
Yes. You can "stamp" one image to the mesh, then add other images to the decals image folder to use the same stamp. -
I just don't understand Modern Fashion
mtpeak2 replied to MJL's topic in Work In Progress / Sweatbox
You could just remove the transparency map from the decal container, it's not needed. -
Wow, your just getting to this now. I thought we were waiting on the 2 or 3 people's test run.
-
Lothario & Ida Do the Undie Cover Dance Thang
mtpeak2 replied to NancyGormezano's topic in Work In Progress / Sweatbox
That looked great Nancy! Nice to see it finished. -
You can create an ON/OFF pose with the BVH constraint setup. Then when you create a new action, turn ON the pose, "show more than drivers" and open the bones folder of your model (under the action). You will now see a new folder for action objects, which contains the BVH rig, there you can capture the sequence. You can also just create and save an action with the setup (do not capture sequence). Then when you want to capture the sequence, open the action with your model, capture the sequence, then "SAVE AS" new action. Don't override the original setup action.
-
How to Fix Chor length PERMANENTLY
mtpeak2 replied to NancyGormezano's topic in Work In Progress / Sweatbox
That's odd, I was able to set all the drivers to 0, and was able to save the chor with a 180 frame range, with no problems. Maybe because the ground model was not available I was able to save it. -
How to Fix Chor length PERMANENTLY
mtpeak2 replied to NancyGormezano's topic in Work In Progress / Sweatbox
Hi Nancy. All those drivers have chor ranges (open properties of the drivers in the chor), if you set the end range to 0, then you can set and save the chor to what you need. -
Looks great David, though the head and neck look a bit too large for his body.
-
Bitmapplus for bricks micro-bug
mtpeak2 replied to R Reynolds's topic in Work In Progress / Sweatbox
I never experimented with more than one bump material. Are you using a greyscale image for the bump material? If yes, can you merge your three bump maps into one image and use only one bump material? BitmapPlus can also use normal maps within the same color material, this may work better than setting the material to a bump percentage. -
You can animate the model bone in an action, but you need to in the models tranform properties.
-
Happy Birthday Steffen!
-
I sent you a dropbox link, the file is to large to e-mail.
-
It's been done. No one answered my question on who to send it to.
-
You don't need to select the hook (you can't set weighting to them anyway). Hooks are automaticly weighted 50% between the 2 cps. Hooks are associated with the cps on either side of it, so depending on the direction the spline runs, a cp may get selected that wasn't intentionally selected.
-
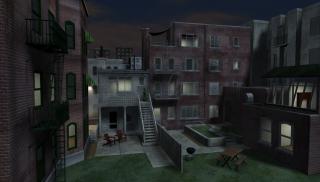
Well, I added interior lights. I'm not sure how well this is going to be for all of you. The lights are setup in a separate model with poses to turn them On/Off, not a problem. The render time with the lights jump to just under 3 mins a frame, compared to 48 secs without the lights (inactive). In day scenes the light model can be set to inactive to reduce the render times. So, do I leave the light model in, or let the animator add their own lights?
-
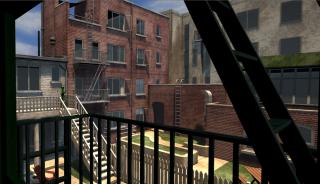
For me, the appeal of this vantage point is seeing the fire escape.
-
I do too, but unfortunately it doesn't give you the full scope of the set.
-
Thanks!
-


