MMZ_TimeLord
-
Posts
1,495 -
Joined
-
Last visited
Content Type
Profiles
Forums
Events
Everything posted by MMZ_TimeLord
-
I just did the same thing with version 13.0s and it works the same as 14.0 Beta 4. The key to refreshing the decal when in shaded mode is to turn off shaded mode (back to wire frame) and then go back to shaded mode. This forces the refresh. The space bar was ineffective. Cheers! EDIT: If you render your animation in shaded mode, it may not show the decal properly either. Use Final mode to render it out to see your animation sequence play on the screen.
-
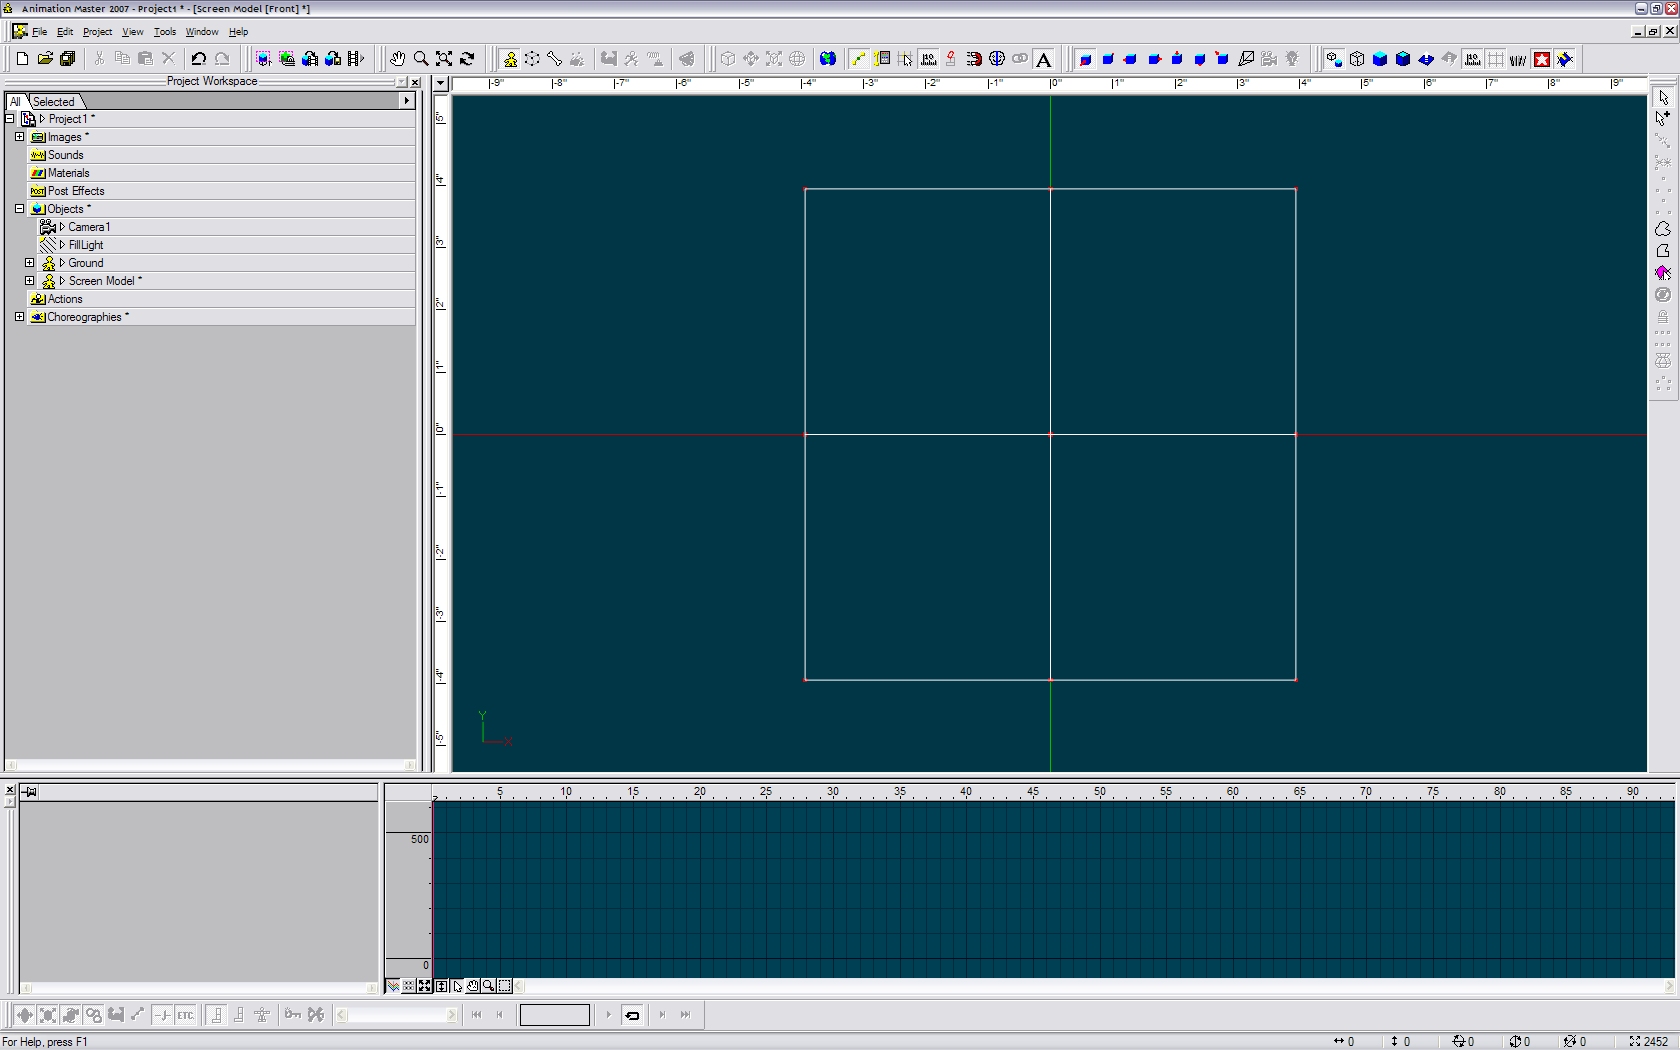
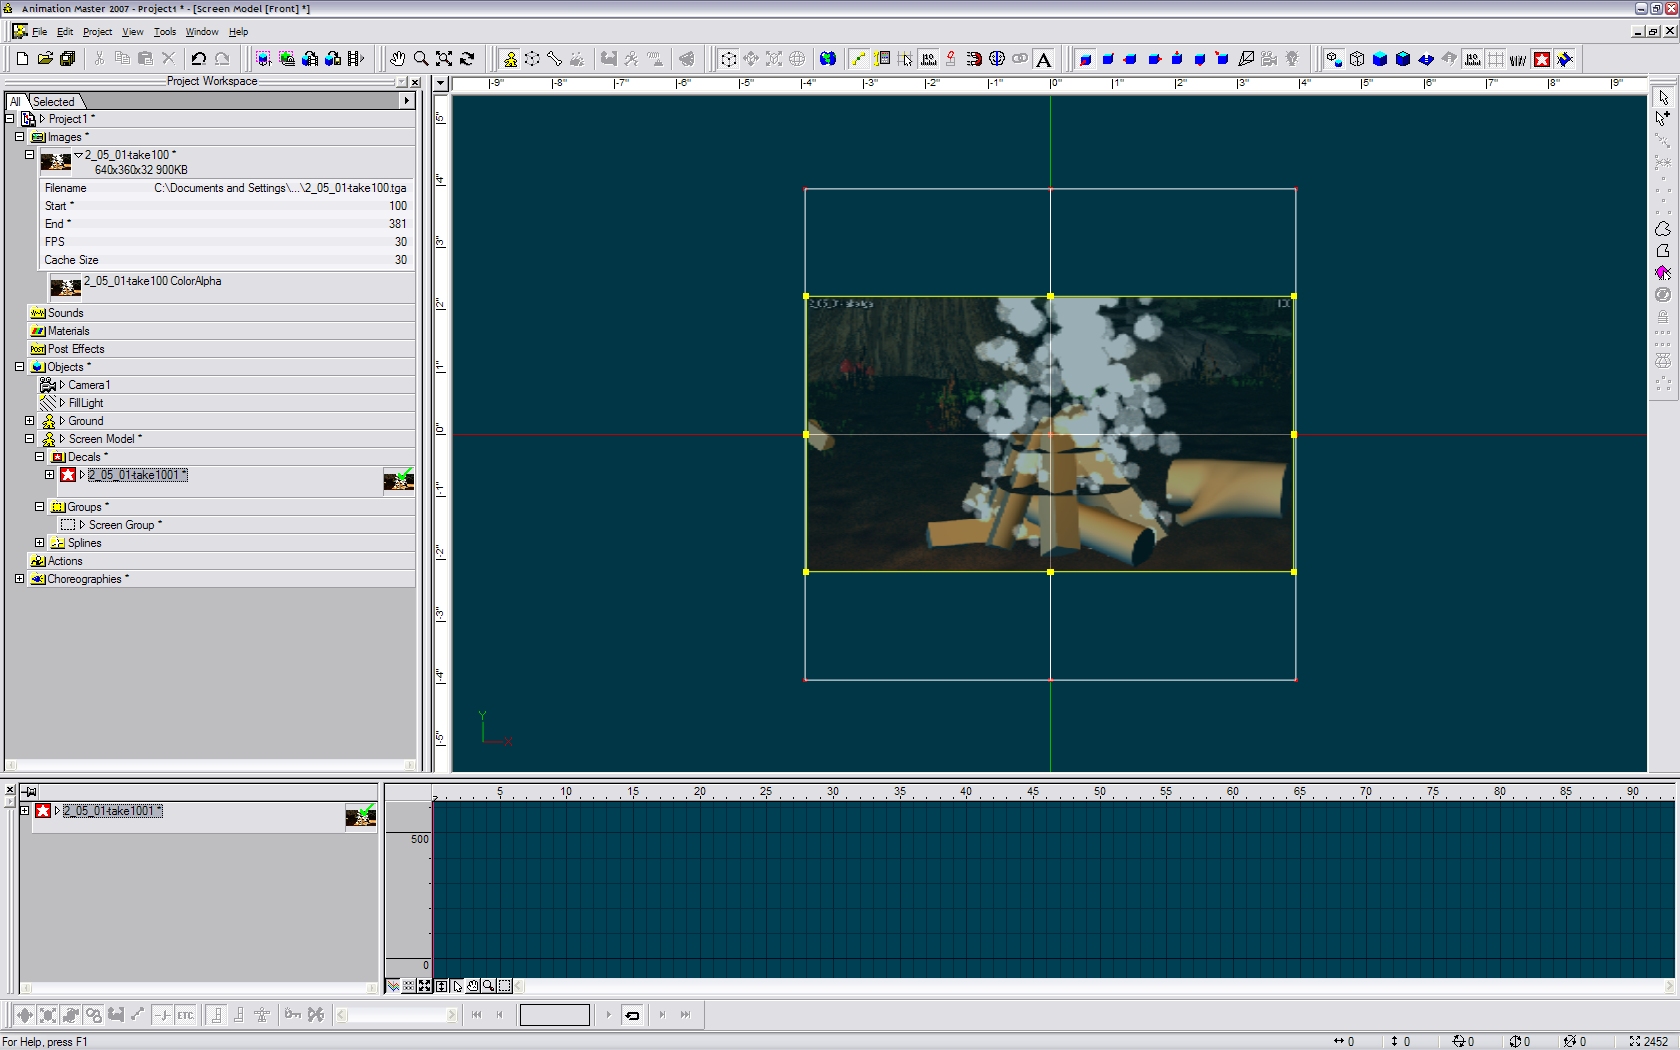
Here's what I did... follow along with the attached screen shots. V14.0 Beta 4 on Windows XP... 1. I made a simple grid model and named it "Screen Model". 2. I grouped it's points and named the group "Screen Group". 3a. I imported a "Movie or Animation Sequence" and selected the first of a series of numbered TGA files. 3b. I then dragged the imported item over the grid and dropped it and chose 'decal'. 3c. I centered it and scaled it to fit and then right-clicked and selected 'apply'. 4. I dragged the model into the Choreography and brought it in front of the camera. I was able to scroll through the time line in both the Modeling window and the Choreography window and the pictures changed. They didn't always refresh though. Some times it looked as if the grid was blank. Probably a redraw issue. Try hitting the space bar or use the "+" and "-" (plus and minus)keys to scroll through the time line instead. Hope that helps.

-
EDIT: I presume you did not scroll through the timeline in the modeling window. Were you in an action window? Also, check the range settings for the decal in the choreography. I'll give it a go here in an hour or so and let you know what I come up with.
-
Nicely done... I'd like to know how the full 'advertisement' looked..
-
Will, That looks great!!! We're missing you at the Hash Bash though... *HUGS*
-
Wow... five layers and only a little bit of break through... nicely done! Some tweaking on the sub step calculation may help lessen or eliminate that. As to the cloth stretching, probably increasing the stretch stiffness, but I'm not sure the effect that will have on the rest of the simulation. Keep going Paul, I look forward to more of your experiments.
-
Paul, Looks like the cape got stuck in the hair on test A09. Good experiments though... great job!
-
Rodger, It appears this is a Freightliner Towing vehicle. I don't think a 40 ft. ISO container would be what he wants. How about that FLD120 to put on the hook.
-
Excellent lip sync... can't see the lips, but the motion I see works VERY well. Great blog... I really enjoyed reading up on what techniques you've been using. Cheers!
-
What has changed mainly depends upon what version you are currently using. Are you on 2006, 2005, 2004 or earlier? There was quite a bit done with cloth in the last few versions as well as better hair shaders (MUHair, etc.) The choreography now has color changes depending upon which bones have a key frame in the current point in the time line. (They will turn from white to blue if they have a key frame.) Then there is SSS or (Sub Surface Scattering) which is a lighting/rendering technique the makes a more rubber/skin shading and lighting possible. Imagine a light behind the character... with SSS you can see some of the light source through the thin skin of the ears.) Much more as well.
-
In bones mode, add a 'light' instead of a bone. It acts like a bone, but works just like a light in the choreography. Hope that helps.
-
That's so simple! Pure genius!
-
Will, That looks awesome! Actually stitched the teeth into the model mesh... WOW... "I'm not worthy!" just doesn't say it.
-
Mechadelphia : p r o t o t y p e
MMZ_TimeLord replied to Mechadelphia's topic in Work In Progress / Sweatbox
Excellent model! Can't wait to see it in motion! Congrats on your winning entry! -
I've used it a few times... it works great in AM. It's the AI Wizard if you didn't already know that. Any Illustrator file works fine. Check the tutorial here. Hope that helps. Cheers!
-
Looking good Will... It'll be great to see him in a full setting...
-
What technique are you using to put in sky lights now?
-
I think you are looking for this thread. Cheers!
-
Here is the link to the old tank tread tutorial article found on A.R.M. Cheers!
-
would like to use newer files in old version
MMZ_TimeLord replied to Bob The Conquerer's topic in New Users
I can tell you the procedure you are following will NOT work on version 13 and up files. The file structure is completely different, unless you are willing to write a script to rewrite the sections appropriately. The data is there, but it is NOT arranged the same, period. If you have been able to import using your method, then you are probably importing models that are earlier than version 13 or even version 12... I'd have to look to make sure. I would seriously recommend the upgrade for another few reasons besides the features. The stability of 12 and up is superb and is even better than 8.5 was in my opinion. Also the speed of the software has gone up and will also be able to take advantage of newer video cards much better. The interface has changed for the better as well. Not to mention the new Extras DVD that has a TON of models on it for you to add to your projects. Anyway... whatever you decide... Cheers! -
Looking for an ancient model that was included in A:M
MMZ_TimeLord replied to Vance's topic in Characters
Okay, here's the skinny... I have every Hash A:M CD produced since 1996 except for 2001 and 2005. None of the CDs I have including the Extras CD Volume One have the model by the name of "Mannequin" on them, unless it's contained in a project. I think you are looking for a prop of a sewing mannequin, but I could not locate it. Do you know when your original video was produced? This would give me some guide as to what CD to search for the model. (I mean search inside every project, etc.) -
Looking for an ancient model that was included in A:M
MMZ_TimeLord replied to Vance's topic in Characters
I don't seem to have it on my hard drive, but I do have ALL the subscription CDs back to 1998 or 1999 I think. I'll take a look when I get home and see if I can find it for you. -
Yes, for small areas or complex models, 'SplitPatch' works great! I have about 5 or 6 plug-ins that I use that are quite handy. But Primitive and SplitPatch are the two I use the most.
-
Want an even quicker way? In a blank modeling window, right-click and select 'Plug-Ins -> Wizard -> primitive' from the dialog box that opens... select a 'sphere' from the drop down and then select the RadiusXZ, SegmentsXZ and the click on the 'Mangitude %' button, then click 'create'. Make sure the 'CP Smooth' option is checked. This should make you a sphere of any division size you want. I'm attaching the plug-in here as I'm not sure that A:M came with it. It's dated from back in September, 2005, but still works, even with V14.0 Alpha 5. Unzip it and place it in your "C:\Program Files\Hash Inc\V13.0\hxt" folder C: being whatever drive you installed A:M in. Hope that proves useful. primitive.zip
-
Might I suggest using a Emerald color and some specularity to look more like... well... Emerald. Seems to be just a bit too close on the opening scroll too... back off just a bit... otherwise the camera move looks pretty good. One idea for a more 'animated' logo, would be to have a bunch of Emerald gems jump into place to make the words or letters made of emerald jump into their respective positions. Just an idea... Looks like a good start! Cheers!