MMZ_TimeLord
-
Posts
1,495 -
Joined
-
Last visited
Content Type
Profiles
Forums
Events
Everything posted by MMZ_TimeLord
-
Video Short Film Blog
MMZ_TimeLord replied to Bruce Del Porte's topic in Work In Progress / Sweatbox
Bruce, Excellent work so far... I really like the improvements you've made... keep up the good work! Bravo! -
If you go through the sweeper tutorials, you will see that you could have used it to easily create your frame. and all the frame sections would be round and not pinched in places. Give them a look... otherwise your model looks wonderful! Keep going on it!
-
When you are modeling any kind of recess like the main sensor dish on a starship like the excelsior class, you can use a boolean to do the cutout. This will let the curved section of the hull remain undistorted by the hole or recess. Let me know if you want me to post an example project.
-
Shame on you Reb... ANY bypassing of the CD Protection is ILLEGAL. If you have an external drive to mount the CD on to start A:M you can run it then remove the drive and A:M will continue making your mobile PC mobile again. If A:M crashes, you would have to have the CD again to start it. I went the Dongle route years ago when all they had was the parallel port dongle... I REALLY like the USB dongle for it's ease of use. Rodney does make a valid point with the flashing of the dongle. For some users this is more technical than they want to fiddle with. For me it's simple, so it's not noticable. Contact Hash, Inc. if you want more info on the dongle. Good luck!
-
Thanks nf1nk... I'll look it over.
-
So, you have an expression that shows how far above the zero mark of the y axis the bone for the altimeter is? Nice! Looks like a very nice model. Could we see wireframes? I would be interested in examining the project as I'm still learning about expressions and how to use them.
-
That is AWESOME! I can't wait to see the whole story! Excellent work... professional all the way!
-
I always understood a 'Planet' as the primary bodies orbiting the solar center of a system (star or stars) that did not have an eccentric enough orbit to cause comet tails on them. So if that was the case Charon is still a 'moon' of Pluto and Luna is still a 'moon' of earth. Even if we found habitable worlds orbiting, say a gas giant in another solar system, it would be called a 'moon' of that planet. Anyway... my mind is probably too simplistic for that scientific debate.
-
Very beautiful Matt... Nice job!
-
The Sol System for the Extra II DVD
MMZ_TimeLord replied to MMZ_TimeLord's topic in Work In Progress / Sweatbox
Well... here I am again... latest WIP is a full flythru video... Two primary issues I have with it... 1. VERY Shakey camera pass, pluto model and orbit spline shakey/breaking. Some of the orbit spline problem can be seen on Uranus's orbit as well. (I believe it's due to limitations of A:M's precision. Don't know if this can even be fixed. I may just have to live with it or try to make a work around.) 2. Every now and then there are rendered frames in the animation that have some serious artifacts. The reason for this is completley unknown to me. The Orbit lines, Axis bars and rotation arrows are all turned off or on with a User Propery in each model. There is also a user property for planets that have it to turn on their appropriate axial tilt. Enjoy! Sol System Flytrhu # 1 (CAUTION! File is over 8 MB in size!) -
In the 'rip-the-shirt-open' motion you would probably be down to one of two options. 1. As Wizaerd stated, using muscle mode to animate the CP's to corrispond to the movements of the hands pulling them open. (Hands moved in skeletal mode first). 2. Following the guides in the tech talk series on cloth, you could create anchors to the hands for parts of the cloth and let the cloth do the rest. NOTE: The cloth would require more experimentation and would probably not be the right choice for a production schedule. Hope that helps urthmaan...
-
You can leave 8.5 installed and still run V13. Note: If you save projects from V13 you will NOT be able to open them with V8.5. Also, you may have some problems importing V8.5 files. I can't recall at this time. I have V10.5, V12 and V13 currently installed and I can run any of them I choose, or one of each at the same time. (Good for comparing imported projects/models to the originals) Give a shout if you need help...
-
The usual way to add a light to a model is in the model window... right-click and select 'new->light'. Then size it and place it where you need it. In your case, inside of the meter casing right? Hope that helps.
-
No worries Matt, I didn't think you were 'out to steal my light' (or thunder), I just hate to see folks duplicate effort if they don't have too. As to the scale... Actually I'm doing the planets at 100km = 1cm... then I'm scaling them down to 0.1% in the Choreography and using 1000km = 1cm in the Chor. I'm afraid that somewhere along the way, the precision of A:M is breaking down (mainly out near Pluto). Because as my camera passes, it REALLY shakes and the orbit lines get broken... I'll be posting an animation soon on the WIP that shows this. I have all of the major satellites done (most of the ones in excess of 100km in diameter anyway) and I'm now working on some user properties to be able to turn off the orbit lines and add notations as well as tackle the asteroid belt. I'm thinking of using particles, but we'll just have to see where that goes. Looks great by the way... excellent comparison!
-
I've already made the planets and solar system to scale with orbits built in for the Extra DVD Matt... just wanted to let you know so you don't waste your time. I'll be posting more progress in the WIP forums soon...
-
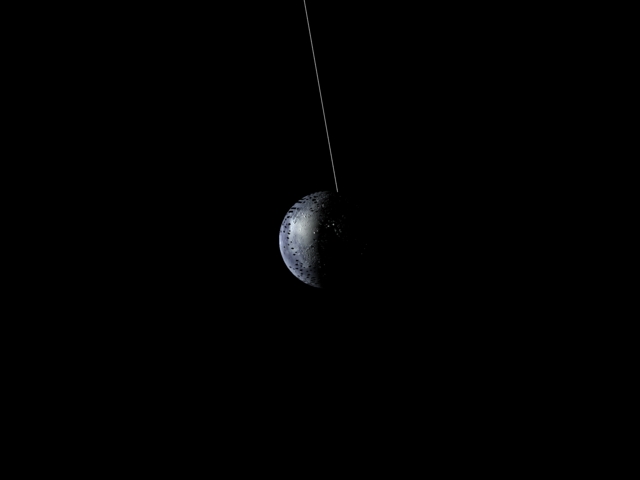
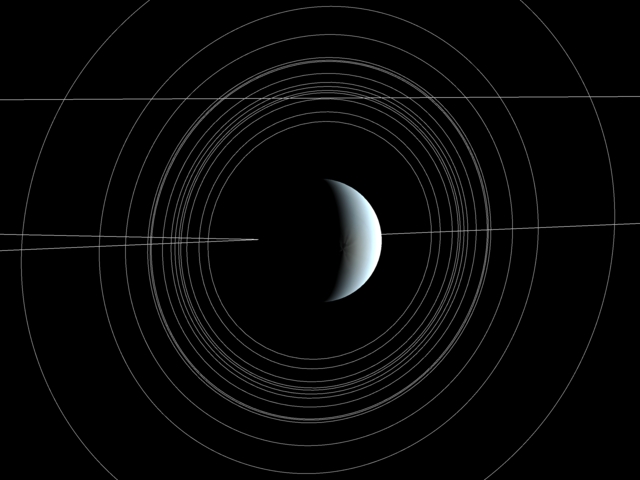
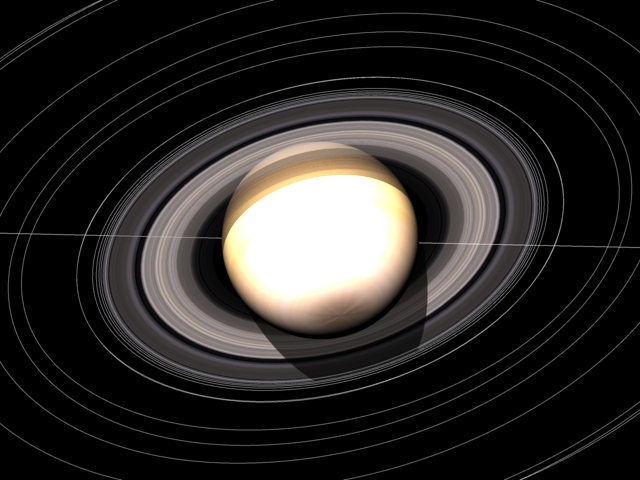
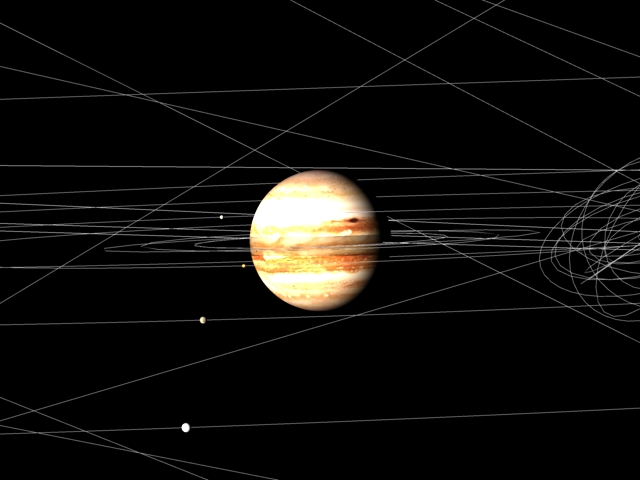
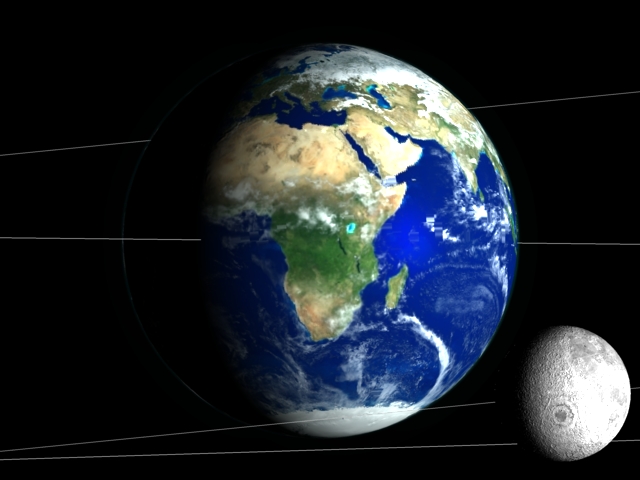
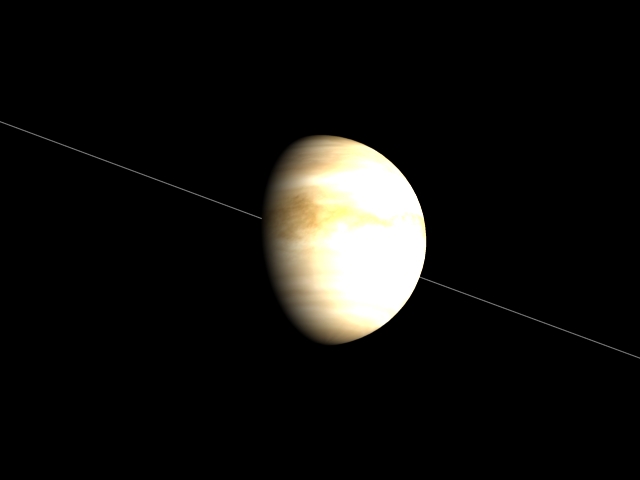
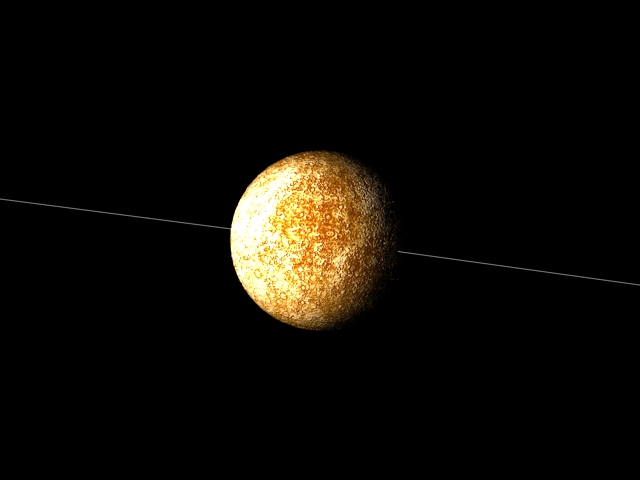
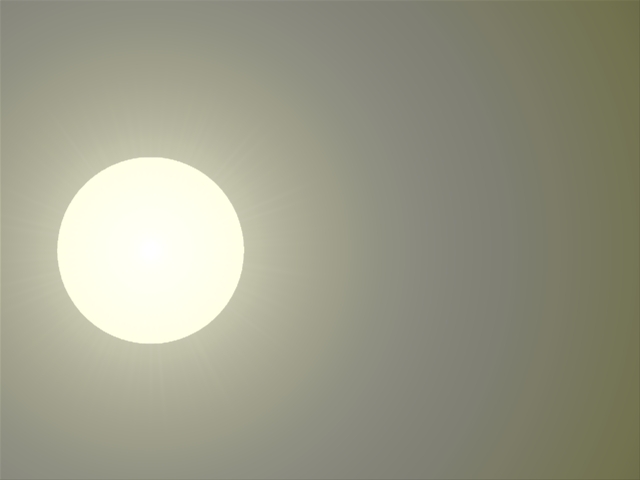
Okay, so here are some shots from a fly-through animation of the Sol system model I'm putting the finishing touches on for the Extra II DVD. All the image maps are either from JPL, NASA or one of their observatories. They are free for public consumption and reuse as we see fit. (Yes, I will have the appropriate End User License file in the project.) So far I have all the 9 planets, the sun (Sol) as well as all of the cataloged and named satellites of each planet. There are some newly discovered satellites that have only been cataloged and not officially named, so I will leave those out for the time being. Each planet model has a pose for the axial tilt as well as a pose to turn on/off the 'render as lines' for the moon/satellite orbits. Same goes for the orbital model of the whole system. Only the larger and oldest discovered satellites of Jupiter, Saturn and Neptune will be modeled. All the smaller ones will simply have orbital paths modeled, but no actual satellite models constrained to them. Another big task I have is how to create the asteroid belt... I will be pondering that over the next few days. Anyway, here are the initial shots with all orbits rendering as lines... (now that my Jury Duty is over I gotta get back to work on TWO) ...from the farthest planet inward... [attachmentid=19224][attachmentid=19225][attachmentid=19226] [attachmentid=19227][attachmentid=19228][attachmentid=19229] [attachmentid=19232][attachmentid=19233][attachmentid=19234] [attachmentid=19235]

-
There are several ways to accomplish the view of the inside appearing larger than the outside. For a static shot, hide the inside geometry of the model and render your scene. Now hide everything but the interior and render a new frame (make sure to use a different file name)... then just composite your two shots in photoshop or your favorite graphics program. You could do it in a single render, but it would take much more prep than that. It's the most simple solution I can think of. For a moving shot, where you will be, say rotating around the tardis, you will need to do MUCH more work. I would suggest making a flat plane just inside the doors of the tardis and give it an easy key color (like you said green screen) and render the tardis without the interior. Then render just the interior and composite the interior to the primary shot with the green screen removed and the interior on the bottom layer. NOTE: when you make a key color like that, you will have to give the surface an 'Ambient' color that is the same (green) and 100% ambience. Hope that wasn't too confusing. Good luck... and let us see the end result!
-
Very nice... there is another member who used to put a Tardis in every one of their TAoA:M submissions.
-
Heheh, now I can see that you have no hill in A:M to block the truck in the first 6-10 frames... so it appears in front of the edge of that hill. Other than that and the brake light issues... it looks MUCH better... way to go David!
-
David, Primarily what I was referring to as far as the movement of the vehicles when they stopped was the body roll/movement on the suspension (weight shift). When the green car comes to rest, you said in a ditch, I presume the brakes were locked, so the body would tend to do a minor see-sawing effect upon the wheels ceaseing to move. The truck would also have this see-sawing effect upon stopping. Again, I'm presuming that the drive had his foot on the brakes hard. Last tidbits about the green car. Everyone else is right, the last 9 or 10 frames just before impact with the truck, the green car accelerates. I would check your ease of the shot. When it impacts the truck it seems (with the weight shift forward at the last second before impact) that she hit her brakes late. Is this the case? If she was full braking when she swerved, the body would tend to shift forward earlier and then upon impact would scrape the ground for that first 90+ degrees of rotation. Only after that would it start to come up off the ground and begin to level out by say the first full 360 degrees. Hope that helps.
-
Maytbe it's the undo level! (lightbulb goes on) Nope... nevermind... just tried turning off the undo buffer on the one section of my bridge that's over 7000 patches... undo buffer has no effect. Oh well... I guess we just have to start all filing the A:M Report on this ... sqeaky wheel and all that...
-
I would say this... - the spin of the green car -- seems actually pretty close, just the nose is down too much in the front after the impact. The center of the spin seems just fine. - how the truck sits wonky on the side of the road -- it doesn't really sit 'wonky' it's the slope of the road to the grassy area that brings the front driver's side wheel off the ground. It seems more that the chassis is kinda stuck or locked on the suspension until just after the truck stops... this is what stuck out to me more than how the trick was sitting 'wonky'. - green car noses too far -- probably what you mean by the nose stays down during the spin more than it should. I would probably start to bring the body more level just after passing the 90 degree mark after impact. Not completely level, still slightly nose down, just not down as far on the passenger side. (leveled out side-to-side) I would also ask, does the green car hit a tree on the side of the road? it seems to stop kind of abruptly. If so or if not the body of the green car does not reflect the type of stop (impact or braking). Hope that helps David Excellent work as usual!
-
Yeah, the scale is a bit small in comparison to the fighters... Your original size is closer to a cruiser or destroyer class. Remember that in space you have to house everything below (inside) the hull. So 2 to 3 times it's size would actually be closer from looking at the image you posted. As to the patch counts, what are your counts for each section? (just curious, as I will be making some rather large ships/sets/objects in the near future too).
-
Actually, it appears that is 'fur' on both. Look at the obvious hairs on the spider's legs. Grooming along with cranking up the density will help a lot on those renders. Good first try thejobe! Keep going, you'll do great!
-
Rendering a single frame of the consoles, then the bridge just after leaving the window and finally an over all 3/4 view in larger resolution with multipass on would give a better sense of the texturing. Only thing that throws me off is the deck plates around the command chair. It seems they are either mirrored or are missing patches. I'm leaning toward mirrored and it's kind of distracting when you do the fly through like that. The exterior scale seems a bit small as well, like the bridge needs to be smaller in relation to the ship. It IS supposed to be a battleship after all. I would say that the exterior should be scaled up 1.5 to 2 times the size it is now. But that's just a design critique. Also, some of the exterior textures looked scaled to large, but I'm unsure without a higher res render with multipass on. Other than those comments I REALLY like the model Rusty!