KenH
-
Posts
13,816 -
Joined
-
Last visited
-
Days Won
1
Content Type
Profiles
Forums
Events
Everything posted by KenH
-
Looking good. It would be funny if the guy on the seat didn't know him and looked at him through the corner of his eye frowning.....thinking he's a stalker.
-
So, you're saying you want to use Sam as the base mesh? But even doing that, and manipulating especially his face into a new character.......still, he'd need different cp weighting. Why not try using the bone falloff property to visually get the weights. It mightn't be perfect first time, but at least, it will give you the right bones in the weighting list.
-
Good start. I'd suggest moving more of his arm (rather than wrist/hand) on the word "unbelievable". I also think the emotion in the words deserve a closer camera angle.....possibly only face and shoulders.
-
Looks intriguing! So you'll be making a human? If I might be so bold....here's an alternative color scheme to your image:

-
I doubt you'll get many responders. Here's the only other model I can find (apart from the other one you posted in): http://www.hash.com/forums/index.php?showt...356&hl=lego PS You might want to post in the "Help Wanted" forum and state your terms of use.....ie will people be paid. Also, any experience you may have in making movies.
-
When your render to file (I assume you know how to do that) there's an option to select a path to save the rendered image to.
-
The render settings are global and hair is either on or not.....it doesn't matter if it's the chor/action/model/rendering. This came up before and I vaguely remember a solution, but I can't remember it. You might try a search. Edit: What you could do is set the real time settings in your hair properties to very low/off.
-
rubberguy - training lessons for upcoming superheroes
KenH replied to thefreshestever's topic in Work In Progress / Sweatbox
Nice. The only real crit I'd have is limbs stopping instantly within a frame. No slow down or tweens. But maybe you were going for that style. There's alot of talent coming out of the woodwork. -
You too huh? Yeah, I also suggest to clean up your groups if they're all over the shop. There's an automated plugin for it if it'll take too long. I seem to remember something like this too. I think I had selected a group in another model and added cps in the open model to that group. So, AM got confused understandably.
-
That's pretty good. The "worst" of the animation is when the character comes in the window. He doesn't seem supported by his feet some of the time. Watch out for the feet intersecting the ground, but I only saw that because I slowed it down. Some of the jumps aren't how I would do them, but they work. Keep an eye on the interpolation of your splines in the timeline. One thing I'd like to see is some emotion on the faces, but you say this is only a test.....can't wait for the real thing! Oh yeah....the shooting at the end could be louder too. And it's not very clear what happens to the guy in the ship when he gets hit in the head......it just looks like he flys to the side. But then the other guy is celebrating and throwing things below him. If the ship went down, his reaction would make more sense. BTW you got your 2D character looking good in 3D..... http://www.hash.com/forums/index.php?act=a...st&id=30873
-
Not really, but you could try pasting the hand out of the model into a new one. Save both models and see what happens. If you're using Direct3D try switching to Opengl. Happy Patricks Day back!
-
AM repairs this when it finds a model with a cp listed twice. It's not sure why it happens, but I guess it's something to do with Copy/Flip/Attach. Anyway, if you save the model after AM repairs it. Then open it up again, it might get rid of the 033 error.
-
If you right click on the model in bones mode, you get the option to add a light to the model.
-
Relationship folders have to be dragged onto the model name. TSM 2 works in v14, so you should try it in v15.
-
It's working here in v14.
-
Guys I just noticed this...... In the TWO characters, to make a character smile you would move the mouth corner null up. But in this rig, he also smiles when you move the sync null to the right. Previously that used to make the mouth wider. In other words, you can't make his mouth wider without him smiling. I think it's as intended, but it's different to last time and the method used in the "Stop staring" book. I can think of instances where a characters mouth would widen but not smile. Also, in the second image, with the null in this position, both lips would be equally curled into the mouth. Ideally between the teeth (the bottom lip definitely needs to be between the teeth for FV sounds).
-
If you've tried it, then it should be working for you. I don't know what you're doing so I'd need a screen shot to go on. The mouth is part of the face. Are you asking how to model a mouth or how to make splines? If it's the former, then there are lots of characters on the cd for you to look at and get ideas from.
-
Eyes are separate spheres that are put inside the head. They'll automatically follow the character. You can do the same with the hat or use constraints (translate/orient like) to constrain the hat bone (in a separate model) to the head bone.
-
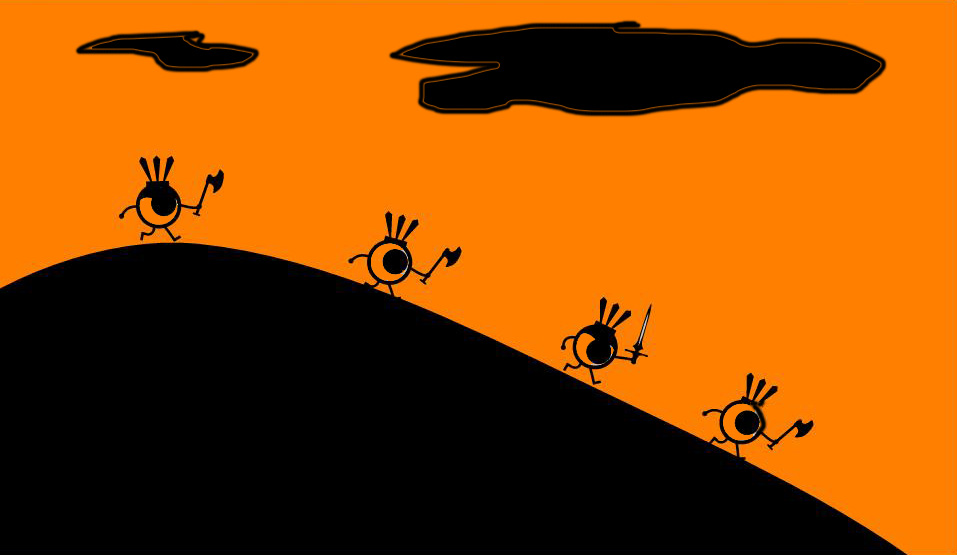
Actually, you could group the eye whites and make their transparency property 100%. But only if you want to. The clouds look good! They fill up that space abit.
-
Nice work Masna. I wonder...... Would it be "better" if the whites of the eyes were transparent/cut out and showed the background. It might make it more cut out like. I think some black cutout clouds floating by would add to the animation. Edit: I did a mock up of what I mean. It's a subjective thing of course.
-
Is it not: 100 = 1cm up 0 = level -100 = 1cm down 200 = 2cm up etc ?
-
Yeah, this is looking very endearing. Can't wait for the animation.
-
No.....decals have fixed uv co-ordinates.
-
What do you mean by silver? Objects have shadows which might be what you're talking about. If you want flat white, then there's an option to do that in the light properties. Or increasing the intensity of the light might be enough.
-
I guess you copy and pasted alot. If they're all the same name with a different number after them, then you can use the "merge and purge" plugin on this site: http://www.sgross.com/plugins/