-
Posts
635 -
Joined
-
Last visited
-
Days Won
3
Content Type
Profiles
Forums
Events
Everything posted by markw
-
I fear it's not going to work on the Mac, even in v15 going by this post here.
-
That was a nice looking plugin with some great potential! According to this post here the source code may have been sent to Hash Inc? Did anyone ask Hash back then?
-
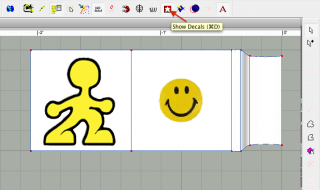
Yes, agep has the right of it there I think. Though for you and me on Macs that would be cmd+D If you have the Show/Hide Decals icon in the tool bar make sure its on.
-
Ah, thanks Robert that got it! I wonder if there is a technical reason why we can't call up a decal in a pose window in the same way as in a modeling one? It is the most familiar way of decaling and it would be a bit quicker. I'll maybe put in a feature request for the option.
-
So, I've isolated one side of a model by hiding what I don't want to effect. Next I opened an On/Off pose widow and flattened the mesh. Then in the pose window for the popup contextual menu and looked for New > Decal but can't see it anywhere? Have I missed a step somewhere or something?
-
Hi Simon, The closest I can think of to traditional film mattes would be using layers in A:M. There is an introduction to using layers on the ExtrasDVD; Tutorials > Layers. Or you can find it online here; http://mossor.org/Desktop/Tutorials/Layers/layers.html As Rodney says the uses of mattes is a large subject! Mattes were used in film originally because of the limitations of two things, budget & reality! Though budgets still remain, in a computer reality is ours to play with! We now have infinite space in which to build and film, our only limiting factor being how long we are prepared to wait for frames to render. Which is where compositing comes in handy and when done well, impossible to spot.
-
-
Like the direction you are going with all this. Especial the alien's skin. But before you get to far into lighting and texturing I would strongly urge that you check your monitor's calibration as suggested by Nancy. The images are very dark and any animation would be invisible I fear! The only way I was able to see anything clearly was to download and reprocess the images as Nancy did. I'm afraid the black square I've attached is how your avatar looks on my screens. I use a SpyderPro4 for keeping a check on my screens accuracy but there are other systems out there.
-
What everyone else here has said ! Have a modeling window and action window open and just keep plugging away at it. And be prepared to make spline alterations to the model if it helps gets you closer to the desired movement.
-
Well Simon it gets better, no extra investment is necessary to get Netrender! If you get v17 then you will find Netrender already packaged with it when you instal!
-
Robert Thank you for your reply and impressive video. I'm not sure the problem is quite as you suggest, in occuring when save/save as was used? I will have to try to watch for that in future. It seemed to happen when I did cmd/ select to group a multiple, then activate/deactivate in the PWS. ? I'm hoping to upgrade to V17 in March, so that should avoid it anyway. On an upgrade question. This might seem odd but, I understand that 64bit only works with Windows at the moment, and that is a lot faster at render time than 32 bit ? I prefer OSX to windows but, if I had a dual boot machine with Windows and OSX installed on it, would that require a multiple purchase of AM or would a single purchase cover the requirements ? It would be good to be able to model and animate under OSX but gain the speed advantage of 64 bit. I apologise if that is not an appropriate question. I'm just musing before the upgrade. regards simon Hi Simon, As to you joining us all here in v17, fear not! While its true Mac A:M is, and at the moment as I understand it can only be 32bit, v16 and the current v17 are much faster than v15 was at rendering. I suspect there really is not much, if any, significant difference between Windows or Mac render speeds now. For me the only thing I would like from the Windows version is the FastAO plugin. But I think a Mac version of that might be out of Steffen's hands as he didn't create it. But the major thing you will get for speeding up rendering if you have multiple CPUs and/or other computers, will be Netrender!
-
Shaded and Shaded Wireframe works on my Mac here.
-
Having the master0.lic is good, very good!!! That was generated when you registered your copy of A:M and is what allows A:M to run. Keep it there but gard it well!
-
Hi and welcome Robin! If A:M is asking for your info on each launch it might be that it is unable to write to the Animation Master folder in Applications. Just in case, open a "Get Info" window for the Animation Master folder and set all the permissions at the bottom to Read & Write. As Robert says you can remove the Simbiont2 texture plugins as the latest Mac version omits them anyway.
-
... one for the laptop and one for the desktop? Purchase six months apart from each other so the subs will overlap for maximum coverage? Now you're thinking
-
A:M and no Rodney . Inconceivable!
-
I haven't noticed that now since maybe v14 or v15 and even then that "moment" was very, very brief. As for stability now in v17 I don't think A:M has crashed on me. Now the only major difference is not all the plugins work on Macs. The big one being Fast Ambient Occlusion that's still only for Windows.
-
Yes, Happy Birthday Holmes I learned so much about A:M from your tutorials.
-
Tell us some more about how the new versions are a better experience / more fun. Also if it requires more computer power / resources. Regards, -SB I started with v13 (I think) which wasn't great for stability but now v17 is very stable. Forum help with trouble shooting will be easier with a more current version. Much faster render times now. Netrender. If you have more than one CPU core or indeed more than one computer you can connect to, V17 and up comes with Netrender for free which can dramatically cut down render times! Snap To Surface Tool in v17 for modeling. Basically it allows you to load a poly model as a 3D rotascope to model over. And there's more but this is what sprang to mind first As for computer specs; Having masses of RAM is not greatly important. I'v typically used only 1GB maybe 2GB at most. A:M just isn't that hungry for it. A fast CPU though is always, always a good thing to have!
-
Hi sb4 and it looks like welcome back to A:M v11 is a bit before my time but the interface hasn't changed much so I'm told. So in very broad terms for animating a scene... Choreography Mode: Use this for the initial positioning of models/assets in the Choreography window. Skeletal Mode: Change to this mode for 99% of your animating needs at this stage of the learning curve . Muscle Mode: There can be occasions where individual CP's need to be moved when animating a model, not often, but that's when you need this.
-
Hi Heiner, I don't know if you have already seen this but Fuchur has a good little video on using the Snap to Surface tool on his website here: http://www.patchwork3d.de/html/page.php?page_id=69
-
I see yet another of our leading lights here on the forum has a birthday! Happy Birthday Matt
-
Hi Simon, As always my "go to" box of A:M resources the Extras DVD has what you are looking for! ExtrasDVD > ExtrasData > Unsorted > Sets > Skies, where you will find three Skydomes to use and/or experiment with.
-
Don't worry Visping, I've found its not always that easy to understand when English is your first language! Glad you got it solved.
-
I'm afraid I can't answer your specific questions but if you have the Extras DVD and are curious, there's a tutorial on how to do pupils on non spherical eyes in there, (though it may not be a suitable method for your current model); Extras DVD > Tutorials > Bootcamp > Eye Tut.html This is the same method used I believe for the eyes in the KeeKat model that comes with A:M. If you don't have a copy of this DVD, its well worth getting one as its a veritable goldmine of info and will repay the time spent in exploring its secrets.


