markw
-
Posts
635 -
Joined
-
Last visited
-
Days Won
3
Content Type
Profiles
Forums
Events
Everything posted by markw
-
Captain Crazy Pants works out
markw replied to NancyGormezano's topic in Work In Progress / Sweatbox
If I may Nancy?… @Simon, sorry but the future Nancy spoke of is already here for the Mac version of TSM2, has been for a while. Unless you have very old Mac lying around? Nancy you have created yet another amazing character here. It's always a pleasure seeing your creations! -
Captain Crazy Pants works out
markw replied to NancyGormezano's topic in Work In Progress / Sweatbox
Be still my beating heart I think I may need to go lie down, I feel quite faint... -
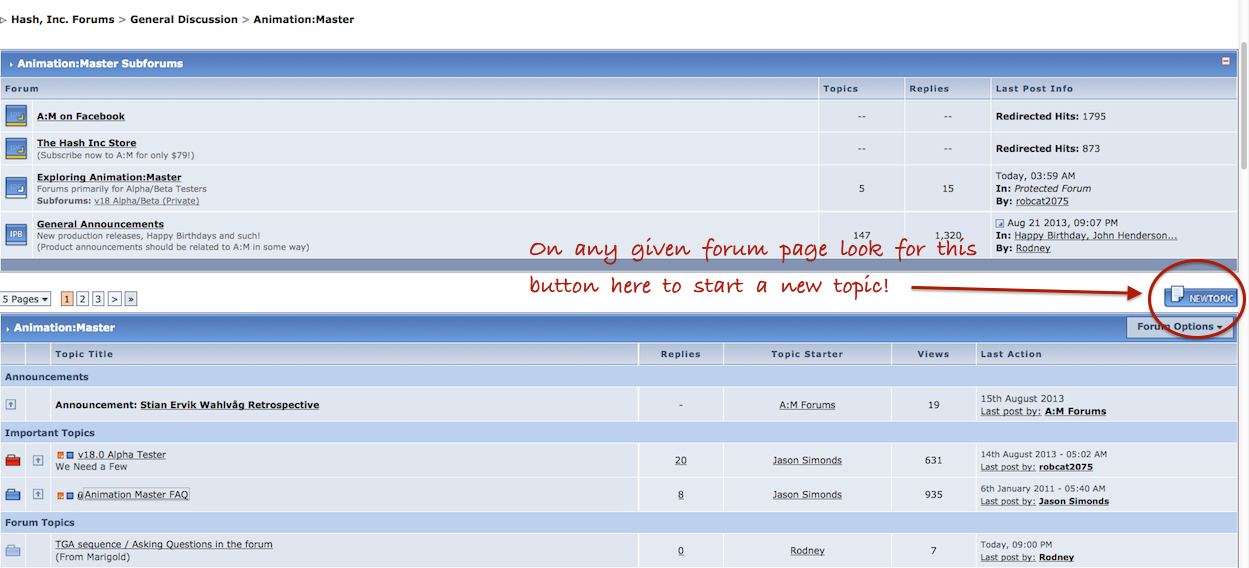
For your animated decal; Go to the Images folder at the top of the Project Workspace. Right click on the folder > Import and choose 'Animation or Image Sequence...' This will open a window for you to navigate to the sequence you wish to use. Next click on just the first image in the sequence to highlight it and then click the 'Open' button at the bottom of the window. A:M will now import the sequence. Now open the model you want to use it on, position it as you want and hide all the parts of the model you don't want to decal with the image sequence. Next drag the sequence from the 'Images' folder into the 'Modelling Window' and position and scale it just like a normal decal and apply. Also if you open the properties for the image sequence in the PWS you will also see that there are some parameters like start and end points, fps etc... you can adjust. That I think is about all there is to it. I hope this helps. And as for starting a topic/asking a question, you will need to be logged in and then...

-
Ah I see. You know, I didn't even know it was possible to do that in a Chor! If nothing else, your misadventure can stand as a warning to the rest of us that it can happen! Glad to hear you use Time Machine too. I'm constantly surprised by the number of computer users I meet that don't have some form of backup strategy in place.
-
Time Machine You do use it, right? If the model was in it's correct functioning state on your HD for more than a couple of hours then you will have a clean copy of it backed up. If its an old model then you definitely will have copies of it saved. Go back to the closest Time Machine backup of the model before things got messed up and hit Restore. If you don't use Time Machine, start! It's saved my arse on more than one occasion!
-
Thank you Mark & Nancy for the clarification, I see we have more animating options with this rig than I for one was previously aware of!
-
In the 2008rig, with IK Legs and Arms "OFF" there are quite a few bones you can directly animate with all of which have the word "Geom" at the end of their names; Shoulder Bicep Forearm Hand Thigh Calf Foot Toe Turning on "Show Right/Left FK Finger_Thumb" will reveal all the finger and thumb bones of a hand, if you should ever need to move any of them individually. Their names also end with the word "Geom" I would note that both the bones used for animating the Head and Pelvis have the word "Controller" at the end of their names. However there are corresponding bones ending with the word "Geom" but they should have been hidden automatically during the rigging process. I don't think you should be animating with these two "Geom" bones. All I can say is I've never used them and in fact you have to turn off the Head and Pelvis Controllers in order to see these "Geom" bones again.
-
Hi Simon, I'm not too sure what you are describing there? I'm only seeing key frames being made as and where expected when using the 2008 rig here. Can you post any screenshots or maybe even a screen recording of what you are seeing?
-
Thanks for making that Robert I had no idea A:M could do this. More invaluable information!
-
Well I think I might pitch in here as well with some suggested viewing. First I really liked Barry Zundel's videos on Character Animation. Not so much a step by step "how to" but more a running commentary about what he's doing as he goes. This next one though is an absolute must watch! Its short, at around 17min but very informative and was made by our very own Robcat! Its called KeyFraming Options and you can find it here on his screen cam tutorials page. (Appropriately its the first video. The sounds a bit low on it so you may want to turn your speakers up!) http://www.brilliantisland.com/am/amtutorials.htm
-
Hi Simon, If you've not already got them, the ever reliable Barry Zundel has a series of videos on Character Animation, number 4 of which is an hour on playing in the curve editor to fines things, well worth watching, as are his other videos on modelling. They all were made some time back, so some things are different in A:M now but easily 99% is still good solid information! Link: http://www.barryzundel.com/home/Tutorials.html
-
I see we've had a visit from a spamer this morning, one myrakern279. Not that we get many here but could there be a "button" on the forum pages to let users report a post as Spam. Should first time posters be allowed to include links? myrakern279's signature link is definitely of an adult nature!
-
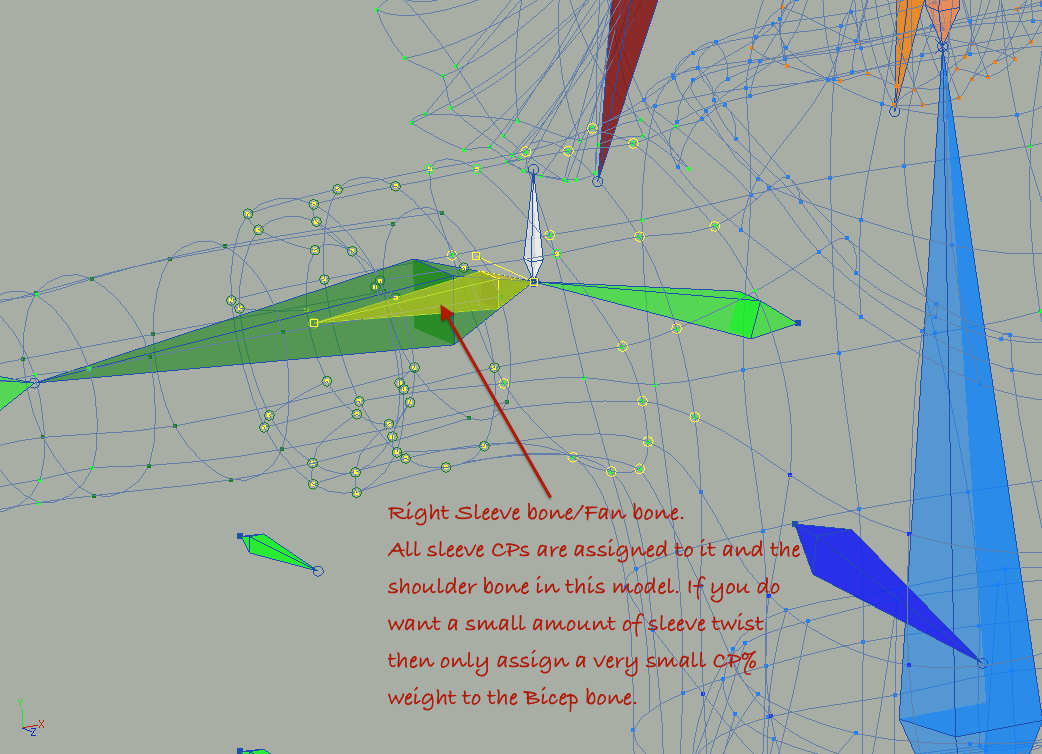
There is something very appealing about wanting to dress our creations its true but (and you know where this is going!) I would say to you loose any and all geometry that can't be seen. It just makes life easier and animating is hard enough as it is! Also you might want to consider setting the 'Bicep-Fan-Bone' so that the bone dose not "store roll" and assigning the sleeve Cps to it and not the Bicep-Geom-Bone. This will stop the sleeve twisting with the upper arm (which generally doesn't happen much with shirts, jumpers, jackets etc…), whilst still following the arm's motion. Sometimes though and it depends on each model, this doesn't work so well and I've added an additional bone at the top of the bicep instead that follows the bicep's motion but as stated before dose not store roll. In any event with short sleeves like you have here I wouldn't assign any sleeve Cps directly to the Bicep Bone. As always with this stuff experimentation is key!
-
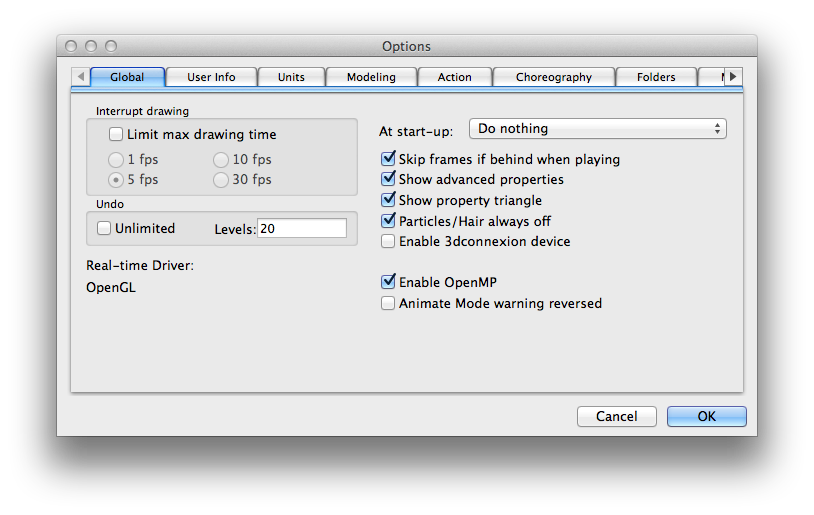
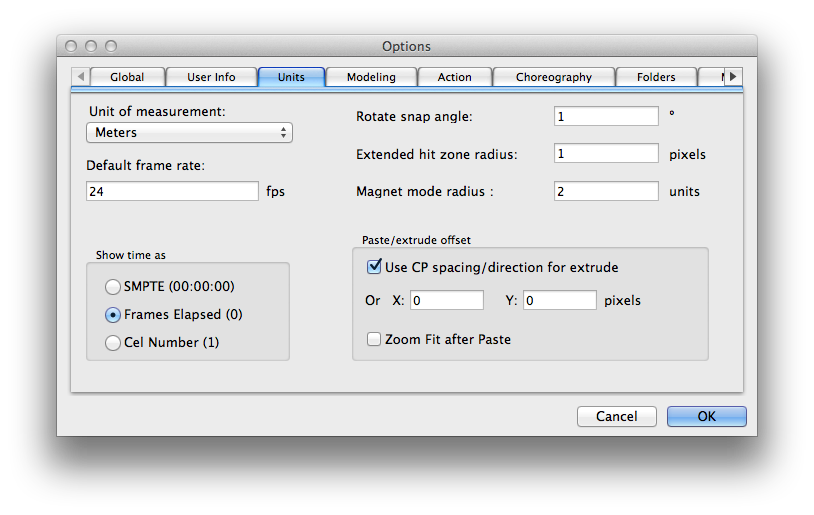
I'm afraid you're not going to like this answer but no I've not had any problems so far with those two settings, sorry! Could the snap angle not be sticking because its less than a degree? Mine's set to 1. For very fine changes I zoom in and then hold down the Option key as I rotate things. This overrides the snapping from one degree to the next. Snapshot of my settings as of a few minutes ago;
-
Dose anybody know why these numbers are displayed in the first place? What use could their information be put to? Indeed is there anyone here who dose or has used them?
-
Hi Simon, I don't think there is any built-in Help for the Mac version of A:M anymore, hasn't been for a long time. We just have the downloadable PDF to look for things now.
-
Cue theme from 'The Twilight Zone'...
-
Nicely summarised Gerald. I for one would find this a most valuable feature addition.
-
Sorry about that, no it's not your eyes Paul ! I meant to post the project as we'll yesterday but somehow didn't!? When I noticed today I added it to the post. 40℃ here and no air-con, makes the brain sluggish and a bit fuzzy I fear!
-
Hi Paul, Dynamics could still be an alternative to cloth but as you found its not without its own settings to endlessly fiddle with! And it will never be 100% automated, you will still have to go in and tweak things at key points. As for DC collision detection, I too gave up with it. The results were usually quite wild! Anyway, I've attached a very simple shirt setup here which may be of interest. This uses an idea that Nancy told me, that of using a "Master" control bone at the base of a chain of bones that are using Dynamic Constraints so that you can have better control over their behavior. Before using the Control bone, you will first need to "Bake" the Dynamics in the Choreography. Next play through it and note where there's any pass through of geometry. Key the Master Control bone (without actually moving it) just before and just after geometry pass-through. Now at a suitable point between these two keys its safe to adjust the Control bone to move the mesh just far enough away to prevent the pass-through. (The attached .Cho has had all the above done to it) Baked_Shirt_DC.cho Shirt_DC_Test.prj
-
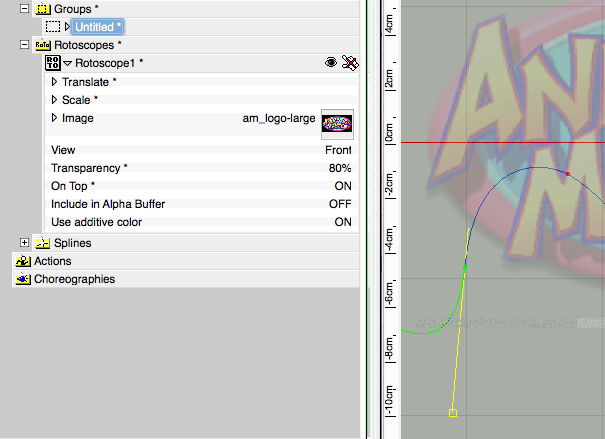
Can't see bias handles through roto when set to top 17g
markw replied to pixelplucker's topic in Animation:Master
Hi pixelplucker, I think this is because you have the rotoscope setting 'On Top' set to 'On'. I have no idea what 'On Top' is supposed to do, I always leave it as 'Off', but yes if you turn it on it will cut off any bias handles that are covered by the rotoscope.
-
I second Rodney's Wow! I am in awe of you Sir!
-
My first thought is; "are they really unassigned?" With your model in 'WireFrame' go into 'Bones' mode. If a CP is really unassigned it will be Black. If assigned it will have the colour of the bone it is assigned to. To double check this, click on a bone and all Cps assigned to it will start flashing with the selected bone. If you want to triple check, open an 'Action' window and see if the Cps move with the desired bones. In the PWS 'Groups' the same Cps can belong to many different groups which in turn can be called anything. Looks to me like some automated feature in the assignment kicked in and made this group for reasons best know to itself! Save an incremental version of the model and then I think it would be safe to just delete the group from the PWS and carry on.
-
Funny, I was just thinking the self same thing
-
Well done Sebastian!