Search the Community
Showing results for 'project'.
-
Hi Robert, a good starting point might be that: It is a shame, that the pdfs are not available anymore here, but there is still nice information in there. And here the PDFs are still available: Important: All computers need to be in the same network of cause! It is very helpful, if you have the render-data at a place where every computer can access it. Best is a NAS or another type of network drive. If you do not have something like that, you can still copy the data (A:M files, textures, etc.) over to each computer on the same position like for instance "C:/am_project/my_project.prj". Important: Do not copy it on your desktop, since the path will vary from computer to computer if the computer user name is different(!). In general it is pretty easy: 1.) Start RenderServer_64.exe on one of your computers. Make sure it has at least one Core assigned, which is not occupied by a Messenger/Slave. Theoretically it is not necessary, but I think it is the best option. 2.) Now you should read out the IP-address and Port of this computer / the Render Server. You should be able to see that by going to "Tools > Options > Connection". 3.) You can use the other cores of the computer (renderserver) to render too. 4.) Double-Click on RenderMessenger_64.exe in the A:M folder and use the wizard. There your NetRender Server should be automatically set to the IP address you got from step 2. If not, put it in. Same with the port. 5.) On "User defined data" you do not have to put something in, but it is a good idea to write something in that helps you to identify the computer with. That makes it easy to find out, if something is happening with that computer (this is not very hard to guess if you have only 1 or 2 computers in use, but I did it with 12 computers before and than this is really helpful). 6.) If the path of the project files (etc.) is different for the computers (so you could not use a NAS / network drive with the same letter (P:/, etc.) on the computers or you could not copy the files to the same position, the next step can help you. I would try to avoid it, but you can try it out here. 7.) Now start the next computer and install A:M on it. You do not need an own license for that computer or something. After install, just click on "RenderMessenger_64.exe" and follow the Wizard here too. Be sure to put in the right IP and Port of the RenderServer now. 8.) Check the connection of the Rendermessenger. You can see that, in the task bar (next to the clock on Windows). If the icon shows a connection (both "lines are next to eachother without a gab inbetween). If that worked, go back to the Renderserver and have a look. In the lower area of the RenderServer-Window you should now see the other computer-Netrenderslaves and the one of your own computer. 9.) If that is the case, the connection is working and you should be pretty ready to go :). After that just open Render Messenger on both computers as often as you've got cores (or virtual cores if you use HT/SMT). Only on the Netserver computer leave one to the server. So if you have a 4 core computer with HyperThreading (HT, Intel) or Simultaneous Multithreading(SMT, AMD) you can use 8 instances on the other computer and 7 on the the server (if the server is a 4 core too). 10.) Now on the Render Server go to "File > New". This will open a new window (Pool1 or something like that). In that at the top right-click and choose "New Job". A wizard will pop up. Give it a name (this is only for you if you render a couple of different jobs in a row for instance you can see what you do there... for instance "Peter's day out - Walk animation Scene 01 - Take 01" or something like that is a good idea, especially since I leave the jobs in there in general even if they have finished. Browse for the project-file (or chor) on the next button. Be sure, that the path is available on all computers in the same way (or use the option of 6.). Select which camera and chor in the project you want to use below that. In general you can leave OpenMP off and GPU is only needed if you use for instance FakeAO/SSAO or something like that. But first I would just try it with an very easy project. 11.) Next put in the render settings you want or use a preset. At the path at "Filename" make sure that the path is available for any computer. You can render to your own c:/ or a net-drive. For the net drive be sure you can access that from any computer. Anything else should be clear. It is mostly the normal render settings you already should know. 12.) After that the new job should be available in the Pool1-Wndows. Now save the job on the server somewhere. (or a net drive... this does not need to be available to other computers) 13.) Now drag and drop the Instances in the lower area of the Window to the lower part of the Pool1 window. After that, the Netmessengers on the computers should start Renderslaves and render the things. You should be able to watch that on the computer displays and you should be able to see that on the REnder Server too. It refreshes every few settings. If something is not working, you should get an information about errors and so on. If you get some, check what it might be on the computer or by having a look at the render server. Notice: In the Pool1 Window the right mouse button is key. There are a couple of different options there which are really helpful (and pretty straight forward). I hope I could help a little. If you have any kind of question or problems let us know. Best regards *Fuchur* PS: And this might be interesting for a lot of cores too: https://www.patchwork3d.de/start-am-netrender-185-en
-

crash when rendering multiple frames at Super35
cribbidaj replied to cribbidaj's topic in A:M Rendering
Hi Robert - yes, rendering to image sequence (.tga). As a follow up, I'm assuming now that the problem is in some part of the specific scenes I've been rendering. Perhaps lighting, or transparency over a model's eye's, or something I'm not catching. These scenes take place within a house I've modeled, but the lights in the choreography are in their default states, which causes some camera angles to render with different shadows, darkness, etc. Because I really don't have a deep grasp of lighting I just render with something that "feels" cool. When I have rendered scenes without the house as the "environment" all rendering works without crashing. I've finished rendering the scenes, so . . . I may upload the project soon so that I can hopefully learn from you or someone else on the forums what is going on in those specific projects. Thanks man! -
Try loading this project and do an onscreen render from the camera view. simple cyl01.prj Do you get anything other than blue sky? I just get blue sky. Other projects load and render normally, but in this one the ground and model don't render. What is different?
-
A revisit of an old idea/project done to test the working method. The old one was a bit of a mess too but liked the idea. The scenario is that, the Mum is starting to learn to play the piano, and the baby has yet to walk. But will by the end of Day Three. This is a rough pass at Day One. Any Critical feedback very welcome. It was animated and rendered in AM, the notes hand coloured in TVP and the composite done in After Effects. The composite will need some work as I have very little knowledge or experience of AE Simon BEWARE of Sound !!! TLC S1 003S.mov
-
I'll note that "Build Composite" in A:M will create a composite project that lets you manipulate all the shadow and light buffers in A:M if you are inclined to do so.
-
I just updated to the latest Mac OS and wanted to let the Mac A:M users know what to expect. As expected, A:M is NOT really usable in Mojave. Many things still seem to work, but the primary problem is that the Project Workspace is unclickable. It's responsive in that selecting something in a model window or choreography will highlight the specific element in the PWS, but no amount of clicking on it will allow you to select it or interact with it via the PWS. Fortunately, the menus and item specific pop-up menus are still functional. Most of the other windows do seem to function: Timeline, Properties, Poses, etc. Some of the tool panels are also unclickable. Ironically, I haven't once encountered the old Finder access problem that has plagued A:M Mac users for a decade or more. It's possible, with a different workflow that you could still use A:M. Some of the tools that can't be clicked should be able to be mapped to keyboard shortcuts. I don't have the time to explore all of the elements to see what works and what doesn't, so there may very well be other obstacles I've not come across. Mojave is supposed to be the last Mac OS that allows use of 32-bit applications, so beyond this, A:M will no longer be usable at all on the Mac. From my experience, I would recommend not upgrading your Mac beyond OS 10.12 (Sierra) if you plan to use A:M. (My experiences with using it under 10.13 were frustrating.) If, like me, you just want to open some of your old models and export them to other formats, this does seem to work.
-
One last question....completely unrelated to the decal mapping question. I am trying to create a plume of smoke like the kind that happens when a rocket is about to launch. (see the "red line" in the picture below) I am struggling to understand how the sprites can react to the force AND gravity and create that cool looking plume that rolls in on itself. In the zipped Project I attached I create an invisible channel to help shape the plume ........but my smoke is a dud. The project file is zipped (but it is in V. 18) so if any adjustments are made, please do them in V. 18...thank you, Any suggestions are welcome... Tom RocketPlume.zip

-

Planes Trains Automobiles Image Contest Results!
Simon Edmondson replied to robcat2075's topic in Contests/Challenges
Robert Thank you very much for all your work on this project and all your help to me on previous productions. The very least I can do is donate my copy of the book to you. Please accept it, as you stopped listing desired items some time ago. regards simon -
When I started out in using Animation:Master, part of it was because I liked the movie Shrek and wanted to learn how to do 3-D animation. Another part of my motivation was making a movie to tell a story. I can't afford to hire actors, buy cameras, etc., so I thought it would be great if I learned how to build the actors, sets, and props and use the cameras and lights in the software to make a movie. One of the things I really like about 3-D is building the environment or set and then using it like a real location. I have experimented with using flat pictures in a rotoscope fashion, as background but as I moved my characters, the background did not look real (in the sense that it looked like a flat picture background). I took a small free course in visual fx offered by Hitfilm (about 6 lessons) online, and one of the techniques was to place what looked like cutouts in different locations in a 3-D environment and project a 3-D motion visual onto the flat cutouts. That seemed to give more of a 3-D feel to the movie, but there seemed to be quite a bit of set-up required to make it work properly. I thought that building the 3-D environment itself might be better in the long run. Once I have the environment, I try to place my characters, cameras, and lights in a variety of ways to see how it looks. I guess I have a poor imagination, because I cannot figure out how it's going to look until I do all of this. I have a general idea beforehand, and I may even have sketches, but without moving characters, lights, and the camera into various positions, I don't know which I'm going to like the best. The pictures I have made so far to illustrate my books are in choreography files, and can be used as starting points for camera and character movement and zooming in or out and panning and various transitions. I hope to one day, if I live long enough, go back to my choreography files, improve the quality of pictures (even though they might still have a cartoon style) and create animated movies. I started trying to animate my own stories so that I would have some content to provide motivation and experience that would call forth the need to learn more technique. All of this is to explain that although I am very slow in getting to know a lot of the ins and outs of the animation program, I do have a general strategy in mind for accomplishing a goal. I really appreciate the huge amount and quality of help I have received on the Forum, and although I might not use every lesson in helping me to approach my goal directly, I am learning techniques that I will be able to apply in some small way to my project. For example, I have admired for years the way artists use texturing, and I am very impressed with how closely 3-D artists can simulate reality, especially in special effects in movies. I have been very glad to learn what I have about using textures, even though the style of my work is mainly cartoons. For example, I made a picture of dirt and rocks that had fallen down a cliff. The dirt did not really look like dirt enough to communicate what it was. The rocks did not really look like rocks. I plan to use some dirt texture and some rock texture on those items in my picture even though the rest will remain cartoony. I may even do something to the texture image in Photoshop that pulls it back slightly from hard reality to make it communicate substance without looking photographic. It's just a style choice for these projects, although, as I said before, I really admire the ability of 3-D artists "to make it look real."
-
Had a hard drive crash ..now fixed wit new drive and with a reimage as of mid January ...decided to do a simple project and did a rough test... the project looked okay when it rendered but the playback is weird and windows even at one point said it was invalid format to play ... my machine did not like the format microsoft video 1 so I changed it to mpg for my avi file and now it plays on my machine test.avi roughbun.prj
-
I am very please on how fast it simulate and results were good with the example project file posted. Can you assign the bullet to a weight map or set of points that you want to be effected?
-
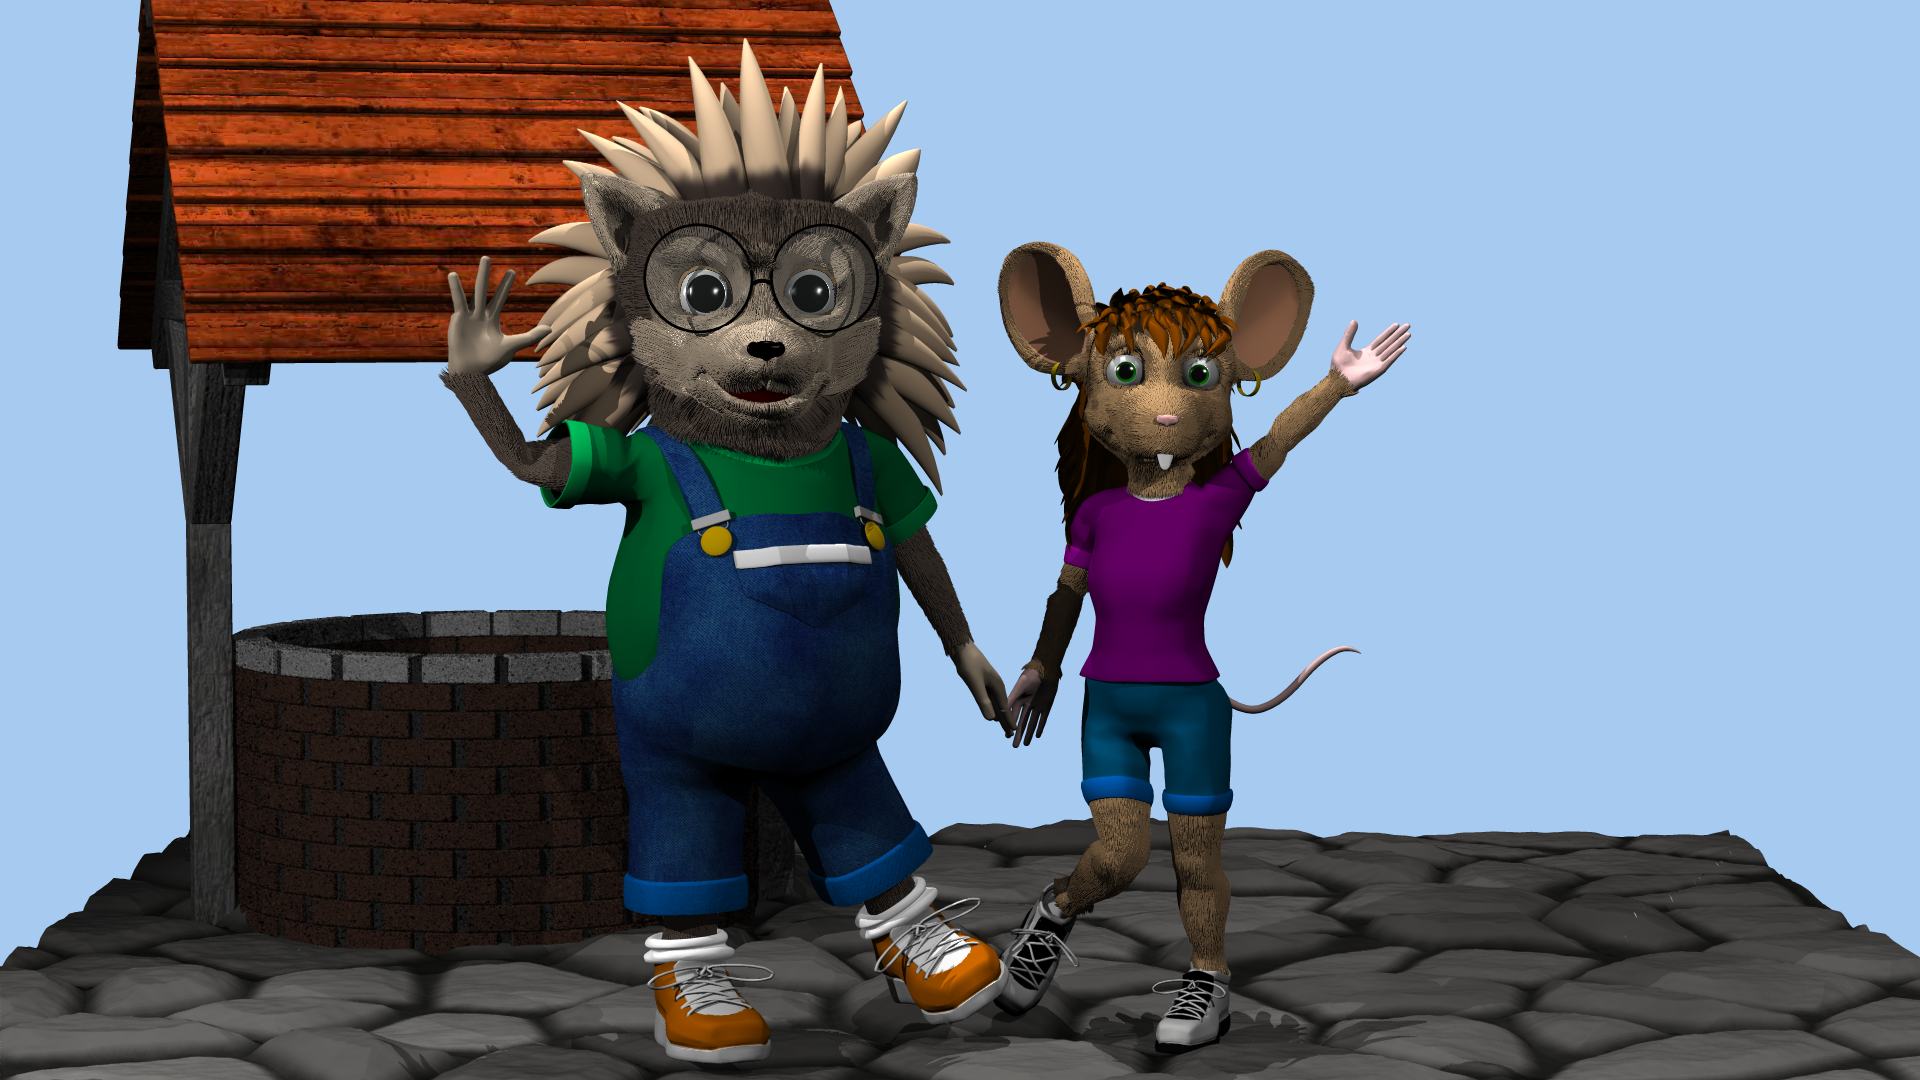
I've been working on my kids' book project and modelled Bernie's best friend Eleanor 'Nellie' Aisling. Also, it seems that when I transferred all my A:M stuff from my old computer a few of Bernie's textures didn't make the trip. I'll fix all that eventually, anyway, I just thought I'd post this little W.I.P render.
-
Thanks! I feel like I really learned a lot by doing the project, and I appreciate the help all of you gave during the process. I hope that reading this thread will also help others who might want to try 3-D printing.
-
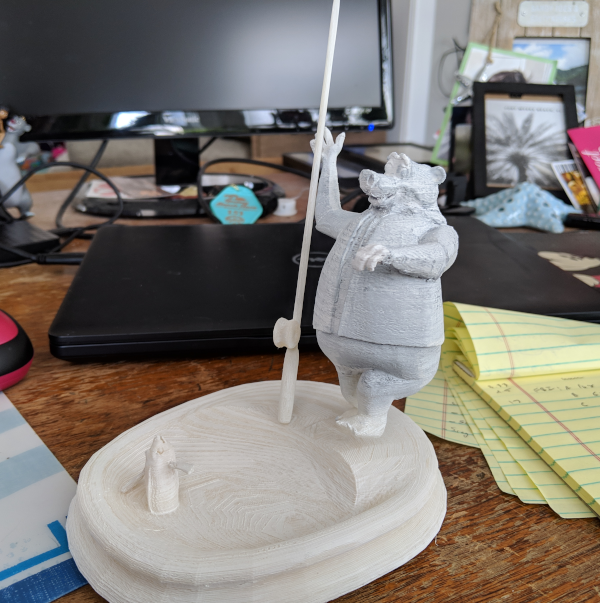
well it's taken a bit, but this project is ready for paint. Some stats: Papa Bear stands 4.15 inches tall. The base is 5.5 inches long. There are 5 separate prints done; Papa Bear, his fishing pole, the base, and the fins of the fish. All were modeled in A:M, exported at 64 subd. Printed under a normal setting with 100% infill (the fishing rod and fish fins) to 20% infill (papa bear and the base). The fish in the base is a perfect example of being able to print merged models. The fish is a separate model which I placed in a chor with the base, scaled down, then simply set inside the base and posed. The slicing software (CURA) had no problem with it. The fins I had to model and print separately since they were simply too fine and at a bad position for 3d printing. Once printed it took some cleanup. Heavy sanding to get the support ridges smoothed out, then I hit Papa Bear with two coats of model filler to hide much of the layering. Sanded, then painted with a car body primer filler spray paint. Now I will paint with some Testors Model Paint, then a clear coat. Then Papa Bear will take his place on the shelf of glory in my office!
-
Hello All, Animation Master Community chat server is back. I'm sorry it was down so long I kind of forgot about it in the move. But it's in it's temp home for now but soon(well not that soon... but soon) will be moving to if permanent home. I have a few things to finish both personal and for Hash, Inc. then Hash, Inc. will be getting a new "project" server and Community will move there.
-
On to the next project! Building a "working" model of the Mad Hatter's Tea Cup Ride in Disney. Complete with spinning tea cups, and a dormouse that pops up out of the tea pot.
-
I think if you turn down the particle velocity, the bubble will be a bit more bubbly. Your fish project is still in your other thread, isn't it?
-
Project1.prj Lost fish project so decided to try bubble idea bubble.tga bubble.mp4 bubble.avi
-
Robert Thank you very much indeed. Thats a lot better than sequence I have already. I think it may lead to a different animation rather than redo the current project. Should be more fun though ! regards simon
-
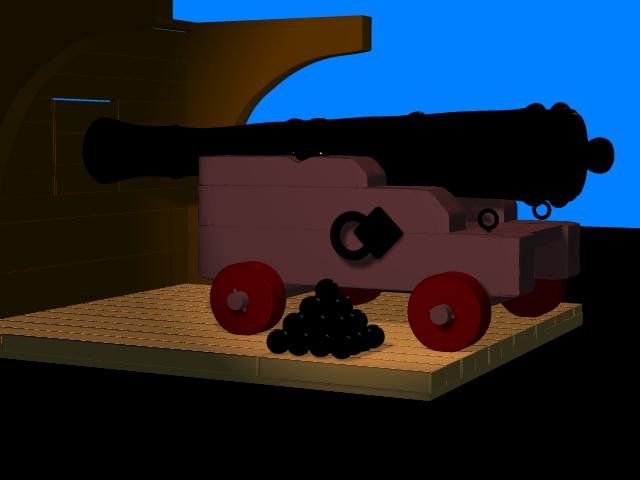
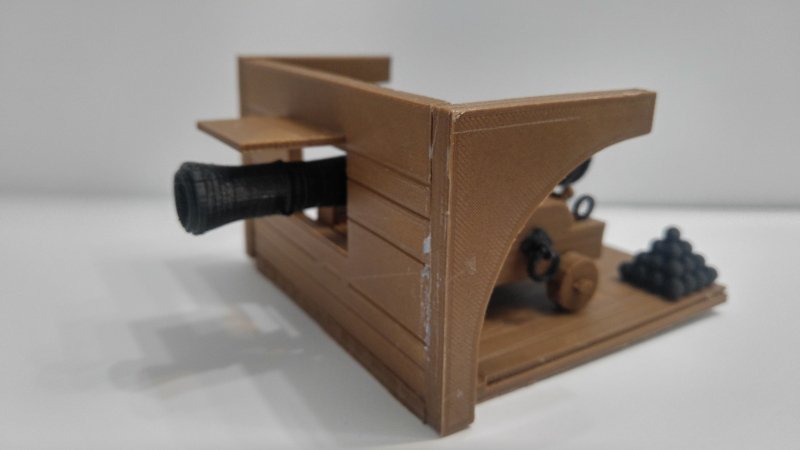
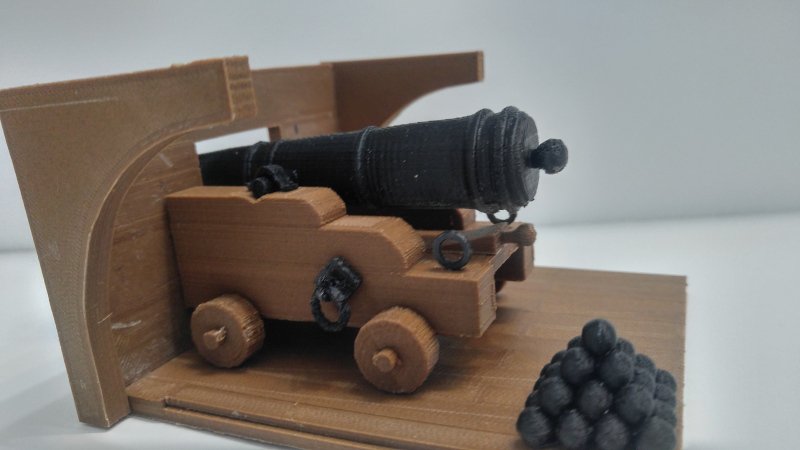
I oft times get sucked down the rabbit hole when it comes to A:M. Someone shouts "squirrel!" and I'm off on a tangent faster than you can animate a blink. Last month I bought some new filament for my 3D printer. It was advertised to print looking like wood. So I ask myself, just what can I print to test out that claim? My mind went to a pirate cannon. Of course it did. So I go straight to my favorite 3D modeling software (A:M) and model up a pirate canon, and send it off to my 3D printer. Needless to say the first time through wasn't all that great, but lessons were learned. Below are some images to show how this little worked out. I'm forcing myself to move on to another project, since if I allowed myself I'm sure I would be modeling a whole pirate ship! The A:M model looks a bit like this Of course I had to animate it: canon_fire.avi and the final 3D printed looks like this: The A:M model had to be broken up 18 separate models
-
Hi Robcat, You have always been very helpful. It's too late for the contest, but it just so happens that my project involves a model of a plane.
-
robcat since it always seems to be you that rescues me I thought I'd ask you a question directly. I'm trying to import any kind of video into AM for a rotoscoping project and having no luck. I'm using Anyvideo converter and several others trying to find a format that can be imported into AM using the imag/seq function and NOTHING is working. Do you have any experience with this kind of thing? Any help would be appreciated beyond measure. (a paycheck hangs in the balance for me on this one) and sorry to be such a pest.
thanks
Going in circles here cant even figure out how to respond. Sorry. Can you point me to that video again? Not sure if this is getting to you.
-
Trying to composite sequences into scenes and can't get anything to work. Elements (rendered frames) are totally unresponsive. Am trying to layer clips and have one clip start at a certain frame. It shows on the layers timeline(the one next to the project tree) correctly but wont start with the frames specified in the Chor Range settings. The layers are compositing ok but cant control the TIMING. Anyone have any experience with this at all? Any help would be appreciated greatly. thanks
-
Hi David i believe the simplest solution is to save a PRJ with all those files embedded. Load your PRJ in A:M Do Project>Embed All Resave your PRJ with a new name Use the new PRJ for Net Render.
-
Goodday all. I have downloaded 19g and netrender is giving error message. I have loaded the correct project, chor, camera, output location, etc into netrender. As soon as the render process starts a error appears. The error message says files (.act .mdl) are missing for my project. Netrender is searching in the c:\Program File\Hash inc\v19\Data\Material\..... for action and model files for my project. I have not saved my act and mdl file in that location. Why is netrender searching for it in that location. The act and mdl files for my project is saved in my 'document' folder. How do I tell netrender to look in my document folder? When rendering from within AM there are no problems. Hope I explained my problem clearly. Thanks David