MattWBradbury
-
Posts
1,410 -
Joined
-
Last visited
Content Type
Profiles
Forums
Events
Everything posted by MattWBradbury
-

Crafton Hills Art Project
MattWBradbury replied to DanCBradbury's topic in Work In Progress / Sweatbox
You bet we had to compensate for perspective! In the image below, Dan and I are on the middle teir of the stairs, and our friend Dub (the one who picked the project) is on the first tier. If I were to bring Dan's image down to the step Dub is standing on, Dan appears to be much smaller than he actuall is (Dan looks 4'4'' compared to Dub who is 6', which is also the same hieght as dan). So this is a great optical illusion, especially since the lighting is consistant over the entire image.
-
Crafton Hills Art Project
MattWBradbury replied to DanCBradbury's topic in Work In Progress / Sweatbox
We did it! This should look familiar: From the sides:
-
Here's some information on AO: Ambient Occlusion
-
High Dynamic Range Lighting
-
Ummm... William, some of the side links on that page arn't really appropriate for the younger users. Still, I'm glad to see they're making the engines more efficient. Hopefullly they get them running on an electrolysis system so they can save on oil as well.
-
Stian, that looks incredible. Though I would suggest increasing your gamma a bit.
-
Mechadelphia : p r o t o t y p e
MattWBradbury replied to Mechadelphia's topic in Work In Progress / Sweatbox
Lets see some transformation animations It looks really good, but the character himself needs a bit of contrast in the shot. Maybe a brighter light on him would bring out the character a little more. -
You see, Clark emmits betta radiation which in turn emmits nutrinos. These nutrinos creates a strong magnetic field that only reacts with certain aloys such as copper 29, 35. Since metal detectors are essentially a giant inductor made of copper, the increased magnetic field in the reverse direction would charge the capacitor instead of drawing from it. The main reason he emmits this radiation is because he was born under a different colored sun which blasted out zeta rays. It didn't come up much in the comic book.
-
I have over one thousand posts, and I still manage to rile the admins. Not that I mean to, but some of my writings are too unstable for general viewing.
-
I can't wait to see a bunch of Toads using that restroom.
-
Texturing Common Assault Marine By Dark_Jedi
MattWBradbury replied to LeeAnderson's topic in Work In Progress / Sweatbox
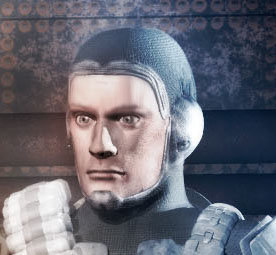
Did some photoshoping with his facial expressions so he wouldn't look so surprised. The first thing I did was adjust the eybrows to be a little more stern (maybe a bit too stern): Somewhere between might be a good place to put them. The second thing I did was adjust the lips. He looks like he's making an unnatural sad face: Not great but a slightly more believable. The third thing I did was adjust the Eyes. They were just a bit too open: Lastly, I darkened his eye color a bit. He looked kind of like a zombie with the brighter eyes: You might want to try some of those adjustments to see if you can get him looking like he's aware of danger rather than surprised.
-
Texturing Common Assault Marine By Dark_Jedi
MattWBradbury replied to LeeAnderson's topic in Work In Progress / Sweatbox
Maybe you can have them press a button on the helmet or on some kind of forearm control that makes the visor change from transparent to opaque. That or have it switch to their operating system where they've got a game of free cell playing. But yeah, you'll want to show the face at one point in time. It will allow viewers to have an emotional connection to these assault marines. It will let them remember that these are people and not just mindless killing machines. Though it should probably a couple of scenes before you reveal their faces. Looks really good. -
There are all sorts of threads devoted to displacement mapping. Just search Displacement on the forum. Any time you use a bump map, you can switch it to a displacement map by simply changing the decal type. It's that easy. So if you make a working bump map, that will work as a displacement map. All of the details you can see are displacement maps. The model itself is only 400 patches. I could have gotten away with 200, but I wanted the splines to be a lot smoother. Had I modeled it by hand it would have been several thousand patches. Move the model until the laser cannon is positioned at the origin and it is rotating around the Y axis. Select your decal and set the application method to Cylindrical, and aply it to the section you want to decal. When you apply the decal it will automatically set 3 repeats on the Y. This is to make the decal wrap all of the image around the entire Y axis. After you get your decals done, you can move it back to it's original position. I'm pretty sure you can do this in the action window, but I have not experimented with that. The three splines running just behind the cockpit need some tweaking. It's too wavy and looks more organic than mechanical. You might want to go with peaked splines in that area.
-
Here's the engine with all the displacement mapping added. I'm not quite sure what all those specs are on the surfaces. It must have something to do with compounding the approximations used by AO and siplacement mapping.
-
Does anyone know how to do cylindrical applications? I just tried it on the engine and all it made was a small strip down the length of the cylinder. I had to use Planer applications to get this: You can see where it messes up around the sides. -------- Nevermind. I had to center the engine about the Y axis.
-
Looking a lot better. Are you using the image as a rotoscope? That's a surefire way to make it look just like it. The splines underneath the rear of the cockpit look a little odd. Can you show a wireframe so I can see what's going on?
-
My suggestions: Make the engines slightly larger. Make the back section a little less bulky. Are you using a rotoscope? There's probably one somewhere floating around on the internet. ---------- Found one for ya:
-
That's a great use of the models. You should try a Sphereical Combiner Material to put on the Lance. Just create a new material, change the attribute to sphereicle, then choose the colors you want. Yellow and Magenta should look kinda cool. Then just drop it on your lance.
-
About the only thing you can do is add oversampling. Check out Yves's site on Oversampling.
-
One solution is to raise the model out of the ground (or above the xz plane) in the modeling window. The other is to translate the object in the choregraophy so it does not subtend below the ground. I'm not sure if A:M can prevent models from moving through a surface other than using newton physics, which is not an animation; instead, that is a simulation to try and recreate accurate forces on rigid objects.
-
This is not a problem with Anti-Aliasing. You need to use Higher Resolution Decals. As the decal gets closer to the camera, it looks larger. This means that each pixel on the decal is getting larger in the rendered image. A:M blend the edges of pixels on a decal so that it looks smoother, which is probably what your seeing as far as the blurring. Here's the decal: [Note: This image has been inlarged so that you can see each pixel individually. The real decal would have had each square as 1 pixel.] Here's what it might look like on a patch when rendered from straight on (from my observations, it blurs to half the size of the pixel): Here's what that same patch would look like tilted away from the camera: The farther it gets away from the camera, the sharper the decal looks. But as it gets close to the camera, it appears blurrier.
-
When using dark colors, try making the ground a darker shade of grey so that there isn't so much contrast. Right now, the white ground makes it incredibly hard to see the details. Once you've set the grounds color to a darker shade, you can increase AO's Intensity to brighten up the object. This is in reference to your camo cannon.
-
The thing I find most concerning about HDR is the time that it's been in development. The first examples of HDR were in the 80's and they still have not implemented it in cameras. I think it's because it's easier for Studios to take a real scene and light it like a CG scene. Most of the film taken is with green screen anyway.
-
An EXR image is a high dynamic range image. We created several maps with different intensities using a flate white surface and a sun light aimmed directly at the surface. We created 100%, 200%, 300%, 400%, and 500% brightness decals. They were rendered using the EXR file format in the rendering window. The EXR was then loaded into A:M and used as a decal on a surface. So whenever objects would reflect this decal, the reflection would be brighter than if you were to use a patch that had 100% ambiance. The eaisest thing (if they ever implement it into A:M) would be the ability to increase the Ambiance Intensity beyond 100%.
-
He used the default values for specular meaning both intensity and size are not set. The highlights you see are from the reflections of the exr decals.