MattWBradbury
-
Posts
1,410 -
Joined
-
Last visited
Content Type
Profiles
Forums
Events
Everything posted by MattWBradbury
-
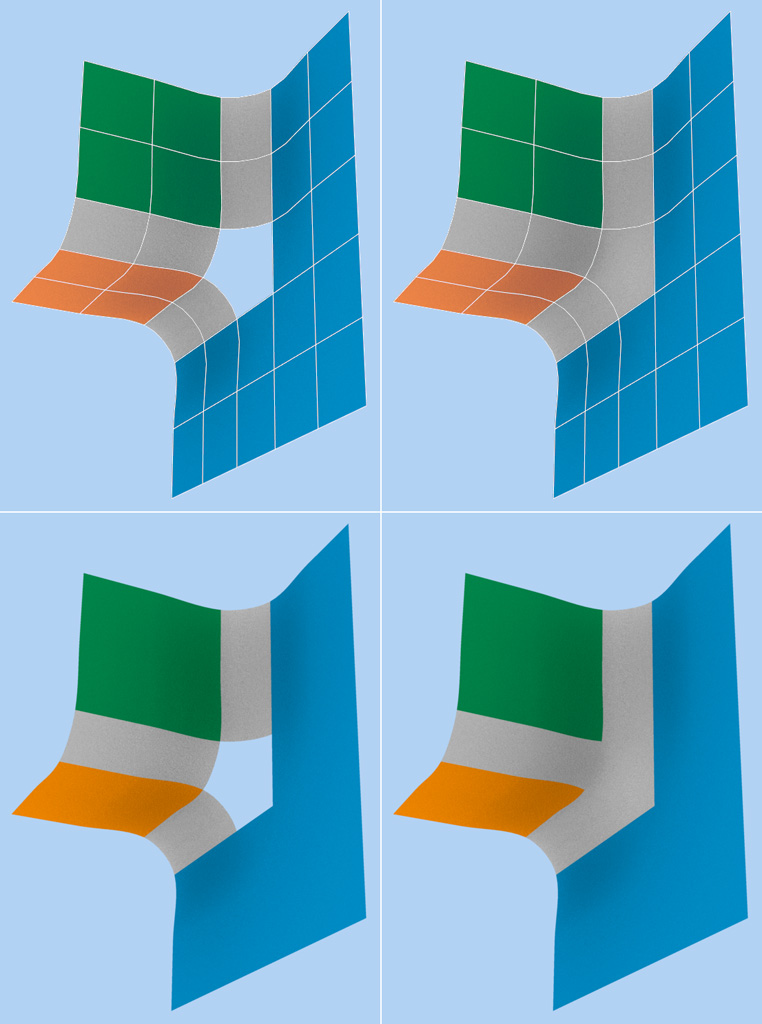
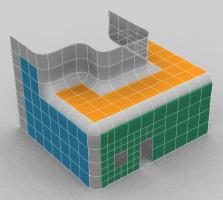
Some more shape shifting. I even added that ceiling vent.

-
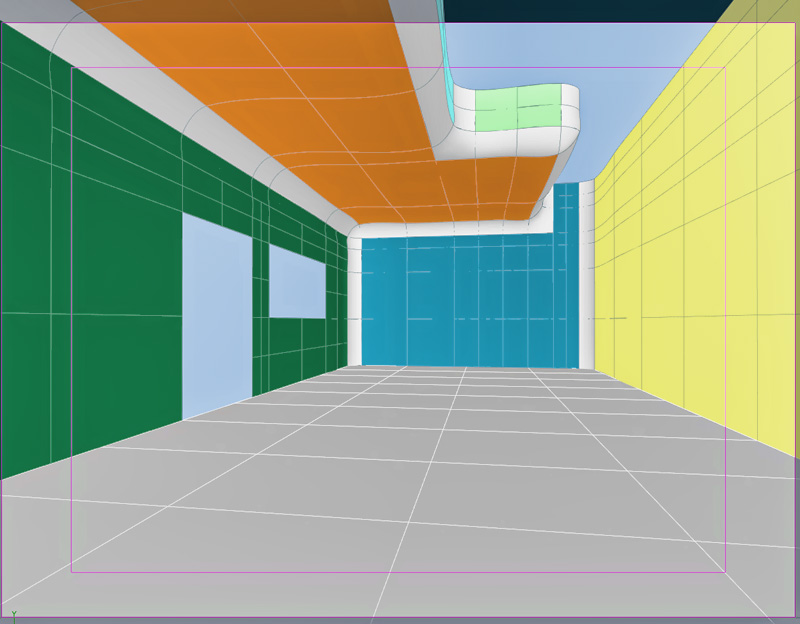
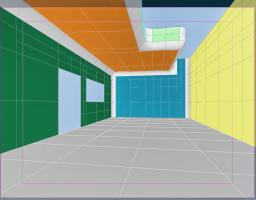
I've tweaked the edges a little more and made the seams and edges much smaller. I've also moved some of the geometry around to get the proportions a little closer. The wall between the door and the window are too small, so I'll have to increase that. I think I've got the sky light's shape down, though.
-
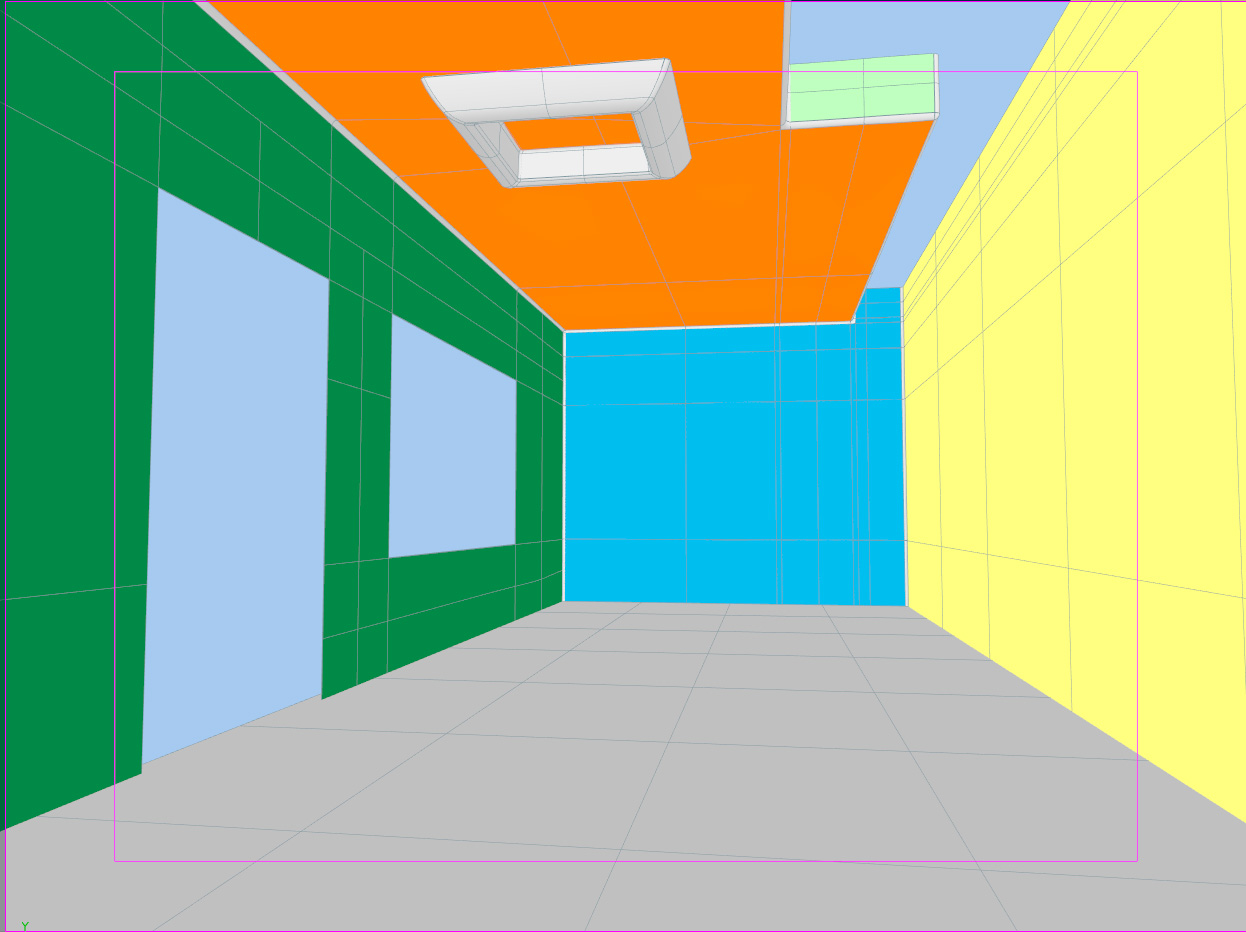
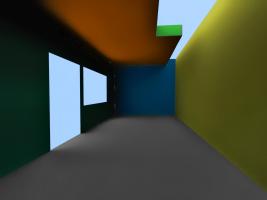
Now I'm tweaking the model to get the proportions right while still maintaining a relatively simple shape. It's a little better, but I think I need to shrink a few things.
-
I'm getting as simple as I can with the modeling as I can, though I have to say, being away from A:M so long has made it take a lot longer. I just now remembered how to put three different planes together seamlessly: using 5-point patches. I think it's looking pretty simple so far. Hopefully when I go to modify it, it wont start to produce artifacts.

-
Sounds good. That might also prevent me from losing my mind when trying to fit models together.
-
Alright, didn't get anything done today, but I want to complete this. I seem to have commitment issues with things like this Does anyone have any good tips for modeling highly detailed rock bricks? I'm thinking of just doing basic rectangular forms (with bevels of course) and applying a displacement map to them. I'm not sure if that's the best approach though as I have had issues with displacement mapping in the past.
-
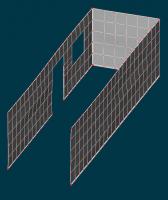
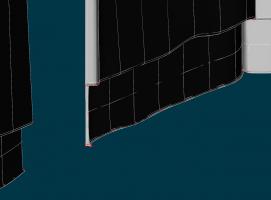
I actually just free handed everything in photoshop. It took a while to get the perspective lines I wanted, but after that, everything fell into place. I already knew how the scene would be shaded because I remembered how it was shaded in my imagination. That depends... Since you are creating a specific scene, it will save you hours of time to knock out the basic models, assemble them in the composition, and get your camera angle fixed. Then you will know where you should add extra detail, and where extra detail will just be a waste of time. It will also give you a good idea of where you have to model that extra detail, and where you can get away with simply adding maps. I think I will start to do this because this is all I have after working on the project for about six hours now: I haven't got the perportions down right yet, so the window and door are just place markers right now. I have a tip for those who want to work with very detailed models with lots of imperfections: build the model in "perfect" condition first, and then create the imperfections. It is taking me forever to adjust the model and see what I'm doing because I had started messing with the walls before they were even connected; this created a lot of seam issues as well. Basically, I'm making sure nothing is straight in the model. These are what the bases of the walls look like along the left wall: Hopefully it's not too uneven as to make it look unbelievable. I'll have to wait and see once the floor comes in; I plan on modeling all of the individual blocks.
-
Thanks for the advice guys I think I may be paying too much attention to small details, as I have just started in 3D and it has taken me about three hours to model two walls (I'm creating small imperfections all over it). Should I avoid doing these details until I finish modeling the basic scene or should I model fully detailed models from the beginning?
-
Now that's what I thought you were doing That June 2012 date, is that the date you want the animation to be finished, or do you want to be ready to start rendering at that point? You'll have about 10,000 frames, so if they're 10 minutes to render each frame, you're looking at about two and a half months of rendering.
-
For those of you who have done this kind of thing before, what should I start on first? I know I want to go in phases like modeling each individual wall separately to get the best detail I can. I'm going to be shooting for hyper realism on this one; I've got a lot of free time on my hands, so I should be able to get that quality.
-
One last addition before I start working with this model in 3D: I think I'm going to head to bed for now. I'll start in A:M tomorrow.
-
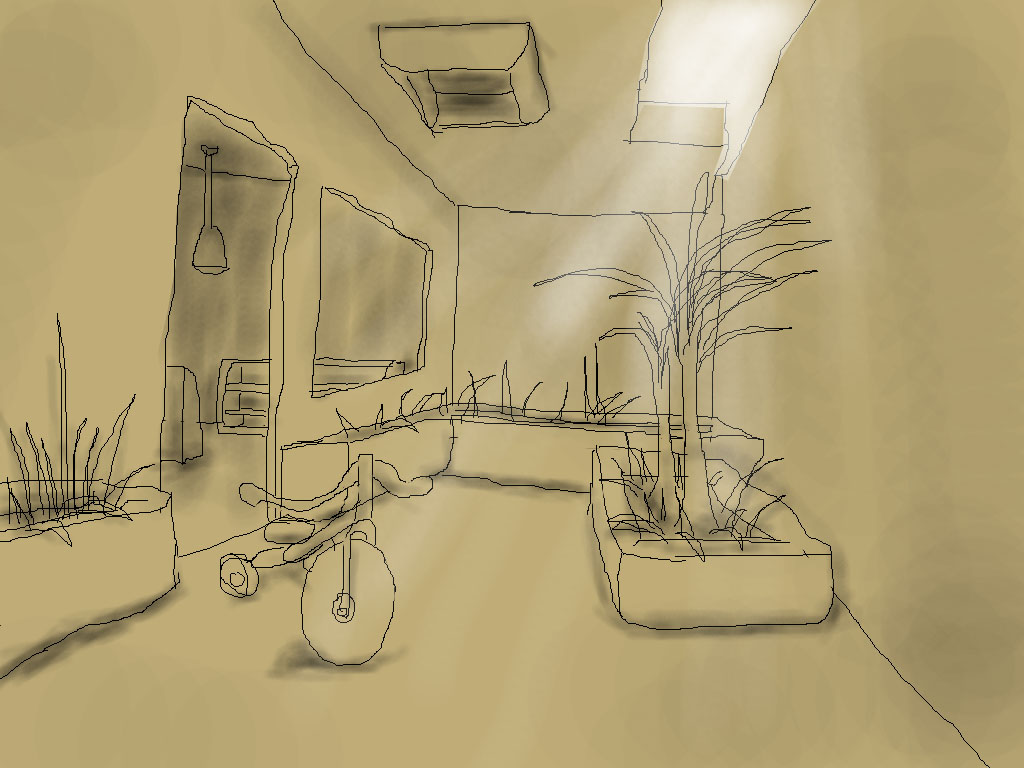
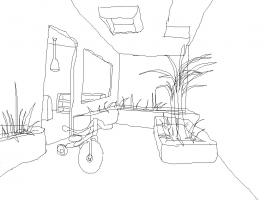
I added some shading really quick:
-
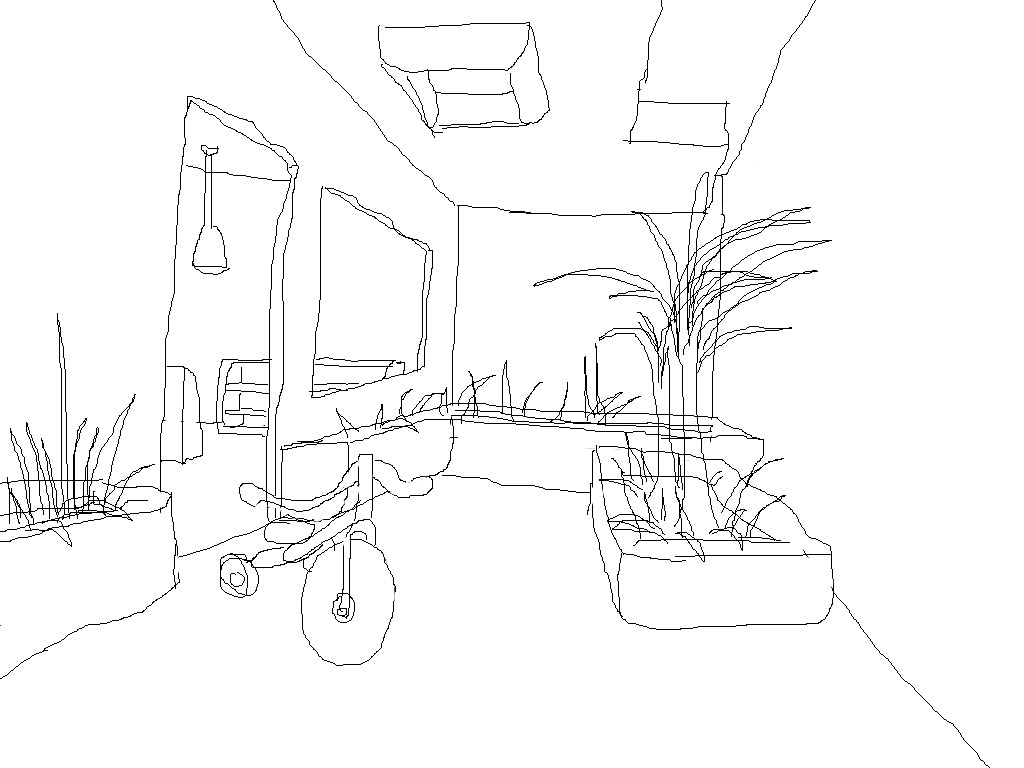
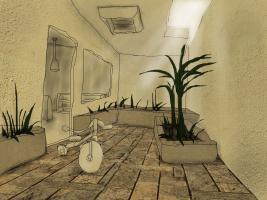
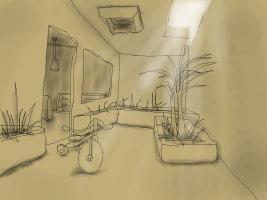
I normally don't do this, but I think if I post how I go through the different processes of making a render, I think I can actually finish an entire scene for once. Last night I had a crazy vision of some lost and forgotten tricycle sitting outside of an abandoned grocery store. There were lots of earthen tones and bright white lights. I just drew up an image of what I saw, and I intend to make the whole scene in animation master! Here's what I have so far: I plan on coloring this image to get a better target for contrast in the image I have this delusion of rendering out the whole scene in radisoity, but I need to try and suppress that in order to actually finish this scene. I'm going to go in steps. I think my main goal to start with the basic shape of the scene then add simple models to tweak in the scene until I get something that looks good.
-
My gut tells me that you should break out some paper or a tablet and start brainstorming to get your ideas down in reality so you can start putting it together. As of right now, I am not really sure how the story will play out, so I would try and create a solid progression. One more question (this one might not be easy to answer): What type of story do you want to present?
-
The story seems like an interesting one. Is this a real environmental issue in Pantanal? There are a couple of questions I have: How long does the animation need to be? Will there be dialogue? Are you going for any particular art style?
-
You're inspiring me to try for another radiosity scene. It's looking very nice, though I think that towel may be a bit too blue.
-
Yes, and what's more of a problem is the pixels on the boarder of your geometry will take some of the color from the background sky. It might be best just to set the background to something strange like neon green and just do a completely green screening in post processing; that, or I guess we could use sky boxes
-
I do see the skybox now. The sky is a gradient instead of one solid color. I have found that laptops, and LCD screens aren't that great for getting the right gamma settings, especially since the image can change dramatically depending on which angle you are viewing the screen; this is one of the main reasons I still have a CRT monitor (that and it makes gaming a lot easier on the eyes). I've tried several methods to get EXRs to render the background color, but every time it all turns black. Usually I do add the sky back in in photoshop.
-
Some of the scenes look pretty dark, so you might want to add some gamma correction to your images. Render a small image (320x240 would do) as an EXR and use the A:M Compositor to find the exact gamma that looks best, and then apply that to your renders. The reason for not rendering everything with EXRs is because you have a lot of the sky visible, and EXRs tend to make all of those sky pixels black. If you put in a sky box, then you could use EXR without worrying about getting a solid black sky.
-
Happy Belated Birthday, Martin. Now show yourself before I post embarrassing photos that have been obviously photoshoped
-
The ammount of photons you need for a simple model should be low, but that doesn't mean you can't add more to make the radiosity calculations more accurate. The most important step is to get the sample size correct. In order to get it just right, do quick renders of your radosity without Final Gathering turned on. Increase your sample size incrementally (usually by 100), until you stop seeing any change in the shading. That's usually a good sample size to work with, but I find that once I hit that point, dividing the sample size by 2 gives me better results once I turn final gathering back on.
-
It's looking better, and much brighter too. To use soft reflections, turn on Soft Reflections in the rendering options window (it's inside of reflections), make sure your surface has some reflectivity, and change the specular size to make the reflection more or less blurry (0% being like a mirror, and 10,000% being like brushed metal). You might want to play around with those settings before you do any long renders. I believe the blurriness of the reflections is exponential, so 10% will be twice as blurry as 1%, and 100% will be twice as blurry as 10%, and so on.
-
Holy Cow that's a lot of detail! That model looks like it's pushing over 100k patches. What are you modeling that with? My computer gets sluggish around 10k patches.
-
Radiosity would be a good choice over AO, but using z-buffered shadows is kind of a no-no with that, and I assume you're going for speedy renders for now. Those reflective stairs could look a lot more realistic if you turn on some soft reflections and get their specular size way up. After a while, you get something that looks a lot like brushed metal.
-
Defiantly don't need acid for this one... Dam.