robcat2075
-
Posts
28,400 -
Joined
-
Last visited
-
Days Won
425
Content Type
Profiles
Forums
Events
Everything posted by robcat2075
-
Nice scene. There should be a way to make the book pages not so rigid when she's turning them. Those snails should fall faster. Plop!
-
that path constraint has an "ease" property. set 0% at the beginning and 100% at some later time. the longer the path, the longer the time between 0 to 100 needs to be.
-
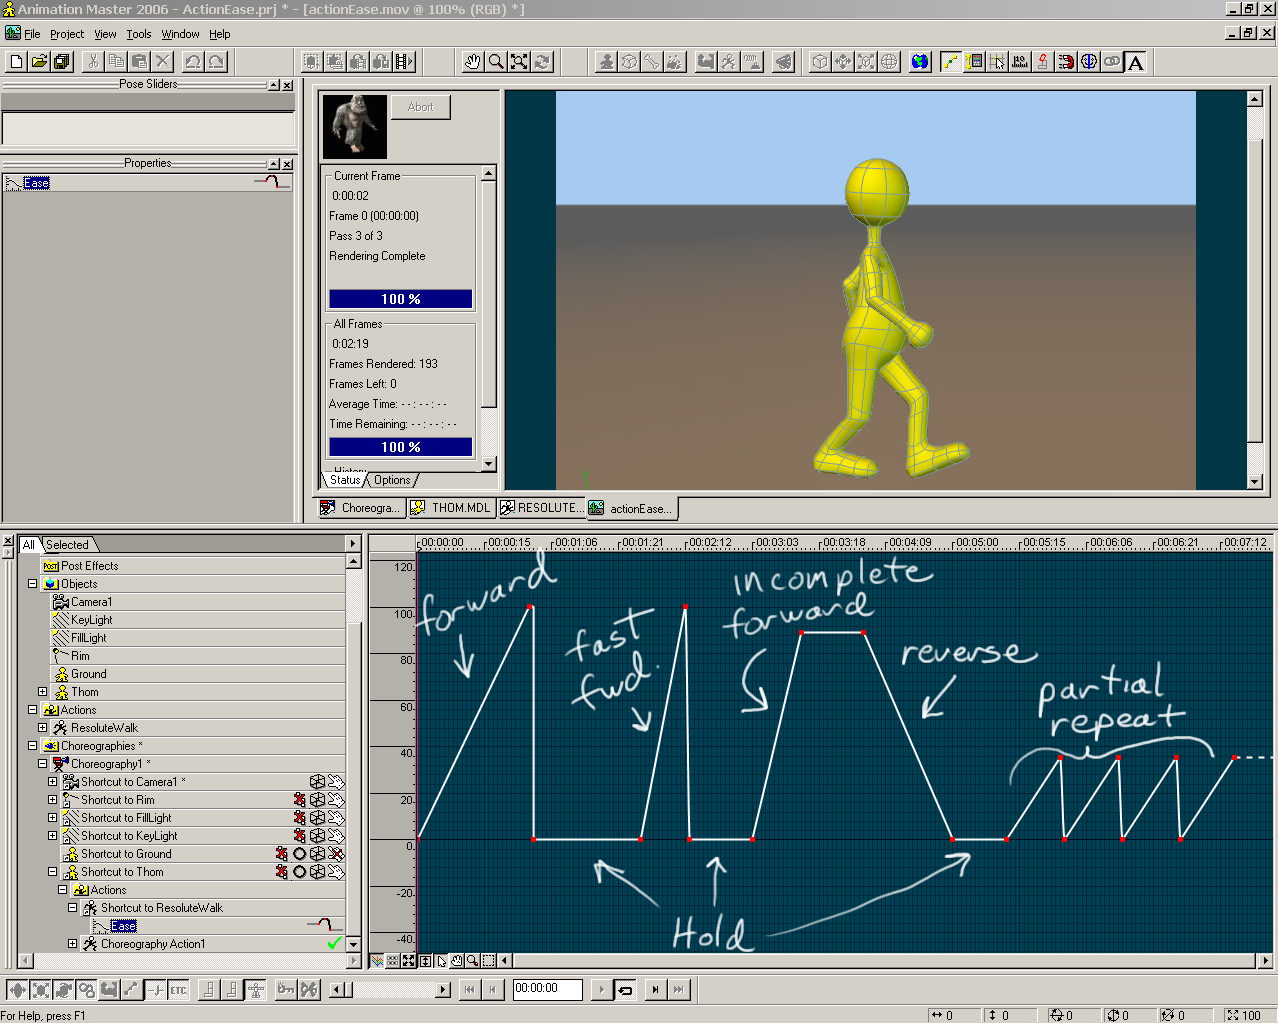
Ease. If your action doesn't have "Stride Length" use the Ease to repeat, crop, accellerate any action as much as you want. I turned OFF "Has Stride Length" in thom's walk action here. The ease channel wont' appear if it is ON. If your action has to have stride length (like a walk cycle) , then use the ease in the path constraint instead. ActionEase.prj actionEaseMP4.mov

-
The tutorial is in "The Art of Animation:Master" book you got either as a book or as a pdf file when you bought A:M That version is somewhat condensed. Colin freeman wrote it originally and although his site is down, you can still get the whole version on the wayback machine http://web.archive.org/web/20071226033127/.../tutorials.html it also has tuts on all the other body parts. I think he directs you to use too many CPs in the first splines, but that's just my preference, you can always thin it out later.
-
Is this one of those cars where the driver must crawl thru the window to get in?
-
that's cute! How about if it had a cigarette!
-
that's a pretty good composite.
-
looking very odd!
-
those are great tips, guys. You should do a car-modeling tut. Car modeling seems to be a pretty frequent desire.
-
A fine monster truck! What does your client do with these models? Any idea what plank above the cab does? Besides decreasing gas mileage.
-
I guess you mean something other tha simple repeating. I believe you can use the ease channel on an action to replay any or all of an action. This would be a similar result to having several of the action on the same channel.
-
looks like a solid start. Probably can be even thinner, but you'll find out.
-
you drag a CP on the end of a spline to the middle of another spline and click the while still holding down the LMB. you can hook to the 1/4, 1/2 or 3/4 point of that other spline, but 1/2 (the middle) works best/
-
I was able to reopen my project and the lights were still there. Were you able to load mine in V15 and the lights were still there? It's odd that a light would disappear and not any other bone. you might examine your saved file and see if the lights were not saved or if they are there and disappear on re-opening.
-

RetroBot - or How I Shamelessly ripped off Ashley Wood
robcat2075 replied to UNGLAUBLICHUSA's topic in Characters
Fine looking Robot! -
i noticed in V13 that a light duplicated in a model would lose a property so i created the light as a new object and dragged that into the model. That seemed to work. I can't get the light cone to appear to fade to 0 at the end of its beam. it always seems to have a detectable stop to it. But it's not bad. Volumetric lights are a post effect , I think, not a rigorous physical simulation of light physics. lights that overlap can have odd appearances. carlights01.zip carlightsH264.mov
-
I think the splines that cross the chest that are continuations of splines from the flippers are more than you need. You could terminate those with hooks near the base of the flippers. find some reference photos of penguins to compare.
-
Thanks for corralling all that together, Matt! I think that's a really fine spot for all the different things people do with A:M.
-
Crown Moulding Installation Animation
robcat2075 replied to flashawd's topic in Work In Progress / Sweatbox
That looks very professional. I hope your clients are pleased! -
TAoA:M does list those keyboard shortcuts and does cover positioning things. Pay attention to the instructions, and dont' discard what you learned in the ones you've already done.
-
when two items overlap you can select a particular one by clicking the tip of its model bone You can also make something unpickable (like the stage after you have postioned it) by toggling its hand icon in the Project workspace window.
-
The make a face tut in TAoA:M starts with reference pics so that's probably the closest I could point you to. It will help (a lot) to have a side view of that face. the artist has simplified most of the features in that pic so that should be very doable as a first face. But it would really help to have a side view to know more about the shape of the face.
-
Problem Running the Software - It won't run from my hard drive
robcat2075 replied to banson's topic in New Users
You will need to have the CD in the drive when you start the program. you can take it out after A:M is running. Also, 15.0e is the latest version available to run with your CD. You can download the installer here 15.0f will be available for CD users soon. watch this thread -
This is a rough draft of another attempt to explain keyframing details in A:M. KeyingShaggyH264_96kbs.mov I'd be interested in the opinions of new users as to whether it makes sense, is helpful, or if it misses something that ought to be included in such a discussion. My initial feeling after watching it is that it is too slowly paced, so that's something that might be fixed in another go at it.