-
Posts
28,257 -
Joined
-
Last visited
-
Days Won
402
Content Type
Profiles
Forums
Events
Everything posted by robcat2075
-
Happy birthday! May you continue to be fresh!
-

How do i control the direction of Snap Group to Surface?
robcat2075 replied to robcat2075's topic in New Users
I think "nicht wahr" is something I picked up from my dad, but he grew up speaking Swedish and only learned German in college so he probably wasn't a great source on that. I do get a dialog with SHIFT but it only offers "Maximum distance" and "Offset" -

Welcome to the A:M Forum! Introduce / Reintroduce Yourself
robcat2075 replied to Rodney's topic in New Users
Hey, Arthur, good to see you peeking back here! I have no answers to your questions except to say that questions about FBX comes up from time to time here and there is interest in that conversion. -
Snap Group to surface is "view dependent" which I take to mean that it will move the CPs in what ever direction you are viewing from, right? However, i can only get it to move in one direction. I filed this as an A:M report which is why it's in German but maybe someone here has an answer before Steffen gets to it... SnapGroupToSurfaceQuestion.mov SimpleSnapTest02.prj
-
Of the sampler set you have in 005 I think the third one is most effective in suggesting that he is moving his mass with effort. Pursuing Nancy's suggestion about using the arms to help push up as in 003, the hands need to pick one spot to push and stay there rather than wander up the leg. Probably about mid-thigh would be a typical spot. IF they are sliding they don't look like force is getting done. They should also stay there as long as the arms can reach. Pushing the hand against the thigh is what keeps it on the leg. If the hand is leaving the leg prematurely then it appears not to have been pushing much.
-
You are right. There was a five second limit on the assignment and I was trying to squeeze too much into it I think we spent two weeks on that. I'm afraid my patience for that sort of time frame is gone.
-
Here's something I did once that involves getting up off the ground... http://www.hash.com/forums/index.php?showtopic=45683
-
From a long time ago, an assignment from animation school. The assignment was to show a change of emotion. wakeupH500.mov
-
I definitely like the snappier pacing of that. A good opportunity for overlapping motion is to have the head lag the torso when the torso starts rising up. You could go wither way on the head. It could lead the torso, as if he is flicking it to help get his torso started, or you coudl lag it as if it's getting left behind by the torso's motion. Leaving it as a rigid extension of the spine will look... rigid.
-
Hi Simon, here are some notes... SimonHeavyliftH400.mov
-
I like that! Especially the sea creature!
-

Looking for recommendations for camera settings
robcat2075 replied to fae_alba's topic in Open Forum
And don't use those wall paper clouds. -
Another way to do camera jiggle might be to make a loopy, tangled path in front of the camera and aim the camera at a Null that was on the path on a path constraint.
-
Several solutions in this thread, mine is in Post #9
-

Looking for recommendations for camera settings
robcat2075 replied to fae_alba's topic in Open Forum
Start with one light. One non-lighting fix I'd suggest is to vary the height and width of the trees so they don't look all the same and make them more pine green than bright green. -

Looking for recommendations for camera settings
robcat2075 replied to fae_alba's topic in Open Forum
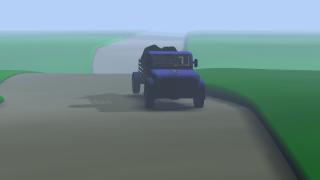
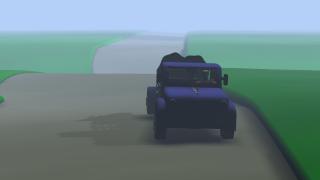
I think that is much improved. Changing the ray-traced sun light to a Z-buffered Kleig light and using regular render instead of multi-pass probably gained most of the render speed improvement. I'd suggest tweaking some keyframes of the truck motion so it's not sliding sideways in its turns as it follows the road. -

Looking for recommendations for camera settings
robcat2075 replied to fae_alba's topic in Open Forum
You can tone the fog effect down but you need some to get a more realistic look. Notice how the distant details in this landscape are subdued by "fog" even though it is a clear day. The farther away they are, the more the are colored by the fog. That's an easier solution! -

Looking for recommendations for camera settings
robcat2075 replied to fae_alba's topic in Open Forum
I would call that "washed out" or "over bright" that doesn't look pixelated in the sample you've posted. The reason it is over bright is that the "Key light" and "Fill light" are shining on it. If you turn them off the color looks normal again. You can use Light Lists to make lights light only certain objects http://www.hash.com/forums/index.php?showt...p;hl=light+list The first advice I should have given is to NOT start any lighting project with the A:M default lighting. It is only good for making sure new users see something in the chor. It's not good for any sort of movie lighting and it's not a standard three-point setup even. The faster way to do lighting is to start with no lights and then add the one light that will be the main source of illumination and get the scene looking as good as possible with just that. Then you add other lesser lights as needed to fill in dark areas or highlight edges or whatever. On that sky dome... since your camera doesn't pan in that shot you could use a much smaller flat card at the back of your scene with a cloud image on it. On that cloud image... that one looks like the camera was pointed up at the sky and doesn't look like clouds at the horizon. Even puffy clouds recede into the distance as if they are on a ceiling, not as if they are on a wall that contacts the ground. There's never a case where the top of a cloud will peek above a level horizon. These clouds are all about the same but the ones near the horizon are much smaller because they are farther away. The only one that contacts the ground line is the one behind a mountain: -
I think the composition would look more interesting if Saturn weren't so horizontal and if both bodies weren't front lit. If they were more side lit or rear lit they would make interesting shapes.
-
All those links come up 404
-

Looking for recommendations for camera settings
robcat2075 replied to fae_alba's topic in Open Forum
Lots of useful tactics suggested here. Paul, something that would be useful is if you posted an image from a movie that was like what you were wanting to get. "Movie look" could be a lot of things. -
One item I'd note is that the orange guy doesn't land with much weight. He shoudl squash into a crouch more instead of just falling into a standing position.
-

Looking for recommendations for camera settings
robcat2075 replied to fae_alba's topic in Open Forum
-
It seems to be possible to customize the icon for .exe (program) files but data files seem to require the uniform icons for all files of a type.
-

Looking for recommendations for camera settings
robcat2075 replied to fae_alba's topic in Open Forum
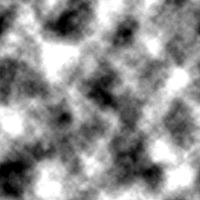
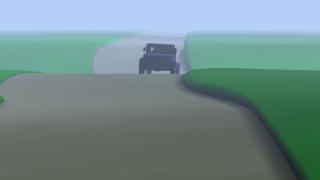
I'm not sure what the intention of the particles in this scene is. Are there supposed to be some? When I render with particles ON I don't see anything but they take a long time to compute. Here's one lighting scheme. I've used fog to make make the background seem farther away. I changed the "sun" light to a z-buffered Kleig to render faster and used two of them. The overhead sun is fuzzy to suggest an AO shadow beneath the car. The other is sharper and tilted to the side to make a more interesting shadow presence in the scene. I added a bitmap to it so it wouldn't be just the exact same light all over. It's sort of like a partly cloudy day. This lighting is designed to be fast. These take about 7 seconds to render This PRJ has all the render settings in the camera so you want to set "Use Camera Settings" in Options Panel. SampleProject05.prj


