-
Posts
7,863 -
Joined
-
Last visited
-
Days Won
15
Content Type
Profiles
Forums
Events
Everything posted by NancyGormezano
-
Oh yes - tis quite good My problems were not with HOW to weight but WHAT values to assign to the cp weights (with a different mixture of bones, different hierarchy of bones) so that the splines would respond well - it was the trial & error process that was driving me batty. I was trying to work out something such that the geom bone structure was more like the actual face muscles rather than having them be centered on spline curvature - more trying to get something like Jesse's structure, Cleary's, soulcage - where geom bones lie more on the mesh, and are translated to a null, and aimed at a null (scale on z) - so that one could squish/squash face splinage more in tune to actual physiology. The control nulls would follow the curvature They were obviously able to get something going - I just ran out of steam - and decided for my simple character I would first go the direct route, and get a little more comfortable...and not have to think...my b..b...buh brain hurt.
-
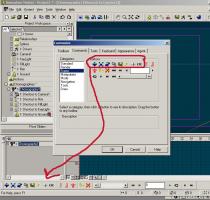
I've used the 'model' key - I don't know where the 'translate, scale, rotate, other etc' keys are. The choices I have are 'model, branch, bone'. ' I didn't see them on your screen capture? Weird. tools/customize/commands/frame
-
What keyframe filtering keys do you have turned on when you do the copy/paste ? (eg model, branch, bone, translate, scale, rotate, other etc) I believe there is a magic combo, which I'm sure someone (rob, mark) can tell you what it is
-
My brain exploded, my eyeballs fell out of my head, and my cat ate the neighbor's dog whilst trying to figure out cp weighting for different face geometry bones. I will give this a spin ... after I clean up my keyboard. Muchissimo Guchissimo! Vaya Con Carne!
-
Looks very good - very smooth Would love to see a screen shot of the geometry bones, if possible, if not too much trouble.
-
Funny. This was the first site I've ever had that warning pop up. I can't say I've had any other false positives. I wondered if it was really real. But I figure I'd rather have a zillion false positives than 1 false negative. I'm not that big a fan of Norton either. Their headquarters is 2 miles from me. They were responsive when I walked in the front door 3 years ago, after they DIDN'T catch a very well known virus. Maybe it was the crazed look on my face? Thanks for the model.
-
Malo - I'll see what I can do. My English isn't that good either, AND I'm a native English speaker. I read French a little. Oddly I found that the French made a little more sense. Go figure.
-
Gerry - I always find it is easier to work with an image sequence - rather than a .mov or .avi that way frame rate doesn't confoooze me. 1) so convert mov to image sequence (tgas is best) 2) import tga image sequence into A:M (all should come in) 3) apply decal with image sequence - 4) set the Crop start and end to be the same as range start and end (ignore length, speed, frame for now) - in my eg it was 0-121 images for whole thing 5) in chor - expand to show all drivers for the model that has the image sequence decal 6) go to frame that you want the sequence to start - set the frame number of the image in the sequence that you want it to start at (doesn't have to be 0) 7) go to frame that you want sequence to end - set the frame number to the end frame number of the sequence that you want to play In my example I set the start of the sequence to be frame 0 on the animation frame 0, and the end frame to be 121 on frame 24 - thus frame 65 of image sequence will play on frame 13 of the animation
-
definitely - if I get anything useful - I will be sure to share - even if it's not useful - I will try to share what I learned.
-
Maddle: If you or anyone are looking for a tutorial on modeling faces/whole characters in A:M - The Colin Tutorial is a good start - but does not create a spline layout that is the best for animating. The Malo Modeling Method Tutorial creates spline layouts that are excellent for animating, and he describes a generalized, logical method for A:M that can be used for just about anything. Wonderful! I highly recommend it, especially if you want to animate your characters, and have minimal splines. I believe Malo is a native french speaker. So sometimes the text, translated into English is a little confusing. But I could make sense out of everything just by the wonderful and complete pictures. The screen captures are excellent - so one doesn't have to read much text at all. Perhaps he has a version in french?
-
Thanks Holmes - no rush on the instructions - I did download your new version when you posted it - I can probably figure it out with the existing instructions some - I'll ask questions if I can't I'm starting to look at Cleary's gizmo face rig - oooo weee - very nice, but complicated (doesn't quite work in 15e) - I like the way he lays out his geometry bones - I may try to figure out a simpler implementation using the geom bones he has and just some simple nulls & smart skin for control. I like the controls in your face rig (but don't want labels, probably want moveable camera, or no camera). And if I can't figure out how to do a hybrid, I will go with lite face As you say - the most time will be spent on weighting the face. Well not exactly, the most time spent will be me trying to figure the laziest way out, and then doing it over the right way, by going with liteface. (thanks Steve for the complement)
-
Your project did NOT have any Material Effector OBJECTS in it. I created one, changed it's shape to box, created a checkered material, dragged it to the effector object, dragged effector object to the chor, placed it around your modeled objects so that it would intersect. materialeffector.prj
-
yeah I believe I found that the effector sometimes acted "flakily" - and I believe that some shapes of the effector work better than others (not sure) - I think if you change properties of the effector to test - you have to delete it from the chor and re-add it (again, not sure) What shape of effector did you use? - try box maybe? (can't remember which one worked best) I believe Master Tinky-John uses effectors all the time to get his crazy stuff - take a look at some of his projects. post pic and/or proj if you still can't get it to work.
-
I don't know much about them - but they seem to be pretty straight forward 1) rt click on objects in PWS, select NEW/Material Efector 2) create any material - drag this material to the Material effector object 3) place effector object in chor 4) ANY parts of ANY model that gets enveloped in the Material effector object will take on the material characteristics of the Material effector. You can play with shape of effector, as well as fall off properties. And you can animate the effector object
-

Recent jobs done with A:M
NancyGormezano replied to John Bigboote's topic in Work In Progress / Sweatbox
Thanks for the lighting info - very handy, neat explicit diagrams - Your final images look terrific. For oversampling - Do you mean 16-25 passes? or rendering at 16-25 times the final size (that doesn't sound right) ? Or? -
DO NOT GO TO THAT DOWNLOAD SITE My norton anti virus Worm protection detected and Blocked (luckily, I hope) an intrusion attempt And I didn't even try to down load - this alert popped up immediately
-
Hoo hoo hooo! This has great potential for those of us who like our holidays mixed liberally with nightmares. (that original physical model is great inspiration - I missed that thread - so long ago...)
-
Just wanted to let you know that I installed the Literig into a new model that I've just done. I may be slow - but I was sucessful. It's a very straightforward process. Your instructions are terrific - wonderfully concise & extremely clear. My only trouble was not completely understanding how the thumb rotator should be placed (relative to thumbA), but it seems to be ok... My cp weighting could still use work. And it was extremely handy and easy to use RobbieLite as a guide. Unfortunately I found out that exporting from an action wrecks some decals (changes repeat counts, & some 5 pointer patches got de-decaled). Exporting from an action also seems to delete group folders. And now I'm on to a face rig - Did you perchance get a new face rig going for Gerry ? and is it available? (ugh - just remembered there is exporting from an action, and I will have to clean up decals, etc again). I know you have a new version posted - but it sounded like you were going to do something different again. I will be investigating doing a modified, simplified face Rig using Steven Cleary's head Gizmo as well - but I'd really be interested in seeing what you've come up with, if it's available. Many thanks for doing this VERY easy to install but VERY complete rig!
-
Looks quite good - I like the variation for the contents of the windows For a still - the only crit is that there could be more variation of window sizes (too many horizontal long windows) - but for a fly by, one might not notice - depending on how fast the camera is moving.
-
I foresee another gay teapot in the making ... how quickly they forget
-
On the PC (don't know about mac) - you can ctrl + D to turn textures ON/OFF in real time view However if you want to preview the textures in "real time", try the render lock mode (green button) or render mode (left most blue button). Render lock with give you an onscreen progressive render (semi accurate - but quicker), whereas render mode will render on screen according to the render options you have currently set via the tools/options/rendering panel. It is a more accurate render edit: I shoulda known - Rob beat me to it.
-

2001 - A Space Odyssey - Modelling the Discovery
NancyGormezano replied to Tralfaz's topic in Work In Progress / Sweatbox
Ooooo weeeee, lookie all them doo-dads. Yep. I'm impressed! -
Of course - A:M Painter can modify any decal image that you've already applied FIRST in A:M - In 3d/A:M painter - its a good idea to rt click on the image and choose "make only this image editable". That way you won't be modifying any images that have been layered on the same patches. When you are satisfied with the modification - I always choose to EXPORT the image file to a new name (rather than SAVE) - because I don't like to destroy the original file. Then I go back into A:M and under the appropriate image in the decal container, I substitute this modified image, that I have imported into A:M. I do not use painter as a plug-in - I find there are less funnies if I use it as a stand alone app - ie, I have both A:M and painter open at the same time. And move back & forth between them (as well as having photoshop, Corel Painter open at the same time) I do not believe that group (patch) images show up in A:M Painter (almost sure) - So, then you will not be able to tell how the mods interact - you will have to view the total effect when you return to A:M. And I agree - if I had known you were going for realistic - I too would have suggested "take a photo". Geesh.
-
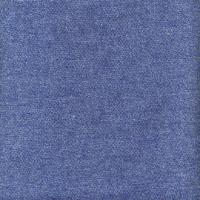
Picky picky picky... It looks like stretch denim to me (really - I'm not joking) I'm not that fussy about the stretching...Textures will stretch no matter what, when your character moves. Can't be helped. The audience shouldn't be focused on the pants, and you can always move the camera so that it's not so obvious. In your 3 egs - I would probably be happy with the decal efforts, and I would fix the patch image effort so that the images were aligned correctly - weave going in correct direction, more seamless looking HOWEVER for picky people, the goal would be to introduce noise so that no regular pattern is immediately obvious. What I sometimes do for pants (depending on the pattern) is to use a combination of patch images, with decals applied with cylindrical & planar mappings That is, using an image swatch for denim of your choice 1) first decal the entire trousers/pants using a cylindrical map - play with the repeat count - probably just increase x from 3 to whatever it needs to be to get the correct scale - seamless ON 2) next - decal the same trousers again using a planar map - set repeat count again to whatever works. Seamless ON. Sometimes it works better to apply the decal from the side, sometimes from the front. Whichever way looks better. Whichever way you do it - probably do some flattening first 3) play with the percentage mix for the 2 decals - ie try 50% for the planar decal, with 100% (or less) for cylindrical 4) If pants STILL needs noise: then take the entire pant group, right click and - add image with same denim - (you may need to set the decals to 0% while you adjust/rotate images so that you can see the patch images) Adjust repeat count if necessary. Again play with percentages of the patch images, decal images You can use the same denim image for all 3, or combine different images. You can play with adding bump as well (use same image). Here is a denim that doesn't have a distinctive weave Hope this helps some. EDIT - Just saw your new image - Looks good to me! I would be very happy .
-
OMG - The world is not safe anymore !!!! Yeeee hawww!!! This sounds terrific...given the great success of your "Flying Dutchman" - I have no doubt this adventure will be great fun to watch (gee - I didn't know dragonflies had round serrated gears at one time .... ) What's the # of flaps/second projected to be?


