-
Posts
7,863 -
Joined
-
Last visited
-
Days Won
15
Content Type
Profiles
Forums
Events
Everything posted by NancyGormezano
-
Scarecrow of Oz 2_10 - Draft - Trot Meets Gloria
NancyGormezano replied to HomeSlice's topic in Work In Progress / Sweatbox
looks pretty good! -
There is water and then there is water... I haven't really played with liquids - here's one tutorial here's BigBoote's quickie intro to fluids John the Bigboote Campbell Soupie-Floopie man - also has done a video - use search on "liquids" and ye shall find - And then again - there is cloth, or just making a surface and displacing cps - all depends on whatcha wants to do.
-
(Oh sure, sure...) Have a wonderful, HAPPPPPPPPYYYYYY Birthday anyway !!!!
-
Thanks Stian! Thanks Pixelpucker!
-
Beautiful chess set! - beautiful render! Stian - could you share the details/technique of your lighting, texture setup on the chess set - when you say depth map - do you mean using fog to generate a depth map? Stunning! EDIT: - I found this topic discussing creating a depth map in A:M - quite good
-
Susan Boyle? Bugs Bunny? Kidding, kidding. I am absolutely amazed at what you've been doing with these materials...
-
Steffan has a plug-in - called resurface I haven't used it - but from the description it sounds like it might be helpful EDIT: never mind - I see that you already discussed that plugin
-
Never meant to imply there were any formulas to composition that had to be strictly followed (that would be boring) - I definitely understood that you were trying to balance the curves. I like the softer lines. This works better (for me) - and you are absolutely right - it's all subjective and a matter of personal taste. The sketch is also terrific
-
I like that you've added some complementary textures on the guitar, love the equation - but not quite sure about the crossed red lines, seems to disrupt the composition (for me) - perhaps try the lines horizontal and parallel ? perhaps about 1/3 down from top ? Beautiful stuff ! (Do I have to keep saying that?...YES!)
-
wonderful layout, imagery
-
yup - very beautiful!
-
for any A:M files (which are text files) not in a zip file - you can right click on the link and choose "save link as" instead of clicking on the link - but what you did works as well
-
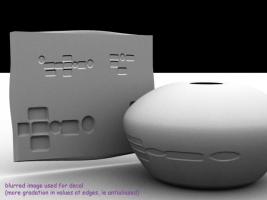
Interesting Eric - I took the opposite approach, for this image - and thought that one would need smoother transitioning of gray values (from black to neutral gray) in the displacement image. So I blurred the image used for the decal even more, essentially anti-aliasing it, rather than use an image having sharp, stair stepping edges. I'll be curious as to how it turns out (this is 25 pass - with new image used for decal)
-
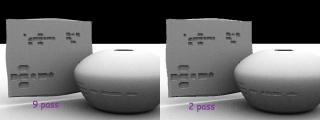
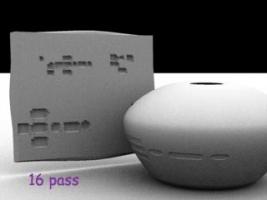
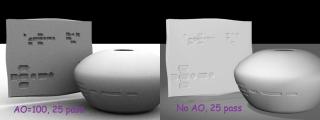
If I recall, 13t might have had a problem with decals not covering the entire patch that they were applied - which may explain your edge showing As for graininess & AO - usually the more passes, the less grainy. AO is inherently grainy. I was using 15j plus - only did 2 and 9 pass, both with ai=100, ao=100. What did seem strange to me tho, even tho 9 pass looks less grainy - it actually took the same amount of time to render? Am I imagining things? EDIT: added 16 pass - took only slightly longer than 9 pass - but I changed the decal image to be a bmp (rather than jpg) to see if that made any difference
-
I did a search on soccer ball and got this thread/post I did not check out the model that was there, so I don't know if it will meet your needs If not - use the search feature of the forum - and checkout the other threads, looks like there were others looking for the same thing thruout the ages.
-
Yes and yes If you embed - however - and don't have separate files for everything - your project file can become quite large and you run the risk of losing everything if your project file becomes corrupted. I never embed unless I am doing a test, or I want to upload/send a project for someone else to look at
-
Ah yes - now I understand Using an image (instead of the background color) for fog opens up many possibilities - here's example of using 2 different images for camera roto, and fog. Thom and the ground plane are both front projected. The fog near, far distances are set to behind thom Not sure what's going on with your weirdness and rotos
-
definitely looks cool - neat idea. Poor thom. the sky/background is white because I am assuming your roto is white (the .mov was not included with project) - rotoscopes in the chor are used to fill up any areas that aren't filled by any of the models, in this case the sky. The roto is also used for the image of which to project onto models which have the front projection option ON. If you want the background image to be different from the front projection image - you might try having fog ON with a fog image (with the image different than the camera rotoscope). Have the start end distances for fog be farther away than the front projected models. Then you can have a different image to use for front projection as well as for background. Not quite sure why you had to front project Tom (why not make it a whitish/transparentish model?) - love the glow effect around him For something even more strange try making tom ghost also flat shaded as well as front projected - with white roto - you might get a melty look - depending on the lighting.
-
here's a movie illustrating some differences in using fan bones versus different weighting schemes - it may or may not help here's the post where the project and discussion is located
-
I also tried NOT using ocean rig - Just tried in chor constraining camera to a null with translate only, and found strange behavior when enforcement was changed. I also found that when the enforcement went to 0 (linear enforcement) - then the camera went back to its original position (if I had originally key framed camera position, and had started out with no compensate when originally constrained, and null and camera had same xyz). But right before enforcement became 0 - the camera was translating to somewhere else - was not obvious what computation was being done (tried in 15e and 15jplus)
-
Well bless my soul! A genuine tied & dyed Girlrilla! Perfect for the Loveboat
-
☼òø©äèãW♀♂♠♣♥♦♫♫♫♫♫♪♪♫♫♥ these are all symbols - that I was able to access from word (insert symbol) - all unicode - but I don't know how to create other than via word - and they seem to change after copying and pasting
-
How about using an aim at constraint for the camera to some bone/null that is in the ocean rig model. Then you can modify/animate the enforcement of the "aim at" as well. Can use that constraint in combo with a "translate to" some bone in rig (that enforcement stays at 100%). I am assuming you are wanting some camera movement that will make us all puke? And then there always is hand animating - Brute force gives you exactly what you need.


