-
Posts
7,863 -
Joined
-
Last visited
-
Days Won
15
Content Type
Profiles
Forums
Events
Everything posted by NancyGormezano
-
I'm using xp pro sp3.
-
Very interesting model! Nice! You should post more of your work, more frequently. Awhile ago, I bought a 2D (basic hand drawn cell-type) animation program, because I thought it would be useful & quicker to use, to make rotoscopes for poses, timing in A:M. Wrong. I am finding it is easier, faster to just use A:M to flesh out poses, timing. If anything, I would use A:M to provide rotoscopes for the 2D program, if I ever wanted to do hand drawn 2D.... And if I did want to do 2D, I would probably more do a cut-out type of animation, in which I would use A:M anyway, rather than any of the other vector type 2D animation programs with what appears to be awkward layering, awkward scripting, awkward rigging. They seem to resemble A:M in many ways, but they don't do 3D, and seem to make doing simple things hard.
-
I have had this problem, I do not know what the cause is, and you have found the solution (delete the funny channels). I have noticed it in previous versions of A:M, PC, maybe only certain rigs? My caution is to not have other windows open when animating...probably superstition on my part.
-
Merriest Merriment to you and your Family, John!
-
There is a free version that works only with ver16 found here Not essential for this image - but gives an added ooomph.
-
I don't believe I groomed them. I thought you had aready? All I did to yours was to increase the length (Materials/branchhair/hair system/length=3"). Thought it looked nice the way it was, so I left it. But I thought it was too dense, so in the hair emitter props I changed the density=2. Perhaps the direction variation of 15% is what is giving it a nice random look. I also added an image for the emitter. And I changed how they were being displayed hair system/realtime/density factor = 100%, so that I could see the changes as I made them. When I look at it now, I see that perhaps the needles could be shaped to end pointier (by changing thickness property at 100%) - but it's a matter of taste.
-
My pleasure! I've enclosed 2 project files, with the images used as well. Put the images in same folder as project, but you will probably have to relink them when A:M asks you for their location. The differences between the project files is that 1 uses the plug-in FakeAO (ver16beta5) and the other doesn't. I am guessing you haven't downloaded the plug-in FakeAO. xmasMod.zip
-
Pretty! Wing flapping looks great. I like the style of the clouds, but I think I would prefer them to not be out of focus. It seems odd to me.
-
A couple of things that might help: 1) You can set ground/options/cast reflections=OFF. That way, you won't get that bottom white half reflection. 2) Create an environment map material (like Stian was suggesting) on the ball, but you can use any ol' image for the surface, it doesn't have to be hdr. If you want red ball - use a red shinyish image in the environment map. Set surface reflectance property to whatever % value you want. I have it at 80-100%. Don't set the ambiance intensity surface property of the ball. Leave it default. And yes make sure the ball has something to reflect as well. Set spec color, size, intensity of ball surface to whatever you like. 3) You probably want to change the length of the branch hair (I made it 3"). Probably make the density less (I used density = 2, tweak to taste). Use an image emitter for the hair, I used a cream/white variegated image, that actually was the same image used for the "white christmas ornament" surface. It adds some variation, dimension. I made the specular on the hair emitter surface property bright yellow. Make sure the lights in your chor have spec = ON 4) I played with the diffuse shader as well for the ball - found I liked oren-Nayer. You may not.
-
Ah yes...clever - that works wonderfully, thanks for the project
-
Did you try in 16beta5: set the render in output/buffers/depth=ON, save buffers =ON. You can render to png and have 2 separate files generated (color and depth), or you can render to Openexr format and all the buffers will be in 1 file.
-
Mais, oui!
-
Thanks and Same to you!
-
OH but of course! By all means, use it for the compilation! Thanks again!
-
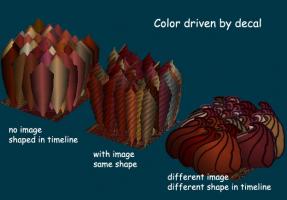
That would be an interesting way to do it, though I wanted to use the decale attached to the skin itself to give the hair color (attributes) already able to do that just fine. Will try some stuff and see what happens. FYI, you can use an image for the hair emitter AND it will also take on the color attributes of the decal. That way you can make as complex, or as simple a shape as you'd like, as well as give it variation in coloring along the length of the hair. The image you use for the emitter doesn't have to be plain white. And you will have easier control of the shape.
-
I don't know why it's not working but: 2 things - Did you get the most recent version? and I noticed you were doing 4 pass, I believe jenpy said to do 1,3,5,...passes, ie, only do an odd number of passes at this time
-
WOW! fabulous! love it - the best yet! Happy, Happy & Merry, Merry to you too! (especially love the icing progressively appearing on the roof - wonderful ! - how did you? Holmes? do that?)
-
Hoo hoooo - GREAT! thanks JimD!
-
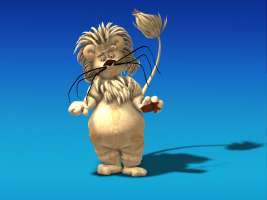
Oh yes...I have also been playing with SSS. Tricky business. If you've ever wondered what a cartoon lion looks like nekkid, wonder no more. Thanks all. EDIT: used SSS RGB = 40,20,15 at 100% density. 3 pass, approx 36 secs/pass
-
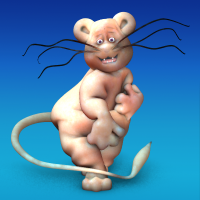
This is a "documenting my progress for me" post. Yay! 1) Changed his leg rig over to 2008 type (took me days to tear it apart - I'm slow). The body, arms, & hand rigs are from the LiteRig. 2) tweaked cp weighting, added dynamic constraint whiskas, dynamic constraint tail (to work with a bendy rig type tail) 3) added LiteRig face geom bones, but will be doing my own face controls. Still need to do phonemes, basic face poses The clip is a further test of dynamic hair with collision detection, and dynamic constraints (whiskas, tail, with no collision detection). Rendered with white AI=75%, 100% white (default size, etc) Klieg with zbuffer shadows (10%soft, 60% dark, 1024 res), FakeAO (haven't installed new version yet). 7 secs/frame 3 pass, 16beta5/32 PC. This has been a good exercise in learning about modeling generically, and learning the rigs floating around. Thanks Malo! Thanks Mark, Thanks Holmes! Thanks Gary Martin (bendy Rig). Thanks Jenpy! Thanks Steffen! Thanks Hash! AIVGAshadows0h264.mov
-
Yes, Could be mac specific, or maybe your settings for constraints both in hair and dynamic? I'm doing very vanilla settings. In my test - the black whiskas are dynamic (set in a pose, default settings) & the hair is constraint type, 30% stiff, use gravity OFF, 20% drag, CD ON with default settings. However, I thought that when I set the dynamic constraints in a pose - I changed some of the settings for the whiskas - and I'm thinking they didn't stick? I will investigate that further. EDIT: I also don't have collision detection on for the dynamic constraints. Only for the hair. Just tested changing settings for Dynamic in pose and seems to work. testhairdynamiccollisionfogfaketailh264loop.mov
-
looking terrific!
-
Hmmm, bummer....sorry, I can't help you with the cloth. I did notice also there is a weird distance thing going on for collision distance & cloth. However, I just tried dynamic constraints, hair and collision detection in 16beta5/32. It worked beautifully (first time I've really tried collision detection). So something is going on in particular with your chor/project. what I did: 1) made sure my chor range was set properly 2) turned hair off 3) baked dynamic systems (channels would show up for the bones involved) 4) turned hair on 5) baked particle systems (files would be created in project folder), groups would show up in chor pointing to these files 6) rendered multipass when I found I wanted to experiment with the hair settings, after rendering - I did NOT unbake particles first - but just ran "bake particle system" again and it worked wonderfully. In the past I believe there would be some funny business with unbaking and baking. No jittering either. I am so impressed with ver16. Great job Steffen!
-
Looks terrific!


