Fuchur
-
Posts
5,412 -
Joined
-
Last visited
-
Days Won
89
Content Type
Profiles
Forums
Events
Everything posted by Fuchur
-
You might try a reset all settings in A:M then relaunch Netrender. Is that the latest v17d? I would be willing to help too. Have 10 cores here. So if u can share the projectfiles we can try it. Make sure to bake the particles before sharing and snd the par and pai files with them (rendering with netrenderer should always be done with baked particles. See u *Fuchur*
-
It is really quite simple: 1.) Create a sphere. 2.) Create a ring of a single patch around that sphere. You can easily use the lath-tool for that. 3.) Create a texture-map with a gradient from black to white. (EXR with 32bit is a good idea, will give the best results, but a TGA can work too). 4.) Create a group containing the ring-patch. 4.) Use the texture-map as a patch-image on the ring-patch-group. (drag and drop the image on the group) 5.) Set the Patch-Image-Type to "Transparency". 6.) Sometimes you need to rotate the patch-image around on some of the patches of the ring-patch-group. For that just select the patch which is wrong, right-click on it in the modelling-window and use "Rotate Image". 7.) Create a bone for the ring which is placed exactly at the center of the sphere (and like that at the center of the ring-group). 8.) Make sure it faces out in a 90°-angle. (so if you look flatly on the ring, the bone should face directly at you) 9.) Attach the ring-path-CPs to the bone. 9.) Drop the model in a chor. 10.) Create an AimAt-Constraint on the bone of the model and aim it at the camera. This should do it... you can decrease and increase the glow by sclaing the outer ring-spline. The intensity can be changed by changing the percentage of the transparency value. I had somet intersting effects with an additional glow on the sphere itself, like you can see in the provided model. Hope this helps . Let me know if you got stuck somewhere. See you *Fuchur* planet_glow_simple.zip
-
You should try this... had good results with this: Earth from Space See you *Fuchur*
-
17.0 c is out... and if you have a 64bit-capable computer, I would recommend get Win7 64bit (not that expensive anymore). 64bit A:M is much faster than 32bit... Which version are you using? SSE3 or SSE4 or is your computer not capable of both? (if not capabale of both this could be the reason for the slower rendertimes on v17...) See you *Fuchur*
-
Lets see if I can help you... did you use the Host-Id-tool on your new computer? > http://www.hash.com/down/get_host_id_win.zip The HostID will be needed to switch the lic. After that contact me privately and I will see if I can help you. See you *Fuchur* PS: You will not receive a new key but a new master0.lic-file if you do that.
-
This is not very easy to solve... processors which use Hyperthreading are often optimized to use them... If you deactivate that feature, they will not run at highest possible level (even if you only want to know how fast one of the cores is) In general: Real Cores are faster than simulated once... but if you compare a 4 core-system with a 4-core hyperthreading-system it is very likely that the HT-system will win if the application takes advantages of the feature. If you compare an equal fast 4 core + 4 HT-cores with a real 8 core-system, the 8 core system will outperform the other one. But this is hard to proove, since there is no CPU available which is only different in that (AMD vs Intel for instance... AMD does not use HT, but builts computers with more "real" cores (actually since Bulldozer this is not really true, but it is still much closer to real cores than HT would be). Intel however is (quite a bit) faster on single-core performance. In Multithreading-situations, AMD outperformance all Intel-systems of the same price in most benchmarks, but AMD will loose very very likely against close to anything that is not multicore-optimised / multithreaded. Additional to that, AMD uses another design when building CPUs, Motherboards, etc. so it is hard to compare those in that aspect. And Intel does not offer equal chips with HT and without HT. So how to give a real good answer to that? The only answer I can give is: Anything that is emulated cannot be faster thatn something that does not need to be emulated because it is physically available. See you *Fuchur*
-
I think you mean over length, right? But very cool looking bubbly thingys . See you *Fuchur*
-
This is one I know of: - MyGuestMap And here is one that could be used in a similar way: - Wikimapia See you *Fuchur*
-
It may be that one is for the subscription and one for the permantent version. You receive a Subscription-code with each permantent version you buy. (at least it used to be like that) See you *Fuchur*
-
Have fun and welcome back Mike! *Fuchur*
-
For any settings you need to close and reopen A:M... did A:M crash on you before you closed it regularly before? See you *Fuchur*
-
You can find a setting called "Dont disable Aero at startup." in A:M under Tools > Options. This helps to disable that... very likely you will experience a solid selection-box when selecting something in A:M with the rectangle tool, but if you are not or you can live with it, you can turn the setting off and it should work. See you *Fuchur*
-
Yes, this is very helpful and was mainly introduced for STL-export. (of course you can use this for other stuff too) Steffen may work again on it, since he did not like the way the patches are subdivided in that aspects. Like that if you want to 3d-print something out, you can very likely just use A:M's output and dont need to increase the subdivision in another software. With a subdivision-level of 16 this was sometimes a problem and you needed to increase the resolution in A:M before exporting... (since A:M is optimised for using small amounts of patches to be easily animated this could be much work) See you *Fuchur*
-
Hi Heiner , Welcome back! The forum rules are still saying, the other software is not allowed to be mentioned... in reallity this is no longer the case IF the post is still mainly about A:M and/or it is about how to get other software to work with A:M, especially if the software is more like an addition to A:M instead of a directly competing product. This is how I see it. Rodney can give you a better statement and what I said is not abou See you *Fuchur* PS: You may want to have a look at my signature at the video-tutorials (A:M2Unity, A:M2Quest3d) and you may be interested in the new retopology-tool "SnapToSurface" in A:M v17.0. There are other interesting project about conversion like Trojer you may want to have a look at too .
-
Some may already know it, other may not: The 3We XMas-Calendar is online again. Everyday another video (funny commercials, interesting videos, nice looking stuff) and of course A:M had to do with it too . http://advent.3we.de Have fun! See you *Fuchur*
-

Newton now working for me ..thank you
Fuchur replied to johnl3d's topic in Tinkering Gnome's Workshop
Make sure the normals are facing the right way and that your ramp has a real thickness. You can just extrude it and it should work at least in a better way. I attached the modified project, which works much better. I am not sure if it works perfectly because it is not spinning at the beginning, but it reacts to the underground in a better way. See you *Fuchur* newtonfalltest_2.prj -
Simcloth crashing for me in v17b & above (64bit) (SOLVED)
Fuchur replied to Kamikaze's topic in Animation:Master
Hm... works for me... did you try to uninstall and reinstall A:M instead of just install it over your existing installation? Be sure to backup your master0.lic-file before uninstalling, just in case! See you *Fuchur* -
Most (free) stuff is included with A:M now... The plugins I am aware of which are not included are these: - 3d Painter - A:M Track - FakeAO See you *Fuchur*
-
This is getting hard... okay so what I can remember is: Version 15 (2008) Liquids, Baked Surface (bake materials and decals to decals), Hash Animation:Master Realtime (HA:MR) integration (no longer available in newer versions) Version 16 (2011) 64-bit Version, Netrenderer-integration with Multicore-support, 3d connexion device support, OBJ-MDD-Animation-Export, overall performance-boost Version 17 (2012) Snap to Surface (Retopology-Tool), Animation:Master Answers, SSE4 instruction support, Create your own "Support"-page, Animate-Mode indicator, Improved Cloth-Simulation with Hi-res Simulation, STL-Export (with resolutionlevels up to 64 instead of formerly 16 polygones per patch) You can find tutorials for Snap To Surface on my website. (see below) There is very likely much much more that I am not aware of now... See you *Fuchur*
-
Dankeschön . Und machen wir schon. Ist nur mal eins der Projekte, wo man es auch mal veröffentlichen darf... (Thanks . And we already do. This is just one of those projects we can show off... ) Bis dann *Fuchur*
-
*grin* Yes it is... so we often use "Dreck" instead but it is a common word . See you *Fuchur*
-
Best wishes! See you *Fuchur*
-
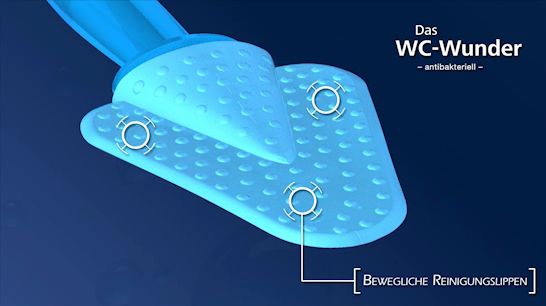
I really was amazed on the robust displacement-mapping while doing this animation... First I modelled the pimples but I didnt want to weight those, especially since the customer changed the design of the product several times while we were producing the animation. And so I first used an TGA with all the pimples on it but had quite many noticeable steps in the pimples... finally I used an EXR-file with 32bit to avoid the steps in at the pimples and it all got very smooth and worked in an instance. I was worried because people here on the forum had problems when animating with displacementmaps, but as you can see it worked like it should without any trouble. (even when you look quite directly at the front and the pimples are more or less 90° to the camera they render quite well. The project was really fun and both the customer and us liked the result very much! Thanks A:M... it really went great and production in A:M was very fast. See you *Fuchur*
-
Here is one of the newest animations for one of our customers done in A:M and AfterEffects. Hope you like it: WC-Wunder - 3d Animation See you *Fuchur*

-
I really love that Well done! See you *Fuchur*