Tralfaz
-
Posts
899 -
Joined
-
Last visited
-
Days Won
1
Content Type
Profiles
Forums
Events
Everything posted by Tralfaz
-
Hi Darkwing, here is a link to an explanation I did on Ambient Occlusion rendering in another post. http://www.hash.com/forums/index.php?s=&am...st&p=267941 That clip was pretty funny robcat. Thanks Spleen. Quick update. Did some more modelling on the robot. The danged arm holes are going to drive me crazy! I have tried 4 or 5 times to model the openings, and they keep looking like crap. Oh well, will get it eventually.... Al

-
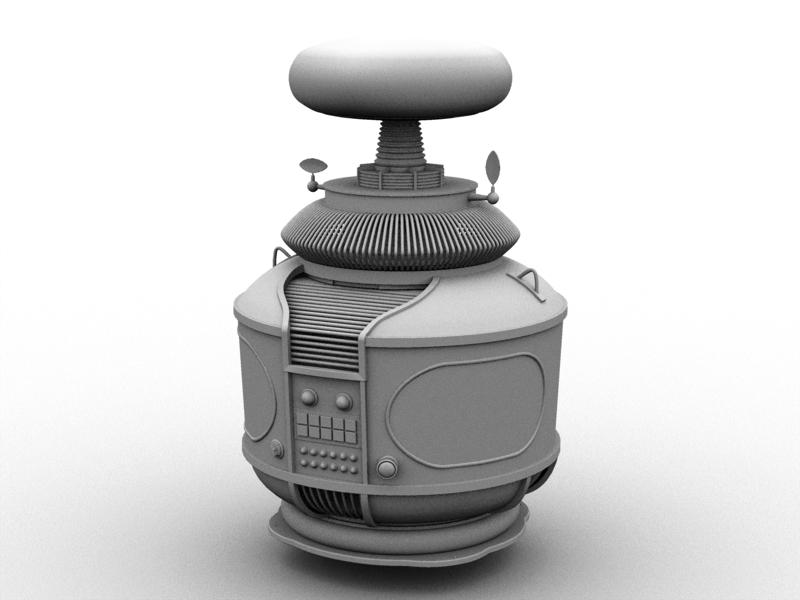
Dang! That was quick. Good guess Mark. Yes, it is the good ol' B9 Robot from Lost In Space. Al
-
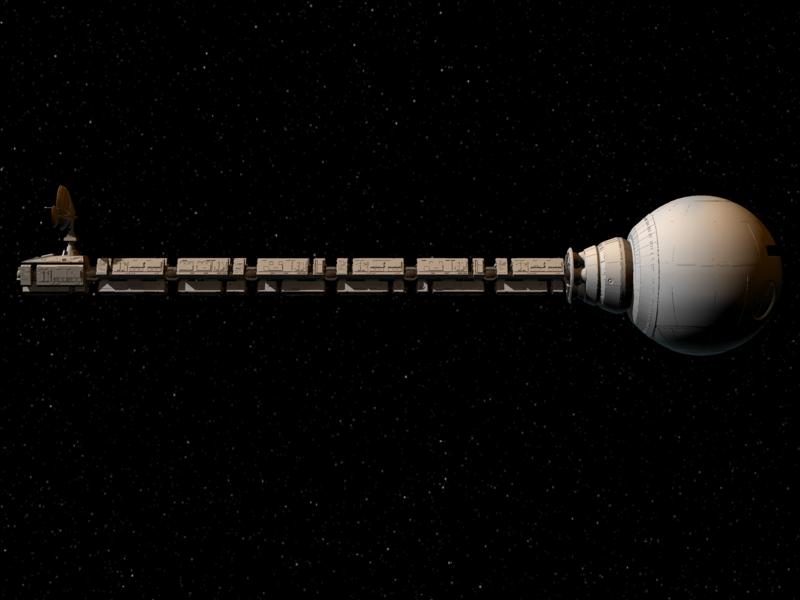
I needed to take a break from the Discovery model, so I started modelling this. All that detail was making me bleary eyed! Will get back to it shortly. In the meantime, can anyone guess what this is going to be? Al
-

2001 - A Space Odyssey - Modelling the Discovery
Tralfaz replied to Tralfaz's topic in Work In Progress / Sweatbox
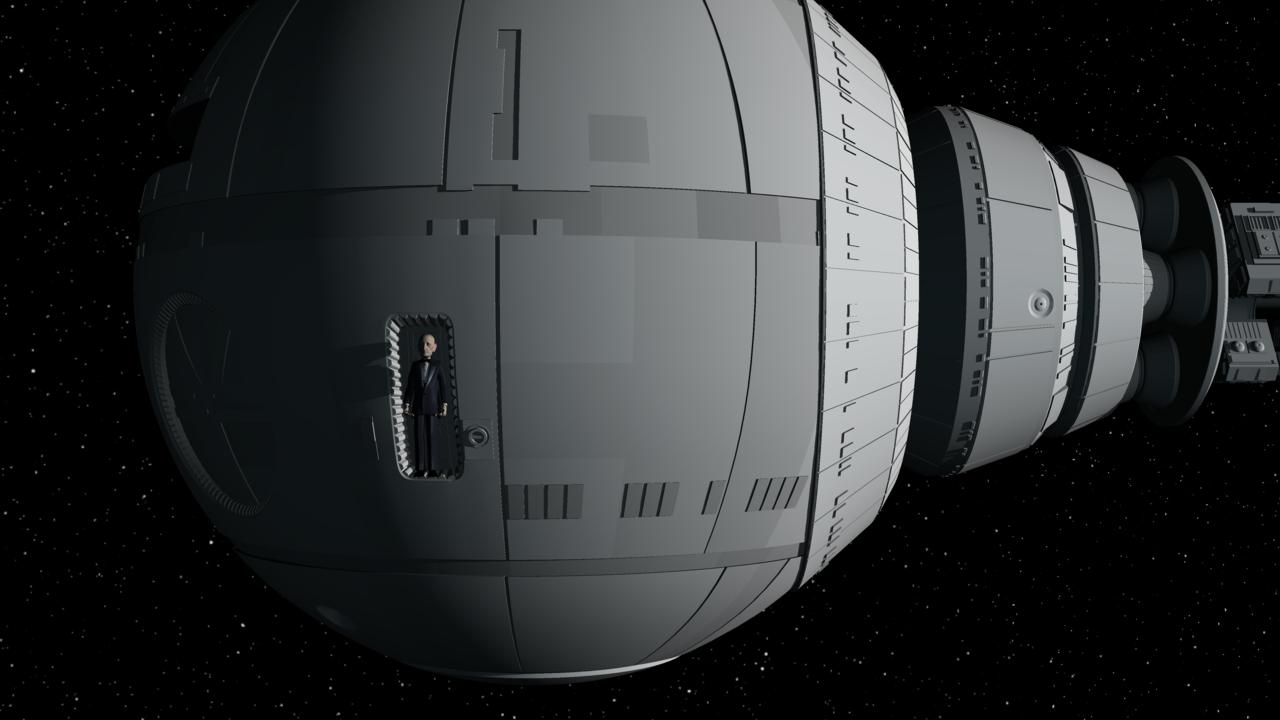
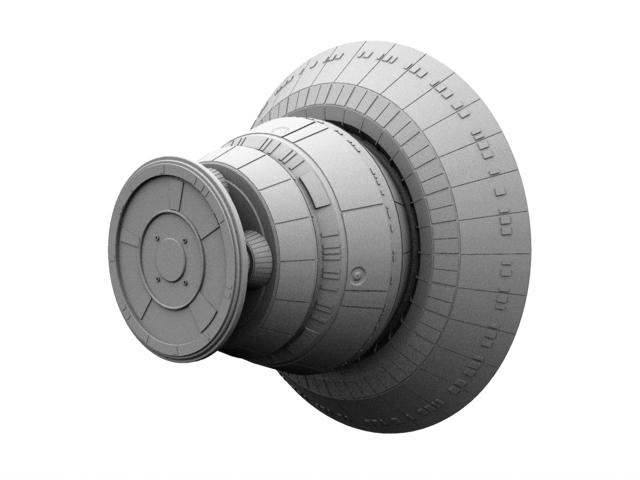
Hey Eric. Actually, I do have the rulers on in feet and inches and am modelling the Discovery full scale (e.g. the command module is just over 40 feet in diameter, which makes the Discovery about 400 feet long. Below is a picture of Sir Nigel alongside the command module. I scaled Sir Nigel down to around 5 foot 8 inches from the 6 foot 8 inches that he was originally modelled at. Also noticed I have to move up the manual controls for opening the emergency hatch. Al
-
2001 - A Space Odyssey - Modelling the Discovery
Tralfaz replied to Tralfaz's topic in Work In Progress / Sweatbox
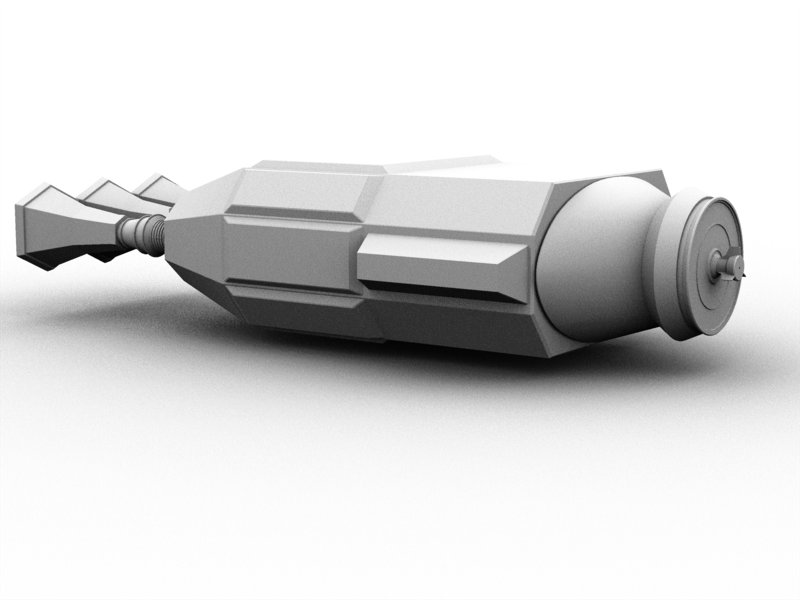
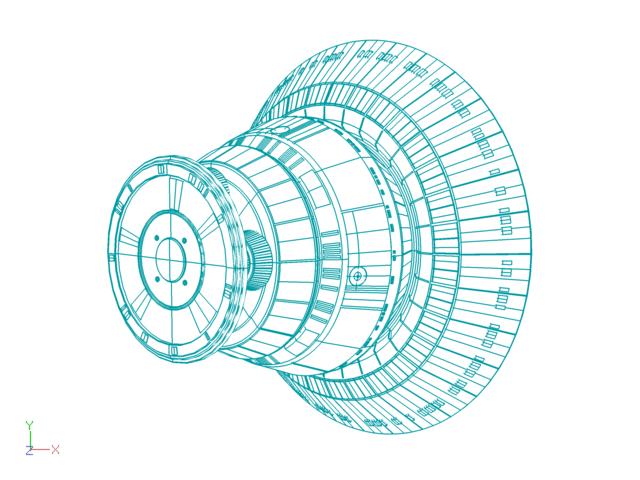
Just out of interest how long is your model? Hmmm..... how many pixels are in a foot? Finished the detailing around the engine bells. Next, to detail the outside of the engine housings. Al
-
2001 - A Space Odyssey - Modelling the Discovery
Tralfaz replied to Tralfaz's topic in Work In Progress / Sweatbox
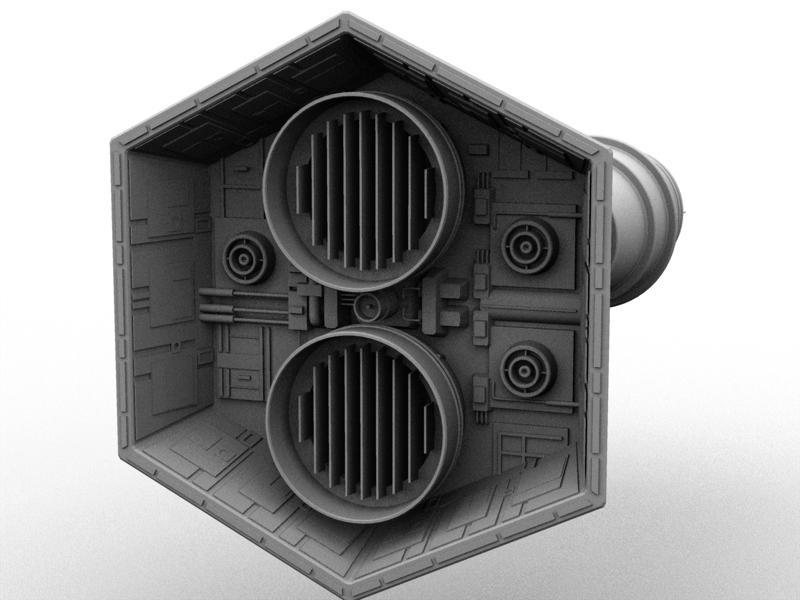
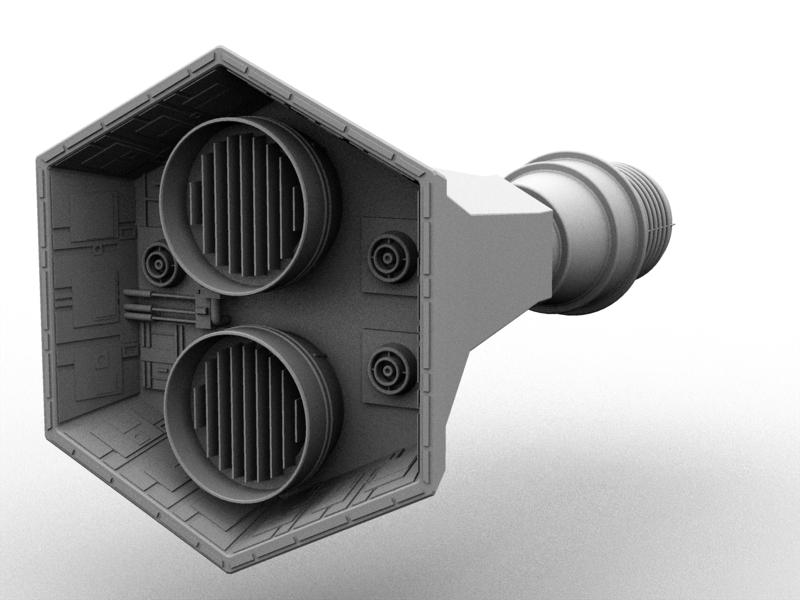
Thanks once again everyone. Jake, your comments are valid and I take no offense at them. As for modelling an existing object, I guess it comes down to a couple of reasons. I am trying to pay homage to a great movie that is one of my all time favourites. Also, I have a little animation in mind for it. And it does help with building up my modelling techniques. Your question could also be applied to folks who model cars, airplanes, buildings, etc. And yes, I also did build plastic model kits (mainly automobiles) and enter competitions with them. Came away with several 1st places, best in category, best historic and a few second places. One model conversion took over a year to complete. 'GASP!' That would be sacriledge, like colourizing Casablanca! Actually, the computer keyboards could be updated. Yes, I am moving the camera to give the appearance of the ship moving. The ship is however assembled in the chor and constrained using bones so that the ship itself could move and everything would stay together properly. Hey Nancy, I showed my wife your comment, and she laughed for quite a while! Seems like your husband and I seem to find all the best 'bargains', or at least that is our story and we are sticking to it! LOL, thank you. I was talking to my son about the 'miniature' Discovery used in the movie. Although we have changed to calling it a 'bigature' now (liked that term coined in the Lord of the Rings movies). There were two Discovery models used in the movie, one was 15 feet long and the other was around 56 feet long. That model was longer than our house at around 44 feet! Kubrik was insanse for detail and accuracy. Anyway, here is an update on one of the engines. Reworked the engine exhaust bells and worked on some of the detail. Al
-
2001 - A Space Odyssey - Modelling the Discovery
Tralfaz replied to Tralfaz's topic in Work In Progress / Sweatbox
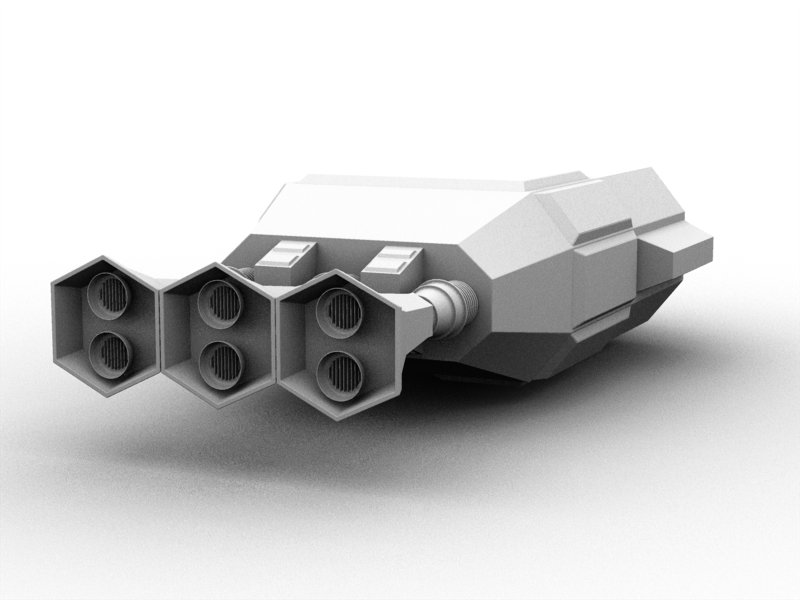
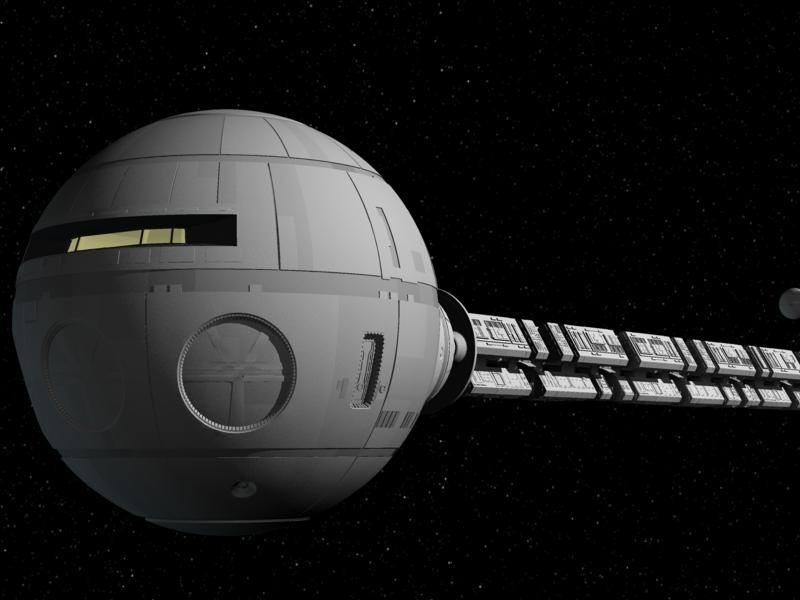
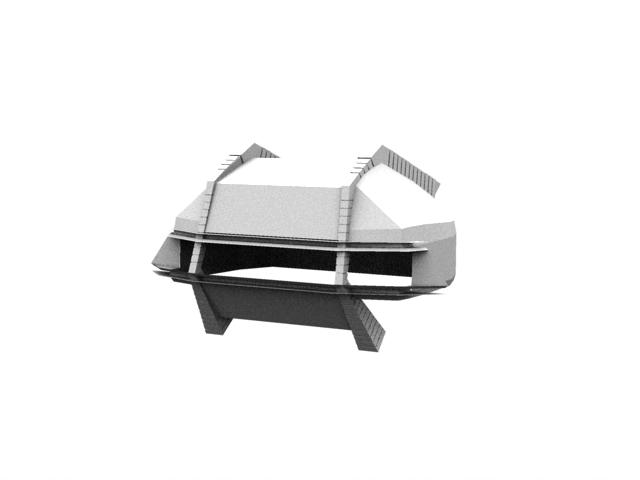
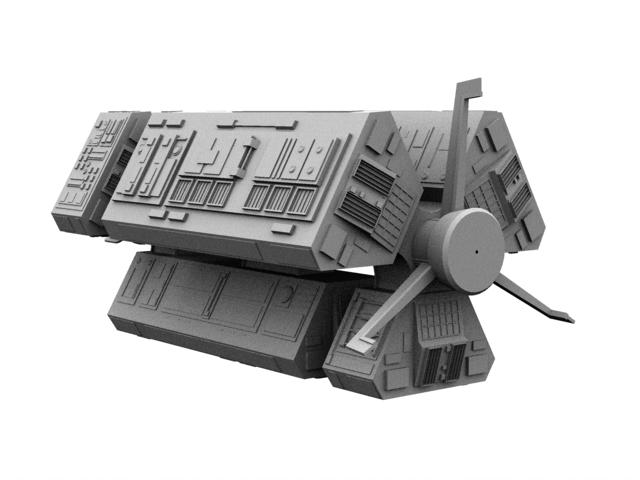
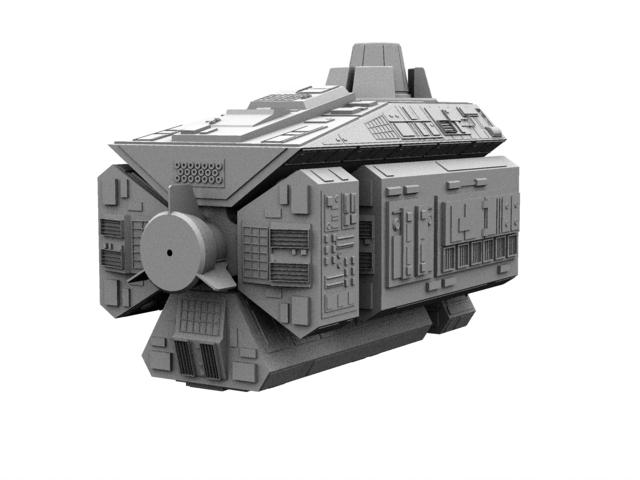
Started working on the engine section. This is going to take a while to do this section justice, as there is so much detail on it. Right now, I've just blocked in the different parts of the engine section. Also, since I have all of the Discovery components, I wanted to do an animation test of the first time you get to see the Discovery in the movie 2001. Sorry for the large file size, but I just couldn't get a nice quality smaller version of the animation. This was done using Sorrenson 3 compression. Al Disc.mov
-
Gotcha' another funny vote! Al
-
2001 - A Space Odyssey - Modelling the Discovery
Tralfaz replied to Tralfaz's topic in Work In Progress / Sweatbox
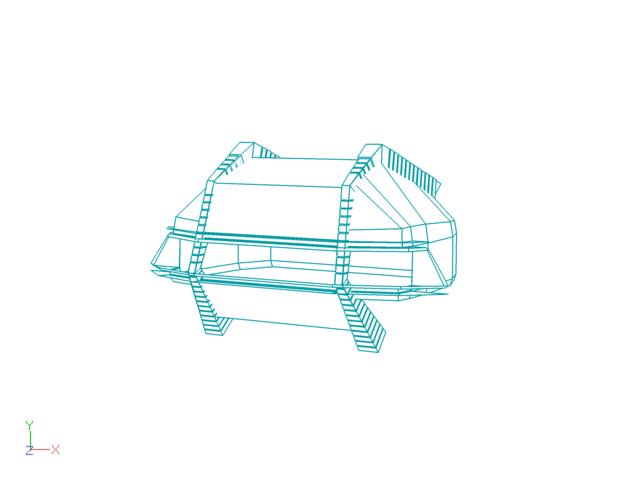
Did a quickie animation test of the center pod bay door opening and closing. Al Disc.mov -
2001 - A Space Odyssey - Modelling the Discovery
Tralfaz replied to Tralfaz's topic in Work In Progress / Sweatbox
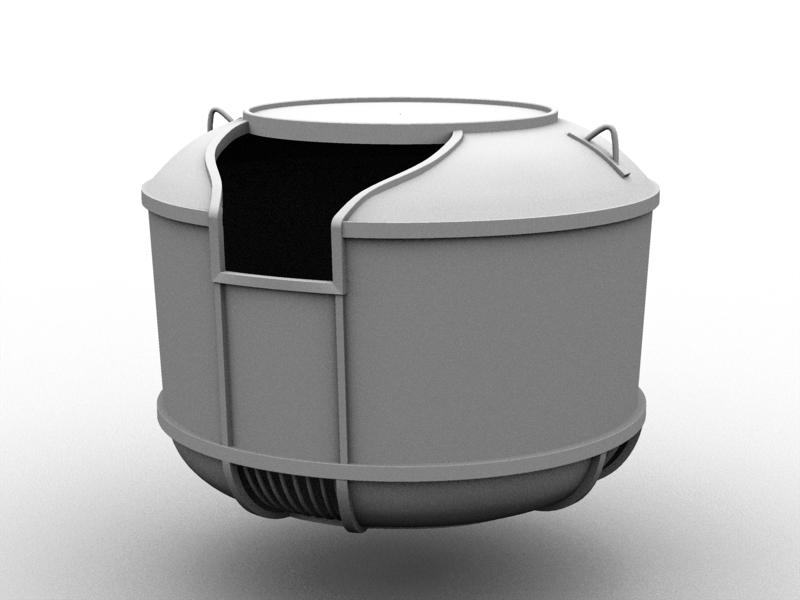
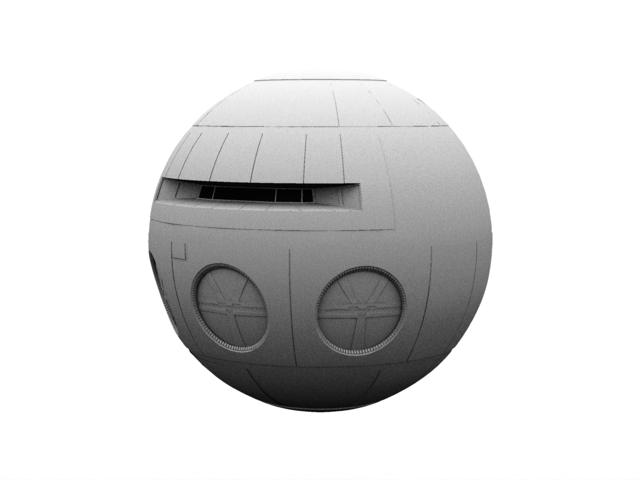
Been doing some more work on the command module. Got the air lock hatch put in, and did some panel texturing. Al
-
I haven't done much texturing, but from what I was able to find out today, is that if you use cylindrical or spherical, it will cover the entire visible object. The regular planar seems to apply to only what the decal is covering. Al
-
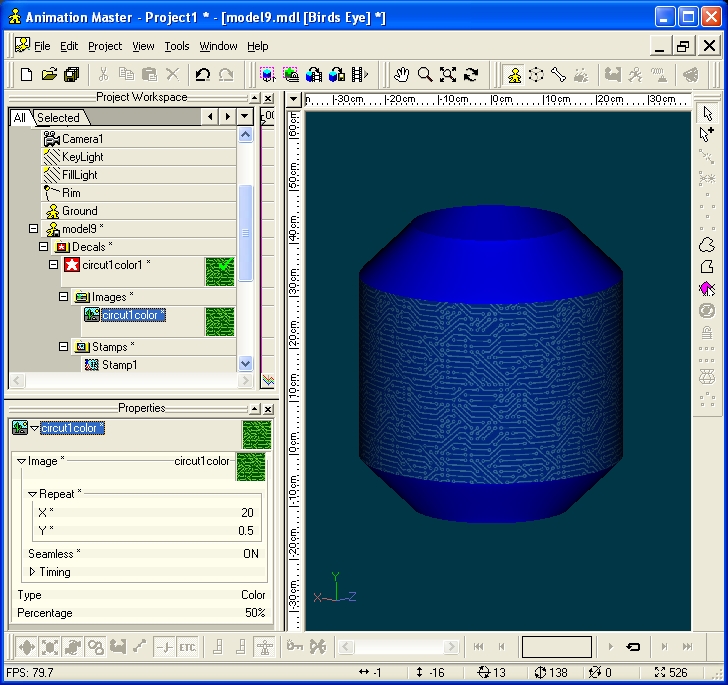
Is this what you were trying to do? If so, what I did was select the control points for the center section of the object, then hid everything else. I was left with just the center cylinder section. The Application Method was set to cylindrical. I turned on Seamless (as this is a seamless tileable image), left Repeat X as 20 and changed Repeat Y to .5. Here is the model file. model9_al.mdl Hope this helps... Al
-
2001 - A Space Odyssey - Modelling the Discovery
Tralfaz replied to Tralfaz's topic in Work In Progress / Sweatbox
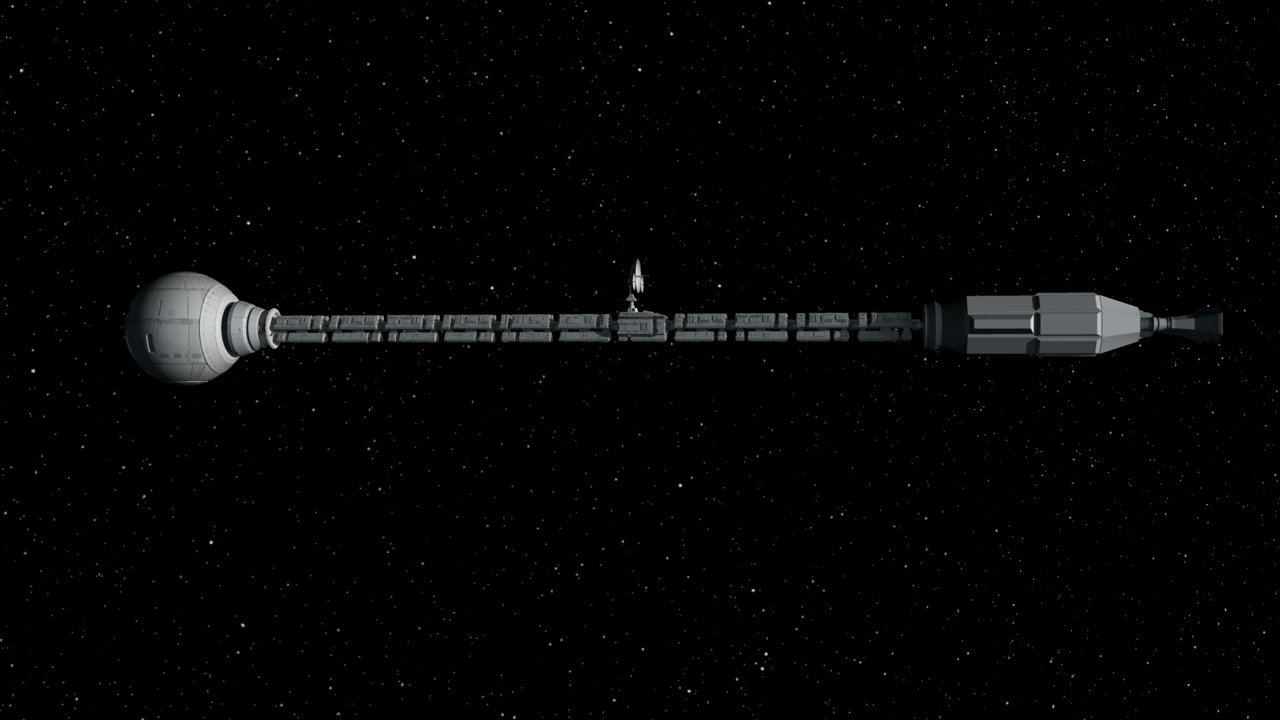
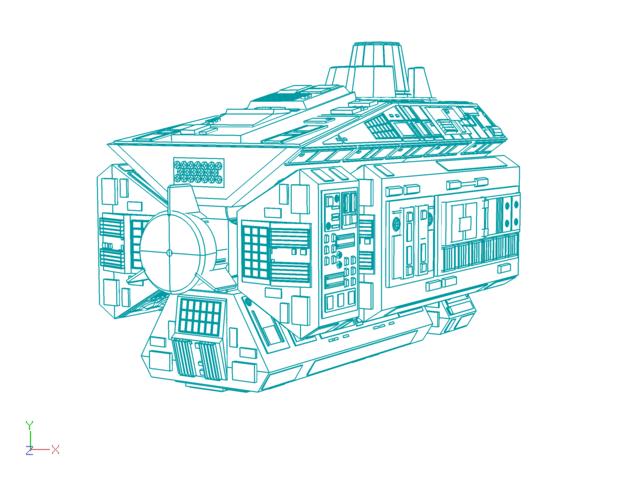
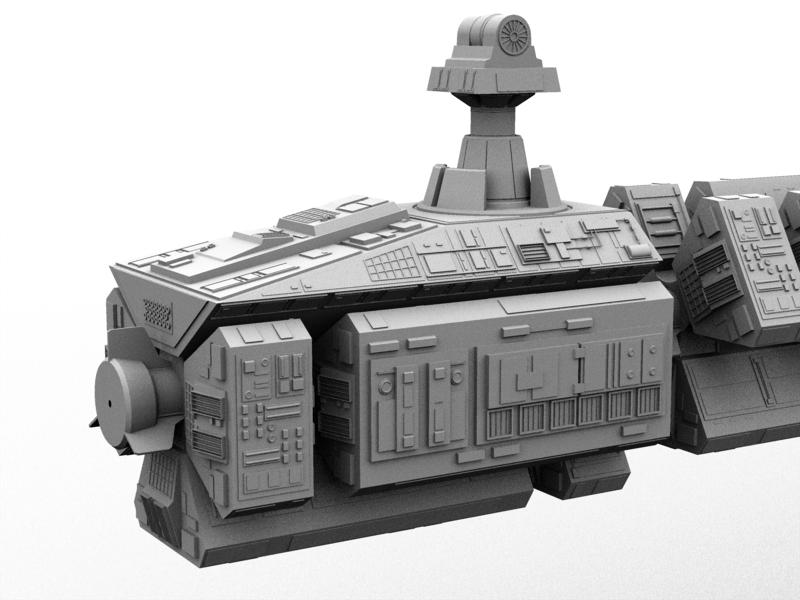
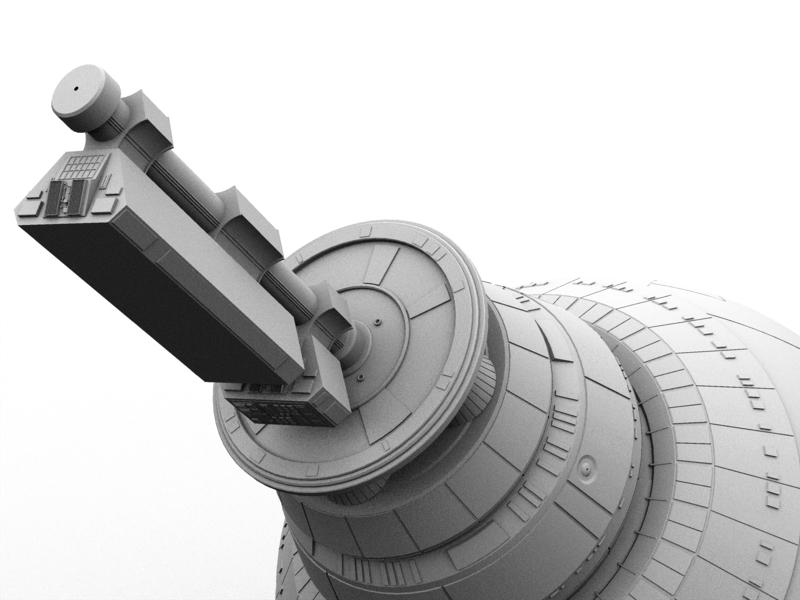
Thanks you everyone for your great comments. Here is what I have so far for patch counts. I am modelling the Discovery as smaller models and combining it in a choreography Total patches so far is around 118,000 patches. Command Module - 7,441 patches (Command module is not yet completed. It still has a lot of high patch sections to it that needs to be thinned down. At the same time, it still needs a lot of detail added to it (e.g. hatch for air lock). Cockpit - 1,062 patches (Also not done yet. Just want to have something visible inside the command module) Neck - 6,695 patches Cargo Containers - 9,245 patches each (There are 10 cargo containers along the spine. Each section is approximately the same patch count, so there are 92,450 patches in the cargo containers.) Antenna Module - 12,079 patches Antenna Array - 5,804 patches Still have to model the engines section. Lots of detail here with tons of pipes, panels, etc. I try to keep to 4 point patches and use 3 and 5 point patches when only absolutely necessary. Well, it is the Canadian Thanksgiving today, and I hear a turkey call me. Off to dinner I go. Al
-
2001 - A Space Odyssey - Modelling the Discovery
Tralfaz replied to Tralfaz's topic in Work In Progress / Sweatbox
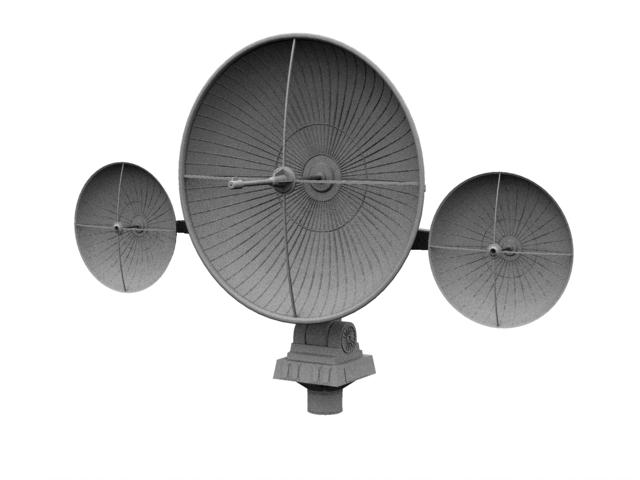
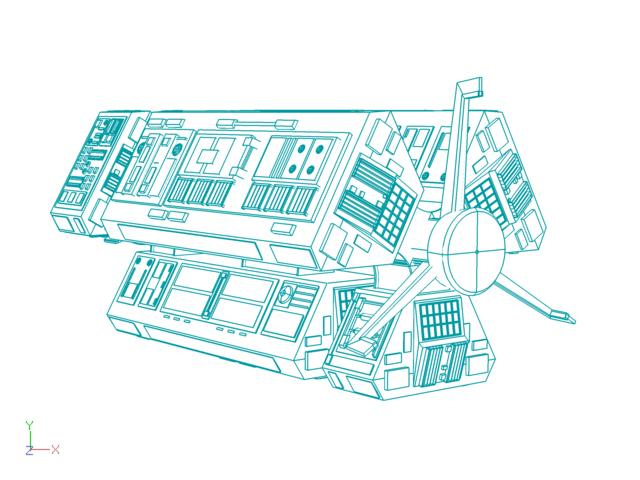
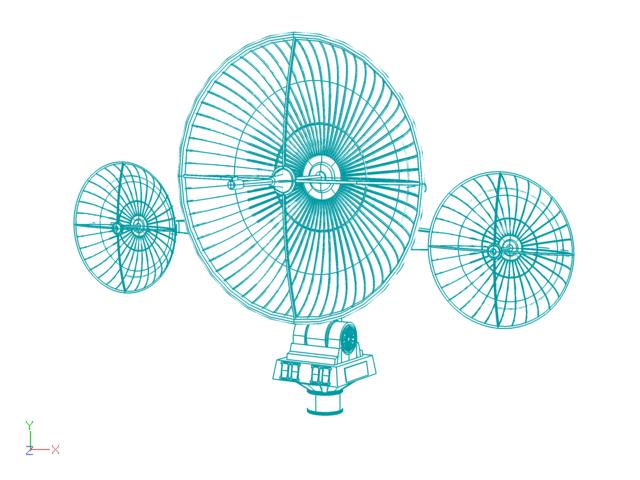
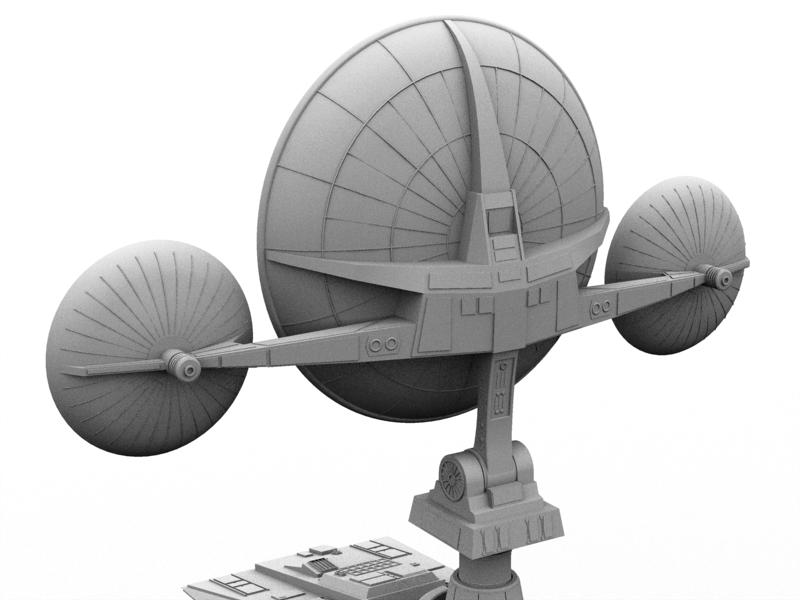
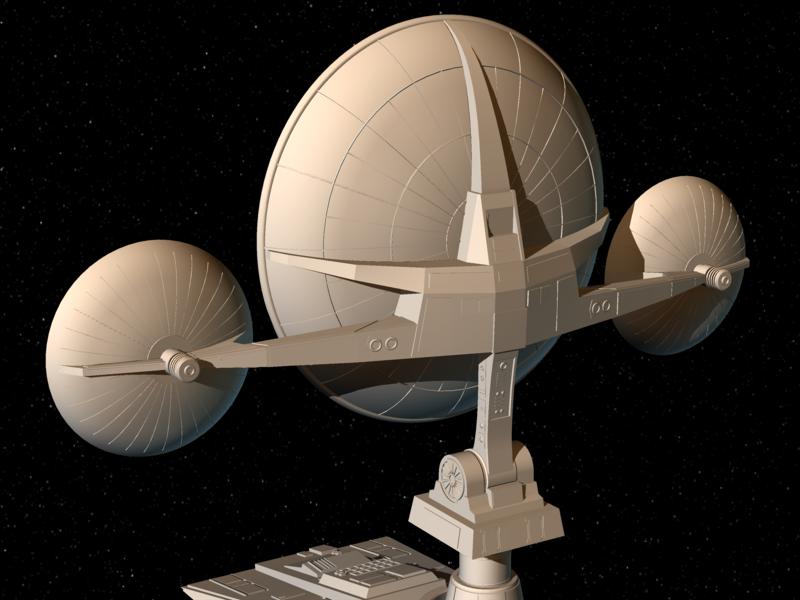
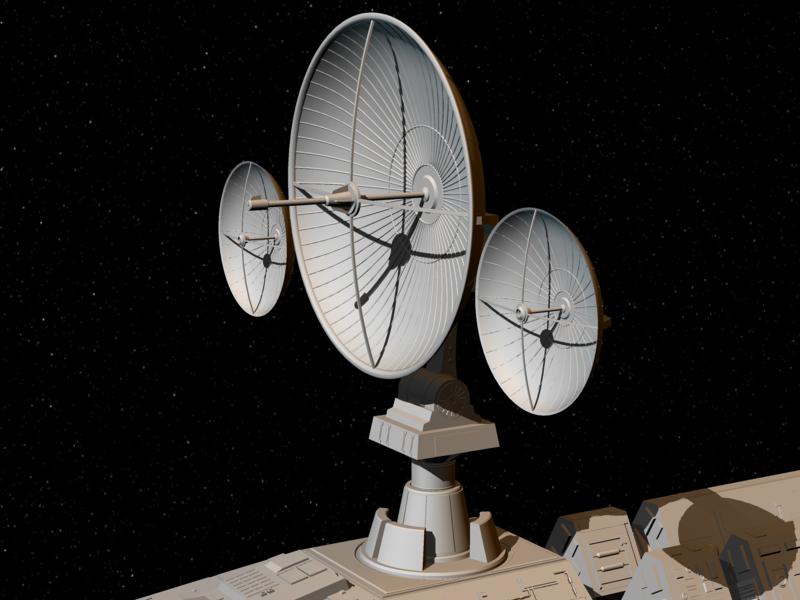
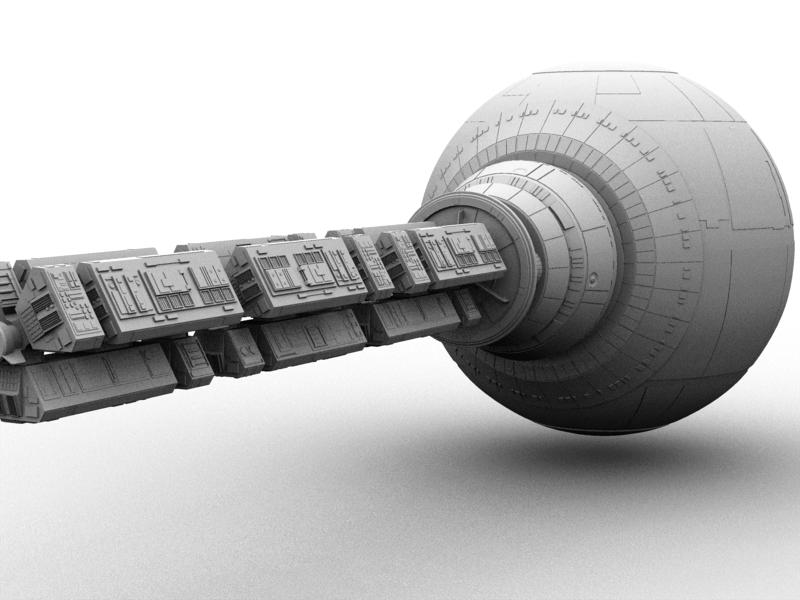
LOL... that's pretty funny Eric. I know what you mean about searching through so many web sites and then not remembering where it was that I saw something! I do a lot of searching on my lunches at work, and have sent a ton of e-mails home with links to web sites. Unfortunately, most of my e-mails are called 'Links'. I need to be more specific in my subject line as now I have to search through my e-mails looking at the different links... And thanks for the comments Paul and Steve. Finished the antenna array for now. Will add more detail through textures later on. Here are three views in both AO and default lighting (with a star background). Al
-
I did a Google on Circuit Board and found these: http://images.google.ca/images?hl=en&s...mp;aq=f&oq= There are some that are seamless tiles and others that are just images of boards. Hope this helps... Al
-
2001 - A Space Odyssey - Modelling the Discovery
Tralfaz replied to Tralfaz's topic in Work In Progress / Sweatbox
Wow! Thanks for the photos Eric. They are amazingly clear and the detail just pops out. Much better than the images I have. The picture of the command module is the same as one that I have in the book '2001 - Filming the Future'. There is also a heads on view, but they aren't near the quality of yours. Where did you get the pictures? Thanks... Al -
2001 - A Space Odyssey - Modelling the Discovery
Tralfaz replied to Tralfaz's topic in Work In Progress / Sweatbox
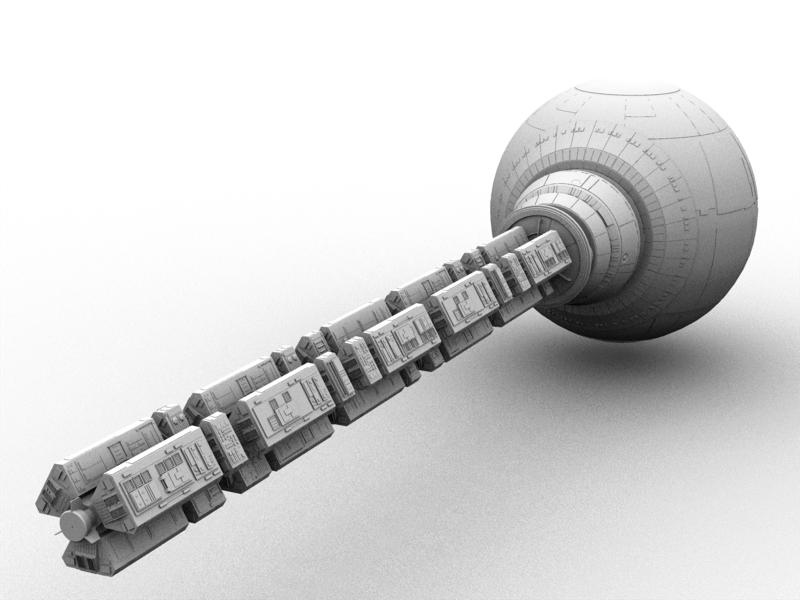
Thanks everyone for your comments. As for modelling versus displacement maps, I haven't had a lot of success using them. I know it can be done, but it just wasn't working out. Also, I enjoy doing all the modelling, kind of a therapy for me. Continued working on the antenna array. About all I have left to do with it is to model the mounting structure for the large dish. I've been grabbing some stills from a high-def video of the movie as a reference for trying to pick out all the little details. It won't be 100% accurate, but does give a pretty good representation of the Discovery. Al
-
2001 - A Space Odyssey - Modelling the Discovery
Tralfaz replied to Tralfaz's topic in Work In Progress / Sweatbox
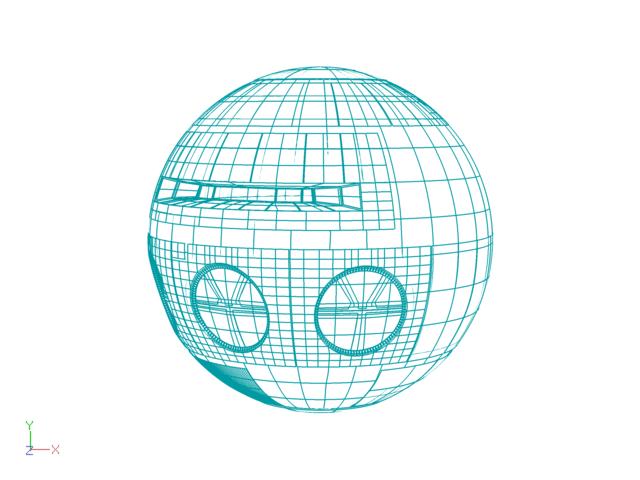
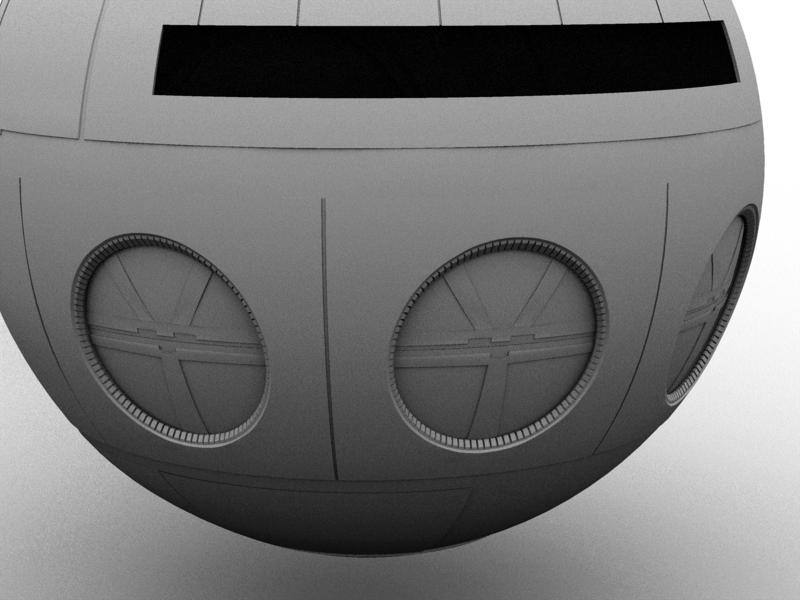
Thanks guys. As for the pod bay openings, they are slightly out of round in a couple of places when you look at them really close. I think it is just a matter of adjusting the bias handles to smooth them out. AMOCD, hope my wife doesn't figure this out...... Been working my way further down the spine, and am now at the antenna array. I really love the AO renders that AM does. Al
-
2001 - A Space Odyssey - Modelling the Discovery
Tralfaz replied to Tralfaz's topic in Work In Progress / Sweatbox
Thank you Eric for your excellent tutorial on using the Sweeper function in A:M. I re-did the ribbed openings around the pod bay doors and it looks so better now. I still need to tweek the door openings to round them out a bit better. Also worked on the spine a bit more... Thanks again... Al
-
That was another great tutorial Eric. I had never played with or even knew what the sweeper was for. I've been spending hours manually doing what you did in a 6 minute tutorial!! And yours looked 1,000 times better!! This is a technique that I will end up using a lot. Thanks again... Al
-
2001 - A Space Odyssey - Modelling the Discovery
Tralfaz replied to Tralfaz's topic in Work In Progress / Sweatbox
Thanks very much Eric. Quick update. Did some more work on the cargo containers along the spine. Right now, I have 3 spine segments showing. Each segment is around 9,200 patches. It was almost double that, but removed some of the detail that wasn't really visible in order to keep the patch count down. It is great being able to assemble the different parts in the choreography. Makes things much, much easier to work on. Al
-
Thanks Dusan for giving us the opportunity to view your film. Absolutely brilliant piece of work, and congrats to you and all who worked on it. Best of luck in your world wide distribution! Al
-
2001 - A Space Odyssey - Modelling the Discovery
Tralfaz replied to Tralfaz's topic in Work In Progress / Sweatbox
Thanks very much Mark. And thanks Paul for putting me in with such an elite group as Stian and Eric. I don't consider myself there yet, but keep trying. They are both great modellers and keep providing the inspiration to push my skills farther and farther. Thanks MJL. Right now, the Command Module is one model, the 'Neck' is another model, and the start of the 'Spine' is a third model. They are placed together in a Choreography for rendering purposes. As I work on each model, I make extensive use of grouping control points so that I can easily hide or lock them later as needed. It is also a nice way creating sub-sections within the model. For instance, in the Command Module, I have a group called Pod Bay Door 1 Upper, Pod Bay Door 1 Lower (and similar groups for the other two pod bay doors), a group for Inner Hull, Outer Hull, the different raised panels, etc. Say I decide to animate a pod bay door later on. Then all I need to do is create a bone for the upper door, select the upper door group and select Hide or Lock CPs. Then I would select the bone and then all the CPs that will be associated with the bone. I would then do that for each bone I need. Hope that helps. Al -
2001 - A Space Odyssey - Modelling the Discovery
Tralfaz replied to Tralfaz's topic in Work In Progress / Sweatbox
Gotta' love having a laptop! Brought my laptop to work today and did some more work on the Discovery. Found I was starting to cut corners on the Command Module (which I don't want to do), so moved on to the containers along the spine of the ship. Will go back to the Command Module a bit later. Al
-
2001 - A Space Odyssey - Modelling the Discovery
Tralfaz replied to Tralfaz's topic in Work In Progress / Sweatbox
Thanks Eric. Just checked the e-mail and replied. Al