Tralfaz
-
Posts
899 -
Joined
-
Last visited
-
Days Won
1
Content Type
Profiles
Forums
Events
Everything posted by Tralfaz
-
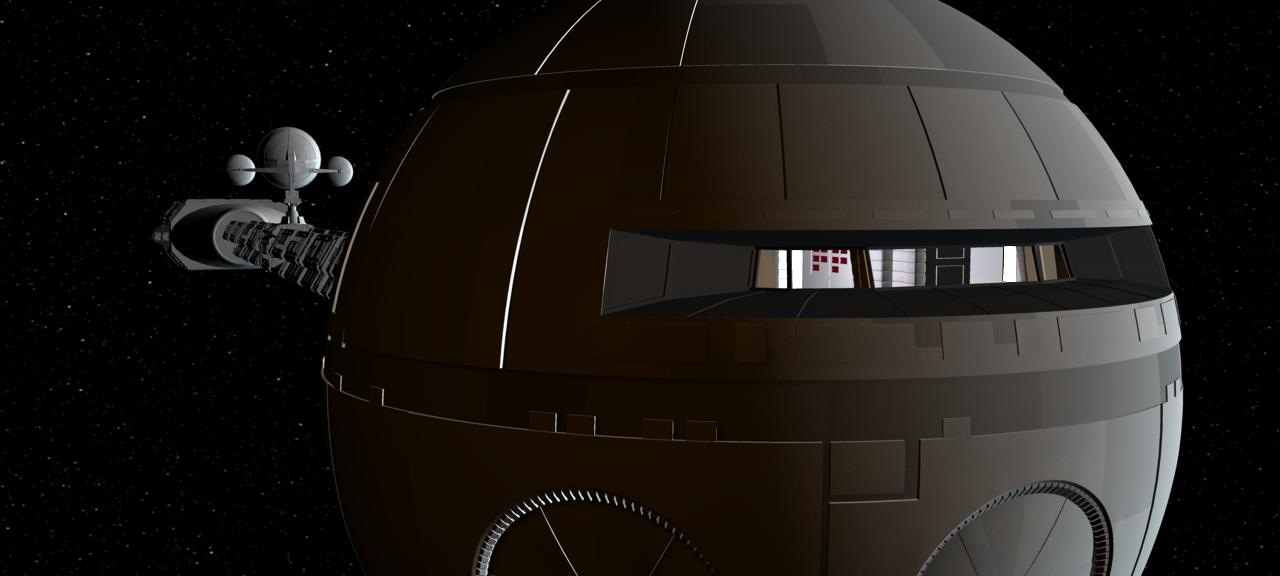
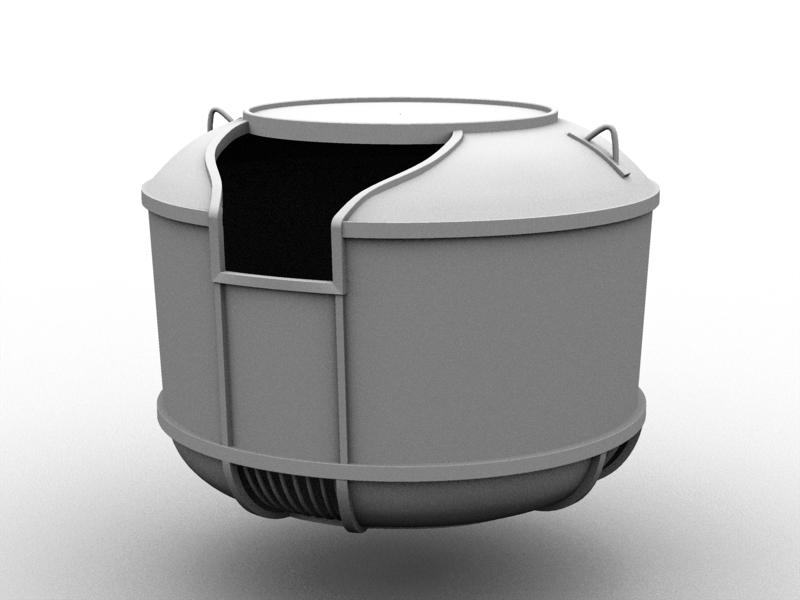
Thank you everyone. The completed model has been added to the Discovery project. As for HAL's brain room, no plans for it right now, but you never know. I do have plans for the monolith, but that is going to be a different project. What I am planning on doing is a series of small video clips (similar to Robot Chicken), and 2001 is my first project. What I do need next though, is a Dave Bowman astronaut. Not very good at organic modelling, so this is going to be a huge learning curve for me. Officially an hour. My son is going to University these days, and I had an extra hour or so after work while I waited for him to come by and pick me up. That is what is great about having the laptop. I just did some modelling at my desk while waiting for my ride home. Al
-
Looking pretty good Photoman. It is really interesting to see what different people do with my models. Great way for me to learn, as I (and I've mentioned this before) really need to improve my texturing and lighting skills. Look forward to seeing more. And that fisheye lens is excellent and makes a subtle but huge difference to how the image looks. Thanks... Al
-
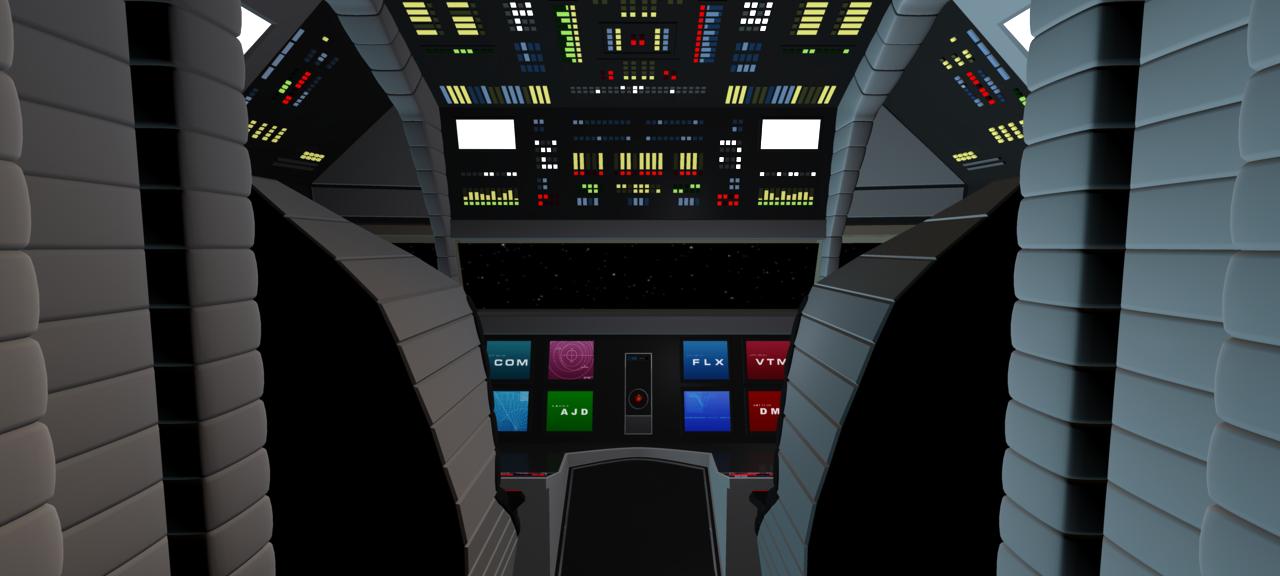
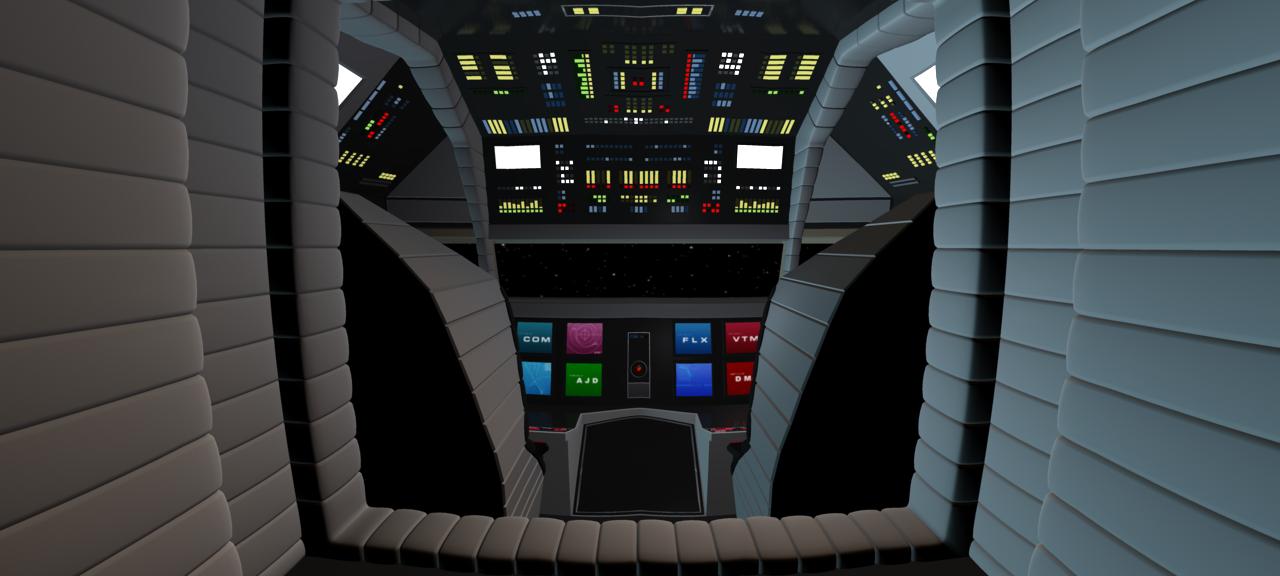
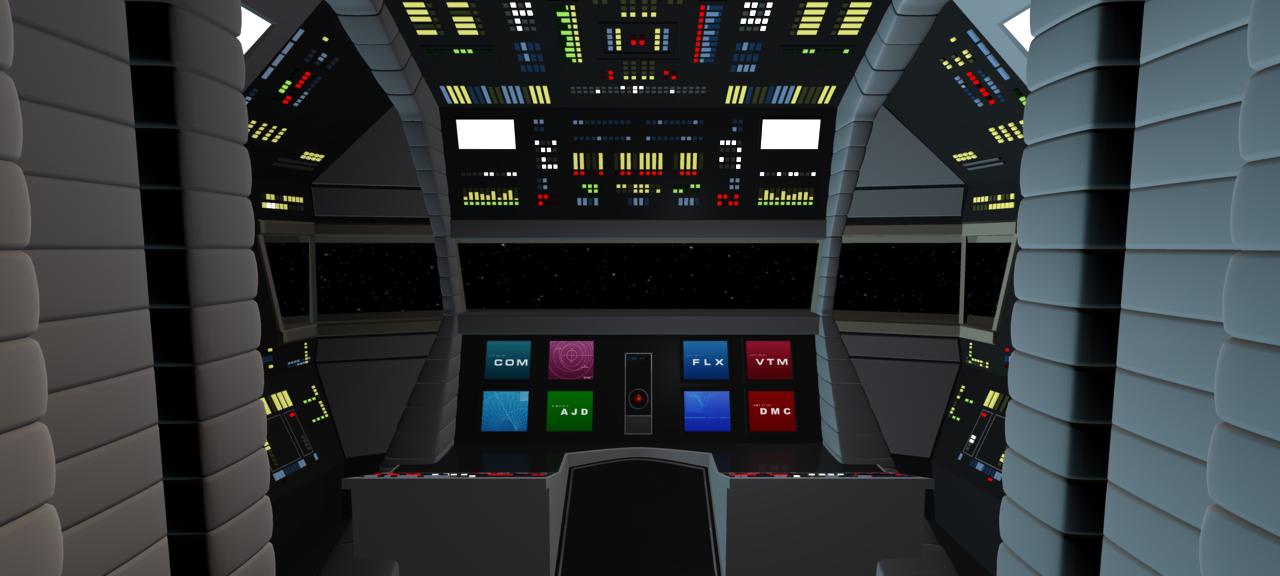
Thanks Steve. No, I haven't seen the websites you are talking of. I've seen the really, really large photos that you can zoom in on (like Obama's innaugaration). Update: Modelling of the cockpit is now complete. Worked on the seats today on my lunch, and got them to work. Extremely weird design for the seats, with weird angles coming off them. I will probably be updating the Discovery model tomorrow with the cockpit model. In the meantime, here are some renders, again using the standard lighting in the default chor. Beside the default camera renders, are renders using the fish eye lense model constrained to the camera. The camera doesn't change position or angle between the two renders, just the addition of the fish eye lense. Even though the fish eye lense model was created in A:M v15, it loaded just fine into v14.c. Al Default Camera ------------------------------------------------ Fish Eye Lense

-
Hmmm... modelling a universe. Has posibilities. I mean, how big can the universe be? Just about have the cockpit done. Have the seats left to do now. I've started them a couple of times, but they are just being a real pain in the seat! (pun intended) Al
-
Well, I guess the Discovery needs a cockpit, so here goes. Again, it would be nice to have some accurate blueprints to work from, but the model is getting there. Some of this is guess work as the cockpit is not completely shown in the movie. Still have the overhead panels to complete along with the seats and rear wall section. Once the model is complete, it will be posted in the models section to go along with the Discovery model. Al
-
That is one sweet looking Corvette! Great job! Al
-
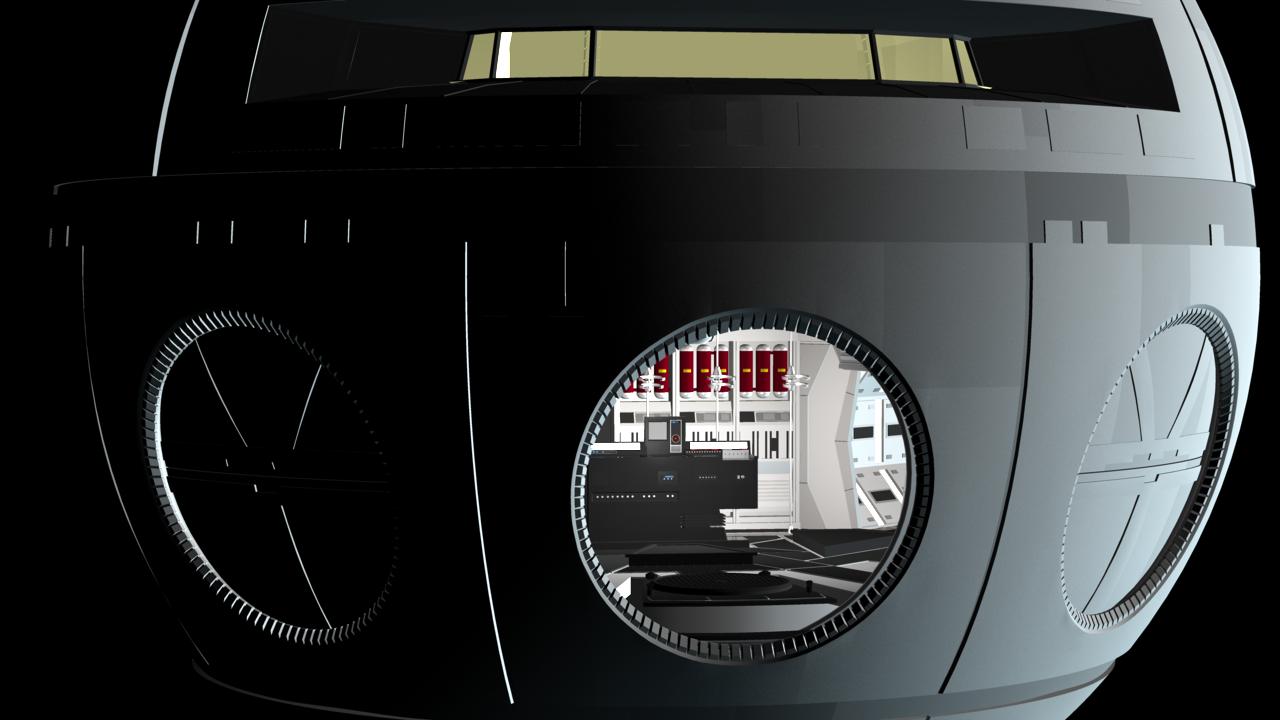
Hey Darkwing, my first (non-test) animation is going to be based on a Dave joke! And just a quick test animation of an approach to the Discovery, pod bay doors open, fly into the pod bay and rotate around to view the interior. Nothing fancy, just wanted to see how well the parts work together. Al Discovery.mov
-
One of the worst I've seen for scale is the Jupiter 2 from Lost In Space. Originally designed as a single level ship for the pilot, it was later expanded to have 2 levels (upper and lower) for the series. But as the series progressed, it gained an extra third level where the engines were located. Then the infamous magically appearing space pod in the 3rd season with it's own hangar area. And somewhere in that tiny ship, they also stored the chariot, rocket packs and all sorts of other equipment. The TARDIS had it covered though. The size of a phone booth with infinite space inside! Al
-
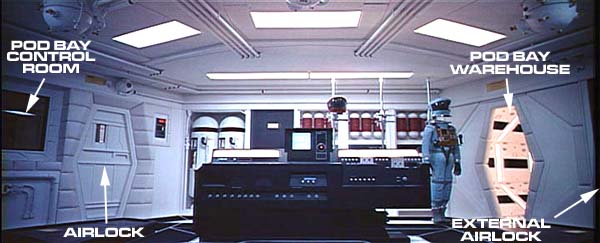
Thanks everyone! I do have a very basic cockpit model right now, but there is absolutely no detail to it at all. I've been kicking around the idea of doing something a bit more elaborate so that something actually shows up in the windows of the Discovery. You are right about the centrifuge not fitting inside the command module along with everything else. As it is, if I modelled the warehouse section as long as it is depicted in the movie, it would stick outside the hull of the ship! The centrifuge was suppose to be around 40 feet in diameter. And the command module was supposed to be 40 feet in diameter. But with the width of the centrifuge being around 12 feet, the hull would have to be quite a bit larger than 40 feet, or the centrifuge would have to be quite a bit smaller. But, that's Hollywood! Al
-
Thank you everyone. I've updated the Discovery model so it is built in an Action. Makes it much easier than having it built in a Chor. I am also including the Pod Bay interior as well. In order to build the Discovery, simply drop the Command Module model in the Chor. Next, add either the 'Discovery Assembly.act' Action onto the Command Module. If you want to build the Discovery with the Pod Bay interior, then drop the 'Discovery Assembly With Pod Bay Interior.act' Action onto the Command Module. Hopefully, future updates will be a lot smaller in that only the necessary components will be in the zip file. The up-to-date zip file is in the first post. Al
-
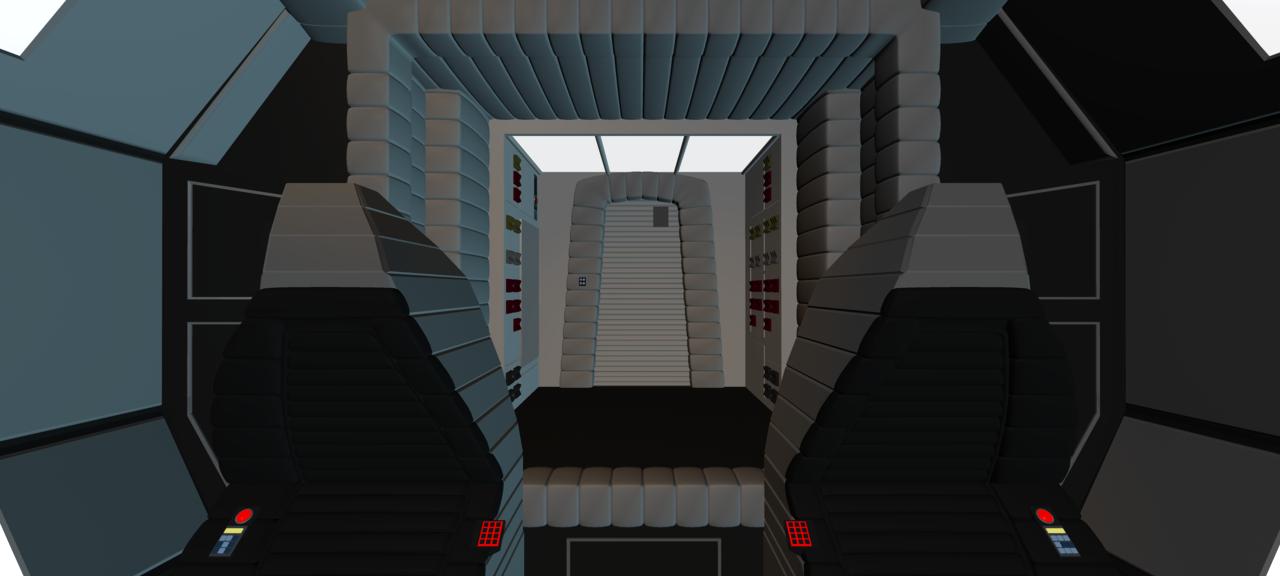
Eric is working on the lighting for the pod bay. Update: I think the modelling of the pod bay is now done. This render is done with the default 3 light setup that comes in a chor. Al
-
Wow! You've captured the lines of the 63 split window vette really well! The car just screams to be red or black though Looking forward to see more. Al
-
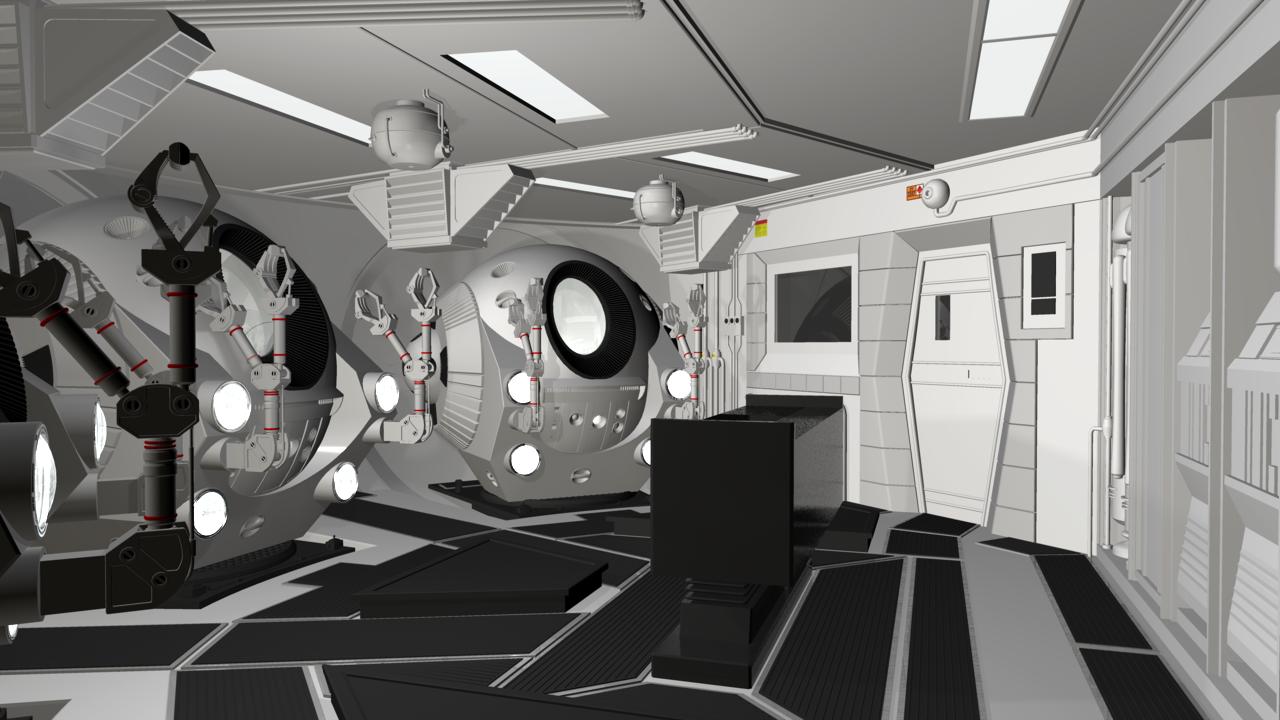
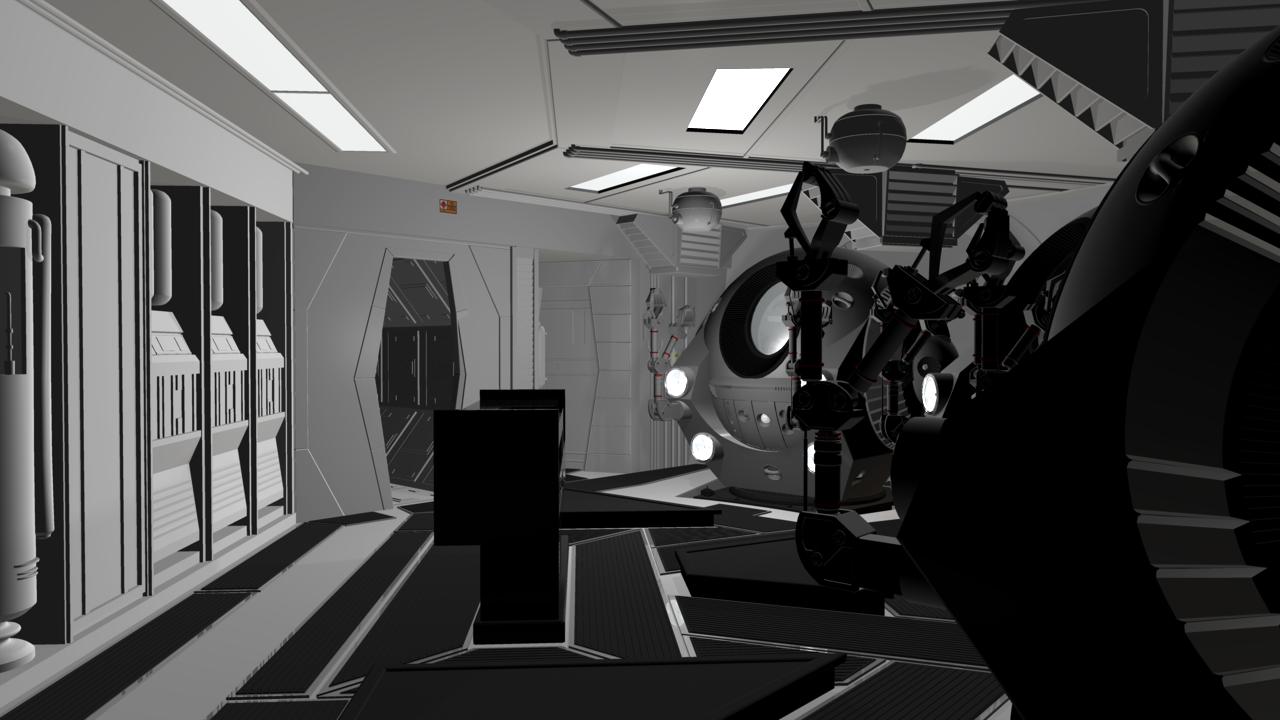
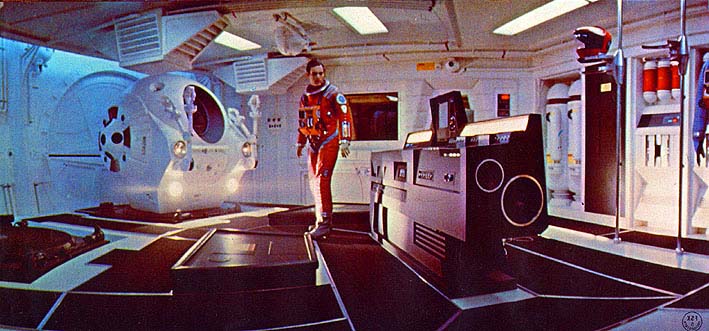
Thanks again. Eric created an EVA pod, which he is letting me use with the Discovery project. The pod is an exquisite model and extremely well modelled. Eric has left no detail unmodelled. Thank you Eric for allowing me to use this great model. I've put the pod into the pod bay to see what it would look like. Other than my lighting and textures not being up to par yet, I think things are coming along really well. 2001 was filmed in a very wide screen format. And than Kubrik also liked using wide angle lenses in the pod bay scenes. Never realized this until I tried to duplicate a camera angle from the film, and found there was no way I would be able to do it. And due to the distortion of the wide angle lenses, this is probably why I was having problems with the scale of the interior and having to rescale it a couple of times. Al
-
If you want to select your hood (and it is just one separate mesh), all you need to do is select 1 or a group of control points, then click the forward slash '/' key. It will select all control points associated with the entire mesh. Once you have the mesh selected, give that group a name and you can re-select it any time you need to. Actually, there are some pretty useful hot keys. Say you wanted all the model except your the hood. Either select the 'hood' group or follow the above instructions if you haven't created a group. Once the hood mesh has been selected, press the period '.' key. This will invert your selection. Your hood will be deselected and all other control points will be selected. The comma ',' key will select all control points along a splines path. The eight '8' key will switch you to wire frame mode. The nine '9' key will put you into shaded mode. The zero '0' key will put you into shaded and wire frame mode. The back slash '\' key will toggle you between a perspective and straight on view (not sure what the correct terminology is). Just found this one by accident a couple of days ago. The 's' key will toggle between scale and normal mode. The 'r' key will toggle between rotate and normal mode. Also, the numbers on the keypad will switch between different view modes. (e.g. '4' = left view, '8' = rear view, '5' = top view, etc.) These are just a few of the keys that I use fairly often. Al [edit] One more key that I am using a lot these days is the 'y' key. Select one control point, then press the 'y' key. A new control point is placed half way along the spline between the original control point and the next control point. This is really, really handy. [/edit]
-
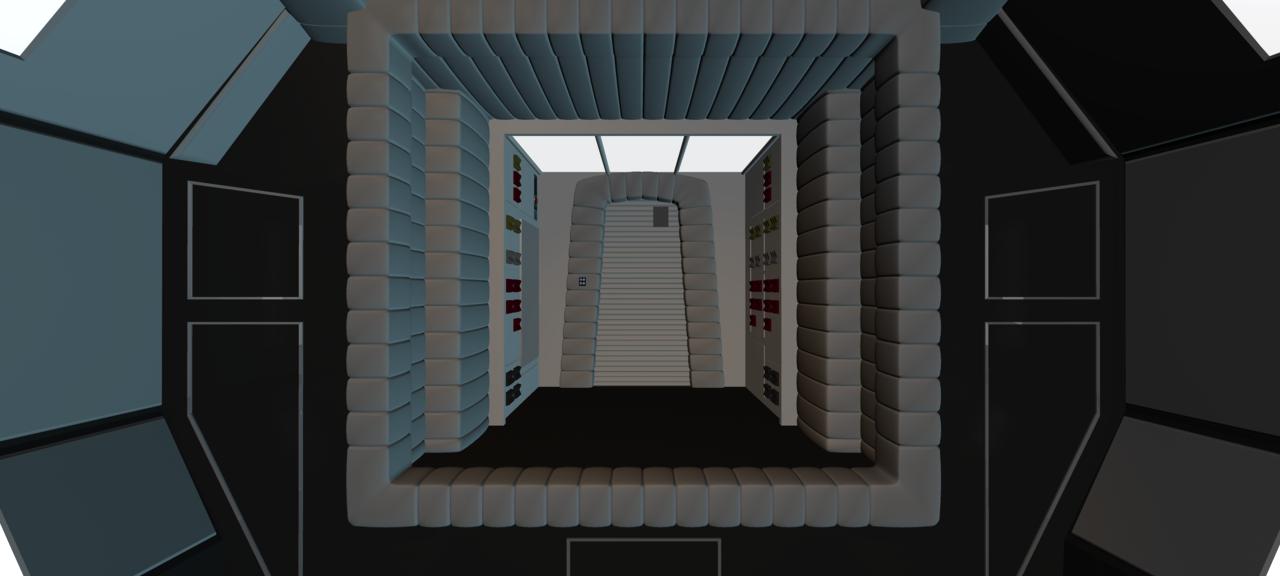
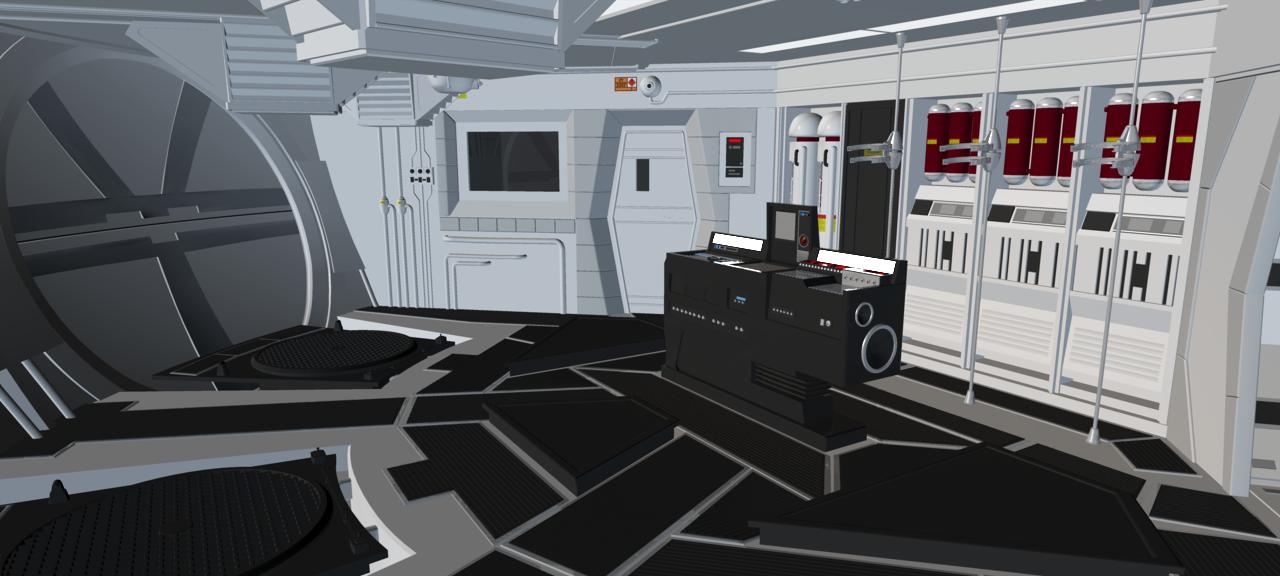
Thanks everyone. Is that an offer Robert??? You would be free to play around with any textures, materials or lighting that you wanted to. Just say the word. Once finished, this model will be released into the Contrubutors Cue and it would be great if the textures and lighting were better than they currently are. Quick update. While trying to get those darned velcro walkway patterns laid out, I found out once again that my scale of the interior was off. Would really love to have some good blueprints of the pod bay. The one that I did find, wasn't even close. Anyway, got the velcro walkways done, reworked the wall layout, reworked the ceiling and started working on the HAL console. The layout is getting closer to how the original pod bay looked in the movie, but still have some more work to do. Al
-
The Chariot would be cool but My absolute favorite vehicle that appeared in the later episodes was the space pod. I always thought it was cool to see the pod exiting the Jupiter 2. It even had the spiral lights on the bottom like the Jupiter 2 if I remember correctly. George Did you know the serial number on the side of the space pod was supposed to be Irwin Allen's office phone number? Don't know how true that is, but it is what I read in on of my LIS books. Al
-
Another great Thomas model Stian. Reminds me of when my son was young and we would watch the TV shows together and play with the little toy engines. And now he is in University. Where does the time go? Al
-
Glad to be of help George, and thank you for your kind words. LIS was and still is one of my all time favorite TV shows. I still enjoy sitting down and watching them every now and then. Even the giant talking carrot episode... It's pretty funny really, to see Don West turn his back to the camera when they are caged up in that episode. He turns his back because he is laughing at the giant carrot in the scene! I agree it would have been hard to keep a show like LIS going if Smith had always been a seriously evil antagonist all the time. It would have been hard to keep a show with a small cast like that going. The movie was kind of iffy for me, although I did enjoy Gary Oldman as Dr. Smith. With the rebirth of shows like Galactica and V having a darker serious tone to them, I wonder if they would ever re-do LIS for TV? I've modelled the Jupiter 2 three times now. Once in Anim8or (complete with launch tower), once in C4D (just the outer hull) and also in A:M (outer hull with working fusion core and outer hatch, partial interior upper deck with working flight consoles and now the B9 robot). The Jupiter 2 was done quite a while ago, and I have learned a lot about modelling since then. I would like to go back and redo it again, making it more accurate and functional. Would love to try doing the chariot at some point as well. Really need to learn organic modelling so I can start working on some human characters. Ohhh... the pain... the pain... Al
-
Come on you guys... I'm blushing. Trust me though, there are lots of flaws in there. Played around some more with the lighting, pod platforms and started working on the velcro walkways. Al
-
OH MY GOD!!!! I'm so jealous. I tried to model this a while ago and gave up after I couldn't get the cut out for the neon voice light look right. HOW THE HECK DID YOU DO THIS?!?!?!? I had asked Stian for his help and even with Stian's model example, I still couldn't get it smooth. Al, would you PLEASE post a wire frame so I could at least see the splinage? George Hi George, I can post a wire frame if you would like, but I have posted the model for download in the Contributors Cue/Models section. You can find it here. Al
-
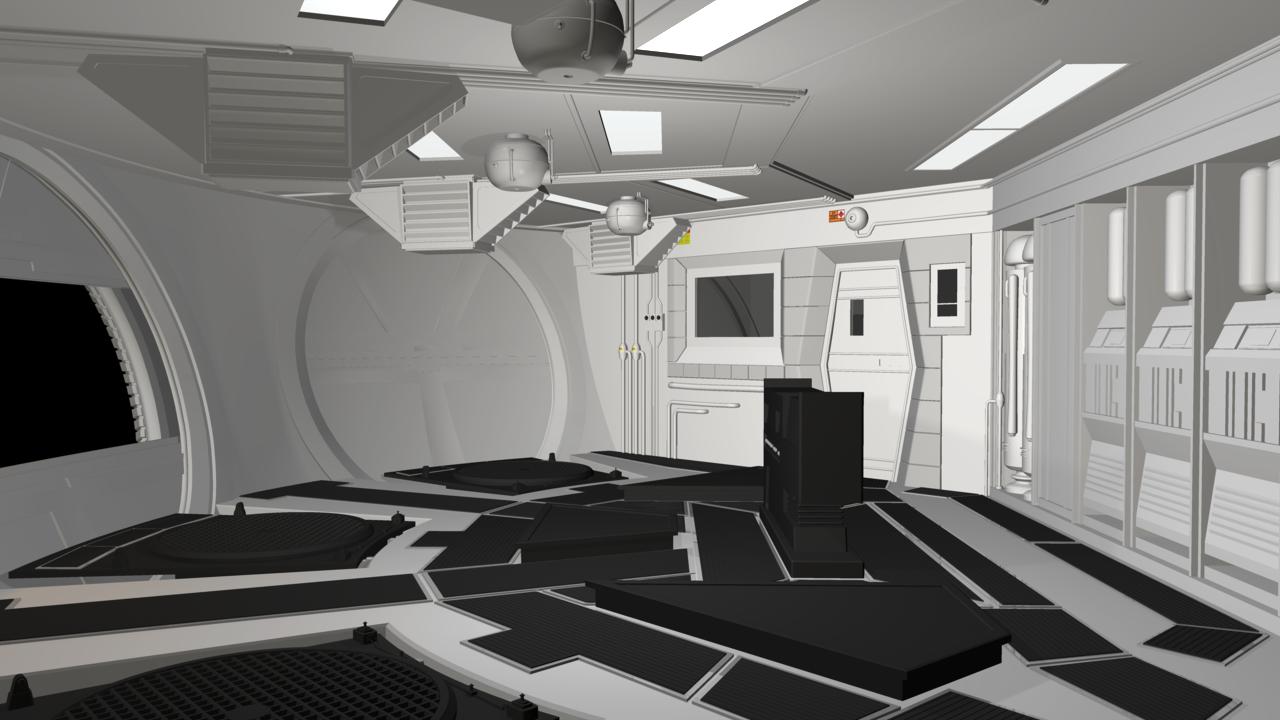
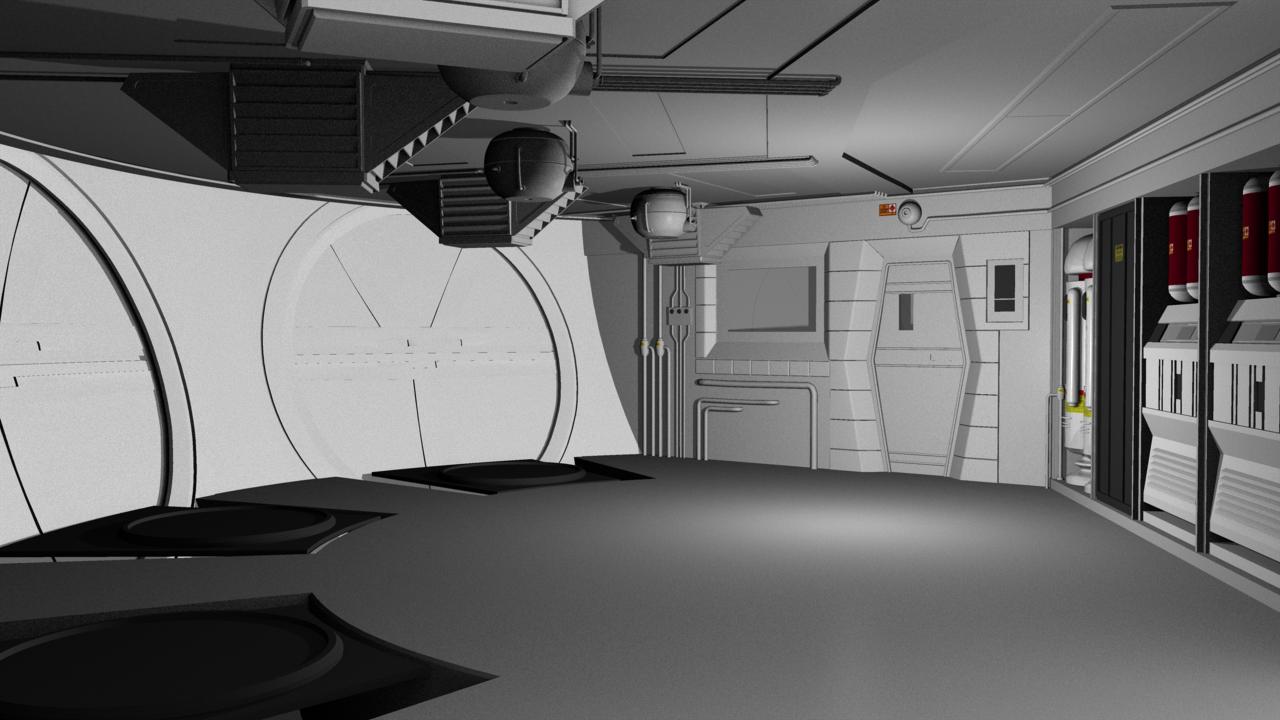
Your project is looking pretty good Darkwing. I know what you mean Robert. It would have been so easy for Hal to off Dave once he got back onto the Discovery. Dave didn't have a helmet in the emergency airlock, so Hal could have opened the pod bay door, thereby trapping Dave inside the airlock. Or Hal could have driven the remaining eva pod at Dave and got him inside the pod bay area. That area is zero gravity, so it should have been fairly easy. Anyway, here is a quick update. Did some more work on the ceiling. You can also see the proper pod bay doors, and have roughed in the platforms for the pods. Oh, and there is only one light inside the pod bay right now. Will play around with lighting a bit later. Al
-
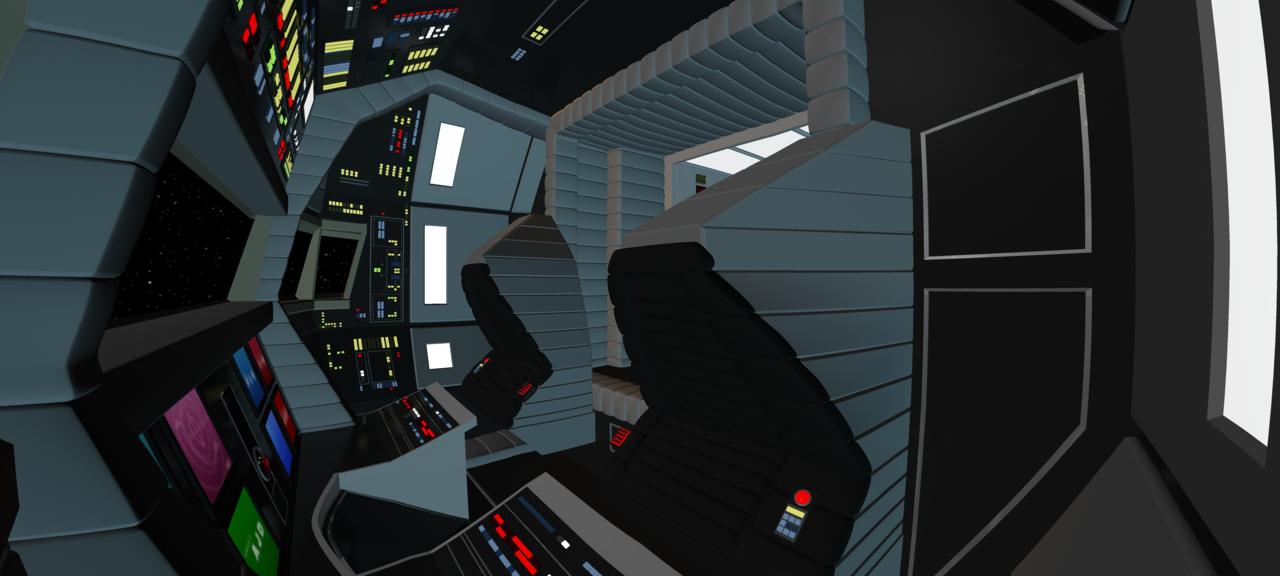
Thanks for all your suggestions, and will give them a try later on tonight. When I worked on MMC5 (a long time ago now), I think I had tried adding lights to a model in bones mode, then the model went entirely black. I added lights to the street lamps, and a light inside the house to light the windows for the night scene. It rendered okay, but was really difficult to see or work on anything in model (object) mode. I am trying to recall this from my old fading memory so this may or may not have actually happened this way. I can't remember if everything went black when I went into bones mode or if everything was black once the lights had been added. In the Pod Bay, it looks like there are some lights between the ceiling and the front hull, which provides some indirect lighting on the inside hull. There are also several, what looks like flourescent fixtures, in the ceiling. Then in the spare parts room, there are smaller light panels in the walls and that room appears to have a slight yellowish cast to it. Would you use a couple of lights to provide the light, and then set the ambience value on the light panels to make them look as if they are lit up? Al
-
Hi Gerry, When it comes to lighting and texturing, it is really hit and miss with me. I truly don't understand the different types of lights and what they do. And why with some lights it doesn't really matter where they are placed in a chor, but the direction they point does matter. A good case in point is my B9 Robot model. Played and played with it until I got something that seemed decent enough. Then Mark redid some of the textures and lighting and it was like night and day difference in the final render. There is just sooooooo much to learn. I realize now why you have lighting teams, texturing teams, modelling teams, effects teams and so on in a movie or project. There is a downloadable pdf from 3DTotal on lighting techniques. The PDFs are for other packages, but I am thinking the techniques could be translated to A:M as well. For around $15 USD, I think it may be worth the risk. Al
-
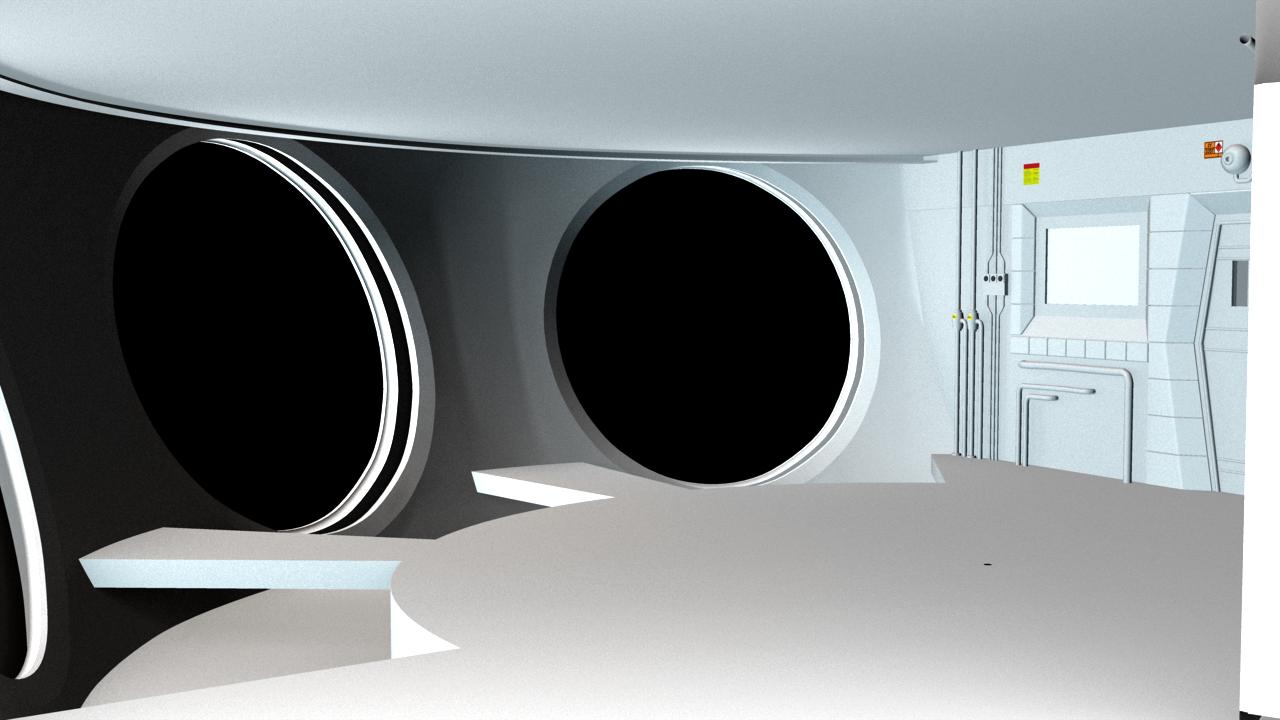
Started working on the Pod Bay interior for the Discover model. To make this model it's own complete set, I am going to include the Pod Bay doors and front wall sections (interior and exterior). The slider to control the doors will be part of this model now, and not the Discovery. So far, I have the rear and left walls modelled (with temporary textures on them). The floor and ceiling are blocked out as well. It's been tricky trying to get everything to scale without having any blue prints to work from, just screen grabs from the movie. The front section with the pod bay door openings, is just a temporary piece so I can get the other parts modelled and scaled in place. I actually do have the interior of the doors done, they just aren't showing yet. I am just using standard lighting to light this set so far. I am not sure how to light this model properly, so that it can also be used with the Discovery model. How would I get the lights to work on just the interior of the set? For instance, I don't want the lights in the pod bay to affect the exterior of the Discovery or the cockpit. Is it best to create the lights in an action, than apply the action to this particular model? Any help would be appreciated, as I really have no idea of what I am doing... Thanks... Al
-
The vette is looking pretty good. If you have the Dark Tree shaders and the AM Simbiont plug-in, you could use their paint shader. It does a really great job of doing a metallic paint. You can get the shaders here. And get AM Simbiont here. I used the paint shader on the Honda Rebel I modelled a while back. Al