Tralfaz
-
Posts
899 -
Joined
-
Last visited
-
Days Won
1
Content Type
Profiles
Forums
Events
Everything posted by Tralfaz
-
I've just gotten back into photography this year. I've tried some astrophotography (moon, stars), nothing too fancy though. Still learning the ins and outs of the cameras and lenses. Played around with HDR photography as well, very cool stuff. The IS is very nice to have. Works fairly well, and helps keep things sharp. I also have a Canon S3 IS point and shoot camera, which is a very good camera as well. If you are interested, you can browse through my Photobucket Account. Have some photos and models up there. Al
-
Great start on a great camera Photoman. I've got the Rebel XTi with the 17-85 IS, 55-250mm IS (nifty 250) and 50mm 2.8 (nifty 50) lenses. What type of photography are you into? Al
-
Thanks so much for all your kind words folks. I've got so much from these forums since I joined a few years back, that it is my pleasure to be able to contribute something back to the community. Thanks again... Al
-
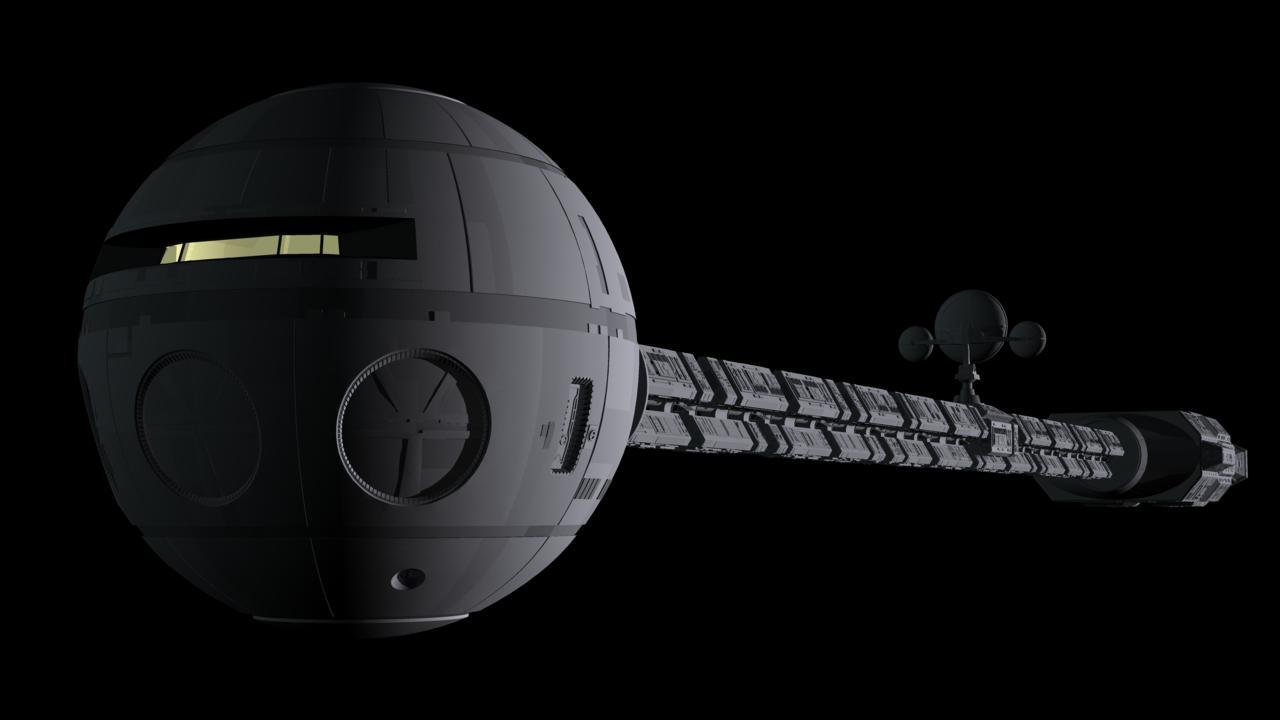
Finished working on the Discovery, and am providing it here for anyone who wants to use it. Revision History: 2009-11-16 Included Pod Bay Interior with Discovery model. The Discovery and Pod Bay Interior are now assembled via Actions instead of inside a chor 2009-11-25 Include the Cockpit Interior as a separate download. If you haven't done so, download the Discovery model. Next, download the Cockpit model and include it into the existing Discovery folders. Discovery actions have been updated to include assembling the cockpit. Separate cockpit action to assemble just the cockpit, independent of the Discovery. I renamed the excellent benlens4.mdl to fisheye.mdl (easier for me to remember what is used for) Enjoy... Al Discovery_2009_11_16.zip Cockpit_2009_11_25.zip

-

2001 - A Space Odyssey - Modelling the Discovery
Tralfaz replied to Tralfaz's topic in Work In Progress / Sweatbox
Thank you Nancy and Robert. As for the engines, you are correct. They were to be atomic engines that would pulse at regular intervals, thereby propelling the Discovery through space. Finished the texturing the ship tonight. Applied different shades of greys to the many panels on the Discovery. I've got a couple of ideas that I want to do with the Discovery and will be working on them in the near future. Al
-
2001 - A Space Odyssey - Modelling the Discovery
Tralfaz replied to Tralfaz's topic in Work In Progress / Sweatbox
Thank you everyone. Nah, I want to go for the minimalistic approach.... Seriously though, modelling is now complete. (hopefully...) Good heavens, just checked how many patches are in the rear engine module. This does not include the 3 engines, just the module. Sitting at 33,177 patches. Al
-
Hi Ken, This is looking pretty good, but I do have to agree with the tops of the roof looking a bit too bright. Once you start doing a fly through, it may not even be all that noticeable. Maybe you could have a nice big full moon to account for the brighter roof tops... Hope you are able to post a video of the fly through (and in cross-eyed 3D!!!). Al
-
2001 - A Space Odyssey - Modelling the Discovery
Tralfaz replied to Tralfaz's topic in Work In Progress / Sweatbox
Yes, Sir Nigel is the latest Nexus model to be developed by the Tyrell Corporation. Thanks Ken. After taking a break to work on the B9, it's time to come back and finish up the Discovery. Started doing some more work on the engines. Still have the detail to complete on the top, bottom and back of the engine body portion. I hope to texture a lot of the panel detail and shading using decals. Al
-
I can't remember if the robot was actually called B9 on the show or not. I had the Alpha Control Manual in which it called the robot B9. I've seen references all over the web to the robot as B9 as well. I prefer the first season in black and white due to Smith being much more of a serious villain character. The robot was more mechanical in everything he did, like walking and talking. Smith actually had the robot programmed to kill off the Robinson family one by one. Made for some pretty tense moments in the series. Unfortunately, the Batman TV show came on the air and it was very campy. CBS saw how the ratings were going up with Batman, and decided to shift LIS towards being campy. This is why Smith ended up being a snivelling coward. In the Alpha Control Manual, there was another explanation for Smith's change. It was due to him not being in a freezing tube during the initial 'full power' lift off from Earth. An unprotected human would be affected mentally, which is why the Robinsons were in the tubes during lift off. Apparently, they never did a 'full power' lift off again, which is why they were only in their couches. That and June, the mother, did not fair well when she came out of the freezing tube. John, said she would never have to go back into it again. Well, this has filled my geek quota for the day.... Al
-
Thanks everyone. Sorry about not adding the labels to a bone. They were a last addition to the model. That is a really great render Mark. The body color looks really good. Did you adjust the material and if so, what did you set it to? Al [edit] I've updated the model and the newest fixed robot is in the 1st post. I've been looking more and more at your render Mark. I am really envious the result. I've said it before and I will say it again. Lighting and texturing is an art form, and one that I really, really need to practice. Would you be willing to share your lighting setup? [/edit]
-
Hey folks. I've been doing a fair amount of mechanical modelling lately, and have been finding myself re-creating the same basic shapes and objects over and over. So, I've decided to start a 'Greebles' library, where I can create re-usable parts, put them into a library and have them within easy reach whenever I need them. I've created a library and was hoping some of you could check it out to make sure it works properly for you. The folder structure is based on the default folder structure that Animation Master installs with. You can either unzip the file into the default Animation Master folder (where Master.exe resides) with the option turned on the create or use the existing folders. You can also copy the files manually providing you put them in the folders as specified in the readme.txt in the zip file. Currently, there are 22 'pipe' greebles, 11 of them as hollow pipes and 11 of them as solid pipes. They consist of straight pipes, bends, joints, etc. I plan to add to the library as I go along, adding things like switches, panels, doors, etc. Currently, we have a folder for models and materials. I wasn't sure if this should go under models or not. Or is it possible to have a Libraries folder? Thanks in advance... Al readme.txt AlsGreeblesLibrary.zip
-
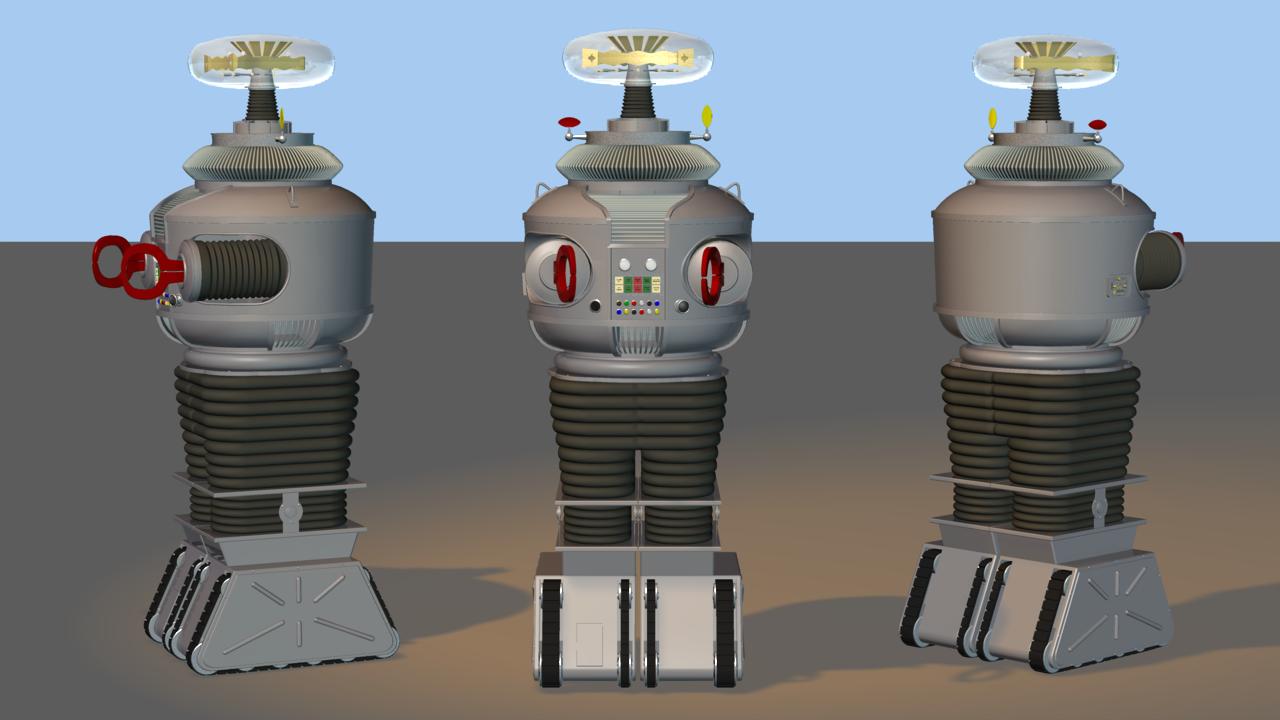
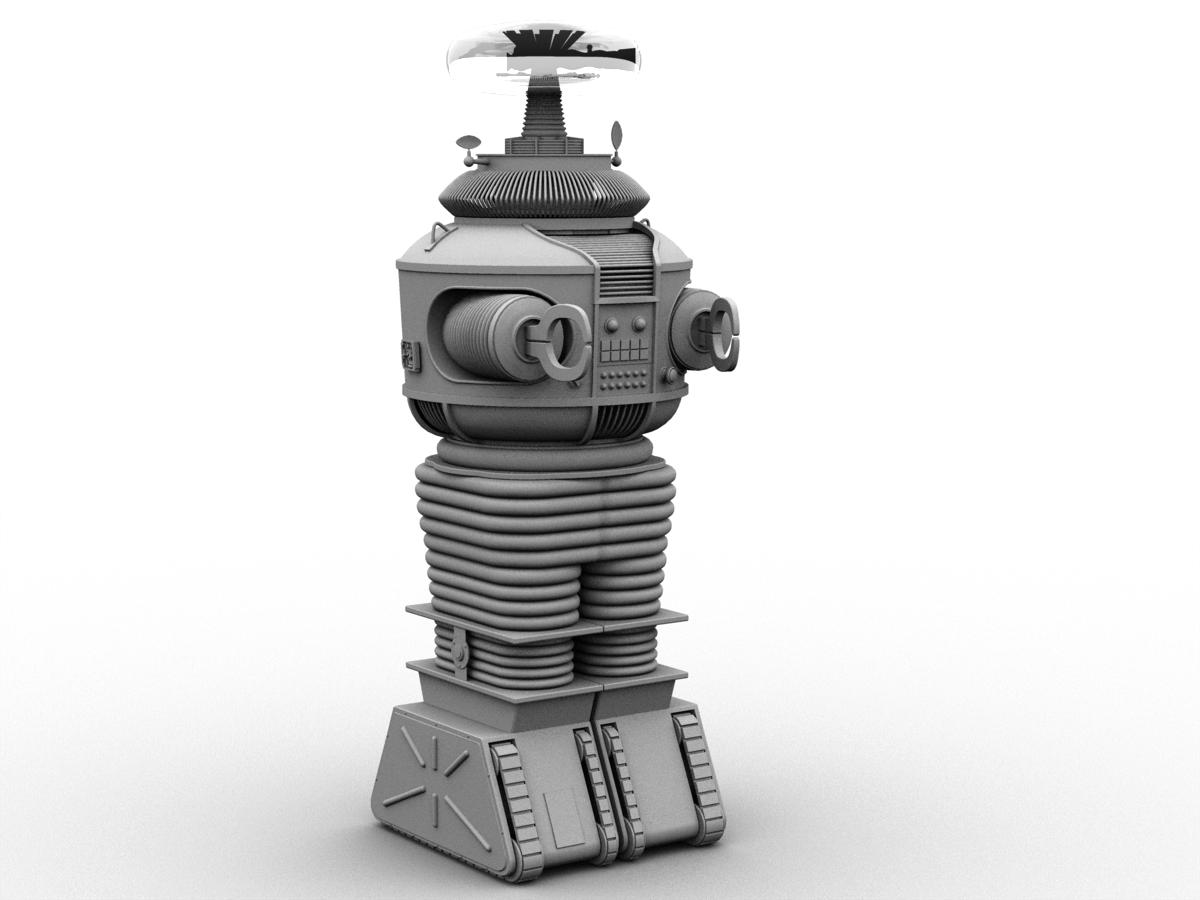
I've finished working on the Lost In Space B9 Robot. I would like to send Thank You to robcat for providing me with his concertina model in helping me figure out how to rig the robot's arms. And thank you to all who comment and help me through the modelling process of this robot. I am including a project file, separate model, two action files and a single decal that was used in the model. Pretty much everything is rigged, lights, arms, claws, whirly gigs and so on. Lots of pose sliders to help make things a bit easier for you. The pose slider for retracting the arms doesn't work properly all the time. Not sure why. Also, I don't have any rigging for the treads. Enjoy... Al Updated - October 31, 2009 The buttons labels were not attached to the Torso bone (as found by Largento). Model updated to fix that problem. Thanks Mark for finding it and letting us know about it. RobotB9.zip
-
Okay, let's split it! IMDB shows it as 1956. Al Edit: Oops! Beat me to it......
-
Forbidden planet was first with Robbie the Robot. It was made in 1955 and Lost In Space was done in the early 1960's. Al
-
And now a quick video of all the lights and whirly gigs buzzing away..... Lights need some fine tuning though... robot_auto_.mov Al
-
You can find robcat's concertina model in this post... robcat's concertina model Al
-
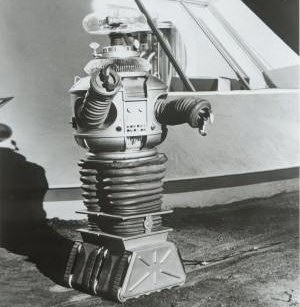
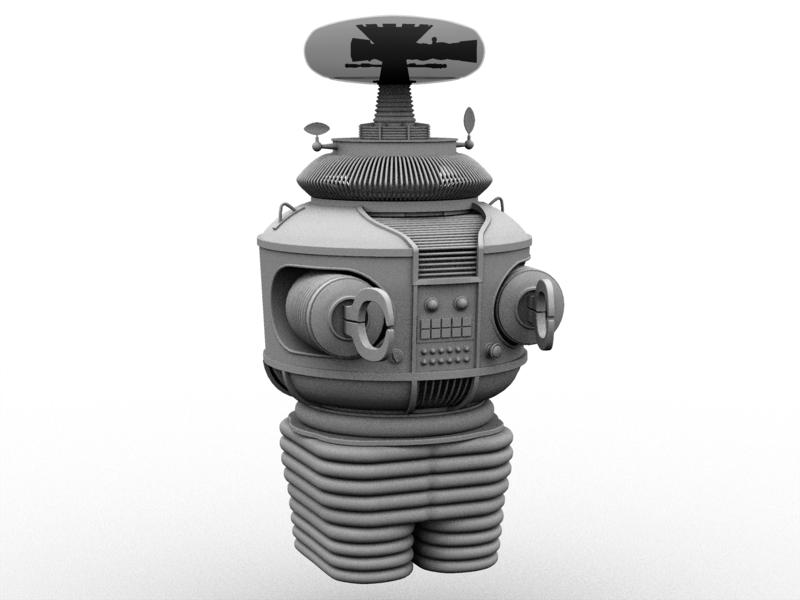
Thanks everyone. I saw that sight already Mark. Got some reference photos from there. Pretty amazing that they can find a market for these robots for that amount of money! I appreciate your trying to create an arm rig Paul. I was hoping to have the lights flash randomly through an expression Rob. I suppose it would be a lot easier to just create an action that flashes the lights, then have it repeat itself. From what I have read, there were definitely two different finishes on the robot (as there was a hero robot, and a stunt robot). One of them had a smoother silver finish and the other was a more textured silver finish. I was trying to go for the more textured finish, but am totally open to other options. A lot of the photos of the replicas have the smoother shinier finish, so I tried using a metallic paint shader from Darksim for the body color. Let me know if this is any better or not. Might need to be a bit brigher silver... Thanks... Al
-
I did a quick animation test of the robot. A huge thanks goes out to robcat for providing his concertina model which showed me how to rig the robot's arms. Couldn't have done it without him. In the video, you will see the robot's arms in action, the torso swivel, the head go up and down, the radar dishes (ears) rotate and the mount for the radar dishes swivel. Also, in the bubble, the blades near the top of the blade also rotate. The blades and radar dishes are controlled through expressions. Now, I just need to figure out how to animate the blinking lights through an expression. Al B9.mov
-
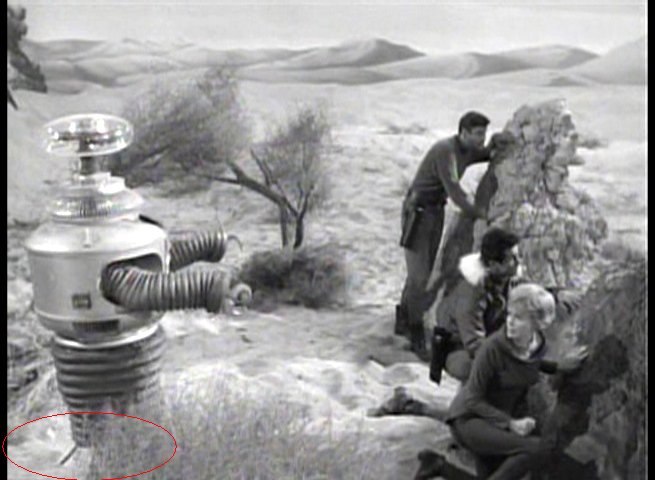
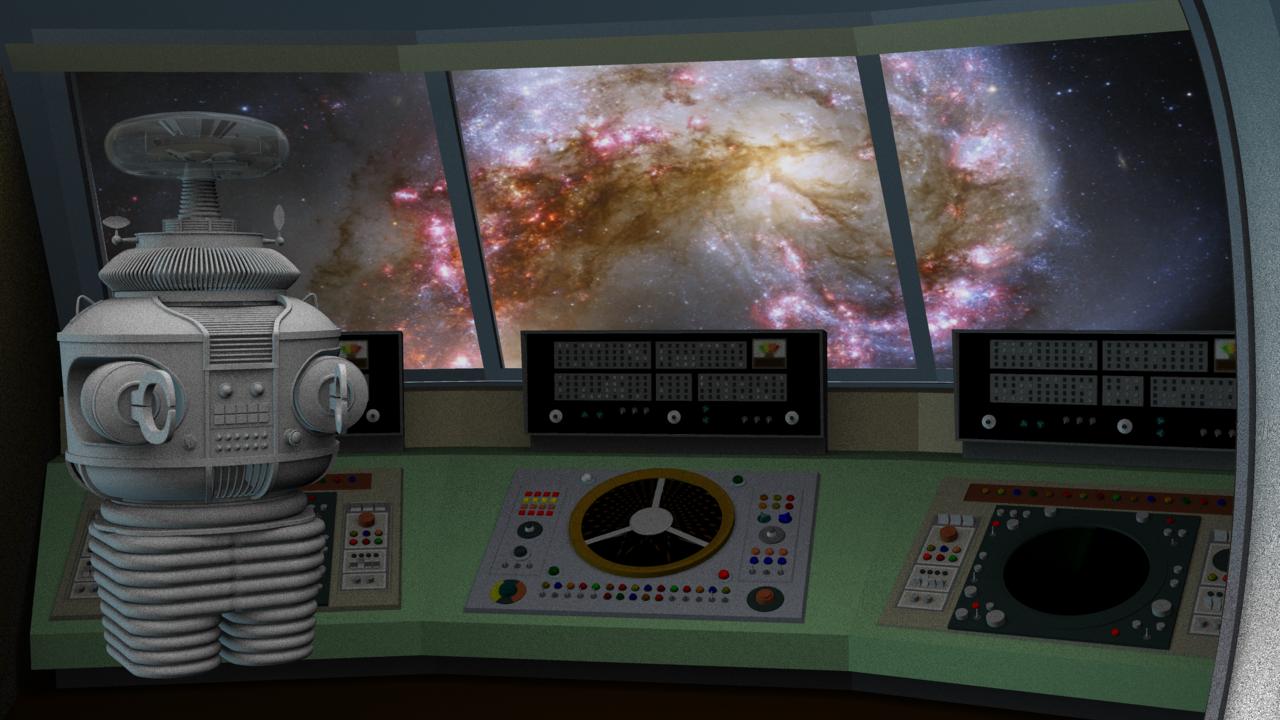
Yeah, it is a bit dark. But after 4 hour renders, I decided that last one was a keeper!! LOL! I did take the image into Photoshop when I got home today and tweaked it a bit. Also, I found a spot in "Invaders From The 5th Dimension" which shows Bob May's legs. It was clearer in the video then in a still, but you will get the idea. You can definitely see the 'shorts' and a power cable coming out from behind the robot. If you look really closely, you can see the back of one of Bob's legs. I also did a check into Scotty's missing finger, and sure enough there were some photos of him showing the missing digit. Weird that I never caught onto it during all the viewings of the old episodes... Al
-
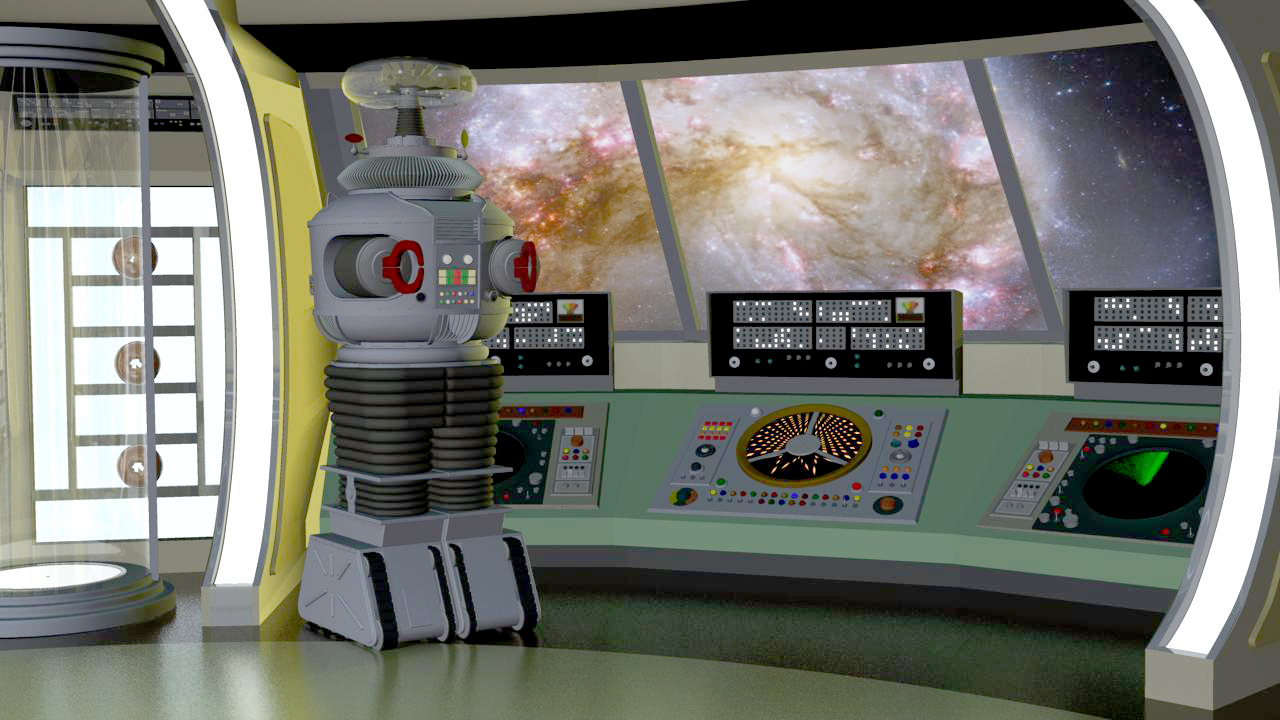
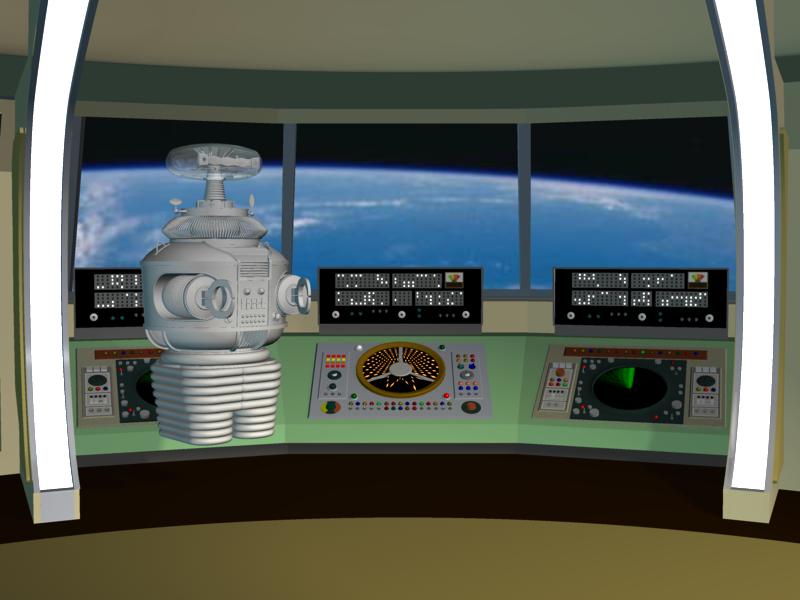
Thank you so much everyone. All your great comments are really appreciated. I am not sure how many hours I've worked on this bighop. I started the model a week ago though, and worked on it during my lunches at work, evenings and the weekend. Thank you Shelton for including me with the likes of Eric, Stian and Rodger. They are outstanding modellers and I still look up to them for inspiration and help. I know what you mean about the robot costume Mark. And you are right about Bob May (the actor inside the suit) legs showing every now and then. I know I've seen them in a season 1 episode, but can't remember which one right now. I will scan through the episodes when I get home tonight and see if I can find it again. In finding reference images on the web, I did come across some that show the power cables going to the robot running along the ground. Funny, that as a kid, I thought it was a real robot! As for Scotty (James Doohan), are you saying he was missing his middle finger!? Never knew that. This will probably be my final update image. Spent most of the weekend trying to get a half decent image of the robot on the Jupiter 2 flight deck. Finally ended up with this one and am fairly happy with it. Lighting and texturing is a whole other art form, one that I need lots and lots of practice with. Al [edit] P.S. I found one of the pictures I was talking about with the cables running from the back of the robot along the ground. [/edit]
-
No, they don't, but when you need a hole in a shape and they just wont' spline together booleans are there. wireframe showing boolean Hmmm.... will have to give it a try and see how it works. LOL! Makes perfect sense now! I wish it had been magic. The arm holes were a real bugger to do. I will try and put something together to explain how I did it. And now the final model (minus textures)... Al
-
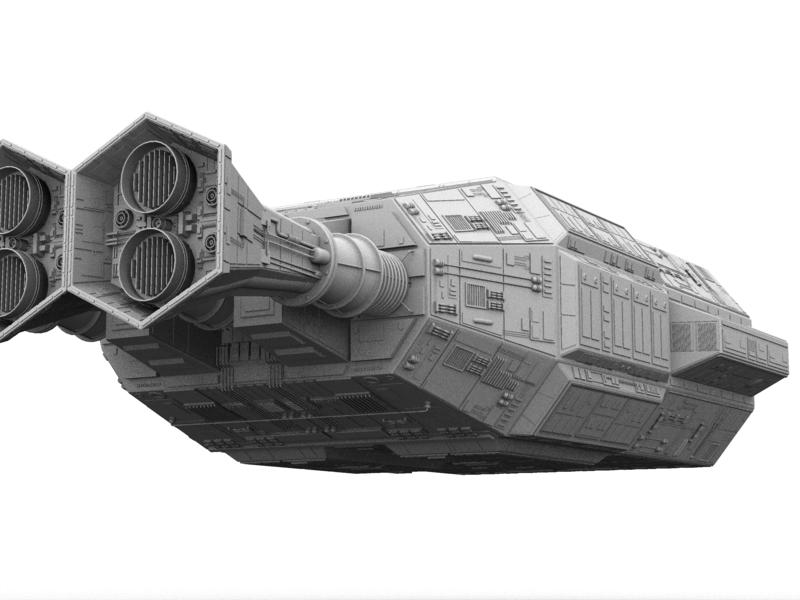
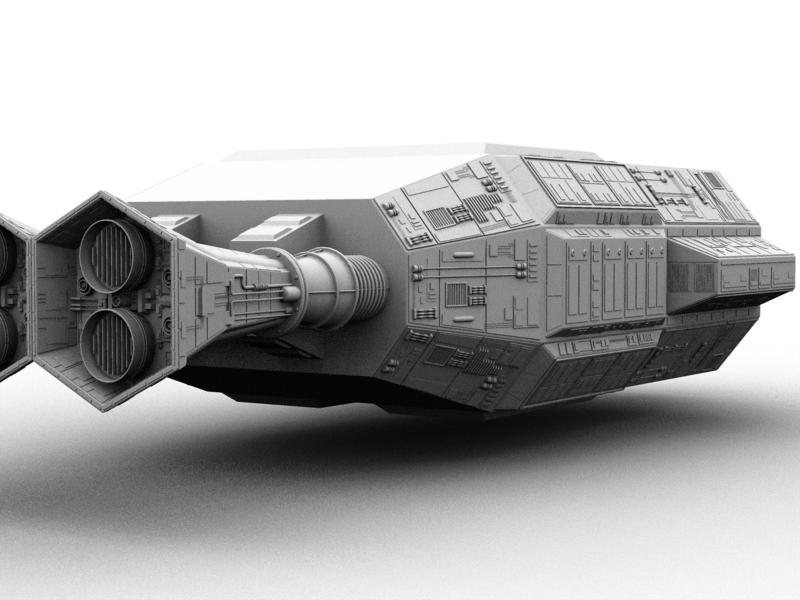
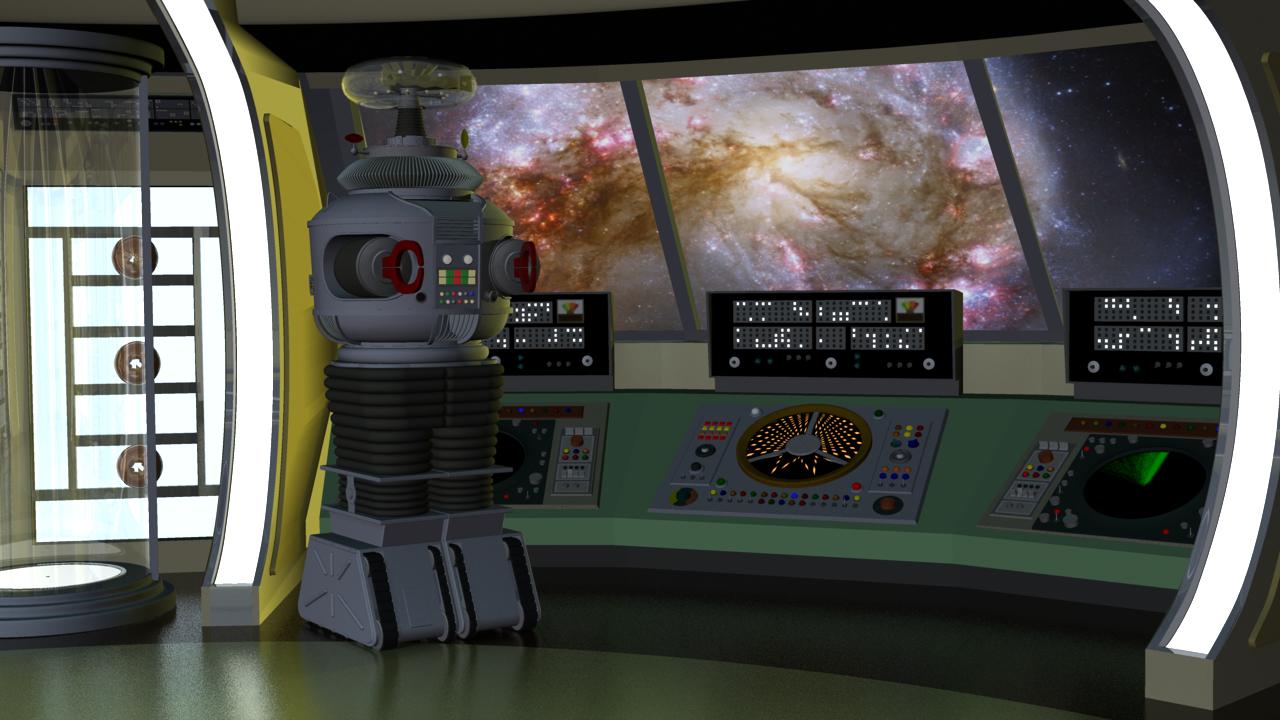
Hmmm... stealing model machines... Isn't that how Skynet was born? Irwin Allen did some great shows and movies that I just loved when I was a kid. As a bit of trivia, I read that his office phone number was the serial number on the side of the Space Pod in LIS. I've never used Booleans in A:M before, so not sure how that would work out. Booleans in A:M don't actually change the geometry, do they? MJL, both Robby and B9 were designed by the same person, Robert Kinoshita. So I guess that does make them related. And both Robby and B9 appeared in an episode of LIS together. Thank you David and Paul. It would be pretty cool to see Smith and the Robot together again! Update: I dug out my old Jupiter 2 model that I had started working on a while ago. Seems like I have lots of partly finished models, and not many fully completed. Oh well. Wanted to put the Robot in a more familiar setting and try some different rendering techniques. I did a standard lighting render and then one with AO turned on. The AO render used the same techinique as the previous clay style renders. I had to hide the top of the J2 hull, as well as the inner roof, otherwise the render was completely black except for the window. Even with those two parts hidden, I still had to use a couple of low intensity lights for the models to be reasonably well lit. Also, you may notice that the computer lights on the consoles are not nearly as bright as in the standard render. Same thing with the radar screens. Yet, if I turn off all lights, and do not use AO, the computer lights and radar screens show up perfectly. BTW, the AO render took just over 2 hours! Al Standard Lighting AO Render with minimal lighting
-
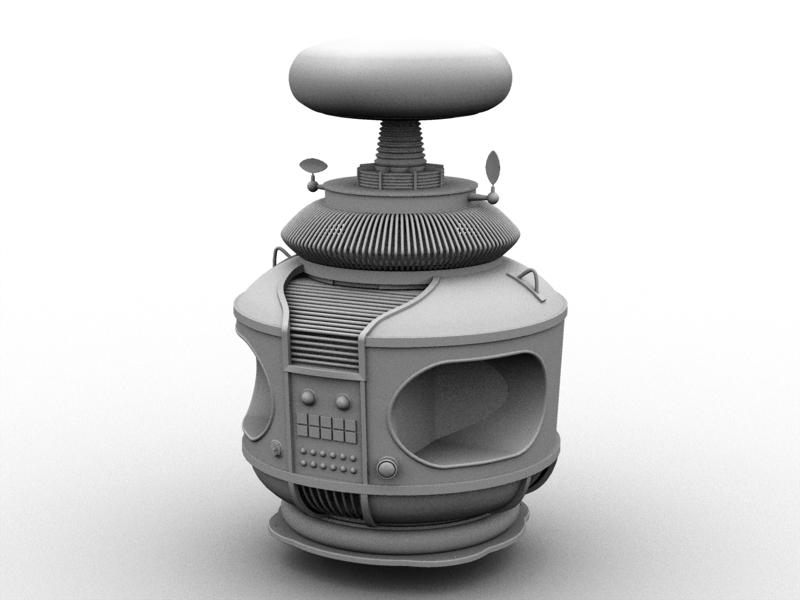
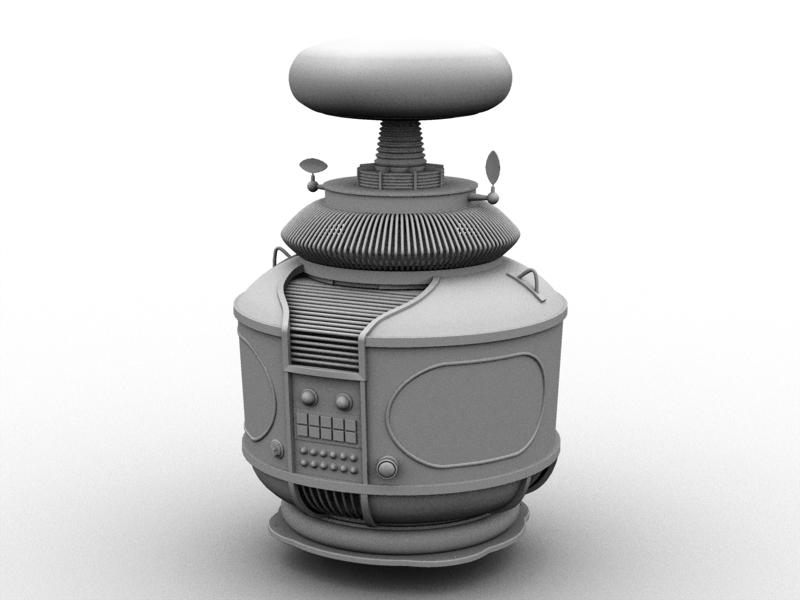
Thank you everyone. After seeing your suggestion Rob, I thought I would give it a try. In a normal render, the transparency map worked. However, in an AO render, the 'hole' rendered as black. Update on the bubble headed booby! Modelled the insides of the bubble (brain). Added the arms and claws, and started on the legs. So far, the model is around 9,500 patches. Al
-
Thanks Spleen. As for being fast? I just don't have a life... Today on my lunch at work, I finally got the arm openings modelled! What a royal pain in the butt that was, but I am happy with the results. Al
-
I really like the look and feel of an AO render and have no problem doing an AO render on a white background (see example below). I would like to be able to carry that look and feel to my final renders. Is it possible to do an AO style render when the model has been textured and it is in a scene with other elements without doing it as a white render? Thanks... Al