DanCBradbury
-
Posts
683 -
Joined
-
Last visited
Content Type
Profiles
Forums
Events
Everything posted by DanCBradbury
-
well you see, there are a lot of objects (large round asteroids, rocks, ice debris, etc) that are equivilent to the size of pluto, and bigger. If we consider pluto a planet, than there are a host of several dozens of other objects that would have to be considered planets as well. I can barely remember the order of the 9 ._.U
-
He's sort of looks like the gekko from those car insurance commercials.
-
Oy! This is the same reason why the US still uses the Imperial system of measurment. The world is flat! I demand that it be flat! MUHAHAHAHA! XD

-
a 5-point patch is a very helpful patch type that allows modelers to create wierd shapes without having creases. If you post a wirefram of the side of his face, i could show you what i mean.
-
his teeth seem pretty messed up. try using two three point splins (connected in the middle) with a 4 point closed spline for the base of each tooth. Also, for his mouth edge you'll want to use 5-point patches so that you dont get that creasing effect
-
I took out the sun and did a skylight radiosity render with matts setup. I think i should ask rodney or one of the admins if i can put this choreography in with the A:M free cd.
-
I was messing around with radiosity combined with light rigs, and who ever said that the two dont mix together, i think it was luckbat, never tried (Note: mars is not to scale cause i was an ideot and didnt check the scales before i rendered, and what appears to be an artifact under the earth is in fact the south pole's light reflections)
-
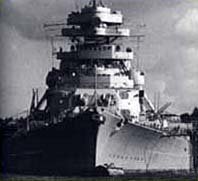
That's awesome! I do have one problem with the renders though: there are no dark hard shadows anywhere on that ship, which make this images look very unrealistic. It looks like you used an IBL exr map, which is good for simple normalized colors, but very bright values in the exr image will create major visible irregularities and take a render downhill. That's one amazing ship, Agep. Wish I could test her out
-
Really nice render! It's looking much better. Are your rims 100% reflective? They dont seem to be from the pic. I've found that the best chrome surface has a black color and is 100% reflective. Also, if you want the realest looking render I wouldn't go with IBL. It does not do any raytracing, so there's light color where it shouldn't be all over the place. In my opinion, AO with a single color is better looking than AO with IBL. You're just having all sorts of weird problems :\ Did you make sure that the option render tab's render mode was set to "the camera"? Did you also make sure that the alpha was turned off? I just did some simple AO with Fog tests, but i was never able to get fog to go away except with an alpha, but it took it away in both a tga and a jpg.
-
Wow, looking much better, now all ya need is to throw in some luninare objects and you're good
-
Ah, it's looking much better now. Your artifacts may be a result of the environment map you're using
-
i've noticed in the past that even when a jpg is saved at 100% quality there is still some very strange noise generated. I would suggest a tga.
-
It looks really dark for some reason are you using white for the AO color? For AO you can increase the Intensity just like raising a light's intensities. Also, you dont have to render out a scene all the way to get a general idea of what it's going to look like. If you select one of the render buttons right click+drag out a box and it will render only that outline. For the trebuchet I used the default camera sky blue color for AO, 100% Intensity, 100% Occlusion, and then I used a sun light type with a bright yellow orange color like 255, 240, 200, 100% intensity, 2 ray casts, and 100% darkness shadows. Hope that helps.
-
You mean like this trebuchet? I could tell ya how I did that if you want to know. The car doors would be pretty dark, but radiosity and the paint reflection of the bright ground would have a large effect on how the underside of the vehicle was lit. When you add lights that dont cast shadows you end up getting bright areas where there should be no light at all, ie the underside of the dash board. In my opinion, it would be better for the underside of the door to be dark than to light a scene with a bright non shadow casting light.
-
oh, that does sound a little confusing. [attachmentid=19119] I just meant i rendered out an exr file that would create all the layers, reflectivity being the one i needed. Though, I had to place one light in my scene to make it render out correctly :\
-
Forgot to add this: here is the project file that i'm using for the environment. Environment.zip
-
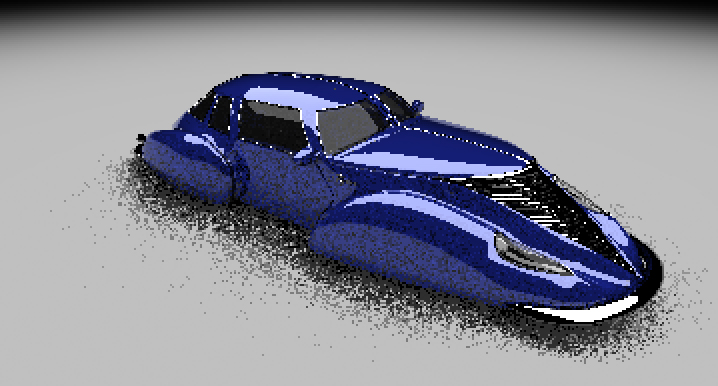
thanks guys Well, I completely changed how I worked with the surface properties and materials, so re-reading the thread probably wont help at all, but I can give you the values i used for the paint. For the candy paint scattered reflection I used 20% Roughness, .01% Roughness Scale, 100% Reflectivity, and 80% Reflective Filter. For the basic wax paint cover i used 0% Roughness, 0% Roughness Scale, 37.5% Reflectivity, and 0% Reflective Filter. each one of the renders took about 20-25 minutes to render, so number 1 it would take a great deal of time to animate, 2 there would have to be two renders for each frame, 3 you would have to by hand put the reflectivity layer and color alpha together into a new composite, and 4 the space to hold all the files would be enormous. So, I would say animation would be out of the question... though i would love to see this thing in action
-
Hm... >_> february 7th, quite a while ago Ever since I made my reflection tests with hdr textures, I found that i could easily make a simple environment for a more controlable model reflection. I no longer use materials or environment maps so the reflections now have a depth to them wich could never have been achieved with environment maps. I also no longer use specularity in any of my surface properties; instead, I use Roughness and Roughness Scale to diffuse and scramble reflections and Reflection Filter to make reflected colors closer to the surface color. For the newest Retro render, the designer asked if I could replicate a candy type paint for the car. For that to work I had to figure out a way to combine two separate reflection layers into one. To do this I first created a simple tga render of only the candy paint base coat reflecting. [attachmentid=19105] After that was done rendering, I turned on all other reflections on, and I made the paint surface have no Roughness, Roughness Scale, or Reflective Filter. I rendered this image using a light buffer exr file. [attachmentid=19107] Once the exr file was done, I imported both the tga and the exr into animation master, made a new composite, and then added a Mix Post Effect to the new composite. I opened up the tga and dragged the color alpha onto the Mix Post Effect. Next, I added the exr's Reflection layer to the Mix. [attachmentid=19109] Once the two layers were now together, I saved the new composite as a new jpg. [attachmentid=19110] After all of that testing, I went ahead and decided to make a blue one too [attachmentid=19111]
-
If you're going to use an hdr image for your reflections, than you'll probably want to go with an environment map material, because you don't need a physical sphere model surrounding your model, and you can make your background look the way you want. Also, was your second image rendered with AO? All of your shadows in all of your renders so far are way too light for what they should be. I'm not sure if you're going for a cartoon-ish style sort of look, but, if you're going for realism, all lights should have 100% darkness shadows, and the choreography Ambiance Occlusion settings should be set to 100% always.
-
Oh wow, that's amazing work there eric. I can't believe i missed this. I saw my name in a whole bunch of the previous posts, so I'm sorry if it looked like i was ignoring ya... heh well, your model looks superb, but overall i've completely changed how i work with my car's reflections and so on. Number one change is i no longer use specularity in anything I do. Another thing i changed is I no longer use environment maps for the reflections; instead, i use a luminare patch with an exr texture on it that has an incredibly bright white value on it (about 300% pure white). In the choreography, I have a non-occluding black box that surrounds the entire scene for an environment reflection color. I have so much control over how my renders come out now, and i like them a whole lot better than the old ones. What's great is i dont have to deal with any complex materials and it's also very easy to change colors and reflectivity values, because I dont have the environment maps to deal with. My AO settings are (in the choreography settings) 100% Ambiance Intensity, 100% Ambiance Occlusion (in the render options window) 10% Ambience Occlusion. At 16 passes it took 32 minutes to render the 1024x768 image. The red one has a very diffused reflection wich was created by surface roughness, but i need to find some way to add on a crisp reflection to the paint that will work on top of the diffused reflection to imitate the car wax layer. Candy paint looks awesome, but is so hard to duplicate... at least i'm getting close ._.U I've included a project file with the environment I'm using, no retro though, but the paint should take no time at all to set up; just add a color and reflectivity value (i use about 30%). It's as easy as that Environment.zip
-
Your machine seems very long. If it always stays on the roof, would it not cover a large part of one of the panels? I think a very long very narrow device that spans all the rows of solar panels would be much easier to design, because you would not need to develop some way for the machine to turn and move onto the other rows.
-
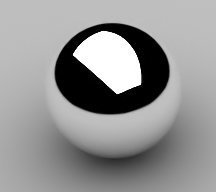
Why not create an inner and outer layer for the sabers? The inner layer would be pure white with a 100% abience intensity. The outer layer would be 100% transparent, 100% ambience intensity, the color of the saber glow, and have a density. This is what it should look like. [attachmentid=17705] The only problem is that when the saber is pointing at the camera or near to it, the inner layer begins to fade due to the density. Saber.zip
-
that's just incredible modeling work kevin! Is everything solid, or are a lot of the things you add just nernies and not part of the main structure? Awesome stuff Jedi.
-
i dont know if it's for the reaction of "OMG A BULL" -- which you really nailed by the way -- but the orange bull jumps right through two of the yellow bulls.
-
AO Intensity acts just like a regular light intensity. It can go from 0% to what ever you need just make sure that AO is set to 100% or else the shadows will not be very dark. Here's a clip of AO Intensity going from 0% to 300% AO_Intensity.mov