DanCBradbury
-
Posts
683 -
Joined
-
Last visited
Content Type
Profiles
Forums
Events
Everything posted by DanCBradbury
-
If you're looking to preserve the AO look but need the subject brighter, just remember that there is an intensity setting for AO
-
Wow, that looks beautymass, Jeff. Why did you need to use photoshop?
-
Magnitude is how rounded you want a spline to be. A high magnitude means more rounded, a low magnitude means more peaked. You can turn on the magnitude toggle here: Here's an example of what changing the magnitude does. I turned on bias handles to show you what exactly it's doing. Changing the magnitude to a low value will give your objects a more flat look, but at the same time you get a nice semi rounded look at the seams instead of a harsh and sharp edge if they were peaked all the way; however, your model has to have splines that if unpeaked have curves, or else changing the magnitues will do nothing.
-
I cant tell for certain, but judging from your normal map i believe your y-asix is flipped. This would cause your webbing to look sunk into the body, where in other areas it would be protruding (because your x axis is fine). Any verticle webbing would appear normal, wearas any horizontal webbing would be dug in. I think that explains it Here's the sphere normal map is use when ever i use aavers normal map material. Notice that green should be on the top, red on the right, and blue on the left. You can Turn the Z-axis off if you want --it wont change the look of the render-- but if you ever want to use your maps in any sort of video game or use the photoshop plugin to reverse them, the Z-axis will have to be on. Looking good Zaryin

-
Are you trying to replicate the claymation look, like Wallace and Gromit? If so, i think your height values are way to large. I think you would get a much better clay look if you went with a more subtle hight value than the super blobby look you have now.
-
The animation is great Stian. Remember, You don't have to take bazillions of images of your home; there is a way to get a quick and easy environment map by taking a photo of a chrome sphere placed preferably where your objects will be. The only problem that i see with your render is that your shadows are grey and they are to uniformly dispersed because they have no real hardness, which would have been coming from the light above; however, even if you used the IBL setting in the AO tab, your shadows would still be inaccurate. The only way to get real shadows and shadow color is to use the archaic IBL technique, because the current IBL has no raytracing ability. Still, it looks good I think you missed this thread High Dynamic Range Imaging
-
I dont advise adjusting the bias handles. You should really only adjust the magnitues, which is a control to the right of the bias handle toggle
-
Cant wait to see the cabin built crop the image, then go to Image>Image Size and there you go. Make sure it's set to Constrain Proportions.
-
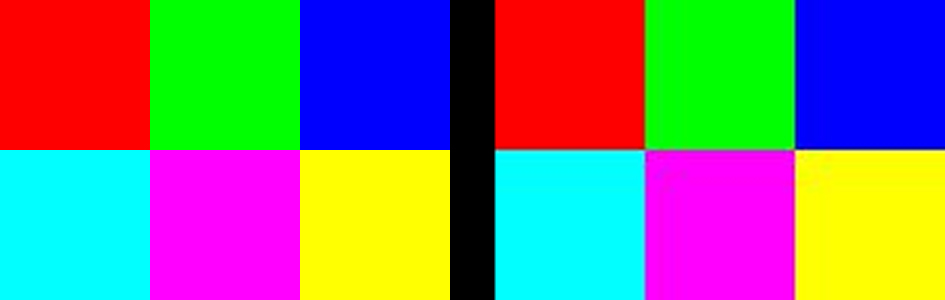
That's a great model Kevin. I love the detail work you've put into it. Microsoft Paint, when you save an image as a .jpg, sets the image quality to low. This creats noticable noise around edges of coluor due to jpeg compression. In photoshop you can save a full quality jpeg which will have absolutly no noise present. The image I provided shows what paint did to a RGBCMY color pallet when saved as a .jpg. The pallete on the right is full quality Photoshop and the left is MS Paint's output.
-
 Well you see, the anomolies you showed above are a problem. They shouldnt have happend unless the 5-point patch was concave, which has always resulted in anomolies; however, this problem is happening with all 5-point patches regardless if they're concave or not, so it is a serious issue that i hope will die very soon... please kill it mr. hash... kill it good
 -
Those are some awesome models Serg, though that environment map is not an unwraped dome photo, which is creating a peaked reflection on the adbomen of your spider; regardless, your models look fantastic.
-
lol you have a good memory. Yes i know how to create a default chor. but that doenst help me when i need a bagillion different lights in a scene XP oh well... i guess i'll just keep chaging the values for each light. lol
-
Hm... i only ever saw the awesome battle sequence everyone raved about in Lord of the Rings Ambient Occlusion is a lighting technique much like a sky light rig, except there are no lights and the generation of shadows is purely a mathematical procedure, and it is very fast; however, for your project you may or may not need or want Ambient Occlusion. It gives the render a much cleaner and more real look, but it is up to you. Also, for your cloud, why not just use a shpere, morph its CPs until you have a cloud like shape, and then give it transparancy and a high density value? I think that would help you out, as your clouds right now look a little akward.
-
Yeah... i wish martin would set the default light darkness to 100%... that always gives me a headache when i'm trying to do radiosity or testing some new lighting feature and cant figure out why my shadows are all screwy @_@ Anywyas, the 5-point patch problem is widely known at this point. The Sully model recently produced in A:M and rendered with AO show the same artifacts that you have on your fireplace. One person said that even though the problem is a known bug that you should post an error report anyways to set the priority with the hash crew. Looking much better now Eric.
-
You didnt know displacement maps casted their own shadows? That's one of the coolest features about displacement maps ⌐_⌐ anyways, it does seem like there is a light comming through your chiminey. You only need one patch to stop light, so you dont have to build double thick walls to make sure your chimney is sealed. Make sure your light setting has both 100% darkness shadows and 2 ray casts: you do this to break up banding when you render with multipasses. looks good eric
-
pretty interesting set up... not really sure what's going on, but wasn't this an extra credit assignment you were doing for your lass about half a year ago?
-
I think your lights aren't casting shadows, because no where in the scen can i see any sort of defined shadow anywhere. You may want to check and see if the light shadow darkness is up to 100%. Very cool fireplace. Did you use the new displacement tool for that?
-
Railroad Station Waiting Room
DanCBradbury replied to R Reynolds's topic in Work In Progress / Sweatbox
That's a a great model. Isnt the entire room built though? I remember old shots of it and you could see the cieling and all the groin vaults. Looking super. Are you using radiosity with this, or AO? -
Somehow things are getting a bit blurry?
DanCBradbury replied to Eric2575's topic in Work In Progress / Sweatbox
College got in the way of that Remember, that when multipassing is turned off, the default antialiasing will take over. This could be giving you your crazy bluring... but i really dont know what i'm looking at. One thing that is rather odd, though. The shadow made by the shelf in that last pic doesn't seem right at all. wow jk Raytraced Shadows are the most acurate shadow type, and are best used with either very low raycasts and high multipasses, or very high ray casts and very few multipasses. If you use only 1 ray cast (the default in A:M) you will get an undesired banding effect if you have multipasses set higher than 1. To prevent this banding make sure you always have at least 2 ray casts; this will result in a noisey shadow, which after several passes or a very high amount of ray casts will disappear seamlessly, resulting in an acurate light penumbra. Raytrace shadows in their grittiest faise look like this. Z-buffered shadows on the other hand, are a very complicated and can be a verry inacurate form of shadow; however, they render incredibly quick, and very efficiantly. My understanding is that Z-Buffered shadows allocate a certain number of pixels to each object or patch making the shadows somewhat pixelated or banded, but I know very little about z-buffed shadows so i will let someone else explain them. I dont want to be spreading misinformation -
Somehow things are getting a bit blurry?
DanCBradbury replied to Eric2575's topic in Work In Progress / Sweatbox
Hey, welcom back Eric. You were gone for a month, how been man? Anyways, from what i can tell with that render you posted, there isnt really any bluring at all. The soften in multipass is used to make the image less pixilated, and I dont think it would cause widespread blurring like you said it's doing. Great model you got there. -
that is just amazing work Jeff... you're scaring me with your awesomeness
-
How did you lock all the cp's zaryin?
-
Hey Scott. Nice work so far on the car. One thing I don't understand: how is light penetrating through your hood and onto the motor? Are you lights not set to 100% darkness? Anyway, very very good work so far. You may want to make the headlight glass have a slight index of refraction, maybe say 1.5. They were crown glass back then, not plastic right?
-
That's a realy cool effect with the breast plate. How did you achieve the beaten steal look? Was it a material, or did you make maps for all of those? The only thing i see that you might want to change is his skin looks a little too shiney... unless he's in battle, which then it looks perfect
-
oh... no wonder the striations looked so good. sometimes when using final gathering with photon mapping striations begin to form on all the surfaces giving it a stainless steel kind of look to it. Here's a matte-white render i did a while back that shows what i'm talking about.