DanCBradbury
-
Posts
683 -
Joined
-
Last visited
Content Type
Profiles
Forums
Events
Everything posted by DanCBradbury
-
ok, final render of the room. Now all i have to do is buy the paint and supplies I've seen them in the light probe websites and stuff, but does anyone know of a free program that allows you to import your own 360x180 images, view them, rotate around, zoom in, and all that it in real time?

-
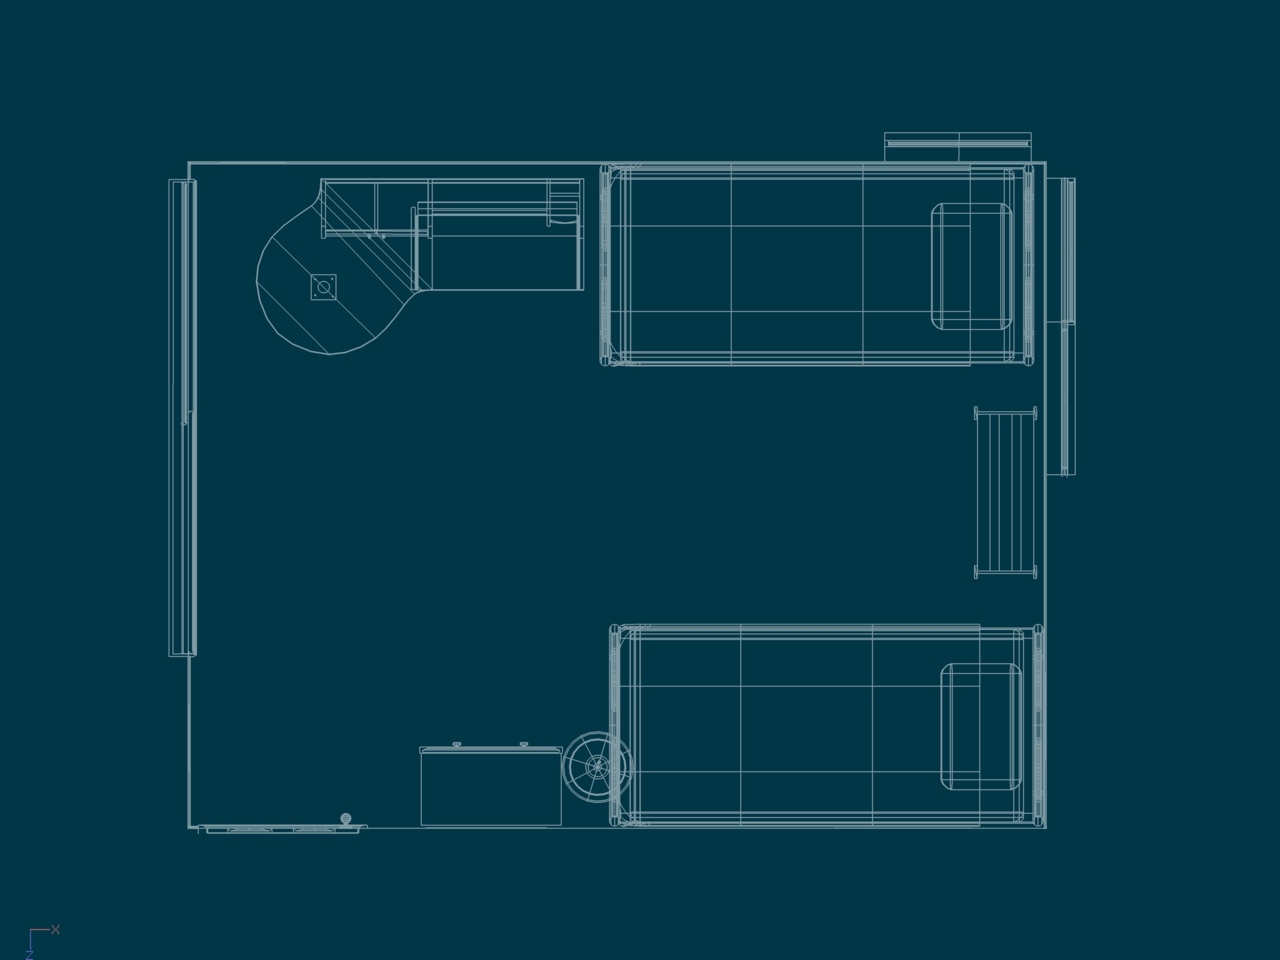
after a lot of tinkering and even removing some firniture, I was unable to come up with a decent arangement for the bedroom (if only there were one bed >_<) The shelf is not actually a book case though, it's just for trinkits and little memory things, so it can be removed from the room if need be. If you'd like to take a stab at the room feel free, here's the top down view
-
Hm, a furniture rearangment would be a very welcome change cause it's been like that for 5 years now. The main problem is space. With the furniture being so large, it's kinda hard to get an aragement that's any different, as one of the walls has to be completly clear, because it's the closet :\ I'll try out some different furniture combinations and see what comes out
-
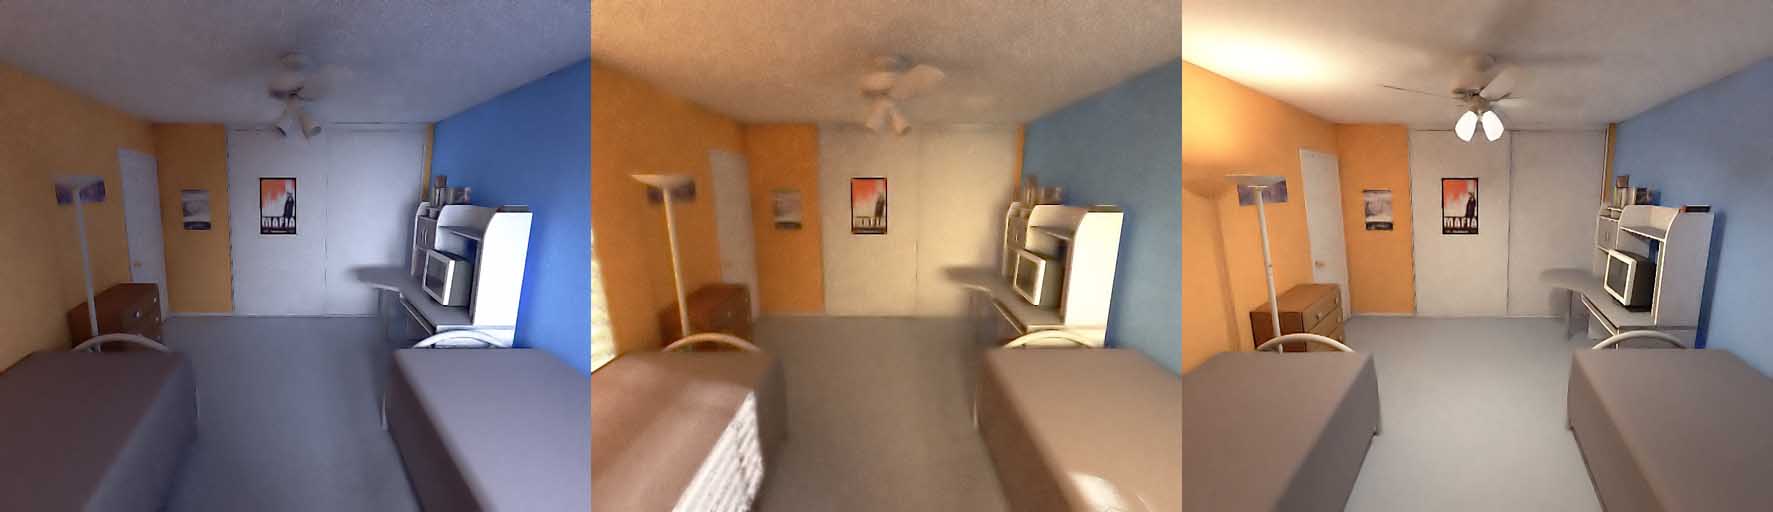
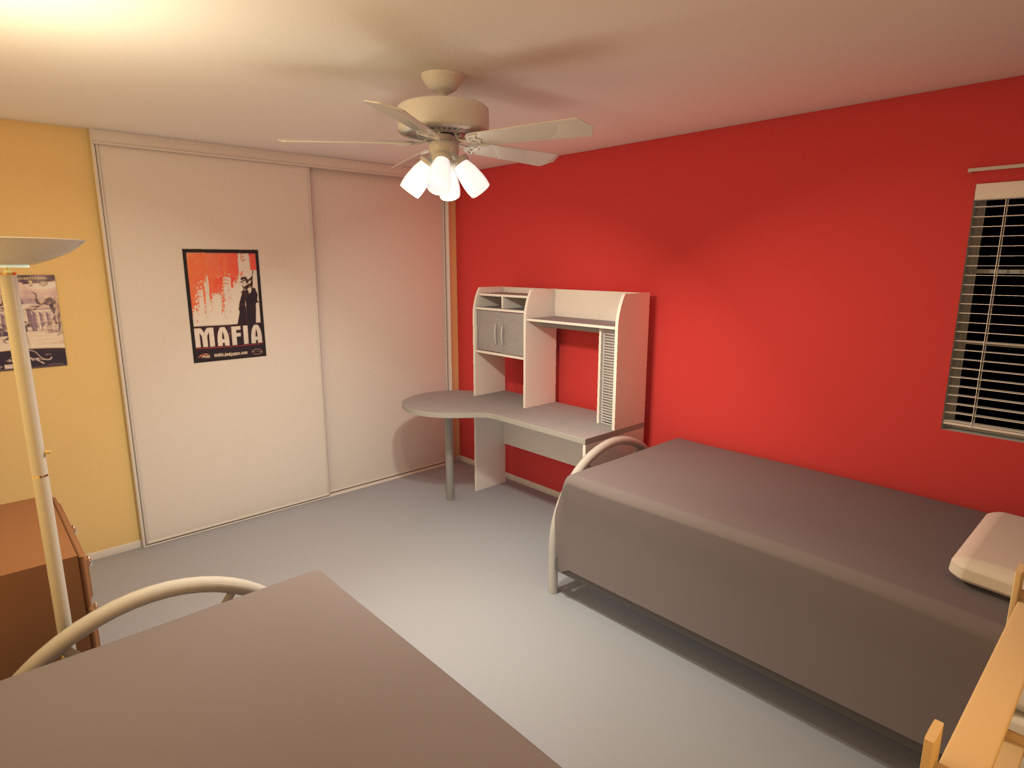
oh boy... neon green would be killer on the eyes for sure I think i found the color combination i want. All three walls except for the one on the right are peach-orange, and the right wall is a dark pastel blue. I rendered out three pictures for different times of day. It goes from mid day, evening, and then night.
-
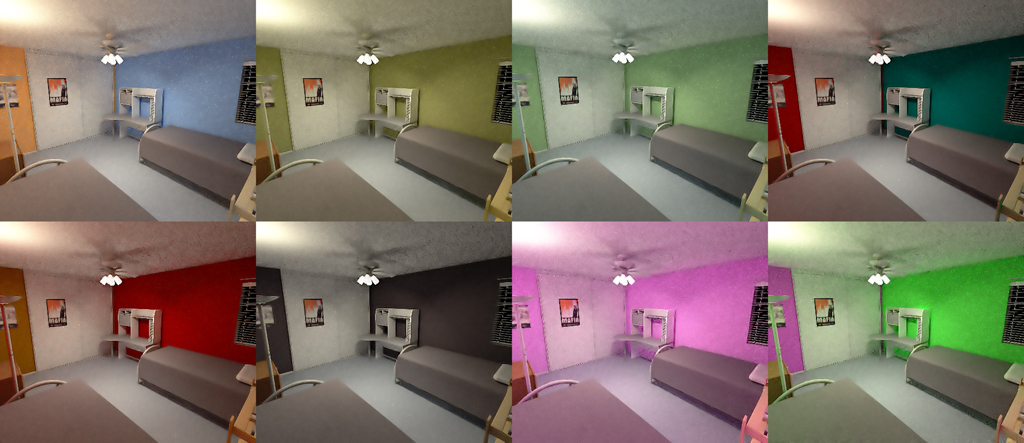
hm... nope not 49'ers fans, though red and yellow is used for pretty much all of the major fastfood restaurant in the world. Matt made a whole bunch of color variations; the blue and orange one looks pretty cool, not sure about the solid pink though (ó_ô)
-
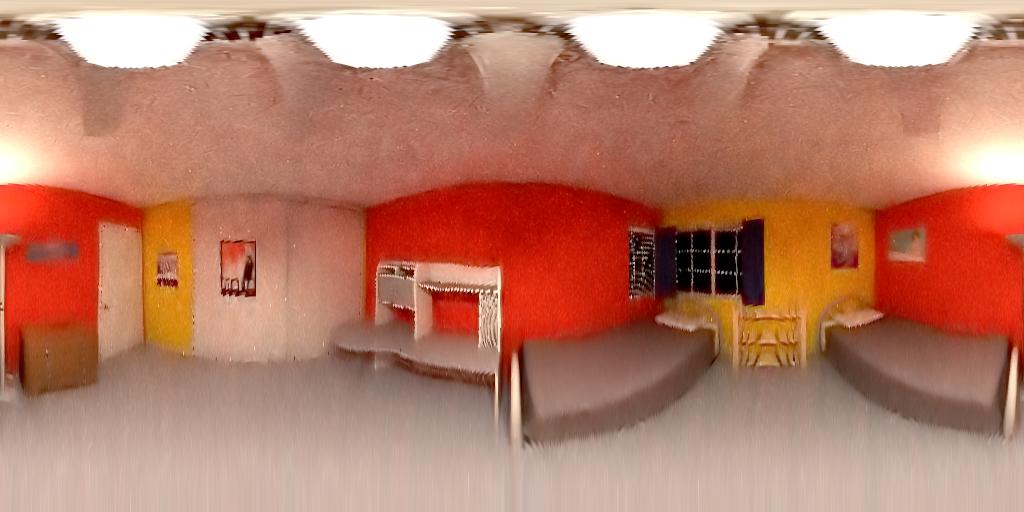
I cant seem to quite find a perfect color combination. Does anyone know of colors that are psychologically best for a bedroom or somewhere where you spend most of your time? I keep coming back to red and gold, and the room then resemble a McDonalds I did a really quick orb render to show a full 360 view of the room, but it's pretty grainy Orb.mov
-
A:M renders can go very fast, i just chose to use the max settings so i wouldnt have to use a noise removing program like neat image ó_ò
-
Well, the render settings for radiosity were at max, because i was going to bed anyways, so it took about 8 hours to render; the desk was made a while back in one of my really early introductions to radiosity, but the rest of the scene took the better part of 6 hours to measure out, build, color, texture, etc. There's still a lot more i want to do with it though
-
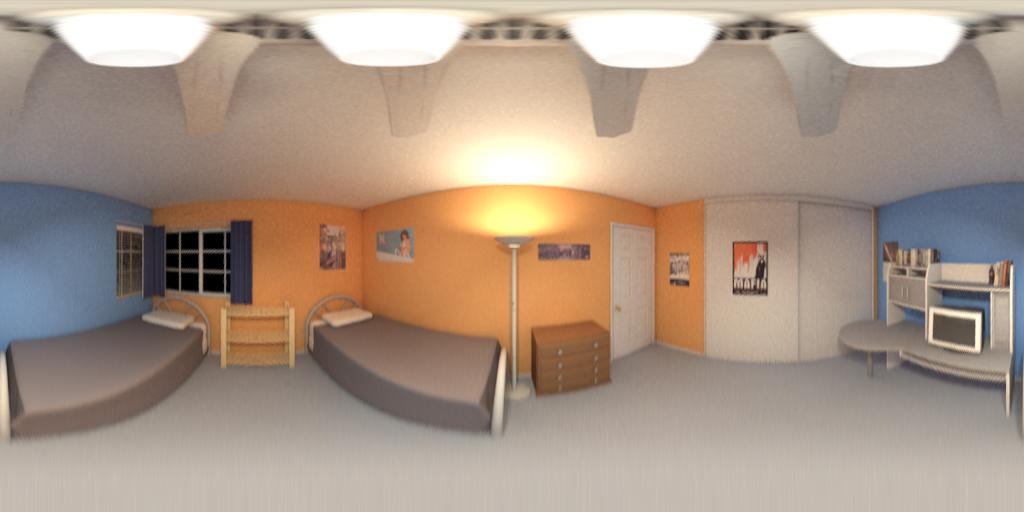
In trying to decide what colors i want to paint my room, I'm builing a full scale replica of it in A:M to see how each color choice will effect the rest of the room. So far all i have is the basic furniture and main structure built. I'm not sure if i want to go as far as modeling every little trinket i have on my computer desk or shelf, but I may just end up doing that for the fun of it. Matt built the bed for me, but i'm gunna try and make it not look so perfectly beveled, texture it, and give it a not so boxy pillow. anyways, here's the first render I've made so far.
-
if only the unicorns would leap into my computer in the form of scuff mark decals (T_T) i scoured through that entire site, very cool, and i learned some new stuff about photoshop, but there weren't any floor scuff decals anywhere I just found a picture of the hallway, and I think my floor needs to be a lot more mucked up, and way more wavy.
-
I used an array of 26 Klieg kights for the hallways luminare. I thought diffuse was only for color? A texture would probably be better than a material, but i think a reflectivity map would be more usueful than a diffuse map.
-
thanks ken. I wish i knew a better way to create scuff marks on the floor. I used an fbm turbulance, but it just looks too uniform like clouds :| i think it's because this is the movie's cg doppleganger
-
The sol system is extremely dark. I've seen pictures of the milky way from earth where the exposure had to be left for over 60 minutes. cool effect though
-
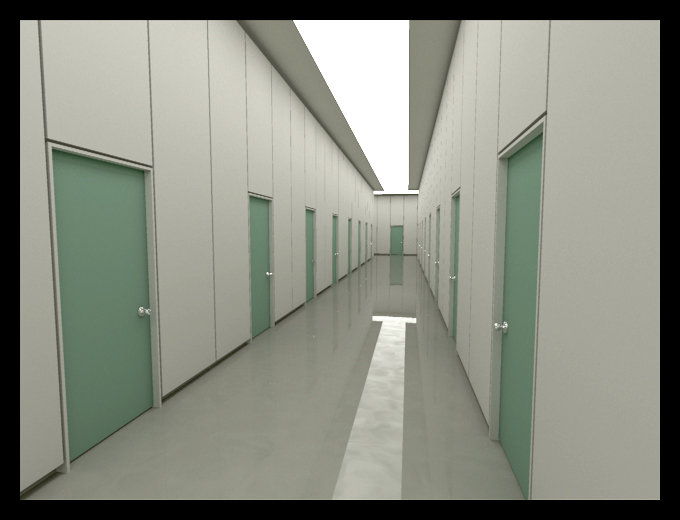
I was messing around with radiosity again, and then ended up building the Programmer's Passage from the Matrix. Years ago I had built it once before (lost in the great computer crash of '04 of course), but without radiosity, the scene never looked right. Anyways, here's the render and project file if anyone wants to take a look at it. Matrix_Hallway.zip
-
Hm, that is very large. I think a 1024x768 resolution version of the planet textures should be good enough, but what ever tricks your using for double layering effects and what not should still be included, at least for the earth one. i guess there's a low limit as to how much any one user can post, because the only buttons i have are: my profile, FAQ, Logout, Album list, last uploads, last comments, most viewed, top rated, my favorites, and search.
-
For a tutorial, i dont think you should skimp anywhere on how you got your final product, unless there are some trade secretes you dont want to get out. I for one would really like to know how you got the realistic looking earth. All the times i've tried to recreate Earth it always turns out looking rather plane and dull. Yours has really 3d looking clouds, and i love how the west coast is all lit up. Very cool also, how did you add all those images to the AM:stills? I've been looking for the past 2 days for the upload area in there, and it seems to be gone now :|
-
>.> <.< Environment maps cant provide light 0.o? Having a smaller specular size will make it look more like metal, but I've always said that the realest reflections are those that use no specular at all; however, it's not always easy to work with, because you'd have to create a light source reflection object (normally a sphere), have it the same color as your light, position it behind your actual light, set it to have no animation options but reflectivity, and apply a very bright ambience map image to the patches of the reflectivity object (by the way i do have a set of very bright EXR images if you want them. they vary between 100% to 1000% white). Also, instead of an environment map (because they're just so dang hard to control and animate with) I would go with an enormous hemispherical dome, with your environment texture pasted on it. That way, if your car is turning or moving around, the environment reflections wont stay centered and aligned with the magnitude and direction of the vehicle like an environment map will. Something that caught my eye right off the bat: the back window frame of the driver side door (the left side is the driver side right >_>?). It doesn't match up smoothly with the front window frame of the rear driver-side door. Anyways, that's a very cool looking car Xtaz. So what's in store for her?
-
He kinda remindes me of the godfather for some reason. I'll give you an offa you cannot refuse.
-
That's a cool yoda model! How come his ears are identicle? Anyways awesome work, ken!
-
it took about 5 minutes to construct the wings and engines, but the propeler blades didn't come untill after I showed the designer. He was kinda flabergasted on how fast i was able to make them, when the whole car took several several tens of hours to build
-
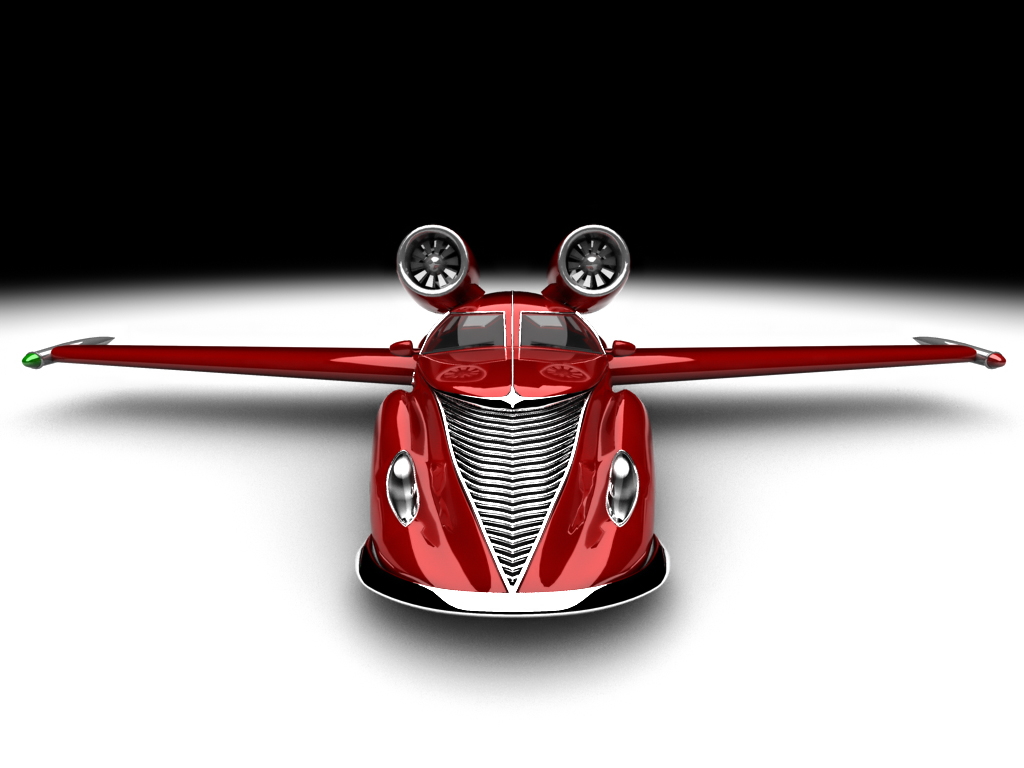
Strange how i keep coming back to this model. I was surprised to find out that I never added a picture of the retro to the A:M stills, so I started looking though all the renders I had, but nothing looked good. So I was going to change some of the settings, get a new angel and then render. Anyways, when I was adjusting the exr brightness so that the chrome's reflection wasn't so bright as to not cause pixilization -- which was a lot of guessing and checking by the way -- I inadvertantly got carried away and added some wings and engines to the car Warning: The Retro Jett cannot fly. Individual results may vary
-
Can someone please think of the children
-
Then wouldn't halley's comet then null out all of the planets, as it does cross all of them
-
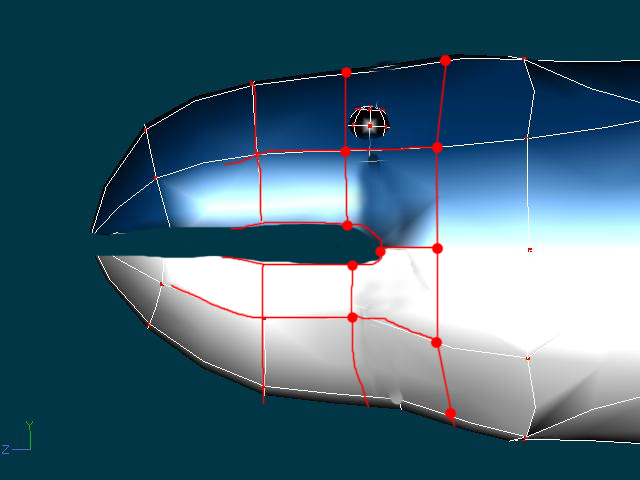
wouldnt there be problems with the 3 point patches? When ever i work with them, the usually love doing their own thing, instead of forming with the patches around them.
-
Ok, you should get rid of the spline that goes all around his head and right at the end of his lips, then create a new spline that is closer to his nose like in the picture. When you do this, select the 5 points that make a patch, and then hit the 5-point patch button on the right side of the screen. Do this for the other patch, and now they should both be solid. hope that help