-
Posts
1,855 -
Joined
-
Last visited
-
Days Won
4
Content Type
Profiles
Forums
Events
Everything posted by jason1025
-

IBL HDR environment map projection map Tutorial
jason1025 replied to jason1025's topic in A:M Tutorials & Demos
Your welcome. I recommend a glass of wine to make the time go by easier. I wish I had the time to plan it out so It was concise. -

IBL HDR environment map projection map Tutorial
jason1025 replied to jason1025's topic in A:M Tutorials & Demos
Ok the first too videos are up. Let me know what you think and if you have anything to add that I missed please let me know. This feature is extremely powerful and easy. -
cant find the link to the new alpha
-
Are we still on alpha 6 or did it go up?
-
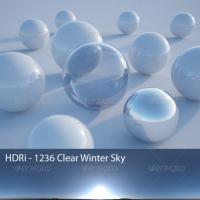
These tutorials show you how to create this type of lighting and reflections. Update. See this short video. Although the video shows what is not working it also clearly shows what is working. The work around to using the probes meaning spherical maps is to just make them upside down in Photoshop. IBL_in_AM.mov This is 1 of 4 more tutorials. IBL_HDR_LIGHTING_AND_REFLECTIONS_Part_1of4..mov Here is the link to part 2 of 6 Tutorial 3 of 6 unwrapping_probes.mov Download hdrshop below under tools. I was unable to upload the quicktime to this site so I had to put it on youtube. Relax and fallow a long on your end. You may need to fast forward through some areas. "Environment shader" does not work correctly in my opinion. Watch the video let me know if you know why. Next tutorials will cover formula for coming up with the correct exposer aka fstop for your hdr image how to adjust gamma on your hdr image how to fix an hdr image that comes into am corrupt how to adjust an hdr image so its beautiful and less realistic how to render out a final image with the ground plane active and AO applied adding more shadows to the render not just ao How to create your own lightprobe, HDR image and place your cg in the image so it looks photo real How to animate using IBL and video as a background plate with moving reflections How to create a CG light probe Had to change the extension to .mov from mp4 to get it to upload Tools HDRShop.zip
-

non-smooth hair color gradients
jason1025 replied to robcat2075's topic in Work In Progress / Sweatbox
looks like a bug. Do previous versions have this problem? -
Thank you nice model.
-
Robert explained it but ill give the same info from my perspective. In live action slow motion is generally done by shooting at a fast frame rate like 48fps or 120 fps or 360fps. Then the film is played back at 24 frames per second the standard frame rate for film and episodic television. This gives the highest quality slow motion. WHen shooting miniatures 48fps or 120fps. The live action miniature needs to move in real life much much much faster than normal speed to achieve the desired effect of proper weight and mass. In CG this effect is much easier. Set your project frame rate at 24fps. In the area where you want to slow down the motion of the cg simply highlight the key frames and stretch them out. Alternatively with slightly less control of ramping the slow motion you could set the frame rate to 360fps and then tell quicktime pro or after effects to play the frames back at 24fps. One other part of the equation which is important but not a rule is motion blur or shutter speed / angle in a real life camera. Depending on what you are shooting it will be necessary to experiment with different motion blurs or shutter speeds. I recommend watching a scene from a movie exhibiting the effect you want to duplicate. Try to copy the amount of motion blur they used. Under normal live action conditions or live action mixed with cg elements a 50% motion blur is normal. In entirely cg movies I think its about 30% This is subjective but these are good jumping off points. For Slow mo I think less is better. Maybe even off in some situations.
-
looks great
-
Looks great. But I think less is more. The floor lights distract from the more detailed architecture and decals.
-
It looks really good. However The bright yellow and blue, being so bright and saturated gives a video game look. But don't get me wrong it looks like the best quality video game out there. In my opinion if you want to get a more photo realistic look make the bright blue on the floor even thinner. Maybe even dim it a bit and desaturate just a hair. Same for the yellow dim and desaturate. Although bright saturated color are initially very appealing, its the flaws of real life that give it its photo real quality. other than that this is an awesome bridge. Now that you have these peaces you can do what they did on the real show and movies. Just swap set peaces to make new stages. Great work seriously.
-
Im impressed. Looks high dollar. My only note would be to make the glowing blue areas smaller. I think less is more with that feature.It has a great look but almost looks like a swimming pool. I think thin pin stripping of the blue light would look cleaner and make more sense.
-
I don't understand what they mean by that. Is it as simple as they were fake? Or was it a play on words?
-
Your surrounded render. I am impressed that I was able to do this with no markers. As you can see the motion is extremely smooth. Your_surounded_.mov
-
Good news As I have been working on comparison videos for a prospective new feature in AM called AMA aka A:M Anseres, I have been intercepting issues new and old and making AM reports for these issues. Attached is 1 such issue that will be corrected in AM V17 Light_Kleig_Option_Volumetric_Brightness_.mov
-
"Did you try it for 3d scanning? If so I can convert the point clouds to an stl or obj for you. Curious how the details are held." I would not know where to start
-
Finally got everything working. One of the rules is that both cameras can not be plugged into the same usb controller. My mac pro has 8 usb ports all driven by 1 controller. So no go on the mac pro. I used my other system which did have more than 1 controller built into the mother board. Attached is my very first mocap. I am extremely impressed. I have the cameras 28 feet away from each other which is too far and they are at the non optimal angles and yet I got this amazing result my first try. This is truly powerful. See attached. You can view it in BVH hacker which is free. Go ahead and have it drive your humanoid model. I am extremely impressed with how smooth it is. No jitter at all. Almost all the True bones motions I purchased had lots of jitter. I wonder if I can run them through ipi to remove the jitter? Well I guess there is no point because I can simple create the move myself as the actor. I wonder if this is a viable revenue stream? Freeze_Your_Surounded_.bvh.zip
-
There semas to be something wrong with my usb drivers.
-
So I finally got everything in the mail. I cant seem to get both cameras working at the same time in ipi recorder. both cameras work just not at the same time. Bummer. I hate Windows. I used to be a hard core PC guy. Now I love mac. My biggest gripe with PC is things like this. Everything is always theoretical. In theory if I get all this stuff and install this software it should work. On a mac. It just works. I remember others trying to sell me on mac. WHat finally made me switch was was people who were not half as technical as me were getting results on mac and I was like did you do this? Did you have to customize your bios, Go into device drivers, get that special capture card? They said no I just bought the mac and plugged in my camera. Sorry about my rant. This always seems to be the case with when microsoft is involed.
-
I have never heard of these tutorials. Is there a link to an example of their AM tutorials anywhere. I dont care which version but I need to see the quality of the tutorials.
-
thanks for the tutorial
-
Yes but isn't the goal to be able to import a poly model and use it? The rotopoligy tool is designed to help expedite that right? So Why not try to go all the way if we can? Speed things up if its possible. I agree a dence mesh is not that great. Except for cloth.
-
I think Steffen is creative enough and smart enough to figure that out eventually. I know its very easy to say coming from my point of view. The guy who does not know how to do it. But in my imagination I would think there has got to be a way to detect the mesh of the polys in 3d space and then constrain the cylinder around that prop. I tired putting a deflector on a prop and then laying some cloth over it but although the prop accepted the deflector it had no effect against the cloth. I tried this on the mac version of AM. I will try again on pc. If this were possible it might be an example of how some sort of detection could be applied and allow a cylinder to snap to the surface of the prop like cloth with heavy friction.
-
I was emailing with Raf the other day. I asked him what it would take for him to make a Face machine for AMV17. He said AM had a special place in his heart, but he also said he had made almost half a million dollars off The Face machine for mia. He said he didn't think he would make enough money for the AM community to make it worth it. Too bad.
-
This feature seams like it has so much potential. From an outside point of view it begs the question can we refine or evolve the feature so that you could lathe a dens cylinder around the prop and have the tool auto snap the cylinder to the prop. The top and bottom of the cylinder could be manually snapped to seal the hole at the top and bottum. Steffen has a plugin that does something similar already with spline models. I forget what its called but its kind of like the old push plugin.


