-
Posts
28,394 -
Joined
-
Last visited
-
Days Won
423
Content Type
Profiles
Forums
Events
Everything posted by robcat2075
-

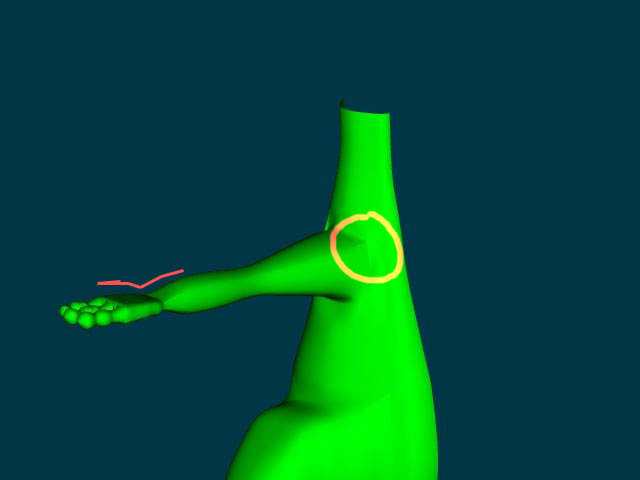
Have attached arm and hand, let me know what you think...
robcat2075 replied to Roger's topic in Work In Progress / Sweatbox
post a wireframe that shows that area. It might just be my imagination. -

no, it's not herbie (vw beetle wip)
robcat2075 replied to kattkieru's topic in Work In Progress / Sweatbox
Welcome back to A:M if nothing else you can save a material out, change the file name and reload it this may or may not be what you are talking about. From Rodney's helpful links page: I think there is a plugin out there that does that within limits but ultimately i think you have to finish it off by sight. a good reason to make your meshed as light as possible. I imagine many mechanical models would not benefit from porcelain. porcelain softens details and you might not want your details to disappear. I guess it depends on whether you want to practice modeling the bottom of a car. -

Have attached arm and hand, let me know what you think...
robcat2075 replied to Roger's topic in Work In Progress / Sweatbox
looks good so far. -the indentation as the arm leads to the hand looks un-anatomical -the crease at the shoulder might be a splinage issue -
"all I got is the clothes on my back" But they look like good clothes! Sounds like the start of an interesting story. I like the head turn at the beginning, it gives a sense o f him being alive. But for the last half the head is rather locked in place with just the facial features moving. That can get zombie. not that you want lots of head swinging, but some slight nods and shifts in conjunction with the shoulders to accent the speech could do a lot. I agree the lip motion could be toned way down.
-
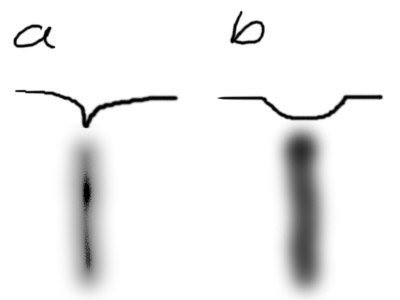
I agree the wrinkles don't look quite right. I would expect wrinkles to have a cross-section more like a) than b ) [attachmentid=18319] maybe all it needs is tweaking your map in a paint program ("curve adjustment") to get a narrower valley and steeper walls. Somewhere around here there's a great tut on face texturing by WIlliam Sutton.
-
It is an interface bug that it is possible to drag a bone in the time line "under" another bone. I've reported it but you should also to AM reports there's no way to undo it, all you can do is go back to the last version you saved before that placement happened. I hope you saved a version before that happened.
-

possible useful feature for new/ intermediate users
robcat2075 replied to Roger's topic in Work In Progress / Sweatbox
I think the "Help" gizmo is a standard Microsoft thing, they (MS) would have to add bookmark ability if it's not there already You can download the Help in a HTML zip, put it on your harddrive and make bookmarks for it in your browser, just like you do for any other site. -
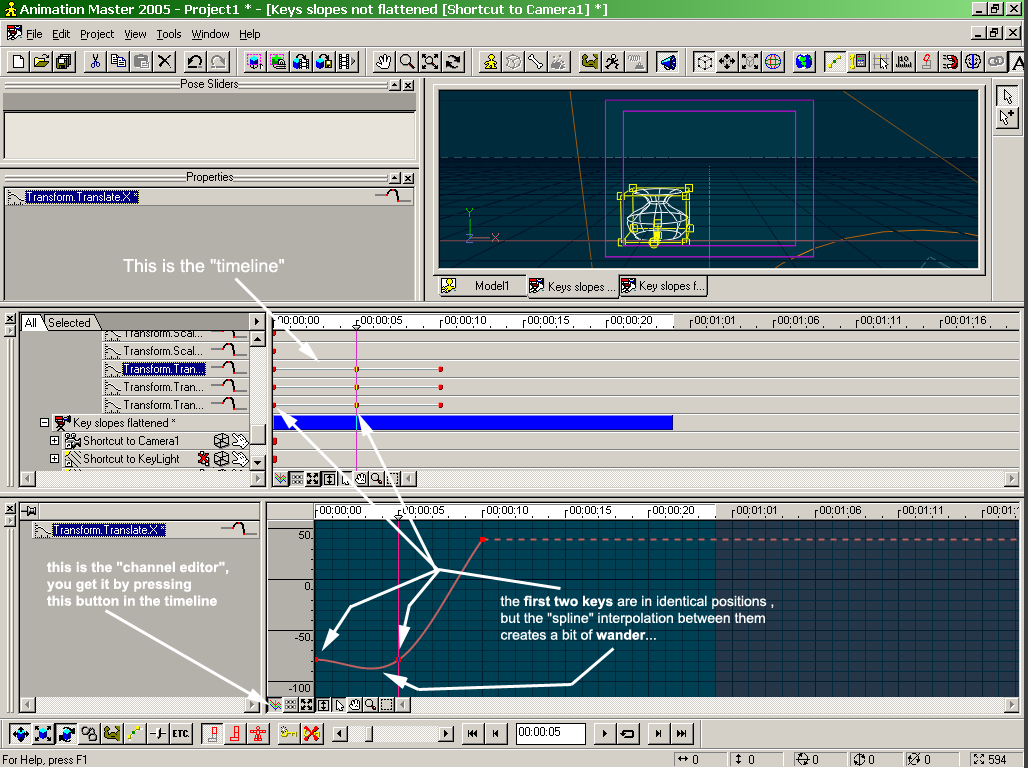
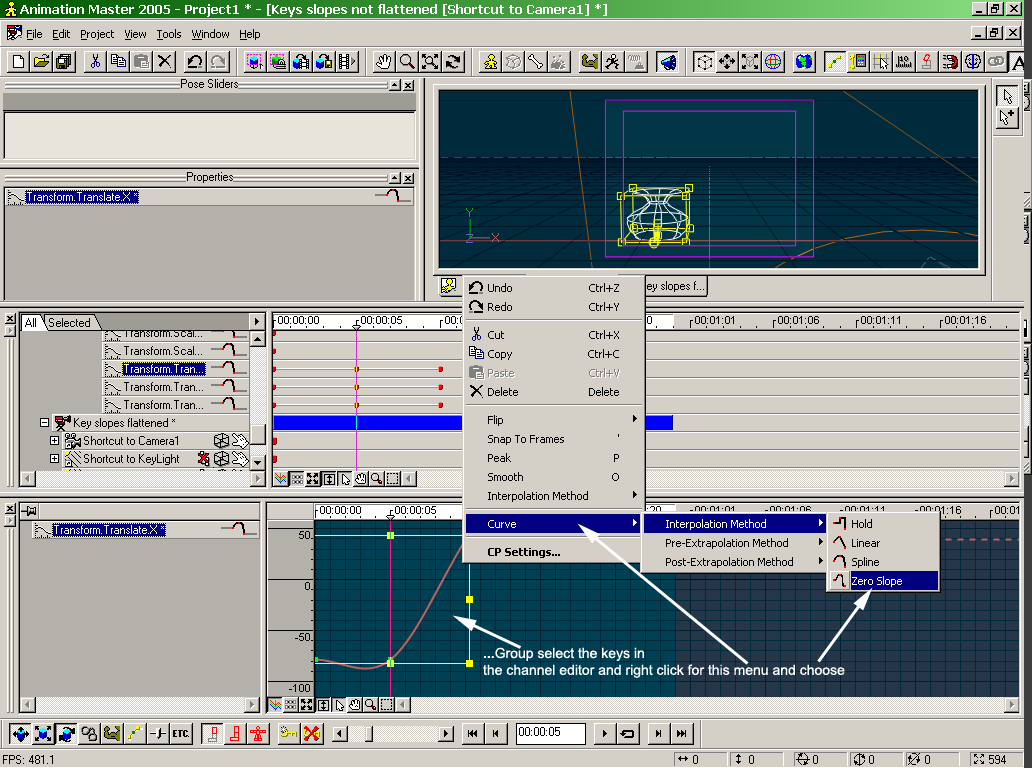
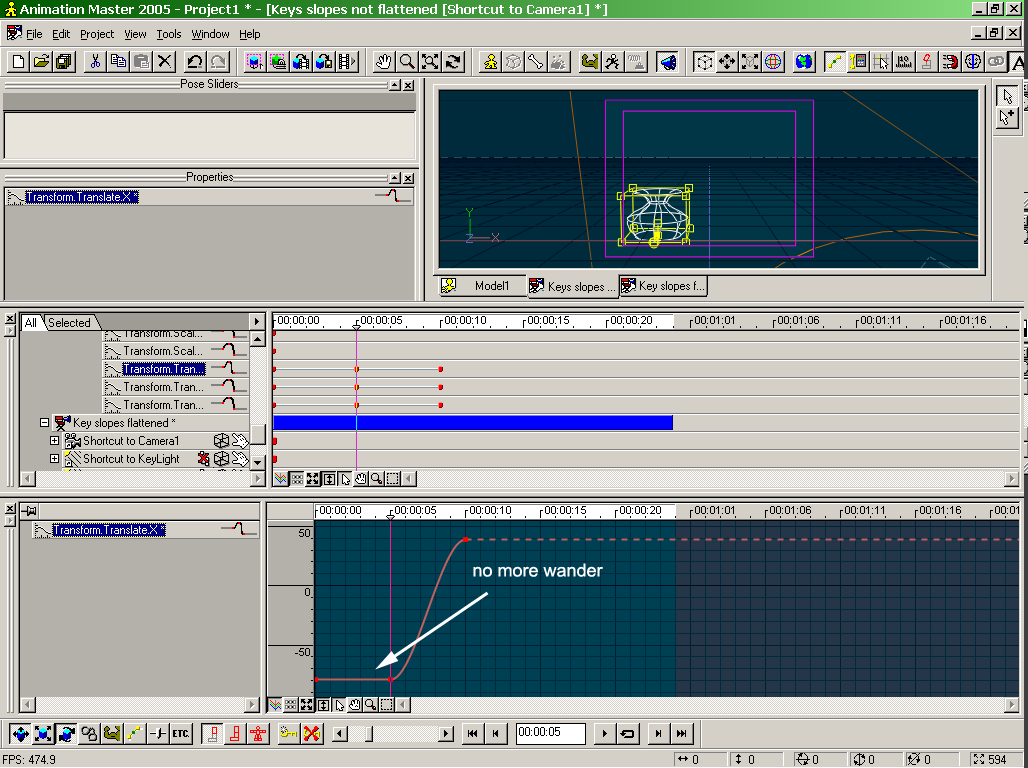
here's how I would do it: -I key my bone at 0:00 -then i advance the time to 0:05 and key the bone again (dont' move it yet!) -then I advance the time to 0:10 , move the bone to where I want it, then key it again. if you do it... that will do it... unless... you didn't do the curve editing Nancy mentioned at the top. Curve editing is huge in computer animation, that's where the power is. you need to use the channel editor: [attachmentid=18225] [attachmentid=18226] [attachmentid=18227] here's the project showing a bone that stays in place then move. Don't look at it without looking at the curves. [attachmentid=18228] channeledittest.zip
-
damn i thought we did this already... first make sure the "left" and "right" bones in your model are absolutely symmetrical and that spine bones are at exact center. (x=0)
-
example of using fanbones to rig an eye lid [attachmentid=18218] I only "animate" one bone, the others follow it becasue of constraints I created inthe model. You'll want to learn more about fan bones and constraints. eyelidbones.mov
-
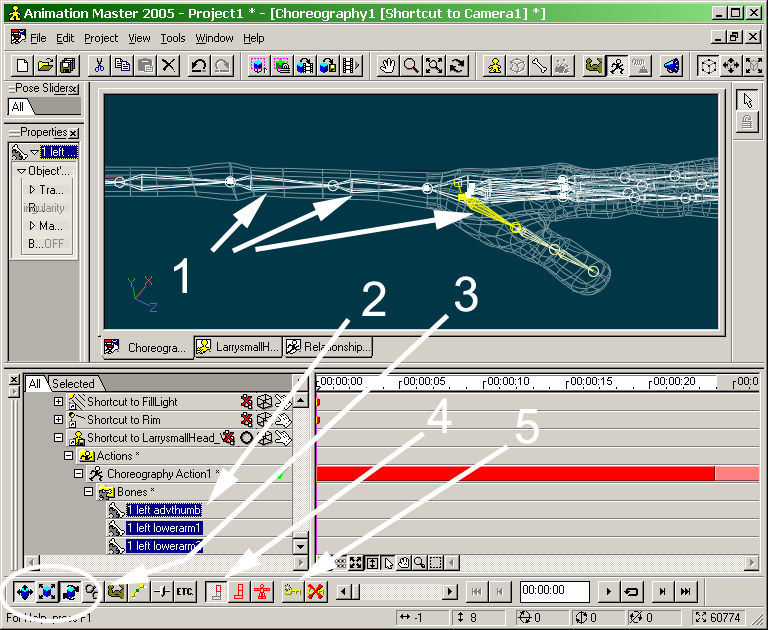
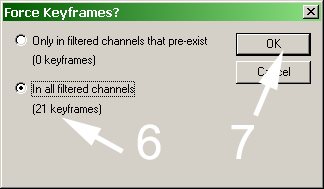
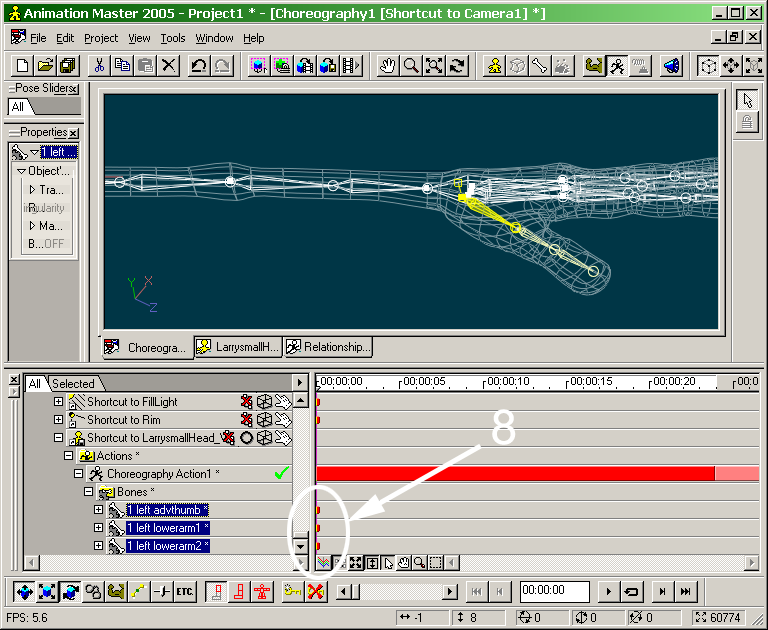
Simple rule: if you want a bone to be in a place for a certain length of time, you need a key at the start of that time and at the end of that time. want to force a key(s) without nudging? [attachmentid=18215] 1- CTRL-select any bones you want to key 2- they will show up inthe PWS timeline 3- select the filters for the kind of keys you want. (probably just translate and rotate for now) 4-select the key bone filter (even though this was meant for single bones , it works for simultaneous selctions too) 5- SHIFT-press the Force Keyfram button (the shift part is important) you get this dialog box [attachmentid=18216] 6) select "In all filtered channels" (this is powerful, this is why you did the filter selection in step 3) 7- Hit OK [attachmentid=18217] 8 keys are created in the PWS timeline for all the channel you wanted and no others. Mission accomplished! Nudging will create keys too, but only one parameter at a time. And there's no way to "nudge" for some of the other parameters that the other filters cover.
-
Zip and post the prj with the non-working pastes and some one will probably look at it. embed all the models before you save it. That's a property of the models, found in their property windows.
-
that looks real good. I wonder how he'll bend when he's animated?
-
Welcome to A:M! You want to take that flat photograph and somehow recapture all the depth that was lost when that flat photograph was taken. That's a tall order, but that's what 3D modeling is all about. If you only need to rotate the object a little bit, you could apply the photo as a decal onto some simple geometry that approximates the shape of the object. If you want to fly all the way around the object and see parts that weren't even in the photo to begin with, you'll need to model the object more completely. You can use the photo as a reference; if its from a good angle you can even import it as a rotoscope to help you get the proportions right.
-

Starting Actions on Specific Frames / Transitioning Between Actions...
robcat2075 replied to Laconic's topic in New Users
If you could zip the project, including any actions and models, someone might be able to diagnose it -
keyboard shorcut "r"
-
After you draw a bounding box around the splines you want to C/F/A... shift select a CP that is on the axis you want to flip over
-

STAR WARS: The Battle Of Mygeeto
robcat2075 replied to Dark_Jedi's topic in Work In Progress / Sweatbox
Wonderful looking models! Be sure to animate them wonderful too! -
Great looking stuff! That's the way to drop in and solicit help on a project! I'll be curious to see what the motion of the face will be like since the texture suggests a wood carving.
-
Well, that looks like a huge undertaking! I think you should be pleased. There were some very effective shots. I'll admit I had trouble following the story, but I dont' know much about the Star Wars or Highlander mythologies so maybe that's why.
-

Star Wars: Banking Clan Communications Frigate
robcat2075 replied to Woloshyniuk's topic in Work In Progress / Sweatbox
Looks good. Don't forget the ATM machine. -
Hey, that looks good. Did you ever consider a brush like those car-duster things? Would save on water. Try to hire a cleaning lady these days and the first thing they say is "I don't do rooftop solar panels."
-
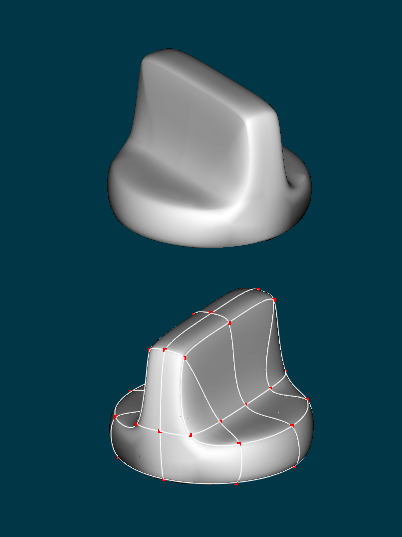
updated knob with somewhat reformed splinage: [attachmentid=17817] much bias tweaking remains to make it smooth Start a thread and post some wireframes. Someone will jump in with suggestions.VFKnob05.zip
-
Simplest topology I could come up with [attachmentid=17808] If you don't need to get very close to the knob it could work With more splines following the contours you could reduce the area of the 5 and 3-pointers and hide their smoothness problems. model: [attachmentid=17809] edit: never mind, I see you found a solution VFKnob01.zip
-

found an old index page for my site
robcat2075 replied to johnl3d's topic in Work In Progress / Sweatbox
I really like the musical note sprites.


