robcat2075
-
Posts
28,253 -
Joined
-
Last visited
-
Days Won
401
Content Type
Profiles
Forums
Events
Everything posted by robcat2075
-
You will be appalled at the state of this but I've got the core concept working now and i think I can get it finished. WeSail.mov
-
One quick rule. You jump by pushing your body away from the earth with your legs and hopefully get enough momentum built up to keep going after your legs can't reach the ground any more. The fastest the body will move will be the last instant that the legs can reach the ground to push. After that, there's no push and gravity immediately begins to slow you down. If the body moves faster up after leaving the ground than it ever moved during the push... something is wrong. It can't do that. Damn near impossible, except for birds and flying saucers.
-
Looks promising!
-
OK, I will get you some comments on that! And if anyone else has comments, don't wait for me, have at it.
-
Eyelashes with the fringe on top!
-
The vid looks like it's working. The vid looks completely different than the pic. However... - you can get dramatically smaller files by not leaving the Quicktime compression codec set to "Animation". Choose h.264 or MPG4 to try. -did you peak all the CPs inthe cloth? it looks like a bunch of square tiles instead of a continuous splines.
-
My character jumps up in the air and lands again. Your character jumps up in the air and lands again. There's a lot in common. Do this... do one broad jump seen from the side. Jump and land. Just that much and post that and we'll look at that.
-
Copy the v15 master0.lic file to your v16 dir after you do the install.
-
i toyed with it a bit, but nothing robust yet. Is there a way to turn "attached to parent" on and off?
-
Jumping is a basic but still complicated motion. It's difficult to get it all right on the first try. I made some notes on jumpin a while back... http://www.hash.com/forums/index.php?s=&am...st&p=304249 take a look at those (mostly just the notes in white for the extremes) and tell me what you think you missed.
-

Techical Help with Decaling Needed
robcat2075 replied to UNGLAUBLICHUSA's topic in Work In Progress / Sweatbox
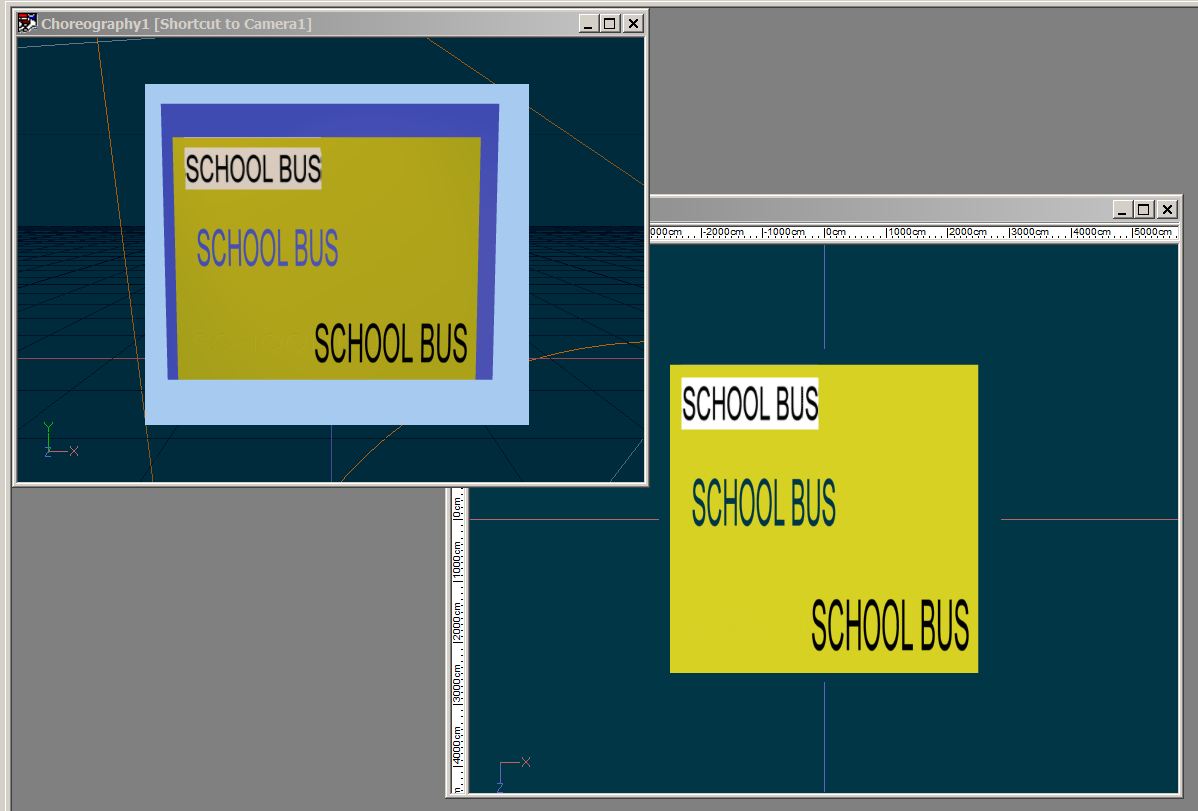
Can you show an example? -
Different programs seem to interpret and create PNG transparency differently so i avoid using them with A:M. However, when i test your PRJ I don't get any missing geometry. Is this what you intended?...

-
300 downloads! Thank you! Don't miss out on the next forum project, coming sometime soon.
-
One found rule: CPs must belong to a patch. This means no "hanging splines", which are rare today but were common before hooks and five-pointers. Also, you can't apply cloth to a single spline of CPs. Hooks sometimes work and sometimes don't.
-
Trying things is half the fun of A:M Almost any topology can be "cloth". Square meshes get the most intutive results. Irregular curved shapes can be had by using a transparency map to hide ragged corners of a grid.
-
Thank Jason, he made it available.
-
Cloth is now a "material" Make a new material, a cloth material, and apply it to a group. TAoA:M introduces making a cloth mat in "Wave the Flag" I believe there's a Tech Talk in the Tech Talk section on Cloth.
-
The good news is that's all definitely do-able with A:M. The people textures would have to be made in a paint program but the object textures could also be done with "materials". You'll just need a good eye for it.
-
I wish I had the sense of texturing that they have. It's very interesting to study. pic #1 : the woodgrain effects are the most obvious of the whole set but those are still very slight. #2: note the slight light and dark patches on the ground and cloth canopies to make them less monotonous. Blue fog in the distance #3: the guy with the cleaver has a few pink accents on his skin in places to make him less perfect. #4: the wall has just a few rectangles of color to suggest bricks. Notice how the boxes holding up the table look like they are getting bounce light from the ground. I don't like the left guy's hair. #5: It looks like they've painted spec reflections onthe piece of wood at the very lower right corner. In all of them the shadow areas have significant bluish cast.
-
Your model still lives in the chor even though it has an action on it so you will be able do the cloth sim in the chor.
-
It's not Toon render, that generally means a black line around shapes and flat shading. I think there is AO, you can see it most in the very shadowed areas. also the ambient light has a blue cast to simulate sky light. They've textured very carefully to make surfaces interesting without lots of realistic detail. those are my first observations.
-
You may have to post an example case model, with the bitmap. I suppose you could change the repeat to a negative number to flip it.
-
Techical Help with Decaling Needed
robcat2075 replied to UNGLAUBLICHUSA's topic in Work In Progress / Sweatbox
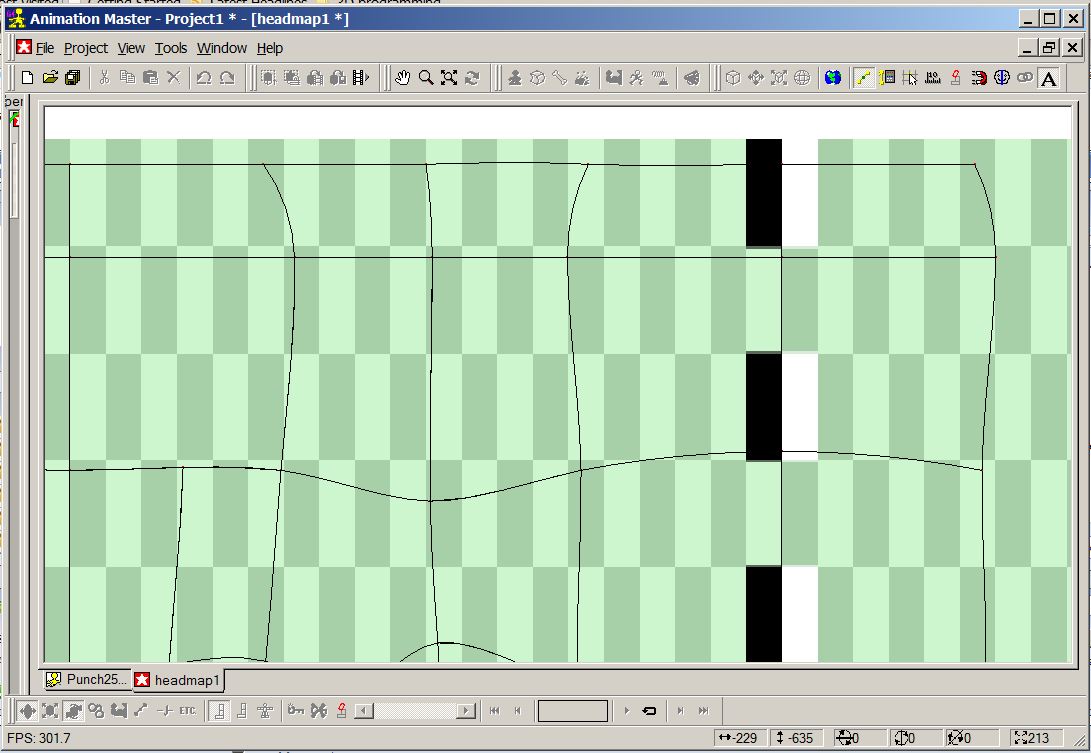
I'm still not sure what your workflow is. Here's what I'd do, using my previous puppet case as an example. I'd modify my scratch cyl map to make the left and right edge obvious Now when I look at the UV view in A:M its placement is clear: (I have set Tools>Customize>Appearance to "Macintosh1" for its black spline lines and small CPs) Want a higher res view of that? Zoom in to the upper right corner and capture... ...then pan and capture the other three corners and piece them together in a paint program to get a high res version of something like this... In the paint program copy over the parts of the wireframe that are not in the center tile of the scratchmap... ... to get something like this: Crop that down to the bounds of the center tile of the scratch map: Now you have something high-res you can paint on in your paint program. When you are done painting swap it for the scratch map in A:M
-
Here is Jason Hampton's tutorial on Cloth Attach Groups: Cloth_attached_group_animation.mp4
-
Here's a guy on the Daily Show playing a more conventional sax and getting a fair amount of movement in. At about 4:22: http://www.thedailyshow.com/watch/wed-june...?xrs=share_copy