brainmuffin
-
Posts
771 -
Joined
-
Last visited
Content Type
Profiles
Forums
Events
Everything posted by brainmuffin
-
You're better off hiding everything but the geometry you want to stamp, and then flattening the geometry in an ACTION to stamp it. try to get the geometry organized the way you want in the action, BEFORE you go into the UV editor. The rectangular selection in the UV editor is really just there for moving stamps around and scaling them.
-
I hope so. I paid good money for TSM2, and I'd like to at least rig one figure with it... I'm taking a break from this guy for a little bit, though. I need time to *win* the architectural challenge for February... I'll be back to him soon though.
-
you might also be interested in A:MTerraform: http://www.tachyonburst.com/software/amterraform/
-
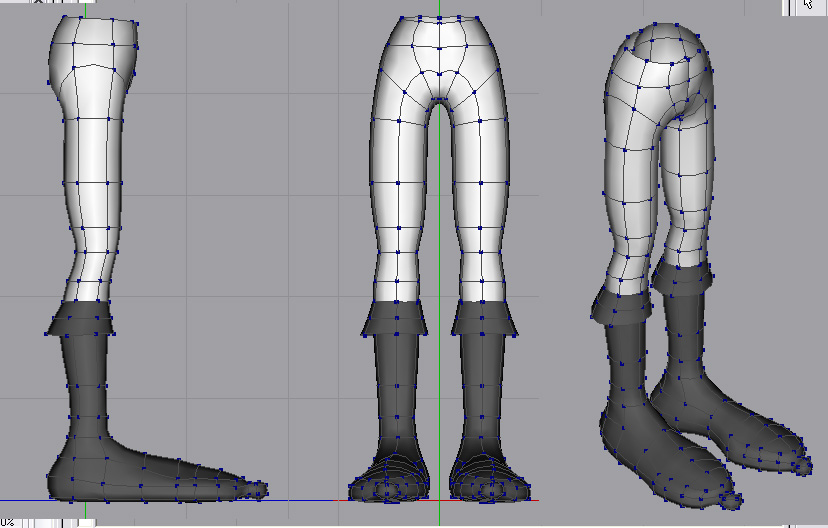
I managed to find a few hours today to work on this guy. He now has legs! I don't think I'll have a problem with the knees or the ankles, but the hips are always a bit of a problem rigging for me. Any suggestions? Also, I'm planning to use TSM to rig him, does it work in 14c?

-
Two great books on cartooning, and must-haves for character designers: Cartooning the Head and Figure by Jack Hamm How to Draw Cartoons for Comic Strips by Christopher Hart The first one is old, it was originally published in the '40s, so some of the clothing and hairstyles are out of date. But the book is so chock full of information and inspiration it's worth every penny. It covers so many subjects and so many different styles that it's nearly an encyclopedia of cartooning info. It even has a huge, cross-referenced guide to various expressions! The second one only covers a few simple styles, but it too covers a variety of subjects, including quite a few standard cartoon animals. The styles covered in this book are fairly easy to model in A:M, and with this book and a scanner, you should have enough reference for quite a few models. I was planning on doing this myself, but I havent had much free time lately.
-
If I'm not mistaken, though, you can create something with photoshop splines and export it as an .ai file. I'm fairly certain I've done this...
-
Couldn't you have saved a TON of time just making the image map in Photoshop? I think I could knock that out in like twenty minutes...
-
You could probably get away with removing one ring from around the eye.
-
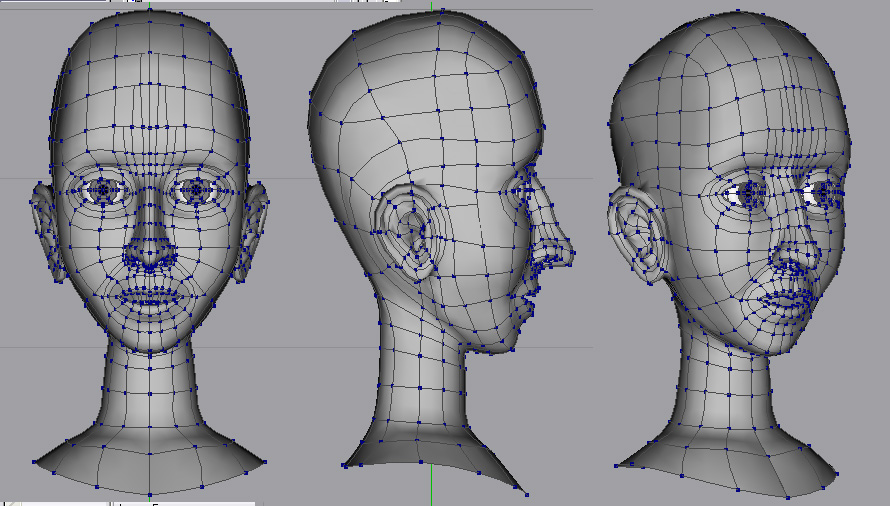
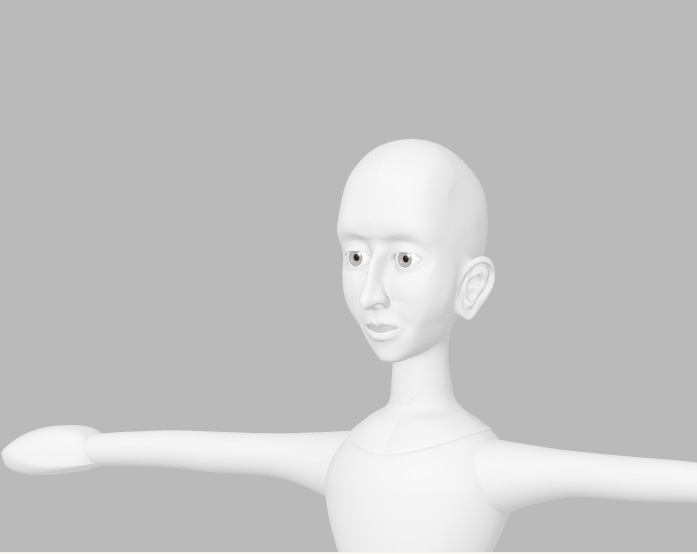
Taking C&C into consideration, I've made some adjustments to the head: And, yes, Phatso, it's just like laying out guidelines before drawing. Only these are 3d guidelines. Just quickly roughing out form with as few splines as possible. The head, hands, chest, waist and feet are all the same deformed sphere, and the arms and legs are the same cylinder. I'm going to do the hands next, and I plan to rough out a proxy in the same fashion when I do. In the past, I've had problems getting hands to look the way I want, and by the time I've got a full, hi-patch hand made, it's too cumbersome to start tweaking.
-
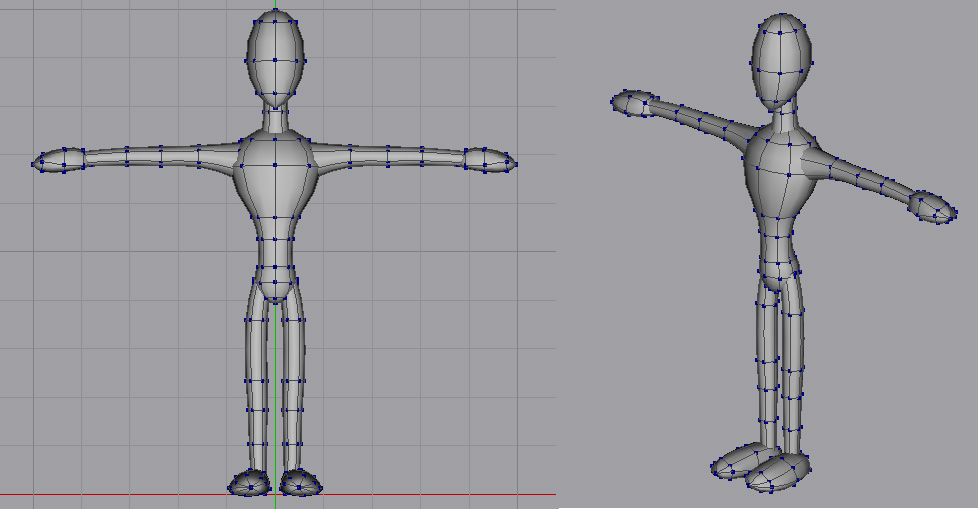
Thanks! I'll fix that spline in a bit. The body is just a temporary proxy. I'll be modeling a more detailed geometry over top of it.
-
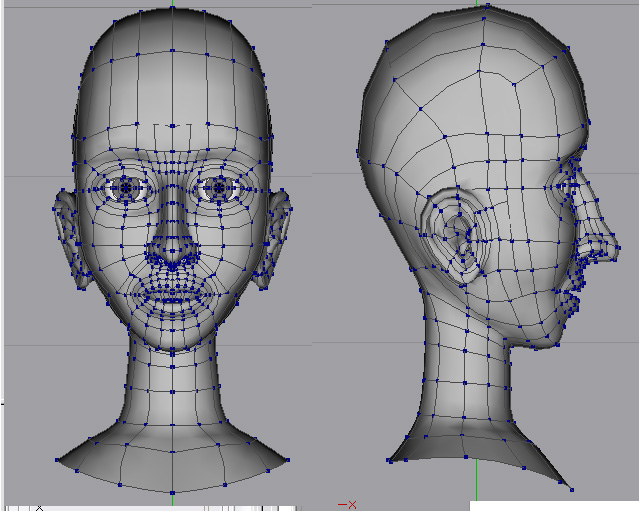
I'm trying some new techniques with this. My eventual goal is just to finish modeling, rigging, and texturing him. I just want to complete a character, for once. I didn't do any rotoscopes, I'm modeling everything on the fly. I started off with a rough proxy so that I had the proportions I want nailed down before I started: With the head, I did things a little different too. I made the eye and the mouth by lathing splines, and re-shaping them. The nose I started by lathing a nostril, duplicating it, attaching the two, and then modeling the bulb and bridge. I did the eye first, then the nose, and attached them, then the mouth. I'm sorry I didn't take screenshots. Here's the head in its current, almost completed state: And here's an AO render of the head: I'll post my progress here, and hopefully I'll finish him...
-
This was going to be an entry for the Heroes contest in Jan. but I won't have time to model the ninja turtles before then. This was the first time I've used IBL in A:M, and the first time I've used AO at all.
-
Have you thought about sprite particles?
-
In that screen cap you can see Matt's got a bullet object emitting particles, and moving at 65000 cm per second. The particle stream is a line of white dots along the spline he moved the bullet on.
-
strange. There was a post here last night.
-
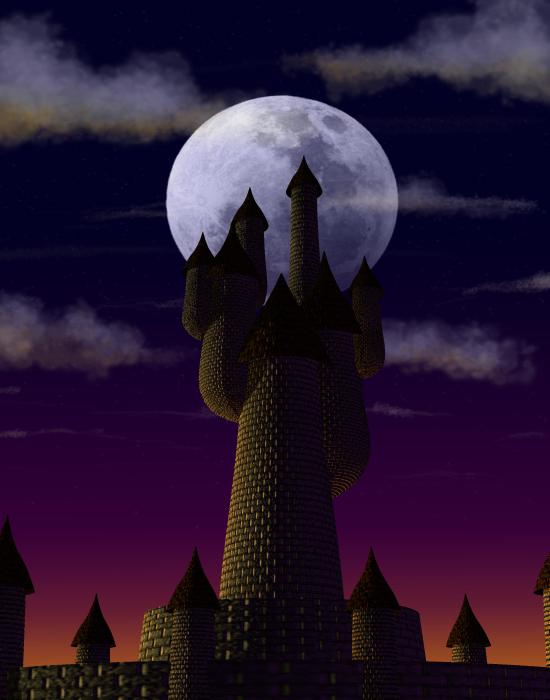
Those clouds were painted in photoshop using a cloud brush that I created.Everything behind the castle is an image painted in photoshop. The moon is a real photo, though. If I can find the time, I'll throw a skydome model together with some tutorials on creating materials for cloudplanes and skies. Sort of a simplified atmosphere generator. In the meantime, today I did some research on castles. Wikipedia has some nice info and pics on Cinderella's castle at Disneyworld, and Sleeping Beauty's castle at Disneyland, as well as the European castles that inspired the Imagineers to design both.
-
I'm going to try to show some sign of the princess in the tallest spire. I'll figure out how once I get the windows in! or maybe I'll have her out of a balcony. She won't be more than a silhouette, though. Maybe 1/4 of an inch high in the finished piece. I like the bats suggestion, too. There are some stars, but they might need to be brighter or bigger, maybe.
-
I had modeled a simple tower to test out some tiling textures I made on photoshop. I started playing around with it, duplicating it, scaling it, and sticking them on, and I wound up with a really cool looking castle design. I decided to work it into a poster for my daughter's birthday. (I used to have a sound clip of her saying, "I'm the princess, in the tall, tall tower", hence the title and inspiration). The castle model is only a proxy right now. I'm going to replace it piece by piece with a more detailed model. The lighting and the background are final, for now. The lighting may get tweaked as I go along, and I may repaint the clouds in the BG, I'm not sure. The BG image was done in photoshop, and the final piece will be 11"x14", rendered @ 100ppi.
-
Kelley, There aren't any modeling booleans in A:M. Only render time booleans. Meaning, boolean operations don't change the geometry, only the render.
-
Count me in!
-
its a Vernling infestation! Those are extremely rare!!! Don't step on them, they're a protected species!
-
I can only guess about the story from the images you've posted, but I don't think it's far fetched to predict that this short is going to win awards. Lots.
-
ropps started making those again recently.
-
Ok, pat, first I was going to scold you for upstaging poor LightBeing in his own thread But then I did a double-take. Did I read that right? Are you telling me that there's AO and HDRI in version 12?!!?
-
Uh, yeah. John, you're gonna have to do a lot better than that.....