-
Posts
1,064 -
Joined
-
Last visited
-
Days Won
59
Content Type
Profiles
Forums
Events
Everything posted by Wildsided
-
Confirmed. I got a new email with the code. Thanks Jason.
-
Hi Jason. I tried the gift certificate/free checkout and while it now says I have made a transaction, it says that it is pending and hasn't sent a serial number. Is that because my current sub has been extended?
-
It looks like it's excreting venom and leaving a burning trail as it passes through the system. Pain guarenteed.
-
I can see that. I just saw the orange area above as the inside of the mouth. A Lampreys mouth would a cool starting point.
-
Aren't those fangs on the underside of its tongue?
-
-
I don't know if this will help with tracing the problem but I found this. http://www.vbforums.com/showthread.php?276466-mci-error-codes 304 seems to be "file name required". But it doesn't list the specific error wording you mentioned.
-
It has been a while since I've configured my monitor so I have just run a calibration thing and it does look darker than it did before. Although I'm never gonna get brilliant results with this 'monitor' because it's not a monitor at all it's a cheap TV I bought years ago when my then laptop fell off a table and the screen died. My sub expired a couple of weeks ago and Jason extended it to today because the store wasn't processing the free checkout that it uses to process purchases made with gift certificates and when I tried again again a few minutes ago it was still down (I know Jason has been ill) so once he gets it up and running again I'll have a look at the lighting and see about re-rendering it.
-
Highlight the cp's you want to weight and either press U or right click on the yellow binding box and choose edit CP weights from the menu.
-
Been working on a model of Darren Greytail, the bully who is the bane of Bernie's existence in the book I'm working on. I rendered this out before I realised that I hadn't put the small scar on his cheek that he's supposed to have.
-
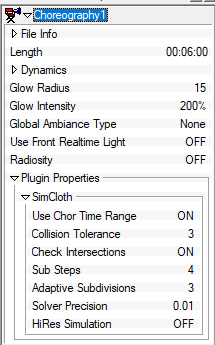
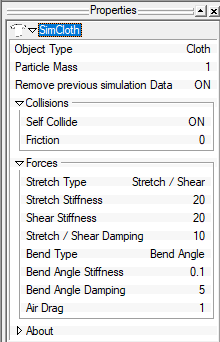
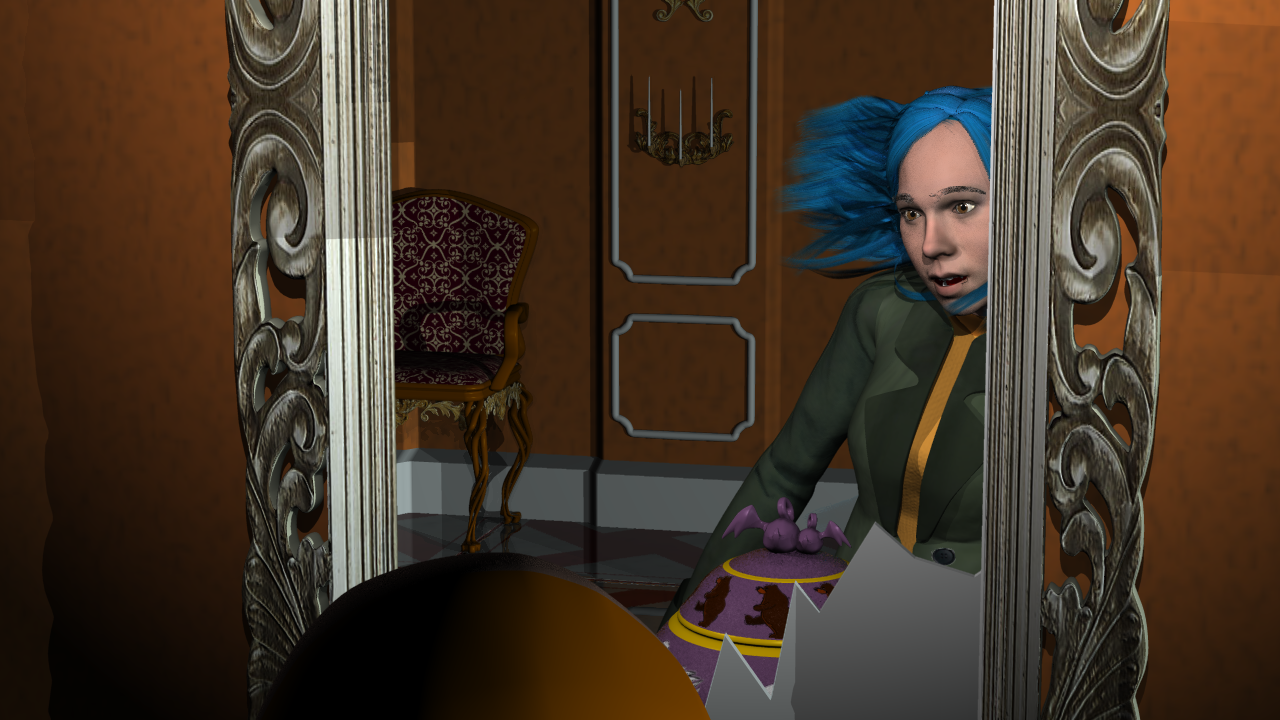
Ok, so....I was writing down the settings I have in the hair group and the choreography and I had a little thought. I turned on self collision and set the friction to zero (Well I set it to 1 first and it was deemed unsolvable) and this happened. hair flair 2.mp4 As you can see, it layered properly and gave her hair so much more body. Unfortunately it means I'd have to redo the hair on the top of her head because to give the hair more body with self collide switched off, I added more layers than I probably need. (Also ignore those 2 strands that go dancing by in the background I had to take them out because they were freaking out and I forgot to remove them before I rendered the sequence) To gt the simulation to work I used the following settings. Hair Material on the left, Choreography on the right. It also has to be done in V19h. I get an unsolvable error in 19j. Probably need to submit a bug report for that too.
-
Lol, yeah she looks like she's stuck a fork in the mains until it's had a chance to settle. I think the trouble is that when layer upon layer start to stack the number of collisions just keeps increasing to a point it can't cope and either produces a completely wild result (Like a CP shooting off into the distance) or just quits. I haven't made a report of the hair issues. I'll put one in.
-
here's a newer test. It's not perfect. Troubles I've encountered so far include not being able to have cloth collisions on, so many pieces in such close quarters causes the simulation to either freak out or give up entirely. That means the strands higher up the head don't layer on top of the strands lower down. For this model I used lots of individual strands layered on top of each other. I've also experimented with making the hair out of larger pieces, but that was with the Bernie Snuffles characters so the art style isn't totally comparable. hair flair.mp4 Mrs burrows hair.mp4 I honestly wish I could use particle hair for making hair but I spent over 2 months last year trying hundreds of different setting variations and simply couldn't make it stop passing right through the models. The cloth collision detection system is vastly superior to the particle hair collision system. If we could specify an area as a deflector that the hair simulations guide hairs simply couldn't penetrate like we can with cloth then particle hair would be a million times more manageable. But at the end of the day I'm no coder so I have no idea how easy or even possible it would be to implement.
-
-
It was always the plan to turn my model of Ellen into the latest version of Annie from Breckridge. This was supposed to be a simple case of changing her hair texture from blue to back, her eyes to blue and her skin to the blueish grey of Annie's ghostly skin. After I did all that, I realised that Annie's hair is significantly longer than Ellen's. That meant I had to extend the lengths of 'cloth' I was using for the hair simualtion. Stretching them obviously stretched the decal which didn't look good and the increased distance between CP's affected the cloth deformation. So I extended the strands by extruding the ends, which meant the decals didn't cover the new geometry. Spent some time yesterday separating, flattening and re-texturing the hair strands and came up with this.
-
That looks 'legit' as the kids would say.* *Disclaimer - Dan is by no means savvy to what the kids do or do not say. He offers no guarantee that 'legit' is something they would say.
-
Don't know about doing it through the registry, but there's a free software called simple disable key that should be able to do it.
-
Lovely stuff Myron.
-
I remember seeing an online course from a company called masterclass where you could learn comedy from Steve Martin.
-
Damned if I know, Robert. The science and maths behind how these things work is way beyond my skill set. I see where you and Gerald are coming from, though. It would be very inconvenient to not be able to reliably recreate an effect due purely to random chance.
-
Shouldn't a physics simulation be a bit different every time? Like if you drop a shirt in real life it wouldn't land exactly the same every time. Or isn't that how the A:M simulation works?
-
There's no denying that it's a quality ad.
-
Is the model tri's John? You might be able to convert it to quads in Blender to speed up the import if you're planning to tidy them up to make them more A:M friendly.
-
I did see the clip, it was very good. I especially liked how he settled at the end. Don't know about everyone else but I've been using h264 encoded mp4's for a while.
-
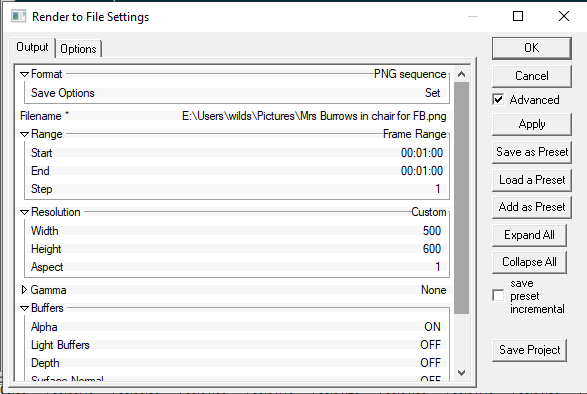
Looks good Myron, but Robert is right, you should be able to continue from where you left off. When you click and this dialogue box pops up, where does the range setting say to start? I noticed you said you had set the range in the 'Camera' settings, which sounds like you mean in the choreography. Robert will be able to clarify but I think you need to go into options and specifically tell A:M to take settings from the camera or it will take its cues from the dialogue box above.


