-
Posts
5,792 -
Joined
-
Last visited
-
Days Won
59
Content Type
Profiles
Forums
Events
Everything posted by itsjustme
-
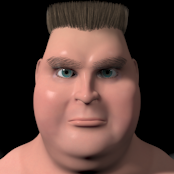
A character I started working on yesterday
itsjustme replied to jirard's topic in Work In Progress / Sweatbox
Great character Jirard! Love the smile pose and the economy of splines for the ears (overall as well, but the ears especially). He has a lot of personality. -
I think I have a solution, but I have to do some trial and error to get it completely worked out, I'm thinking. I generally learn things by pulling every lever to see what they do.
-
I'm just too stupid to quit.
-
I'm still running experiments that haven't yielded anything that I can show...so, I'll have to use another "stay alive" post here. I have a lot going on that limits my time to experiment, but I may be able to do more in the coming weeks.
-
Great stuff, Robert!
-
Great stuff, Tore!
-
Great stuff, Dan!
-
Great stuff, Tore!
-

"Paint fall" Image Contest WIPs
itsjustme replied to robcat2075's topic in Work In Progress / Sweatbox
Fantastic house, Robert! -
I'll have to resort to another "stay alive" post...it's been extremely busy for me the past couple of months. I'm still working on the Neighbor when I can find time. Hopefully, I'll be able to show something soon.
-
Looks cool, Rodney!
-

Peer to Peer Resource Sharing? I need some testers.
itsjustme replied to Rodney's topic in Open Forum
Maybe something like ownCloud? https://owncloud.org/ -

A character I started working on yesterday
itsjustme replied to jirard's topic in Work In Progress / Sweatbox
Great stuff, Jirard! -
Very cool, Robert!
-
Looks great so far, Dan!
-
Great stuff, Rodger!
-
Currently, the only hair is the eyebrows...and they have maps for length and density. The eyelashes are cookie-cut geometry and the shading on the head is a decal that is meant to disguise the scalp and make the hair look less thin when I add it. Currently, the plan is for a lot of emitters. I've done some messing with geometry for hair which wasn't too bad. I like some of the styling tools for shag hair (hair locks) that I wish were available for the newer hair, but the MuhHair shader isn't available for shag. So, I figure using standard hair with a bunch of small emitters to make hair locks would get me what I want. Also, hair has been looking better for me when I use an image to drive it.
-
Great stuff, Dan!
-
It's not much progress, but I had an image I could show. The textures are just there to give me an idea of what it may eventually look like. I was working on some of the modeling and decided I would put in a rig to check things, then decided I should get the modeling farther along before I put in the rig...that way I might not have to re-do too much. We'll see how that logic turns out. Once I sort all of that out, I'll get back to some hair experiments.
-
1. Keeping everything in a 1.0 gamma until the final image is best (the renderer works in 1.0 gamma), so, render to OpenEXR files. This will improve your colors and lighting tremendously. An explanation of Linear Workflow is here: https://greyscalegorilla.com/tutorials/what-is-linear-workflow-and-how-can-it-help-your-renders-look-better/ 2. Use the "Desired Gamma" setting to adjust your quick renders so that you can get the look you want easier. An explanation video is here: https://www.hash.com/forums/index.php?showtopic=47763&p=409439 3. You can use the "Attenuation" setting on any light to adjust the falloff. An explanation is here: https://www.hash.com/forums/index.php?showtopic=3749&hl=light+attenuation Here is another explanation: https://developer.valvesoftware.com/wiki/Constant-Linear-Quadratic_Falloff Set to 100 is Quadratic, 50 is Linear and 0 is Constant. 4. Use Krita to paint your OpenEXR textures and convert renders to 8bit sRGB, Blackmagic Fusion to composite and convert image sequences from OpenEXR 1.0 gamma to sRGB 8bit 2.2 gamma image sequence or video file. 5. As has been stated in this thread, there is also the option of using Radiosity for lighting. You can get really good looking renders out of the A:M renderer...it has been done. That guy makes a lot of incorrect statements that are corrected in the comments. Hope that helps.
-
Great stuff, Steve!
-
Great stuff, Rodney!
-
I've been using the standard hair thickness (.039, if I remember correctly), but I add an image of some hair strands I painted in the material. It looks better, but it will increase your render time because of the transparency. Hope that helps.
-
Do you have an example file and renders, Steve?
-
It seems to be working or me, but I would have to have time to let the renders finish...I'll try again tomorrow.


