Search the Community
Showing results for 'snap to surface'.
-
I am not understanding how to use the snap to surface feature? This is my first time trying it. Can someone walk me thru the steps to get started, please. I have made a SIMPLE obj in A:M (model exported as obj) I imported that obj 1) as a prop, and 2) imported that obj into a blank model. I have tried to use the snap to surface feature both in model window, as well as in chor (with prop) If I try to do it in the chor, and use the Add cp's - I get a path object If I try to create CP's in model that has prop imported in it (used plugin - import, obj) - I can't seem to control how the cps snap to surface. No comprendo. Que pasa?

-
Rob, Here is the model I used.There is no material.I did it with Surface attributes. I welcome any suggestions for an improved Bottle.Standing Bottle and Cork.mdl Here, have a glass of beer.Glass Of Beer.tif
-
I’m trying to get to grips with Sub Surface Scattering, but at the moment I’m at a loss on how to get it to work properly. What I cant quite understand is that the sss effect seems evident in the modelling window when rendered out in final, however not all evident in the default choreography window. I’ve been using some of Yves Possaint’s sub surface scattering value examples and testing them out on basic primitives with no luck. I was told by Robcat that John Bigboote uses sss a lot, any help from anybody would be greatly appreciated.
-
Got a new 3D scanner, models are now much more complex, AM hanging
R Reynolds replied to MAYAman's topic in Animation:Master
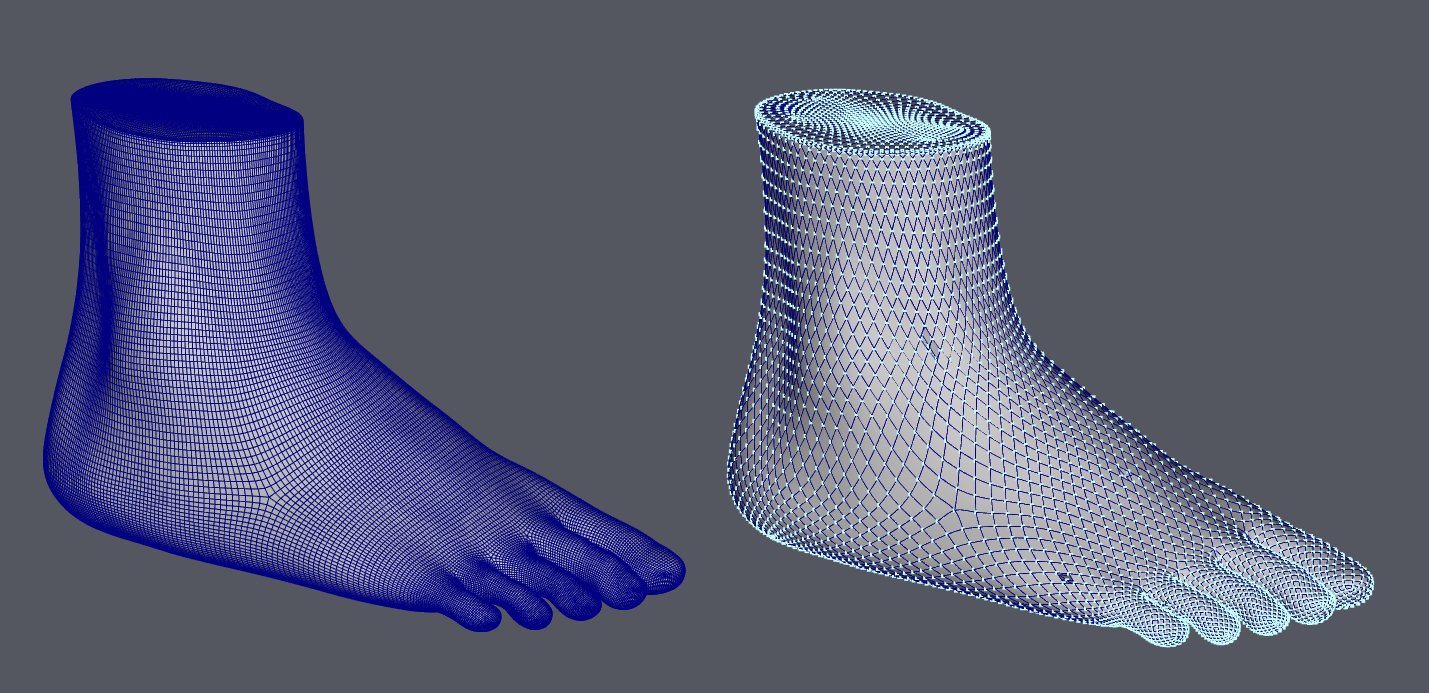
I've left a large poly model running for days and could never get beyond 30%. I've had success with installing Blender and reading just enough of the on-line manuals to reduce poly count and in some cases convert triangle polygons to rectangles (or quads in their jargon). The foot on the left is the imported prop and one the right is the .mdl converted from a reduced poly version. I find there's an advantage to having your template model in .mdl format in that I can easily isolate an area and eliminate the "snap to surface" choosing the wrong side.
-
Made a simple robot
-
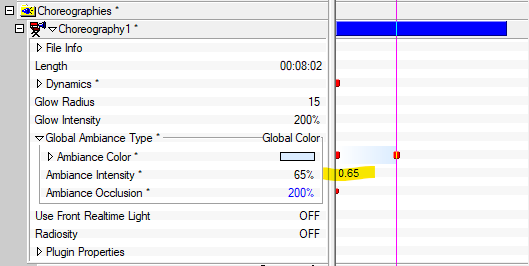
Hi there, the new forum design looks great! I didnT find a section for techincal questions though, so i put it here. and wheres the whats new button now? I am still on AM 15h and discovered surfacebaking bbut: sometimes it works sometimes it doesnt. Any ideas what factors might influence that. Ram and grapics and render power shouldnt be the problem. Maybe some oldtimeuser has made similar expiriences and found the solution? Thanks for any help
-
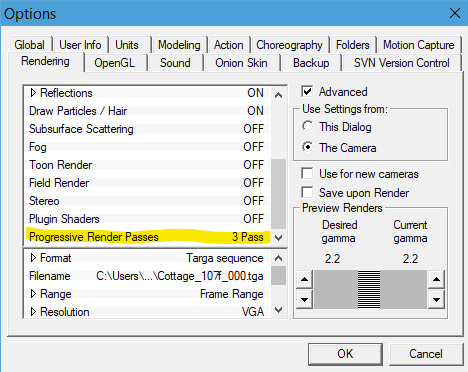
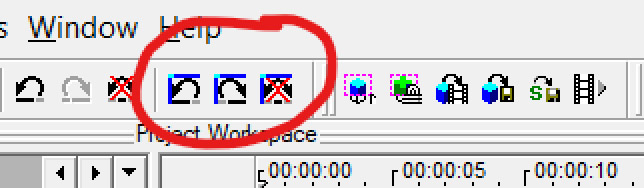
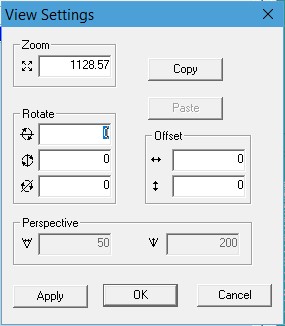
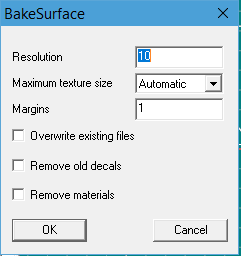
This is an edited compilation of A:M's incremental release notes so that they may be found in one place. This includes new features and enhancements but excludes bug fix and SDK reports. I will endeavor to organize this and add links to relevant documentation and explanations as I find them. If you see something here that already has existing documentation, PM me and I will add it. v19 New features and enhancements Top Five Hot v19 Features... Bullet Physics includes soft body simulations SVG importer enables design of lathe and extrusion outlines in low-cost vector art programs Bias Handle Aim at next CP simplifies common mechanical modeling task of creating straight splines Birdseye View Queue allows stepping through many previous birdseye views Scale to X=0 reduces common Copy/Flip/Attach prereq to one step Been away for a while? Check out the v18 features in the next post! Bullet Physics Bullet replaces Newton for dynamic simulations. See full Bullet Section at bottom. Speedup Coding optimizations make v19 render 10-15% faster than v18. This benefit will vary by CPU Interface Birdseye View Queue v19a It is now possible to step back/forward through many previous Birdseye views rather than just recalling the single most recent one (Numpad 7). undoing/redoing for view position now have a separate undo stack, have their own buttons and shortcuts... shortcut for view undo Shift+Alt+Z shortcut for view redo Shift+Alt+Y If You don't make a new install or "Reset Toolbars" You must manually add the buttons from Tools->Customize->Commands->Standard Discussion thread: https://forums.hash.com/topic/50244-birds-eye-view-queue/ Clear Undo stack (Edit menu) v19a Removes all entries from undo/redo. Also has a button... Forum thread Feature Clear Undo Stack Choreography Groups v19L Added the possibility to add other objects to the named chor group(select the chor group -> than Shift + LMB Selectionobjects. Can be deleted with a Dialog (RMB -> "Remove From Groups..."). "Constant" parameters in PWS now display their current values in the timeline. CP Weights dialog box v19c Remembers last position. Duplicate for objects in a chor. v19a Right Click/Duplicate Menu entry "Duplicate" for objects in a chor. If the Shift key is held down while clicking "Duplicate," keys from the source object are not copied. Progressive Render Limit v19c Progressive renders can be set to make less than five passes to allow more quickly regaining control of the interface after onscreen test renders. This setting also exists in Camera properties so each camera view can have its own setting. Render settings dialog box v19a Resizable Maximize Render to File Dialog Window button added File Menu>"Render to File" Option added Render to File dialog box Size/Open/Collapse state are remembered. Works only in "Advanced mode" Two new buttons here too, "Expand All" and "Collapse All", expand/collapse all possible properties Reset Toolbars (Help menu) v19a Reset all toolbars to their default layout. Save before Render: v19a saves the project, if it is modified, after hit "OK" in the "Render to File Settings" Dialog can be controlled with the "Save upon Render" checkbox at Tools/Options/Rendering , Default is ON Translate manipulator minimum size v19m The translate and the scale manipulator now scaled up, if the size is too small AND the "World Space" button is set to ON. Viewport settings Copy/Paste v19j It's now possible to Copy/Paste Viewport settings from one window to another one. Click on the Viewport settings display to open the "View Settings" dialog for the source window , push "Copy", open the "Viewport Settings" dialog for the destination window, push "Paste" Viewport Settings display is at lower right corner of A:M Modeling Bias Handles: Aim bias handle at next CP v19n Holding ALT while adjusting bias handle snaps the bias to the next CP on the spline in direction of the handle side. SHIFT+ALT leaves the bias handle on the other side unchanged. Discussion thread with demo video Bias Handles Snap to Grid button v19a New button for this , Tools->Customize->Commands->Manipulator (default key Shift+2) Acts like "Snap to Grid". Existing installations needs to add this button manually to the toolbar or "Reset Toolbars" [demo video in post] Bias Handles Snap To Grid menu option v19a When a group of CPs is selected, >Snap Bias to Grid snaps the in- and out-bias for the selected CPs to the nearest grid interval. CP weighting dialog Cancel/Undo/Redo v19a The weight dialog has now a "Cancel" button , which reverts the changes done in the dialog to the state before the dialog was started. Weighting has now also a general Undo/Redo , if the dialog is exited with the "Done" button. Remove Internal Patches v19a "Remove internal patches" Tries to break internal patches , detach CPs from detected internal patches and create a named group with this CPs for 3 and 5 point patches it works only partially depends on the spline layout. [demo video in post] Remove unused drivers menu entry. v19a Delete all drivers without a key available only for model cache, not for instances. Remove User Properties menu entry for models. v19a Deletes all user properties and relationships for this model available only for model cache, not for instances. Warning : This action is not undoable Reset Main Bone v19h Set the main model bone back to the default values (helpful for simulation with bullet constraint, if the main bone not at default , unexpected behavior can occur) For objects> menu -> "Reset Main Bone". Scale Group to X=0 v19a Before doing a Copy-Flip-Attach it is good practice to scale all the center spline CPs to be truly on the center axis. Now this task can be done in one step: select the CPs and then >"Scale Group to X=0". Show Groups, where the CP is included Button will show which groups a CP is in. For existing installations the button needs to be added manually. Add the button Tools->Customize->Commands->Manipulator -> "Show Groups, where the CP is included" to the toolbar, or "Reset Toolbars" For new installations, it's default in the manipulator toolbar. Works only for single selected CPs. Spline and CP selection from PWS v19n It's now possible to select Spline and CP from the PWS. Select the Spline or CP (under Objects -> Your model -> Splines) and hit SVG importer: v19a Plugin for importing the SVG vector graphic format. This enables graphic outline importing as the .AI importer does. Particles/Simulations Particle system: Hair v19a Support for Turbulence on forces. Forces no longer need high magnitudes to affect hair dynamics groom mode: selected guide CPs now drawn with the selected CP color groom mode: added possibility to select more than one Hair guide for operations except the "Brush Mode" operation two new buttons "Select Hair guides" if You press this button you are now in the selection mode, and can select more than one Hair guide. Limitation: it's only possible to select one Hair guide CP, for the other selected Hair guides the Hair guide CP from the first selected Hair guide is used. "Deselect Hair guides" deselect all selected Hair guides Hair grooming Disable Particle System Update v19o For faster manipulation of hair guides. Implemented for Edit, FK, Brush and Lengthen Mode. [demo video in post] New button "Disable Particle System Update" is available under Tools->Customize->Commands->Categories:Tools to add this to Your grooming bar... The other way to enable this button is Help->Reset Toolbars If this button is checked, the particle system is not updated while you're modifying the hairguides. Be sure that only the window where You modify the guides is visible (no tiled or cascaded view mode), otherwise the other views are updated. Particles: Color change over lifetime v19L Streak and Blobbies there is a new Bool property, "Color change over lifetime". This controls how the color is changed. Default ON: the color is changed over the lifetime from each particle OFF: the color change is done for all particles simultaneously. Simcloth v19c Simulations faster with with OpenMP (multicore processing), to disable this option set "Tools->Options->OpenMP Threads" to "Disable OpenMP" Simcloth v19b "Custom Attach groups" now only editable in material instances. Makes no sense to edit the cache. Attach groups are used for temporarily constraining a portion of a SimCloth to a bone. For example, to have a character pickup and drop a handkerchief. new property "Remove previous simulation Data" Deletes the simulation data from previous Simulation. Setting it to "OFF" is helpful, when the cloth object has many CPs. Default is "ON" Plugins plugin: Batch v19d added Bullet "Rolling friction" and possibility to set the values back to default. Plugin: Brick v19a it's now possible to add Bullet Constraints for the instanced model. Access with RMB>Choreography>plugins>wizards>Brick z position can be set models can be imported in user folders save/restore settings documentation Plugin: Simple_Scatter v19a it's now possible to add Bullet Constraints for the instanced model models are now imported into user folder documentation Polygon import plugins v19L If peak tolerance is set to 0 , all CPs are peaked ,useful for importing mechanical models. If peak tolerance is set to 360 , all CPs are smooth Other Bake Surface: optional larger margin for Baked Surfaces. v19a Makes it easier to use some paint program filters on tiled image maps. Options dialog accessed by holding SHIFT while selecting "Bake Suface" Distortion Box Action Objects Resolution v19a Now the same resolution as the modeling window Distortion boxes (maximum 1000), and now uses for initial value the same settings as for the distortion box in the modelling window. Measure Distance v19n Menu entry "Measure Distance". Select 2 CPs (both in same view) -> -> "Measure Distance". If more than 2 CPs are selected the distance is calculated for the first 2 CPs in the group. Can also be started from the PWS, select a CP entry, then select a second CP while holding down the CTRL key -> -> "Measure Distance" "Render Stamp to File" v19p Discussion in AMReport 7054 Discussion in v19p announcement This renders the actual stampview to file with a user defined resolution. If You start from the stamp entry in the PWS and the stampview isn't open, a new stamp view is opened. In the dialog , which opend after hit the menu entry, You can change the Path and Filename (the button on the right side) fileformat is selected trough the filename extension (supported OpenEXR, TGA, PNG and PSD) the "Width" and "Height" for the newly created file limited to 16384 x 16384 for Win64 version, 8192 x 8192 for the others the limitation is the result size , means a resolution from 32768 x 8192 is also possible. Warning On the highest resolution around 14 Gigabyte is needed at the creation process. The width and height are always changed to a even size. (1025 becomes 1028 , always modulo 2) "Save layered" If this checkbox is checked, two layers are created , one for the decal self and one for the splines. For all formats ,excluding OpenEXR, in this case two files are created with the naming scheme "Filename"_Decal".Extension" and "Filename"_Splines".Extension" OpenExr is saved as one file with two layers. "Render with CP's" rendering also the CP's on the spline layer A new menu entry for single stamps / a opened stamp view is added. Bullet Physics - v19a Bullet replaces Newton for simulations. Bullet includes soft body simulations which were absent in Newton. Alpha Documentation constraint: Bullet Constraint for dynamic simulation with the Bullet physics engine. constraint: Bullet Soft Constraint v19d Model with this constraint applied act as softbodies (deformable hull) in Bullet simulation Reset Main Bone v19h for objects> menu -> "Reset Main Bone", set the main model bone back to the default values (helpful for simulation with bullet constraint, if the main bone not at default , unexpected behavior can occur) Plugin: Add bullet constraints to multiple models in a cho. v19a on choreography -> "Add Bullet Constraints to multiple models". Plugin: Modify Bullet Constraints on multiple models v19d Modify parameters for bullet rigid constraints on multiple models in a chor. Only parameters where the checkbox "Set" is active are applied to the selected bullet constraints. on choreography -> "Modify Bullet Constraints on multiple models" Menu Remove Bullet Constraints v19d menu for Choreography has now an entry "Remove Bullet Constraints" starts a dialog, where You can select the Bullet constraints , You want to remove from models (Extended selection in the listbox) Menu Bake and Remove Bullet Constraints v19h for chor > menu -> bake simulation data and then remove the Bullet Constraints from the models. If the Shift key is held while clicking this entry, a simulation run is first done for all Bullet Constraints. Plugin: Batch v19d added Bullet "Rolling friction" and possibility to set the values back to default. Plugin: Brick v19a it's now possible to add Bullet Constraints for the instanced model. Access with RMB>Choreography>plugins>wizards>Brick Plugin: Simple_Scatter v19a it's now possible to add Bullet Constraints for the instanced model
-
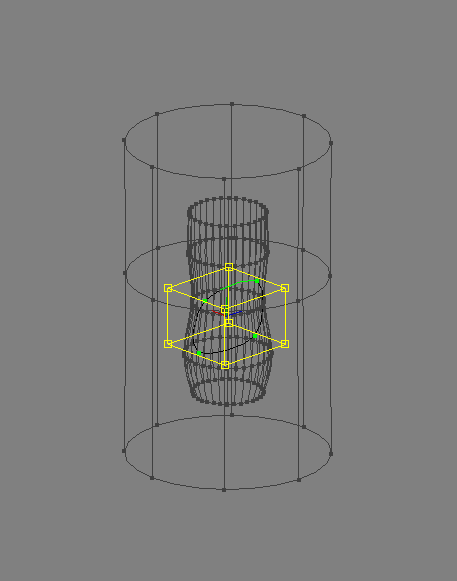
Here's a clue... If I add another surface (the large cylinder) outside the surface I want to target (the vase shape), the CPs I select and move (the 4 point ring) will go to the intended surface and properly slide on it when i move them. It is as if it always ignores the first surface it encounters and goes to the second surface. snap Test002.prj
-
SNAP! Those treasure chests are sneaky! Well done, Steve!
-
Hello, Is there a way to baked surface for a selection and not on the whole object?
-
Hey everyone. I'm considering trying to transfer a very dense figure model into A:M. I was hoping that the re-topo tool would help out, but I was not able to find much on what others had been able to get out of it. Has anyone been successful in "retopo'ing" a high dense mesh, human figure in A:M?? William
-
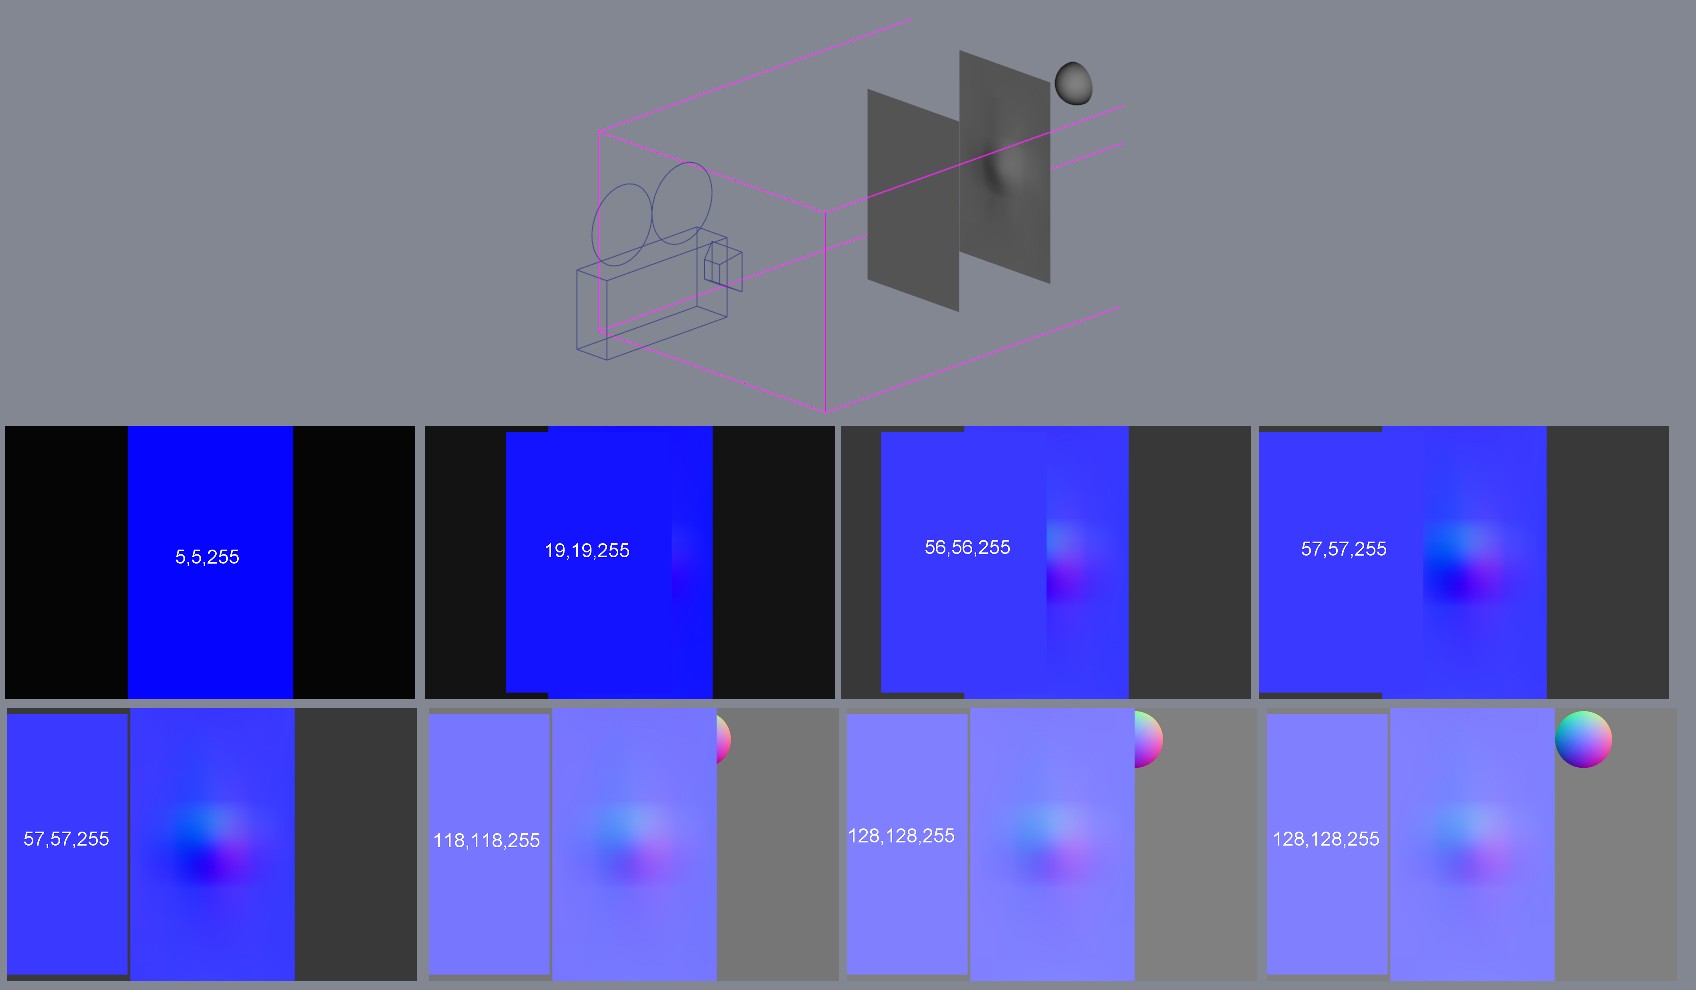
Ever since the MakeNormalMap.atx material was replaced by the Surface Normal buffer in the render engine I've always had unpredictable results. I couldn't seem to get a flat plane that was orthogonal to the camera to return a consistent color of 128, 128, 255. Sometimes it did but many times a flat plane would come up short on the red & green channel. So in the course of generating wrinkle maps for the seats in the street car, I ran more than a few tests and have found the answer; to get the correct colours the algorithm needs a full range of surface normals in the image. The following images are my proof. The top image shows the chor layout; a camera orthogonal to a flat plane. Behind the flat plane is a mildly deformed plane and behind that is a hemisphere. The first image is the normal buffer output looking at just the flat plane. The normal buffer assigns a colour of 5,5,255 Moving the flat plane to the left to expose part of the deformed plane produces the second image. The normal buffer assigns a colour of 19,19,255 The third image has half the deformed plate showing and the normal buffer assigns a colour of 56,56,255 With 75% of the deformation showing in the fourth image the flat plane registers as 57, 57, 255 as it does when the entire dented surface is showing in the fifth image. In the sixth image the hemisphere is moved out from behind the plane to expose about one quarter of it and the flat planes now register as 118, 118, 255 With half the hemisphere exposed to the camera (seventh image) flat surfaces now have the correct value of 128, 128, 255. As is the case when the entire hemisphere is exposed. So my suggestion for generating correct normal maps from any surface is to have a "calibration" hemisphere within the field of view. But keep it fairly large, if it's too small (like about half the size shown) the red/green channels start to fade.
-
I find myself playing tug-of-war with Version 18 of A:M more than I used to with Version 15. There seems to be a lot more snap. I pull a control point to a position when I am modeling, and the computer snaps it back to where it was. How can I turn the snap off or adjust it to a level that is helpful?
-
I have heard alot about it,but never really knew what it was for ,surfing on youtube ive seen alot of programs exporting from one program to another and back,and I saw John Bigboote had just posted something about it for v17 ,and is it new in v17? ( Most videos were just timelapsed and did'nt explain anything)
-
I was just about to start celebrating after Robert helped me mix Toon and normal on the same model in a render. It was going to save a lot of time. Then I saved the project and odd things happened. I had modified one of the models, Delivery Man, that came with AM, giving him a beard and a dress shirt. This is what it looked like with Normal render. V17, OSX When I did a Toon render ( before he new modifications ), I noticed some mesh penetration, I tried Robert's suggestion and was really pleased with the result, except I noticed some more penetration and spent a while fixing it. Saved it and went out to do some analog 3D while it rendered away. Came back and checked it, only to find that his beard , and other surface values had reset to the default ones of the original model. The mix of styles was there but the colours had gone. I then spent about 90 mins trying to get it back to how I wanted it because, very foolishly, I'd trashed the earlier files and couldn't get them back. But, every time I reset the values then tried to save it, it would crash out. Tried it in V18 but with no greater luck. The original model is far better than I can manage but, I only wanted to use a small proportion of it and change the colours.( not trying to take credit for someone elses work ). Is there any way to reset the surface values to the default settings so I can go back and modify them without the originals showing through ? Thank you for your timeand help simon Neighbour Two A.mdl
-
When I test with a simple Prop it works as I would expect. I can draw a new spline and it is created on the front surface. I can slide points I have made on the surface and they remain on the front surface. But if my target surface is a regular MDL only the first creation works. if I touch them after that, they either go to a far surface or some place that is not either surface. That happens in both the modeler and in Model Mode in the Chor.
-
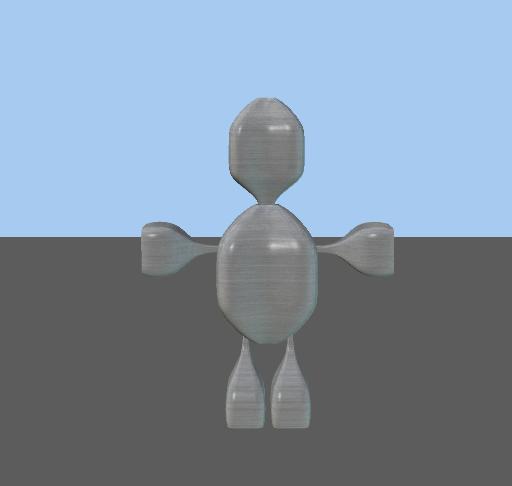
I don't know about other folks but I've been using the heck out of the new Snap to Control Point feature. I was using it before to match up splines and CPs but today I used it in a Pose to assist with precision placement at 0%, 50% and 100%. My project here was to create a modular monster whose belly can match to 'small', 'medium' and 'large' sizes as well as (manually through the pose slider) other settings. If you'll pardon the cheap graphics from this POC... I'd say it worked rather well. I meant to render a wireframe to show the three target zones for the modular monster's waists. Edit: Mov replaced with shaded wireframe render. (the three ovals being the three target sizes for monsters' waists) A:M has gained a substaintial improvement in precision modeling through this addition in v18. SnapToCP.mov
-
Hey Everyone. I tried to find my old thread about this but could not locate it. I inquired previously as to if there is a way to snap a bone's base to a cp. Has that been figured out? Or is it still not possible? Sorry about the re-posted subject. Cheers, William
-
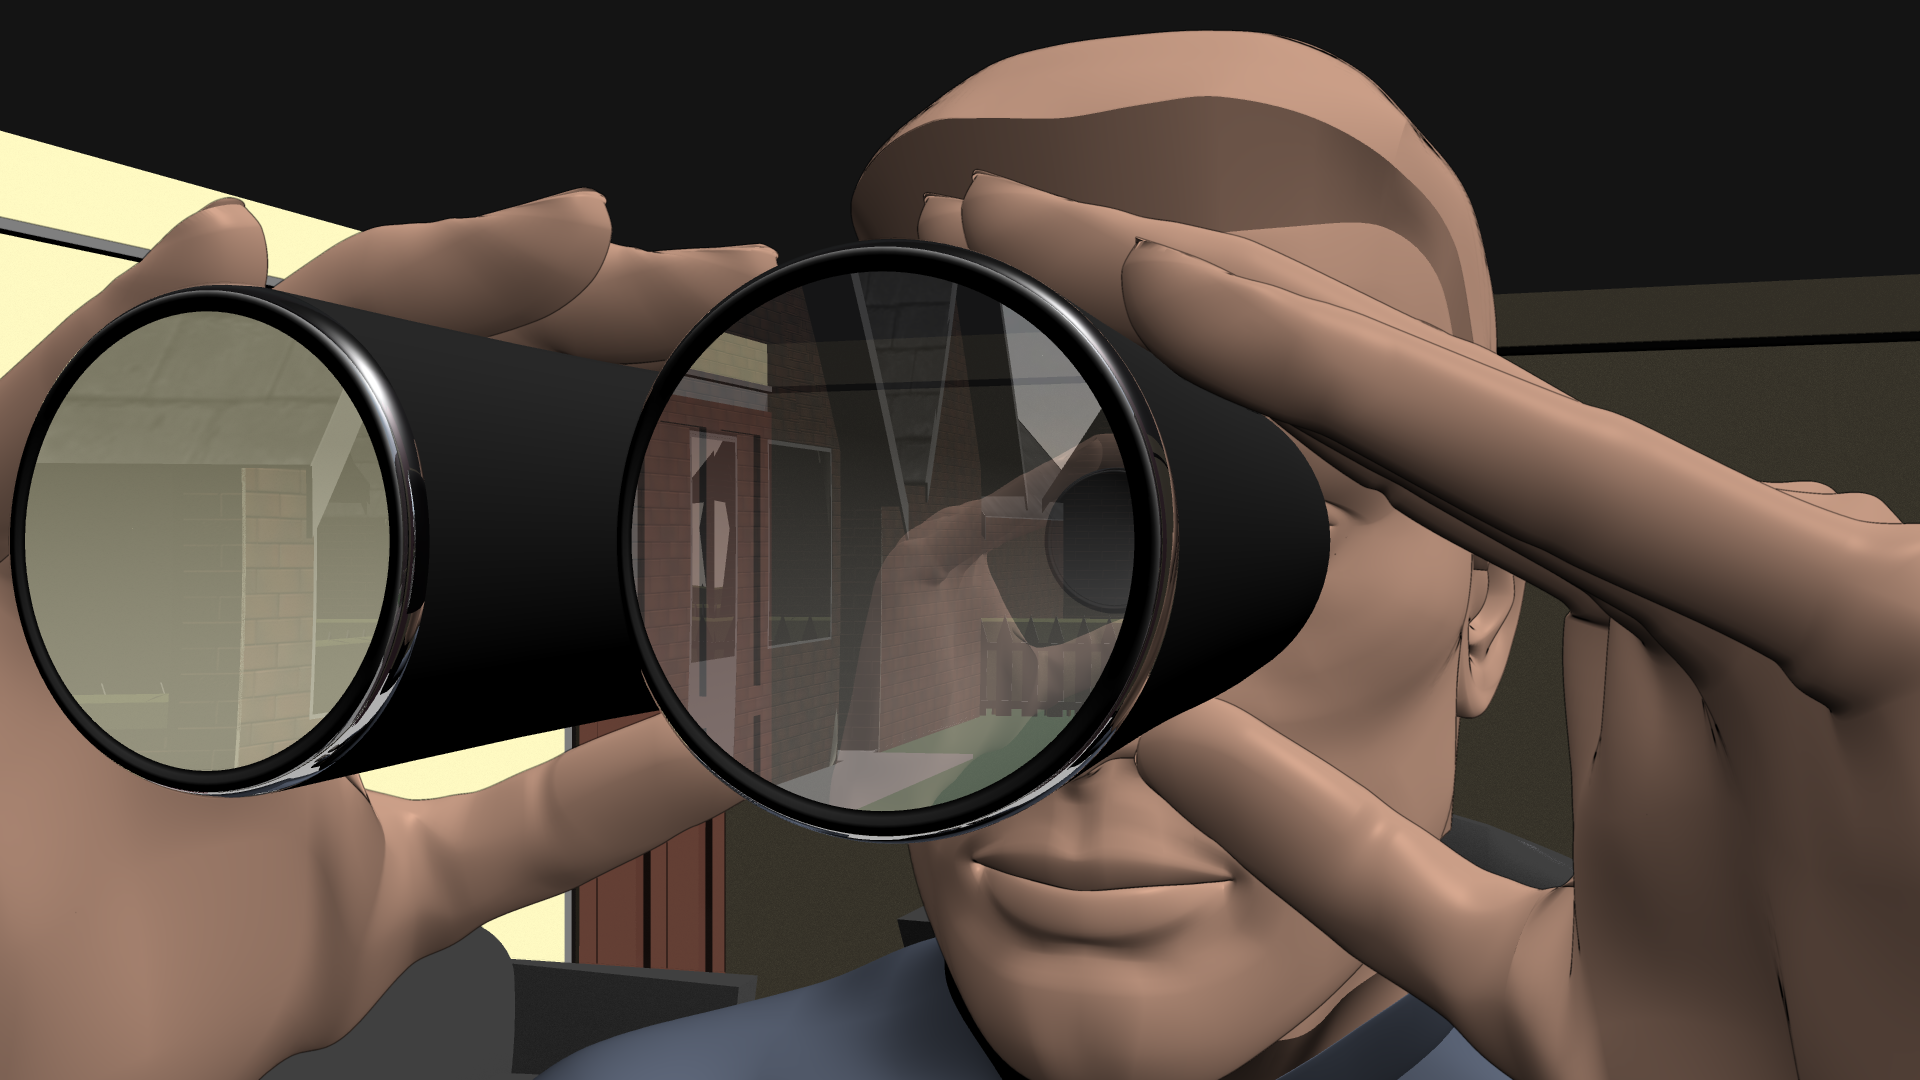
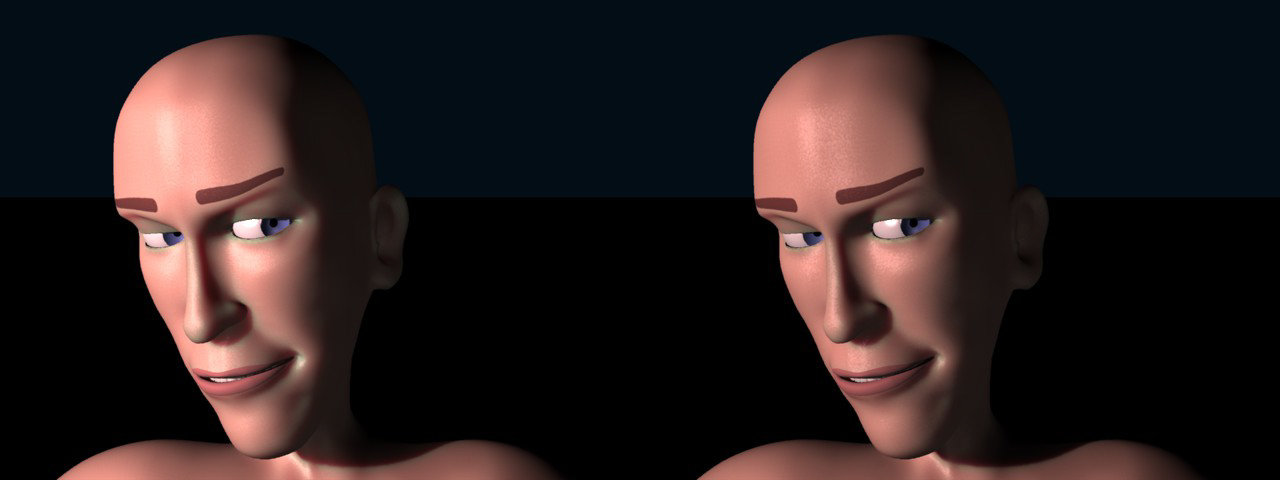
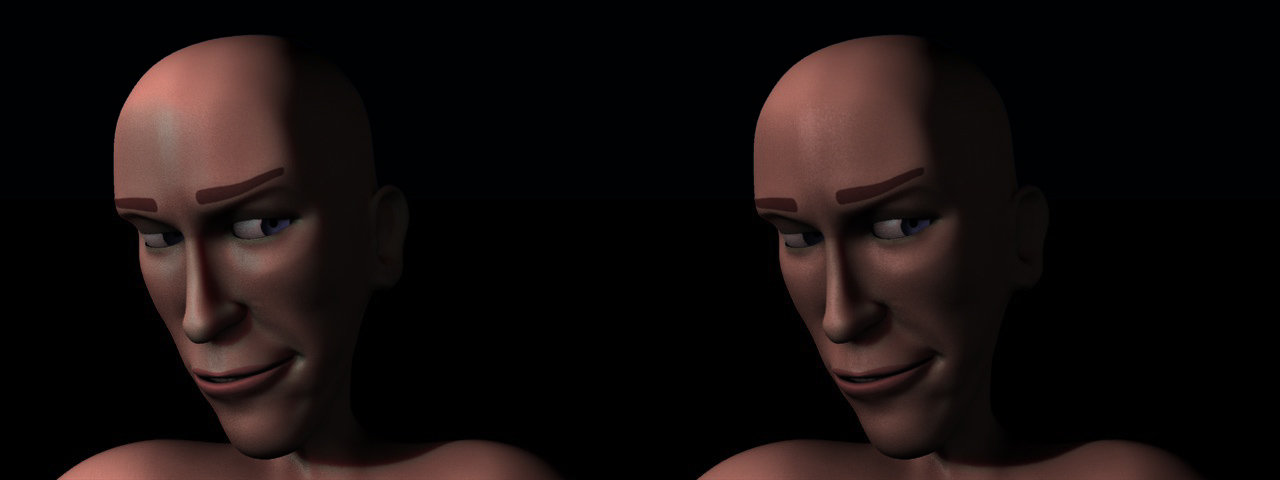
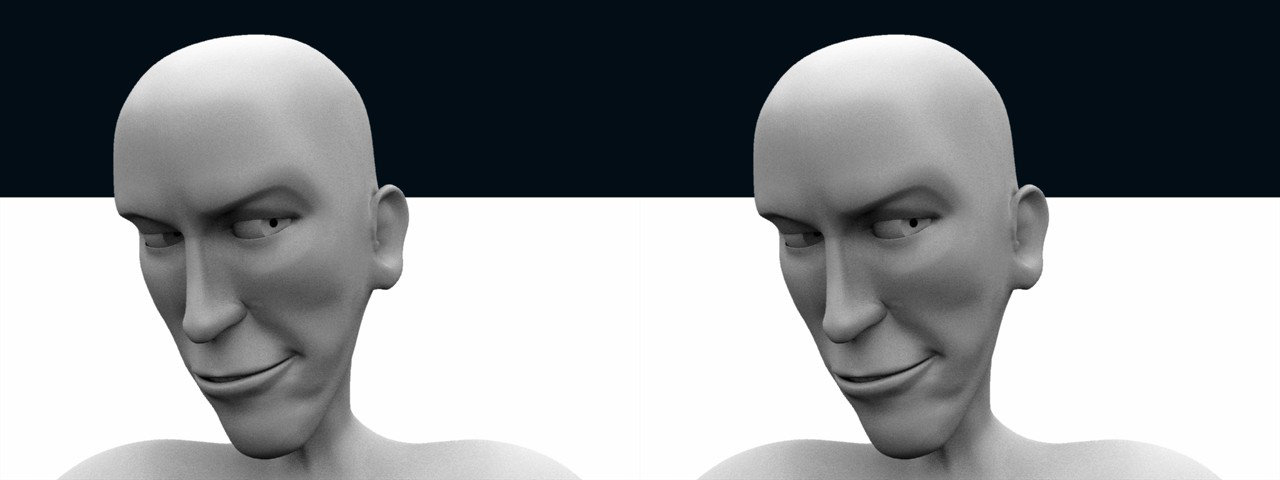
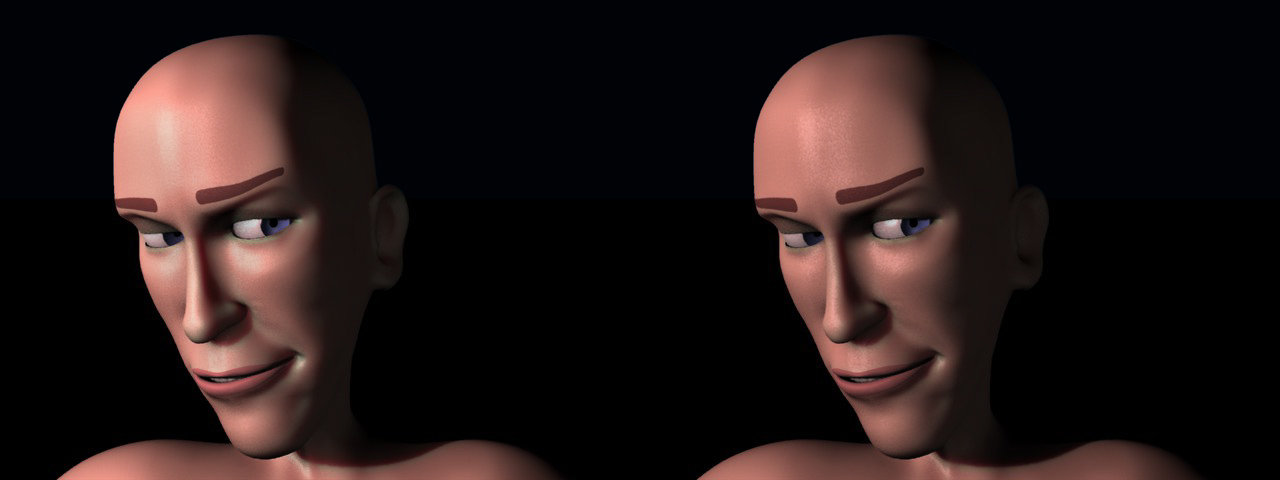
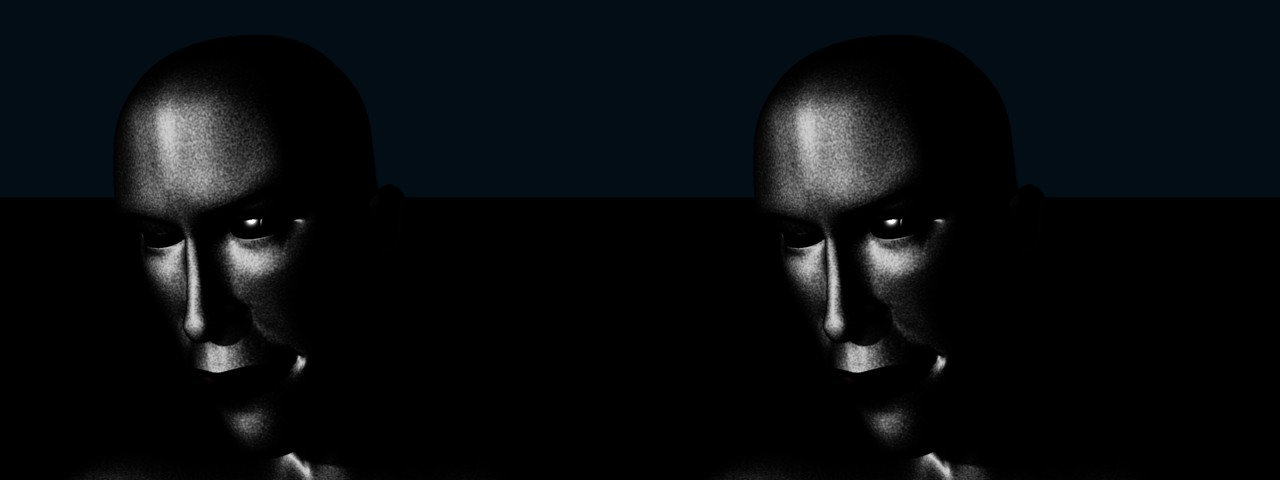
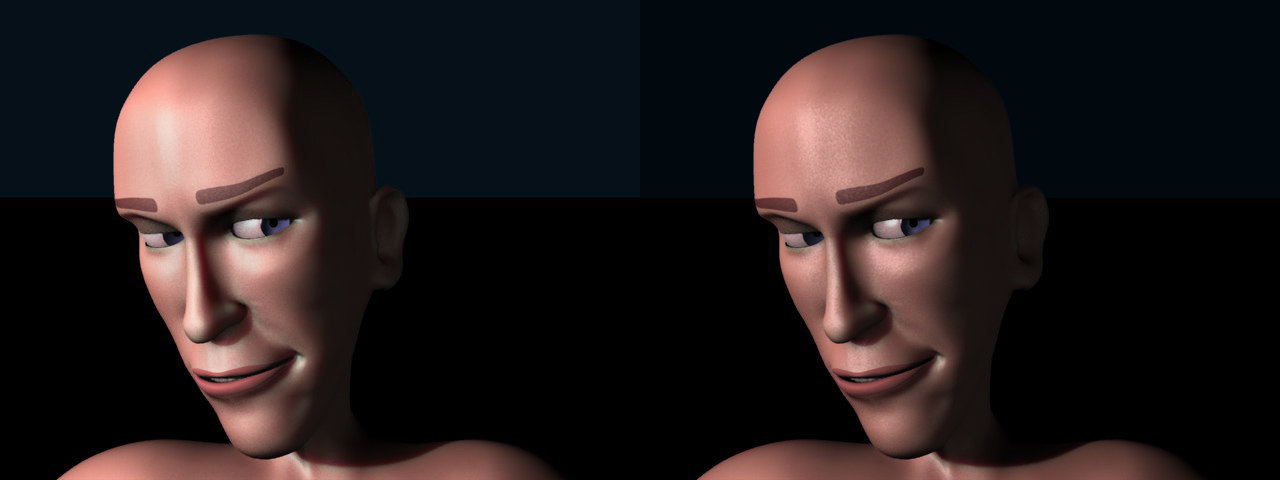
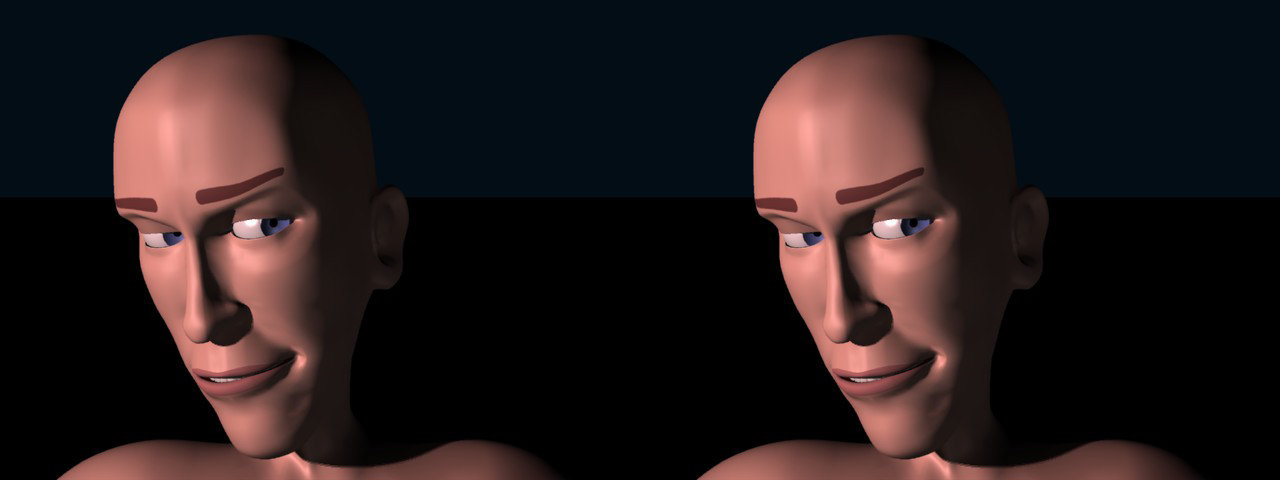
A few experiments toward getting a nice human Sub Surface Scattering result. "Loyd" model by Steve Shelton. Default surface (no SSS) render... Sub Surface Scattering renders. Pink and less pink... I've turned on some Surface "noise" to suggest the pores in the skin. SSS with Ambient Occlusion... Separate AO render... Curve-Adjusted AO... SSS render composited with adjusted AO... Separate specular render... Composited SSS+ AO +Specular...
-
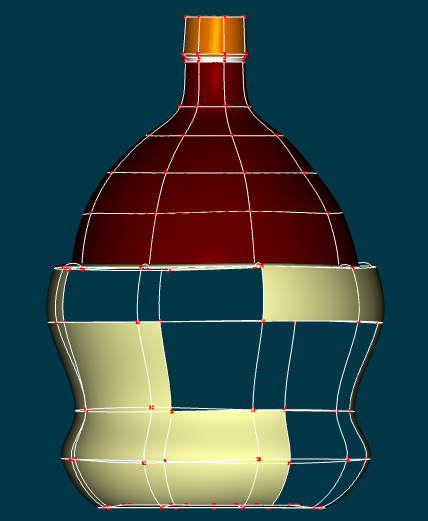
I have been trying to make a chianti bottle. For whatever reason the 4 point patches are not filling in. I have tried rendering, but the patches don't fill in there either. I am not sure what I am doing wrong. Any ideas? A picture of the bottle as it exists now follows:
-
Several areas I haven't yet fully explored: Templates to aid in modeling with Snap to Surface (Some will be more optimal than others) Mixing Props and A:M Models to further enhance workflow (What isn't caught by the Prop might be caught by the Model) -- The example of this would be a flat plane that is placed at a point of intersection with the Prop. Should a CP be placed off the Prop then it would be caught by the Model. Animated Snap to Surface (I need to learn to screen capture my tests because I've forgotten my earlier exploration into this area. The idea is to model on top of (or to track) a moving Snap to Surface object.) Further investigation into what Snap to Surface sees and what it allows through/ignores. (This relates to Templates in that a mesh could be built that would allow something akin to Snap to Intersection. Further exploration of the use of Snap to Surface in conjunction with other tools such as Snap to Grid, Magnet Mode etc. Theoretically, Snap to Surface in conjunction with Snap to Grid should result in a semblance of Snap to Intersection.
-
Phil I misread your question. I thought I read that you were asking about cloth. My bad. Clothing a character for me is easier than cloth. So what I do is build a model at skin level. I then copy a section and paste and enlarge for clothing. I modify the new section such as shirt. Once I am happy with the clothing I then remove the mesh of skin under the clothing. Or use a pose to hide the mesh that is covered by the clothing. Robert has shown me a complete of tricks that enhance the clothing such as a edge material that highlights the clothing. Materials are incredible to help enhance the clothing. whether it is darktree material or materials from scratch they help cover deformation in an animation. I am just now scratching the surface of how to use materials.
-
Still plugging away at ska dance project when time allows. Presently redoing the head in the light of the example David posted a few weeks back. Have encountered a strange problem though. It still needs lots of tweeks and readjustments but, the model doesn't want to acept the surface colour properties assigned to it? For example, the lips have an RGB setting of 208.180.160 assigned to the group but it doesn't show up in shaded mode or quick render. Can anyone kindly suggest the problem and possible soution ? simon OSX 10.68 V17g DH 001.mdl
-
Snap group pivot to grid video tutorial Enjoy Snap_Pivot_to_grid_video_tutorial.mov
-
A review of the Surface Pro 3 I didn't even know there was a 3 yet.