Tralfaz
-
Posts
899 -
Joined
-
Last visited
-
Days Won
1
Content Type
Profiles
Forums
Events
Everything posted by Tralfaz
-

2001 - A Space Odyssey - Modelling the Discovery
Tralfaz replied to Tralfaz's topic in Work In Progress / Sweatbox
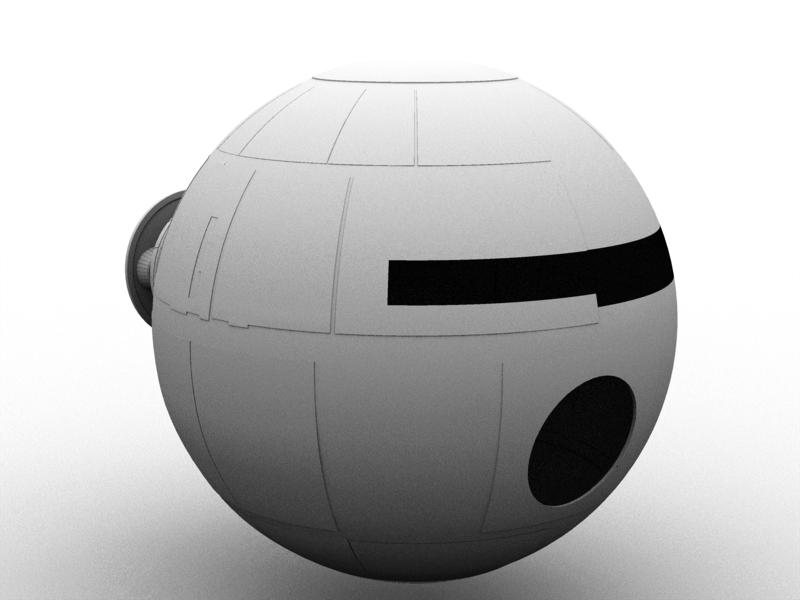
Thank you Jaff and Eric. Every now and then, I see an image of the Pod come up in the images at the top of the forum. It would be so cool to get my hands on that model as I do have plans for a little short animation. If not, I can always try and model one. I believe Vern did Dave and Hal at one point as well. Been doing some more work on blocking out the panels on the command module. Also started doing some rough work on the pod bay doors. So far, the command module consists of 5,275 patches (a lot of them will still need to be thinned out), and 6,400 patches on the neck. Right now, I am going to model everything in small sub-sections and put them together later. Al
-
2001 - A Space Odyssey - Modelling the Discovery
Tralfaz replied to Tralfaz's topic in Work In Progress / Sweatbox
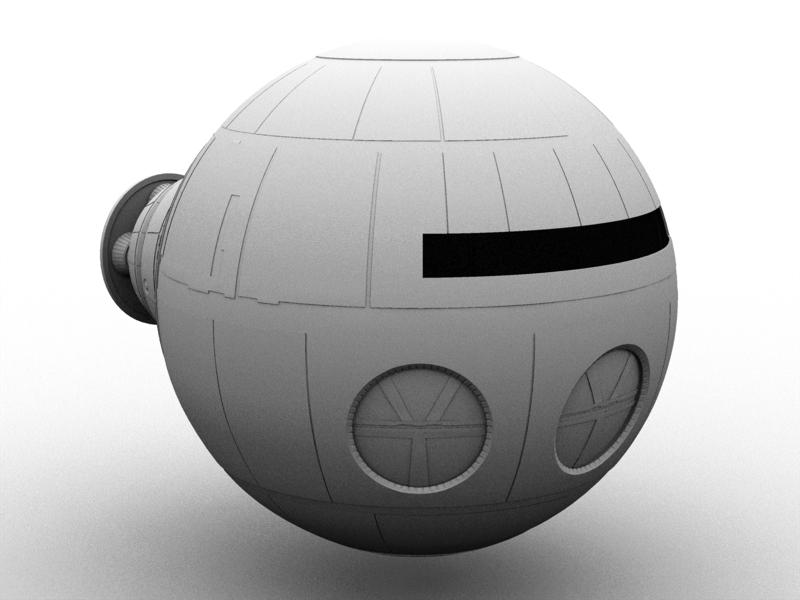
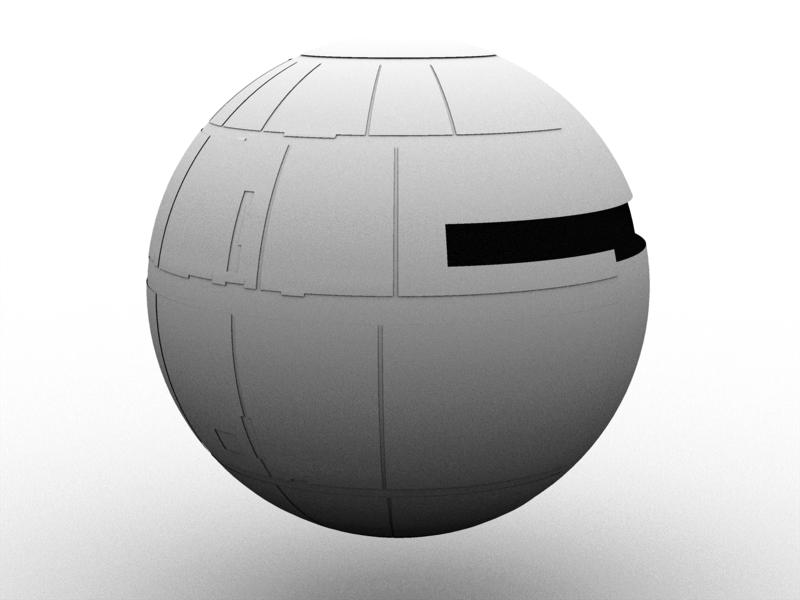
Thanks Stian and Steve. Been doing some more work on the neck as well as reworking the panels on the command module. Modelling the opening for the pod bay was a bit of a challenge, but I think it doesn't look too bad so far. Once I get one pod bay done, I will copy and rotate it twice for the other two doors. Anyway, time to go and get some shut eye... Al
-
It probably never had all those extraneous parts on it when it was new. Han did say he had made a few modifications himself... Thank heavens for deflector shields or most of that stuff would be ripped right off whipping through an atmosphere. Al
-
Amazing Eric! I am really enjoying watching the progression of this model. Al
-
Thanks so much for the tutorial Eric. Very informative and will be really helpful. Al
-
2001 - A Space Odyssey - Modelling the Discovery
Tralfaz replied to Tralfaz's topic in Work In Progress / Sweatbox
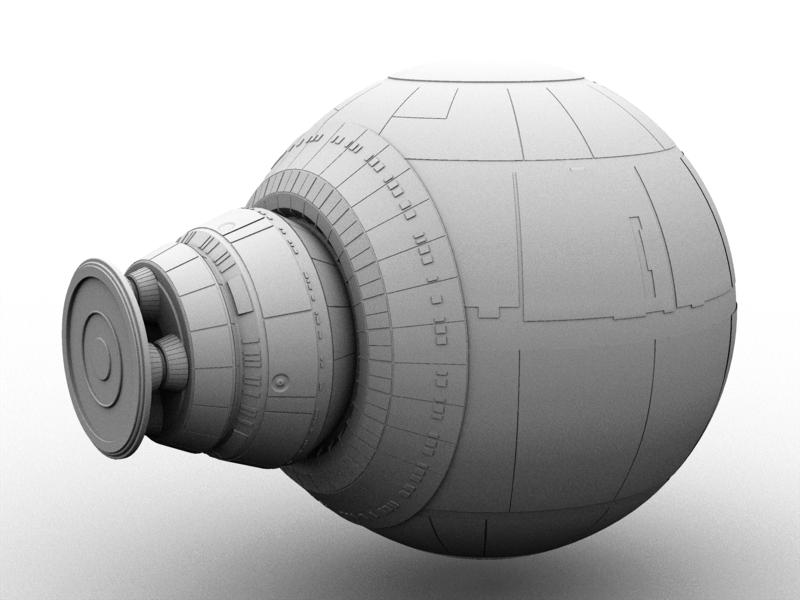
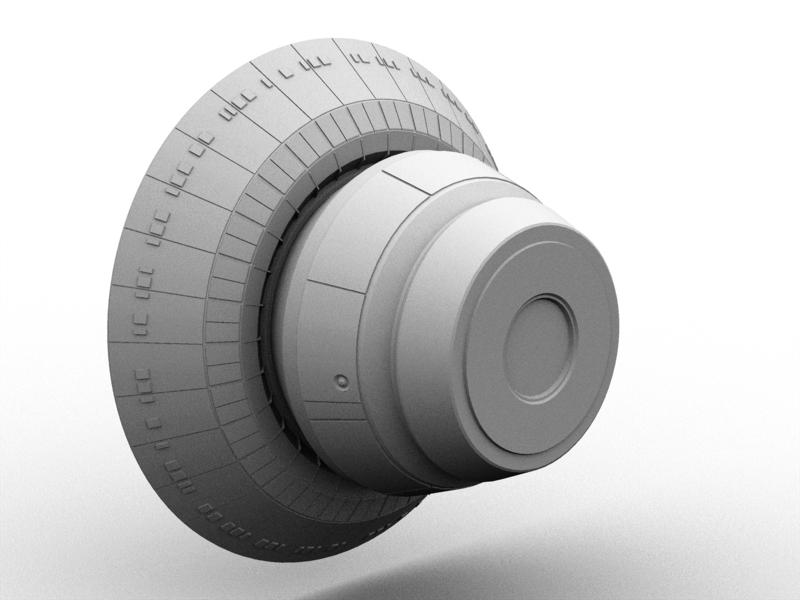
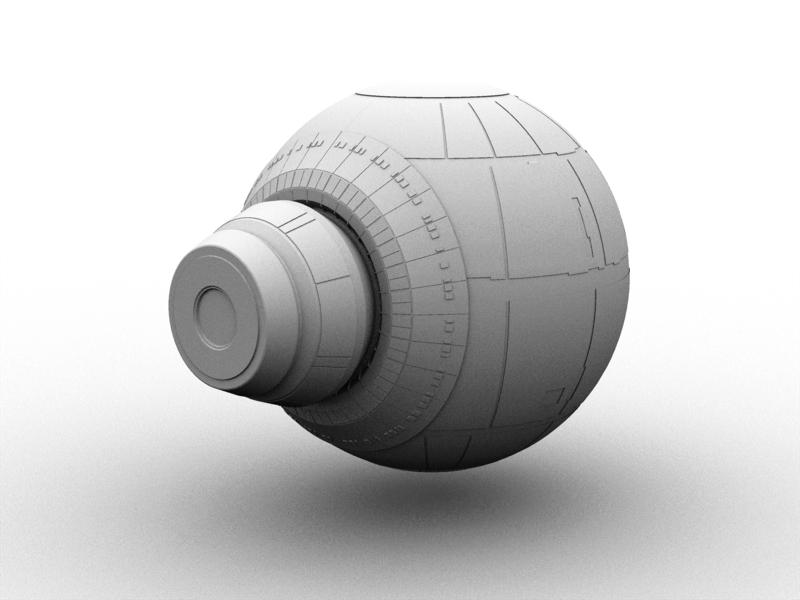
Thanks everyone for your kind words. Definitely looking forward to your tutorial Eric. In the meantime, I started working on the neck, just behind the command module. Things are pretty straight forward here when working with the panels. Here is what I have so far. Al [edit] Actually, when I was working on the neck, I found a way of reducing the patch count, which is making me rethink how I have done the panels so far. I was concerned that as I reduced the patches, I wasn't keeping the proper curved profile of the panel. I found that by selecting a line of CPs along the curve, then setting the translate pivot to the center of the sphere or the lathed object, I could then rotate the CPs, which in effect followed the curve as before. This way, I did not need to get into adjusting bias on the CPs, and kept things pretty smooth. I found that I would need a minimum of 3 CPs along a spline for a smooth curve when decreasing the patches. I also won't need to work with as high a patch count when starting the panel. Not sure if this is how you did yours Eric. My way is kind of tedious, and as mentioned before, am looking forward to your tutorial. Hopefully, your way is easier. Actually, I will have to go back and re-read yours to make sure I am not stealing your idea. Anyway, this is how the neck will attach to the command module. [/edit]
-
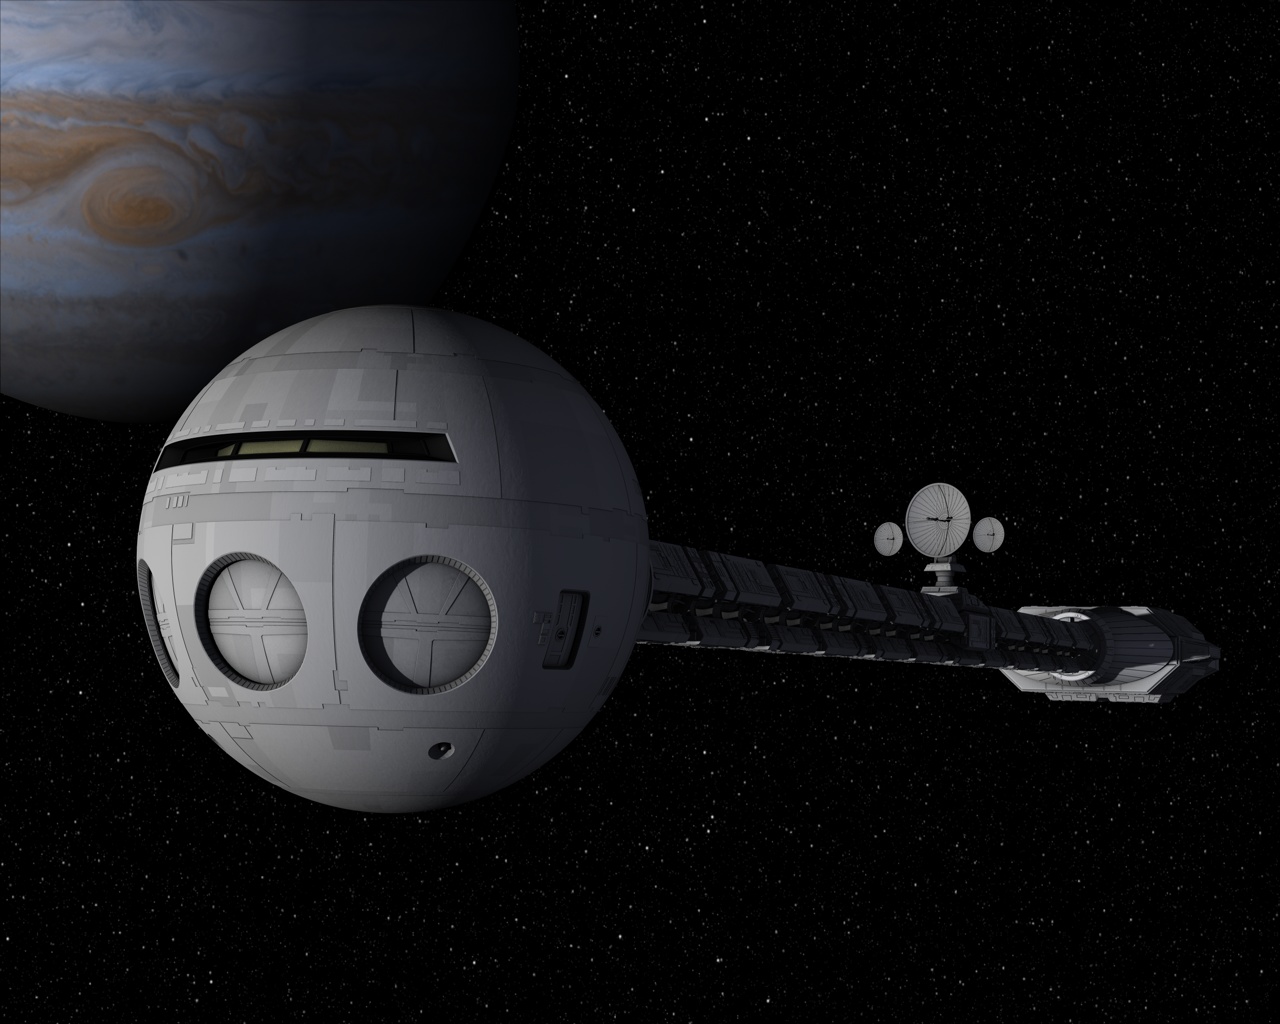
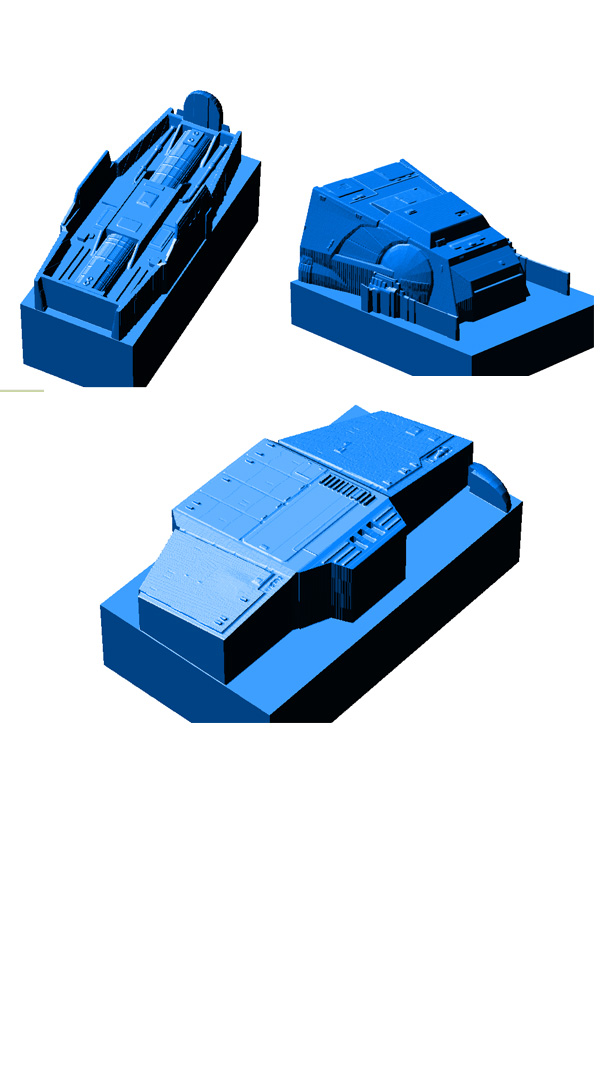
It's been a while since I've done any real modelling in A:M. Stian's Cathedral and Eric's Nautilus and Millenium Falcon have inspired me to give it a go again (that and the carpal tunnel is doing pretty good right now). I had modelled the Discovery from 2001 - A Space Odyssey in a poly modelling program a while ago, and thought it would be great to get back into modelling in A:M with. So, here goes nothing... 2001 is one of my all time favorite Sci-fi films. It even still looks great watching it today. I first created an 'inner hull' sphere. It is relatively low in patches, as most of it won't even been seen. Next, I created a very high patch (over 40,000 patches) 'outer hull' sphere, slightly larger than the 'inner hull'. The high patch count would then allow me to essentially cut the raised panels as needed from the 'outer hull'. I cut the 'outer hull' in half since I will be copying and flipping one half to use for the other half. Then I started to reduce the patch count on each panel. The wireframe shows some of the panels that have been reduced and some that are still high in patches. After all the panels have been created, I will then work on the pod bay door openings, then add depth to the panels. Have to thank Eric for his explanation on how he created the panels for the Millenium Falcon. C&C always welcome. Al AO Render Wire Frame Render Discovery (created in poly program)
-
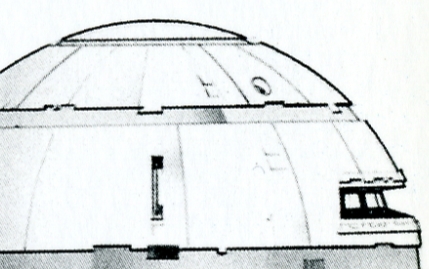
Actually, the first picture in this topic is a great example of what I am talking about. The Millenium Falcon's body is a compound curve. Not only is the main body circular, but the profile of it is also curved. So, how did you go about making the first armor plate with the indents so that it follows the compound curves? I've been able to create a simple raised panel to follow the curves of the Discover command module, but like the Millenium Falcon, some of the panels have little indents and extensions along the borders of the panels. This is where I am having trouble and keeping the panel smooth. The way I am starting is making a sphere for the 'inner hull'. From there, I created the profile of the section of 'outer hull' that I am going to work on with a spline, with the correct number of control points that I feel I will need to accomodate any indents or extrusions. Then I lathe the profile and then start breaking and deleting CPs to get the shape of the panel I will need. However, when I delete the CPs, it distorts the other splines and I no longer have a smooth patch. I've tried moving CP's along a spline, but haven't been able to get them to follow a curved spline properly. It may be that I am not using the correct key when dragging the CP. I've tried 1, 2 and 3. I modelled the Discovery a while ago in a 'poly' modelling program, and this part was actually one of the easiest to model. It's been a while since I've done any serious modelling in A:M, and am kind of floundering right now. Amazing how quick we forget things as we get older... Any help you can provide is greatly appreciated. Thanks... Al Reference drawing of Command Module showing panels with indents and extensions. Raised top panel and simple body panel Discovery model done in a 'poly' modelling program
-
This is looking better and better each time I check in Eric. Any chance of you explaining how you are creating your armor plating on the Falcon? I am playing around with the Discovery from 2001 - A Space Odyssey, and am having trouble getting smooth raised panels on the command module. Thanks in advance... Al
-
Another really sweeeeeet model Eric. Would love to see a wireframe render... Al
-
Looking good. Remember to check your building codes in your area to make sure you are using the right materials for your shed. Be a shame to build your shed, then it doesn't meet code and have to take it down! Al
-
Good looking model you've got going there Darkwing. The textures look great! The bump map for the grid lines doesn't quite look right though. The grid lines (on both upper and lower hull) look too wide and too deep. I think it might look better if the bump was more subtle. There are some great reference photos here and here. (Actually, both links are to the same model being constructed) Otherwise look really good. Al
-
Another great character Mark. Actually, all of your characters are well done, from the pirates to the Enterprise crew. Any tips or tutorials on how to learn to do character modelling? Al
-
Geez Eric, I am at a loss for words. Hope you are able to get a water environment created that will do justice to this model. Al
-
Hey Mark. I said it before, and I will say it again. This just brilliant! Always amazes me what people are capable of with A:M. Al
-
That is way cool. Now, if you can only get a 3D model made of it, then make some printing plates, get the right color inks and a printing press, you would be in business!! Al
-
WOW! That's just crazy! My son had all those characters when he was younger and would watch the show all the time. Ahem, being a dutiful dad, I would watch the shows with him. Personally, I liked Ringo narrating better then George Carlin. Al
-
This model is so sweeeet Eric! Attention to detail is superb! Would really love to see you and Stian go head-to-head on a modelling project! It would be just too scary! Al
-
Holy crap on a cracker!! Gorgeous model you've got there. Good looking render that brings out the fantastic details in the model. Al
-
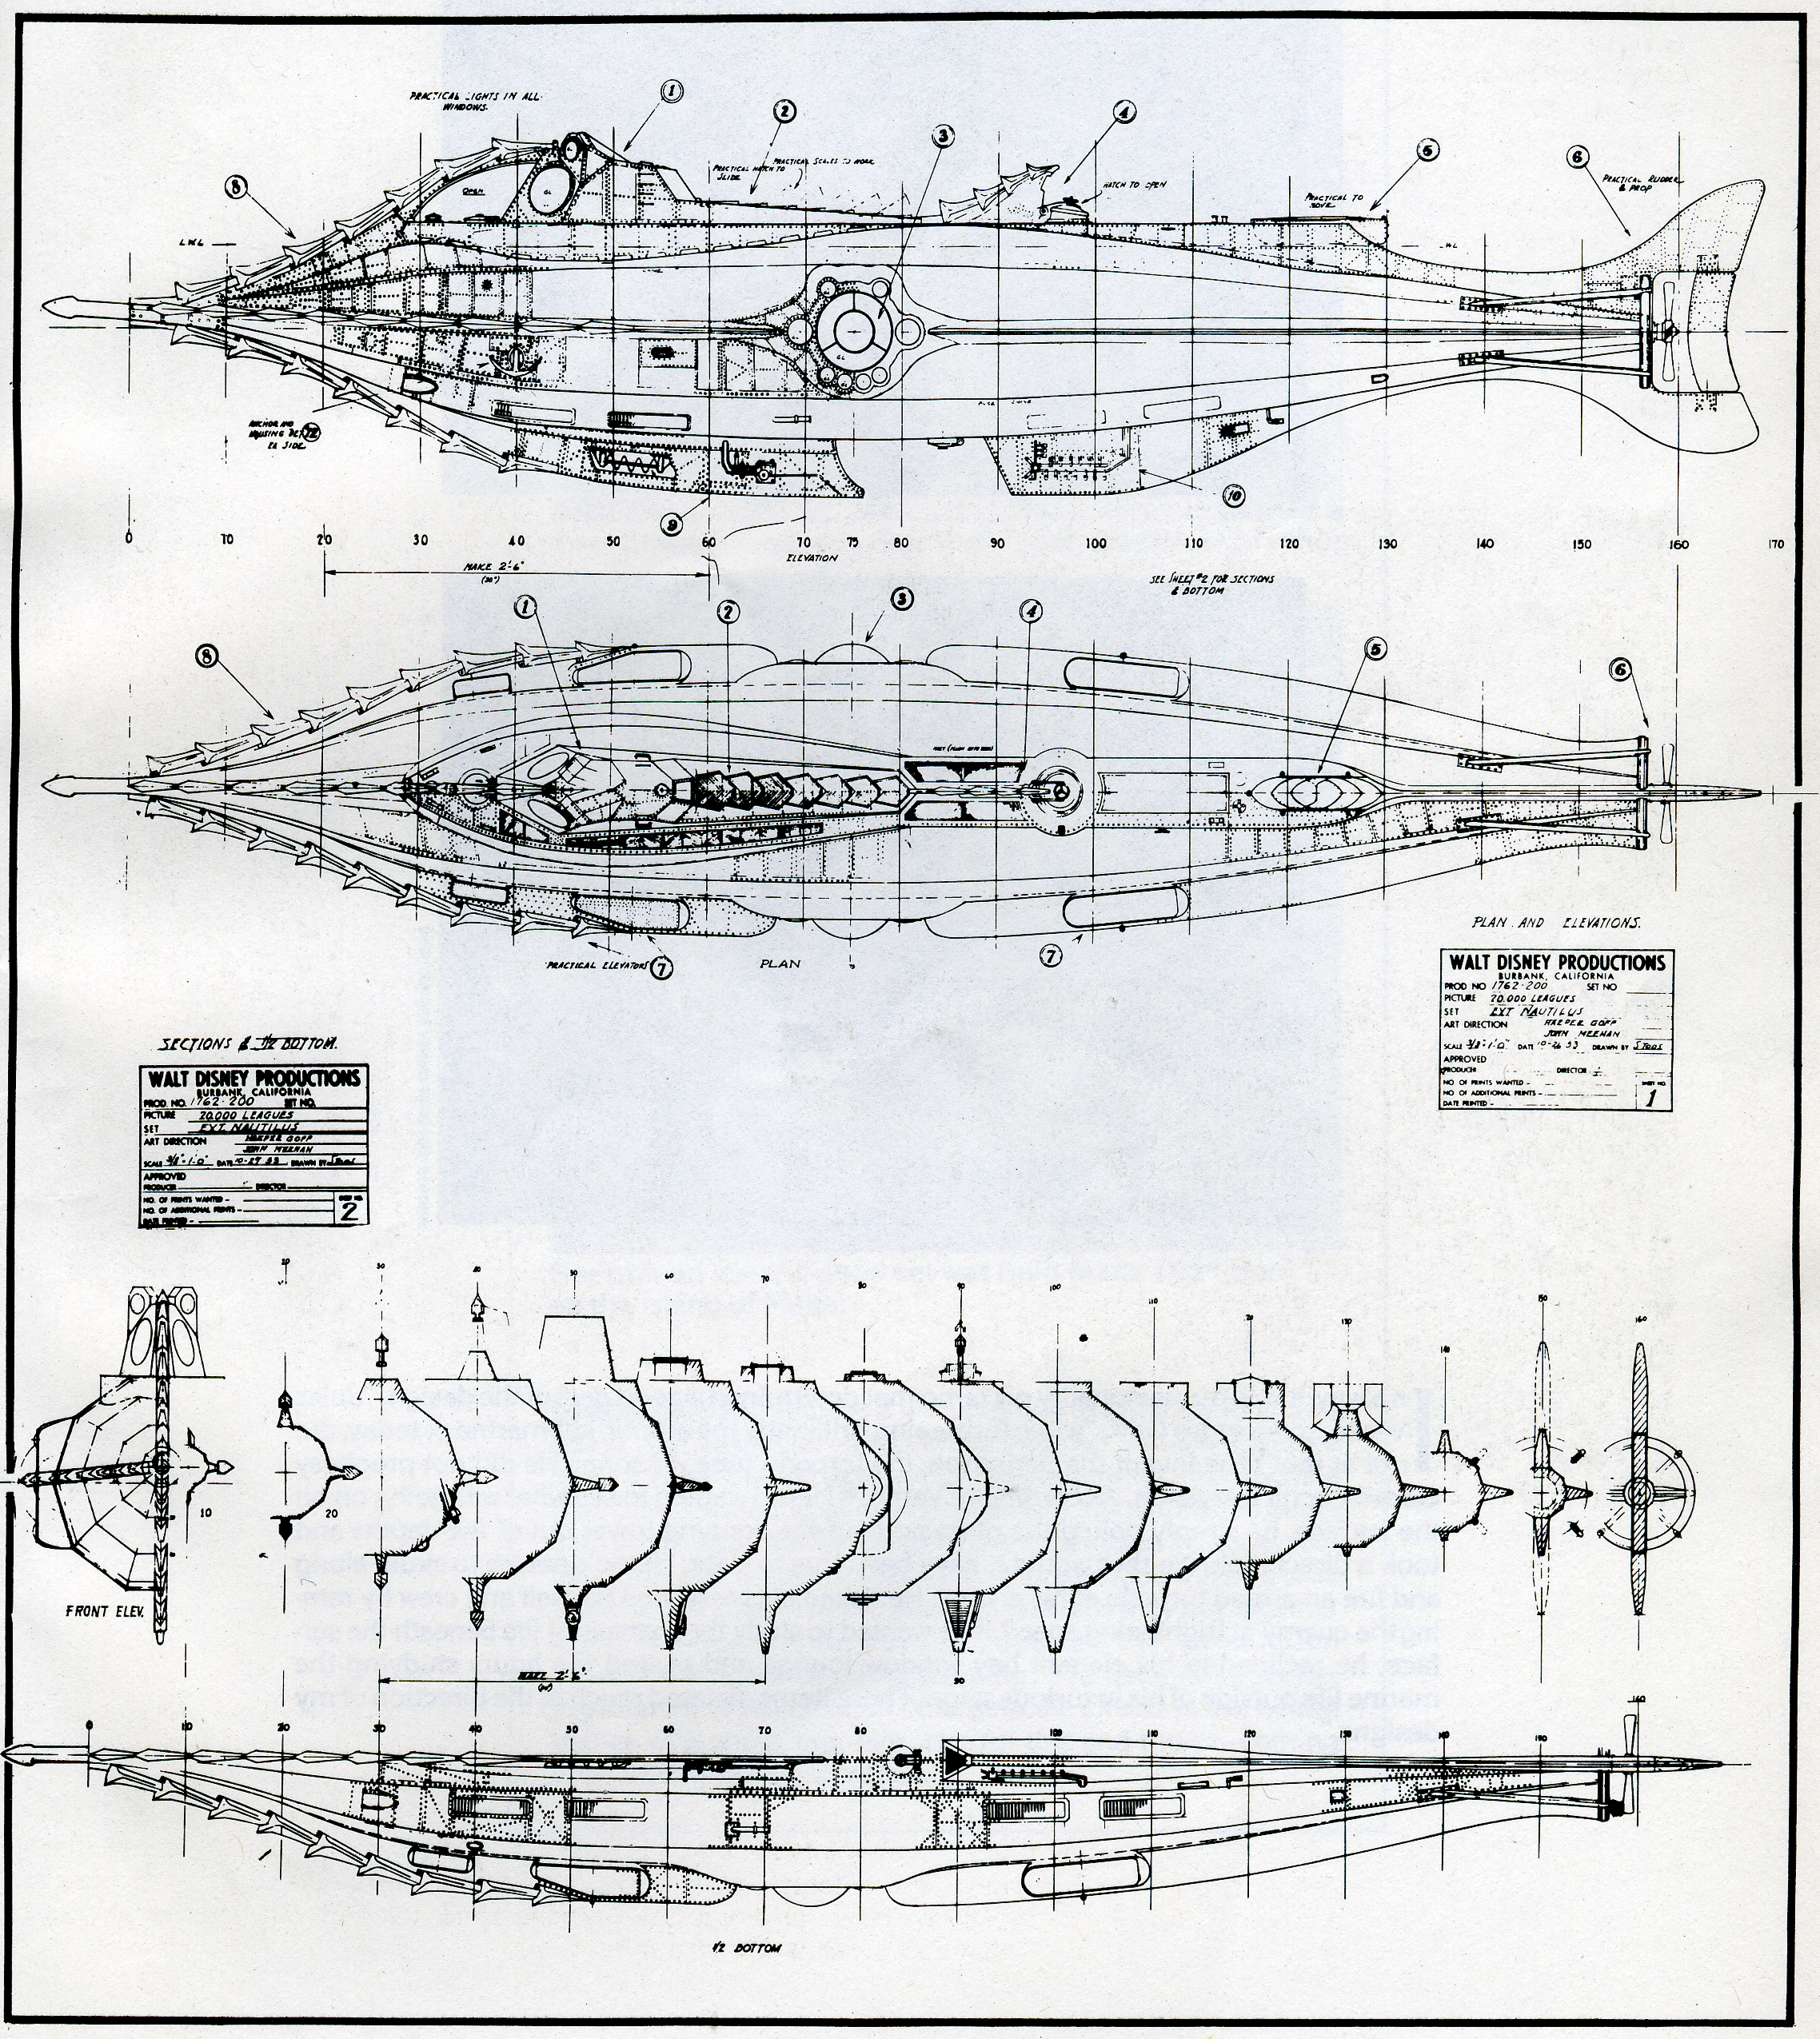
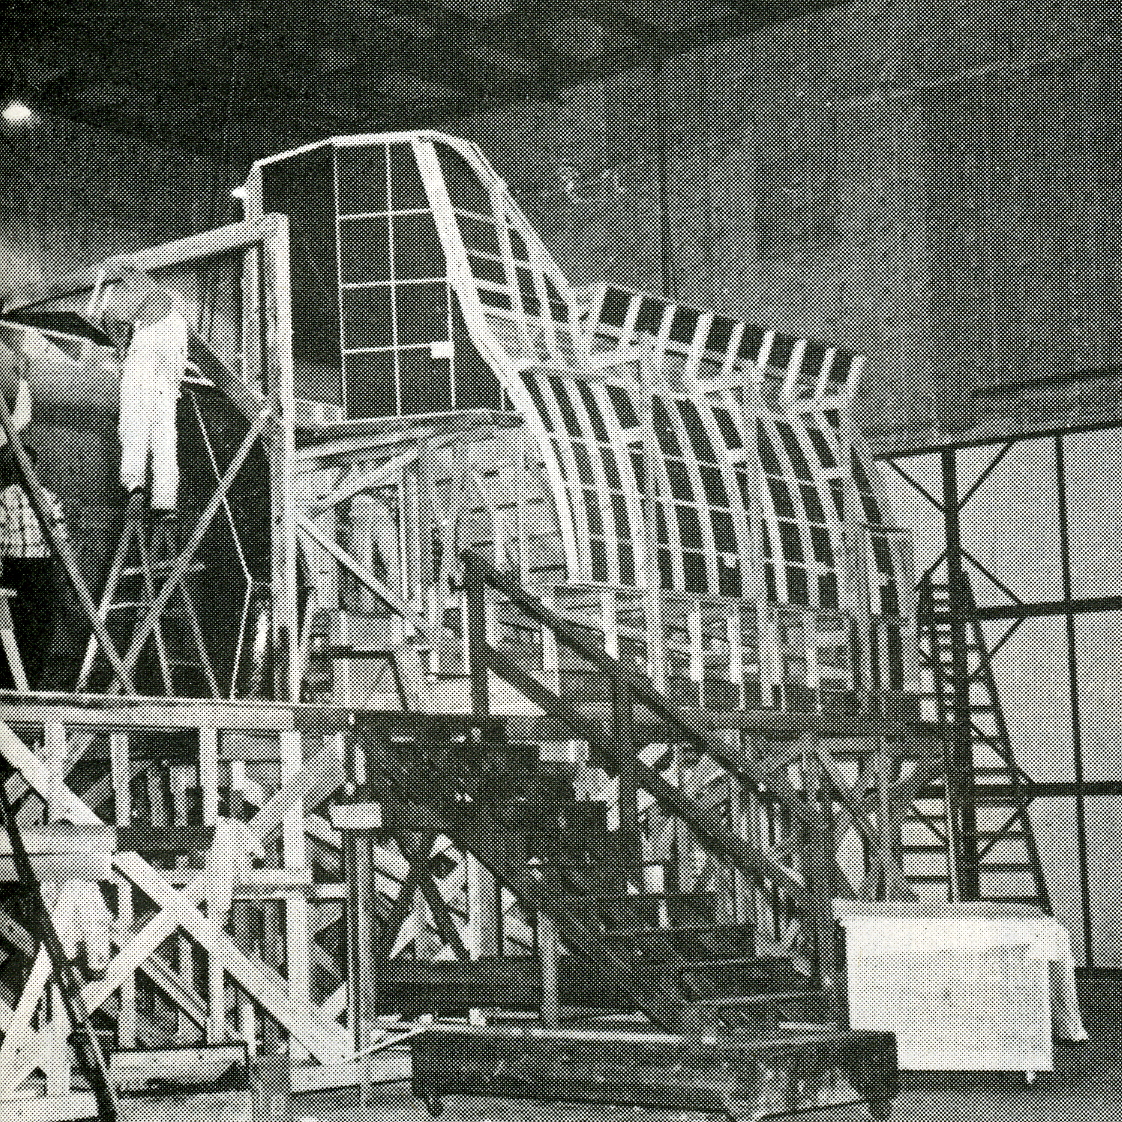
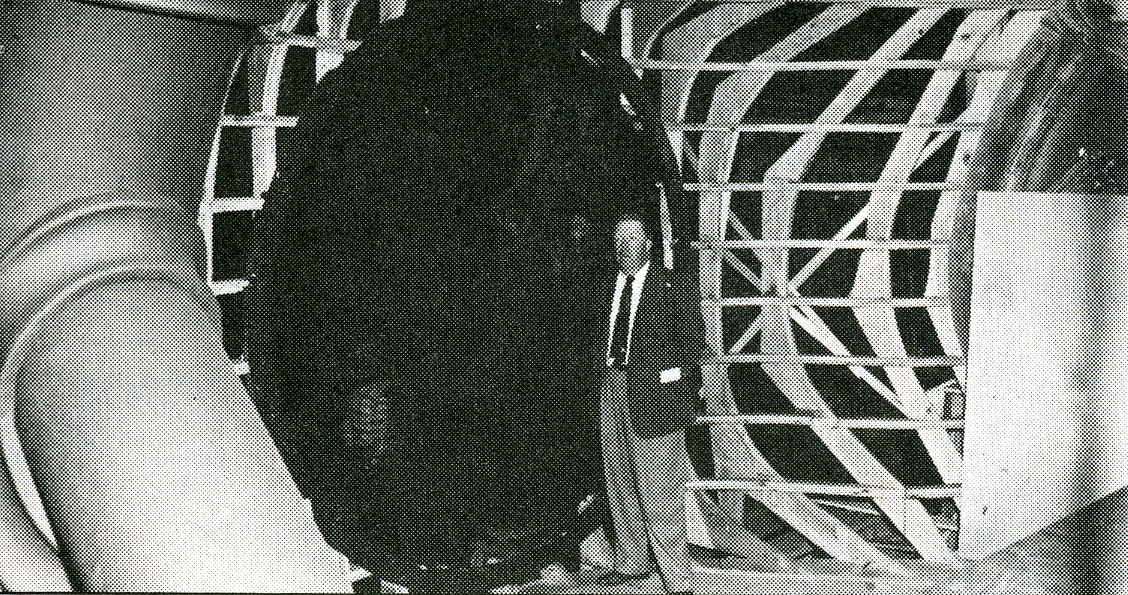
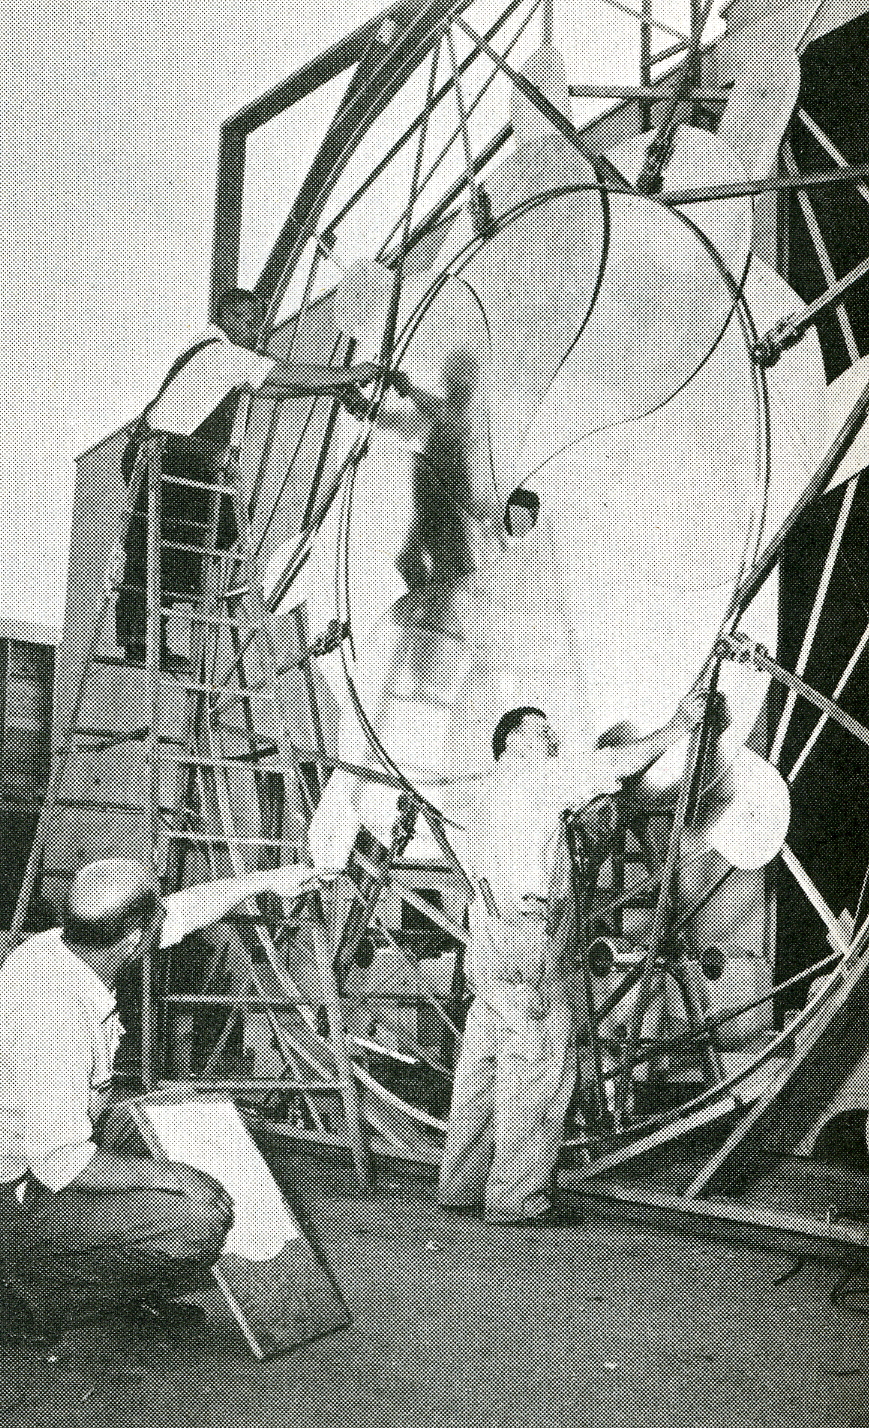
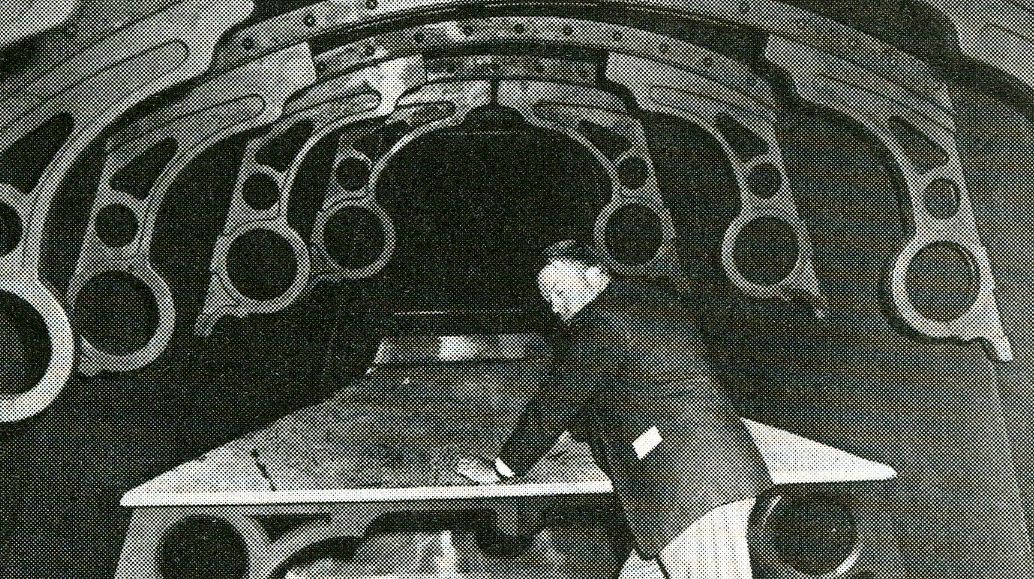
Hi Eric, Here are the scanned images from the book I mentioned. It has the blue prints with cross sections, some photos of the Nautilus under construction, and a couple of finished photos. Sorry, I don't Skype. Seems like the older I get, the less I like technology! (This view on life doesn't fit in well with my profession of being a computer programmer... ) Al
-
Really nice job on the Nautilus Eric. I have a book on Special F/X from Starlog Magazine. It has the blueprints to the Nautilus from the Disney movie. It has cross-sections diagrams and photos. If you are interested, I see if I can dig up the book and can scan them for you. Al
-
Actually, I stand corrected. I was going over my e-mails again, and William did send a picture of the AT-AT model that had been partly milled. Forgot all about getting this photo. I am still hoping to get a copy of some of the models I sent him. There was no money involved, but knew that right from the start. In turn for using the models, we were to get a copy of the model in return. I don't think it was Will Sutton involved with this. Al
-
Sent some models to William, but am still waiting to see or receive anything back. Al
-
Absolutely stunning Stian. Al
-
Very cool, post your update here so we can all see how it turns out! Thanks... Al