Caroline
-
Posts
1,248 -
Joined
-
Last visited
Content Type
Profiles
Forums
Events
Everything posted by Caroline
-
It's a hard thing to understand until you actually need them. What graphics program do you use? There's an interesting thread here about what the alpha channel is: http://www.hash.com/forums/index.php?showtopic=16922 But if you look at John's ice pentagram in that other thread, that is what an alpha channel is for - if he did not have an alpha channel describing the transparency, you would not see the grass through the pentagram.
-
I think they are the same, Fuchur, just shaped different, so you can see more objects on the one on the PWS, so you can select more keyframes. I usually use the one at the bottom, but if I have dual monitors set up, I use the one on the PWS. The 1 key works on the PWS one too. Ravager - to make a print screen, click Shift + Prt Scr (That key is part of a group of 3 that includes Scroll Lock, unless you are on a laptop or have a Dell, in which case I don't know where it is). Then go into your graphics program, and Paste (Ctrl V). I use Irfanview as my graphics program for printing screens, as it is quick to load. Then you can draw a box around the part you want to keep and crop it (Ctrl Y in Irfanview). Did you try doing a TaoA:M exercise, like Ex 5 take a walk? That might get you started. If you just watch the video http://www.hash.com/2007web/vm.htm, that might help too.
-
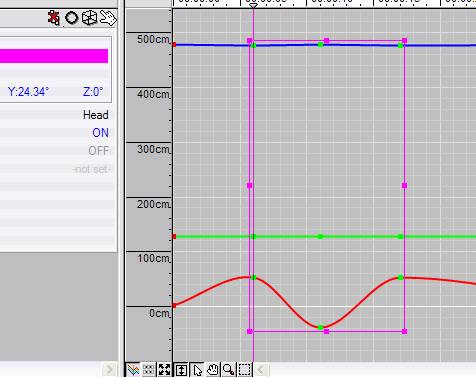
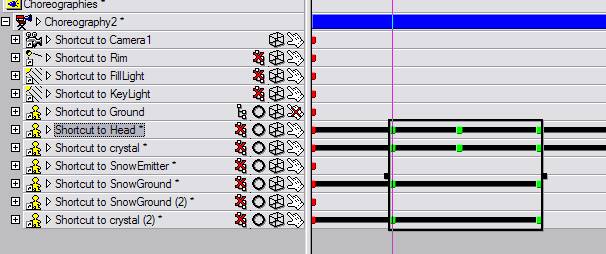
I'm not understanding that one, as can't you can just highlight them by drawing a box around then move / copy: Technical term "channel"? Do you mean the spline mode? Because you can move the keyframes there by holding the 1 key down while you drag sideways. Ravager - are you in the chor? Do you have the timeline window open? There are 2 timeline windows, one that you can open View Menu > Timeline, and one to the right of the PWS - in the two above images, I have used both. I think we need a screen shot.

-
Hey, Joe - I came in and your name was at the bottom in italics, and now it's not - does that mean that whenever somebody's name is in italics that they are answering the post? That would be a really nifty forum feature to know, so that if someone was already posting, just to wait a couple of minutes.
-
You need to have a decal with an alpha channel / transparency. I did this in Photoshop Elements with 2 png files - separate decals: Here are the 2 pngs so you can see the transparency: You need an editor that will create transparencies, like Photoshop, The Gimp, PS Elements, and I think the free Artweaver does pngs now (not sure). Graphic formats that hold transparencies are: .tga - in Photoshop Elements you define a selection, and save the selection, and then save to a 32 bit tga. .png - in PSE you just paint on a transparent layer I am not sure how you would get a 'glowing' effect - I did my glow in PSE with layer styles (hastily )
-
Not quite sure if I understand what you mean. You do it the same way as copy/cuts and pastes in all other programs. In the timeline, highlight by dragging a box around the keyframes. Then right click > copy and position the time to where you want the frames and right click > paste. Ctrl C and Ctrl V work too, and so does the Edit menu. If you only want to move it a little way, you can also drag a box around the keyframes, then use the right and left arrow keys. There is one tricky thing, to drag a single keyframe left or right with the mouse, you need to hold the 1 key down (not on the numpad, but above the Q), while you drag.
-
 Wow - that was very emotional. Congratulations on your first movie. You must be very proud of it.
 -
And the wonderful thing about learning animation, is that you are learning principles, not just 'how to use a particular software'. This means that there is ENDLESS stuff on the internet that you can look at. I like this site: http://www.rmit.edu.au/aim/a_notes/anim_contents.html especially the Walk Cycle: http://www.rmit.edu.au/aim/a_notes/04_walkcycle_project.html Here's a couple of others among the millions out there: http://www.idleworm.com/how/index.shtml http://www.brianlemay.com/Pages/tip.html However, don't spend too much time reading about it - just do it That book "The Animator's Survival Kit" is one to buy if you can - it's quite cheap on Amazon.
-
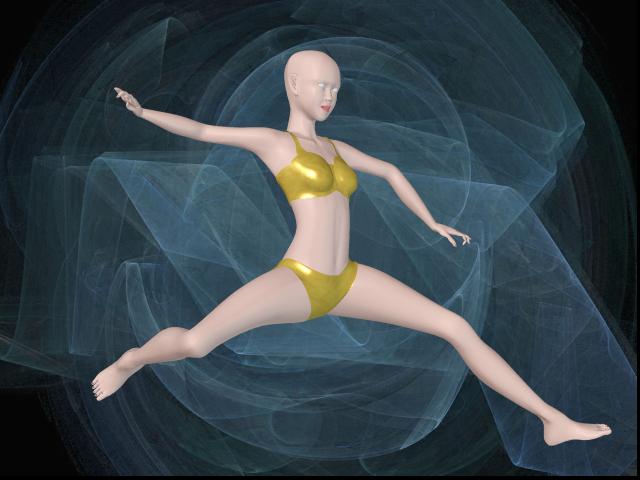
I think she's fabulous.
-
I have been tweaking this for days now - it's not perfect, but I think it's about as good as I can get with this mesh. I think the pelvic area, which is not very good, even with SmartSkin, needs more splines. However, as long as she's wearing clothes, and not doing too much gymnastics, it should hold up GalaDM_RigFinalAlpha.zip So unless anyone has suggestions, I will now document up to here without all my mistakes along the way.
-
And that great tutorial from brainmuffin is why you need full Photoshop and not Elements
-
I use Photoshop Elements 5 which is way cheaper. I don't miss the big guns, but probably other people would. The only thing I miss is not being able to organise my layers into folders. Other people might miss some of the brush abilities, but I do my painting in TwistedBrush or Dogwaffle. I would suggest you download a 30 day trial of Photoshop Elements from Adobe, and see if that does for you, and then try a 30 day trial of Photoshop, and see what more it gives you. PS is much more expensive than PSE, so you could find out first whether you need to spend all that. Whichever you get, there's a whole lot of learning to be done
-
Help me step Uv flatten model krub! (totorial)
Caroline replied to Klum3D's topic in Work In Progress / Sweatbox
And movies: http://members.cox.net/jtalbotski/tutes.html -
Doesn't TWO set it up as an action, so if it changes, it changes in all the chors?
-
So that is a pre-requisite - I did not understand that. I will go back and edit my earlier MirrorConstraint post so it goes in the final documentation. Thanks, Mark.
-
Steffen - thanks for fixing that other thing, I haven't tested it yet, but now I am having a weird problem with MirrorConstraints. This is my model. GalaDM_RigStage011BeforeMirrora.zip I do this: 1. In modelling mode select Left Half Group. 2. Right click selected area and do MirrorBone 3. Right click away from model and do MirrorConstraints 4. Open up Relationships > User Property Relationships > Rig Setup Constraints Relationship, and right click Setup > Edit Relationship The problem is under the Setup Constraints. The 50% constraints are now 100%. For example, right knee fan is now 100%. However, if I revert to the saved model, and do step 4 first, and go back and do steps 1 to 3 while the Relationship window is open, the constraints stay at 50% and are mirrored correctly. Do you get this result? It is driving me mad that sometimes my constraints all disappear! Addition - if I leave an Action window open while I do steps 1 - 3 it also works, but if no other windows are open except for the modelling, then all constraints are set to 100%
-
Thanks, Jason - I am enjoying it, but it is true that 90% of the effort goes into the last 10%.
-
I like that idea, Rodney - I guess there's no real reason why you can't have separate body parts rigged in the 'morgue'. I don't have much time this week, but I might play with that one.
-
And I'm watching it - that was such a good hand movie, that I was thinking what it would take to have a little section on the end of my rig section replacing the TSM hand. But you are such an expert, it's hard for other people to comment. Maybe you don't realise how HARD other people find rigging
-
Oh well done - do give us a .mov - I thought the model was fabulous. Are you going to do dynamics? Homeslice has done a tutorial in the Tutorials forum.
-
WIP... she is a beautiful Thai moview star.
Caroline replied to StormedFX's topic in Work In Progress / Sweatbox
That's looking really good. -
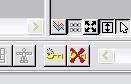
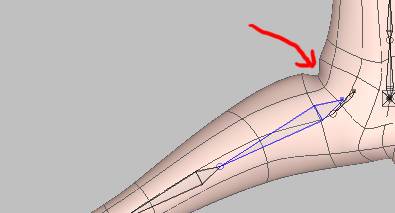
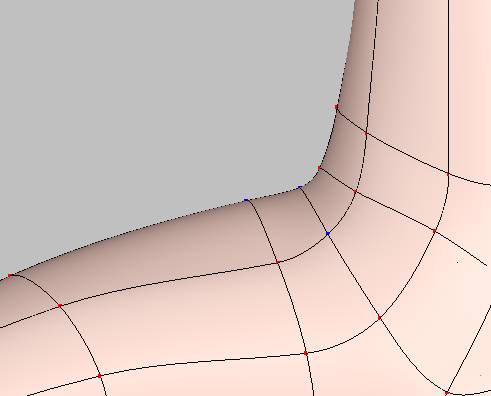
Stage 11 - SmartSkin Actually this should come before MirrorBones and MirrorConstraints. Smartskin is a quick way to fix up those wayward CPs that could be fixed by proper fan boning and weighting. Holmes' Tutorial on SmartSkin is here: http://www.hash.com/forums/index.php?showtopic=29742 I have a couple of CPs in the hips that I don't like. Smartskin works on rotation of the bone. You set the position at 0 degrees rotation, then where the CP should be at, say 90 degrees rotation. The software interpolates the position of the CP between these degrees. It is very similar to creating bone keyframes during an animation. So you need to check where the CP is at all rotations, and if necessary move them. It is best to moved the CPs at fixed rotations, like 90 degrees, 45 degrees, 22.5 degrees etc, just to keep track of them better. A moved CP will go blue, and the movement can be deleted from the Smartskin by highlighting the CP and clicking Delete Keyframe (the icon with the red x as in this picture). The Delete key does not remove a Smartskin movement. If you have a lot of smartskin, the model's file size will get bigger and less efficient, so it is better to use weighting. In this picture, when the leg swings out, a dent is caused: This should be fixed in the model BEFORE the Mirror plugins are run, and before TSM is Rigged. 1. In Bones mode, right click the "1 right leg" bone and choose New Smartskin 2. A new Relationship window will open, with the "1 right leg" bone swung in a 90° Y rotation. 3. Open the properties in the PWS for this Relationship, and change the Y rotation to -70°, which is as far as I think the movement should go. 4. In Front View, go into Muscle Mode (F7, and move the CP to the 'correct' position). I also moved some of the surrounding CPs. 5. Move the bone around in the Relationship window, to test it out. I do not think that SmartSkin is immediately updated in Actions, so you can't have tiled windows as we did previously. Any Actions have to be closed and reopened to ensure the SmartSkin works there. You can edit the smartskin by right clicking the same bone, and choosing Smartskin > SmartSkin1 I also did a back swing smartskin on 70 degrees in the X rotation. After doing MirrorBones and MirrorConstraints, you can right click in Bones Mode, and choose Mirror All SmartSkin.
-
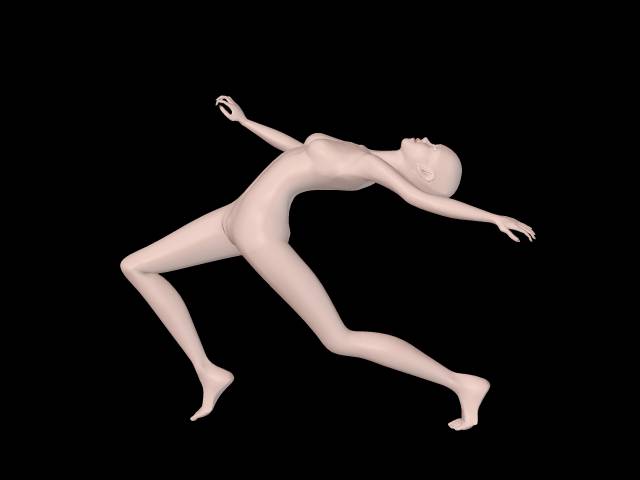
Lol, Jake - it's a terrible animation especially in the shoulders and knees - it was just for fun. There are a number of things wrong with Gala - her fingers, and her ears especially, but I like her the way she is At least for the moment. Maybe I'll fix her up on version 2. But thank you for pointing that one out, I actually had not noticed her arm length deficiency.
-
There's Eggington, but they're not expensive: http://www.eggprops.com/catalog/category_2...ion_Master.html Extras CD is here: http://www.hash.com/amtutes/X_Vol001/ You can also buy it at the Hash store, and there is also a DVD from the store available with GBs of stuff. You will need v15 for some, but not all. When downloading a zip file from the above link, the site has forward slashes in the zip link, so change them to backward slashes, and they will work. Free models at: Animating in A:M is much, much easier than Poser, and a lot more fun, especially if the model has a decent rig, like the ones that come with A:M on the CD.
-
----- I would say it is because "right upper arm 1" roll handle is pointing forwards not backwards. (One of the first things the 'rigging experts' taught me, during the workshop, thanks experts ) You'll need to go back to the version before you ran Rigger, correct it there, and rerun Rigger. It is possible to correct it afterwards, but you have to track down every bone created by TSM during Rigger and change them. It was the TSM constraints ON - when I went into User Properties, under the Model's properties, and turned them all OFF to start, turning TSM ON made it go wonky.