Caroline
-
Posts
1,248 -
Joined
-
Last visited
Content Type
Profiles
Forums
Events
Everything posted by Caroline
-
You can also download a 160MB data file full of the models that you need for The Art of Animation:Master: Data file here: ftp://ftp.hash.com/pub/misc/data.zip The Art of Animation:Master here: http://www.hash.com/2007web/reference.htm The data file has actions in it, which you use in the second TAoA:M exercise. The subscription A:M is not limited in ANY way! As to your library problem, just putting it into a folder will not put it into the A:M library. The A:M library accesses a .lbr file which lists the library files. like actions and models, in it. Try opening A:M, opening an explorer window that shows the actions, and drag each action onto the relevent section of the A:M library displayed in the Project Workspace.
-
This is the link to the The Setup Machine (TSM) forum: http://www.hash.com/forums/index.php?showforum=136 The second sticky link is where you will find the rig, and the first sticky link is my "workshop" of actually installing it. (Yes, I am still working on the pdf summary of that thread, but am only about halfway through at the moment).
-
That's very good. Did you use a particular rig, or roll-your-own? I shall look forward to seeing Murphy moving.
-
That is a good idea, Jirard, and I will give that a go next model. The way I do C/F/A, I don't have to break splines - if you copy the left half, then delete the whole model, then paste the copied bit, there's no breaking needed. However, my method is not possible if you have any rigging or weighting done. (This is what I do: 1. In Front view, click the central spline. 2. Press the comma , key to select the whole spline. 3. On the top toolbar, click on Show Manipulator Properties. 4. Click the Scale manipulator. 5. Change the X scale to 0% - this aligns along the x axis. 6. Select the left half of the model up to and including the central spline. 7. Press Ctrl C to copy. 8. Press Ctrl A to select all 9. Press Delete to delete all. 10. Press Ctrl V to paste. 11. Shift click the middle spline. 12. Right click and Copy/Flip/Attach.)
-
If you search the forum for 'sphere' there are a number of interesting posts. This is one: http://www.hash.com/forums/index.php?showtopic=23686 But it has A LOT of patches - further in the thread are some low-res ones.
-
I think this is an important skill to master - it really does save a lot of frustration. Also the skill of repeatedly doing it, so you can see how your model is working (ie do a C/F/A, model a bit more, delete one half and do another C/F/A). I find Mirror Mode works, but only for small movements of CPs after the C/F/A has been done. Like when you are refining the final positions of CPs. Huh? Are you stalking me? Have you seen all the junk slowly and unwillingly leaving my house? I am moving next March. If you get here before then, you can stay for a while, as long as you are able to move large pieces of furniture.
-
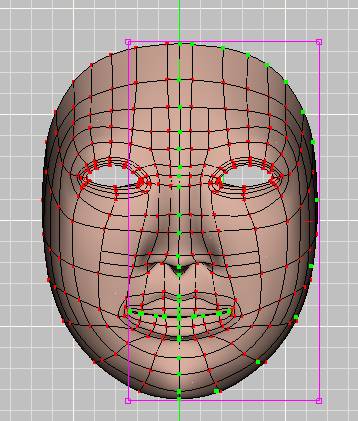
Just a quick look. To see the spline, click halfway between two points on the spline, and press the comma , key. This pic is the result on the centre spline: You can see that the outside spline around the edge is included, and should not be. Use K to break the spline, then A to add to a spline. This one is a bit tricky though. Press the A key, and click the control point. Before clicking to add the next point, move the cursor to see which spline is affected. If it is the wrong one, put a dummy point as in this picture: After adding these two dummy points, the spline across the top can be attached correctly. The dummy points can then be deleted. Same with the point under the chin. The mouth should not be on the same spline as the centre spline either (see first pic). Other than those, I can't see any obvious spline errors.

-
This is my ritual: Save first. 1. Click the central spline. 2. Press the comma , key to select the whole spline. 3. On the top toolbar, click on Show Manipulator Properties. 4. Click the Scale manipulator. 5. Change the X scale to 0% - this aligns along the x axis. - make sure the centre spline is on the centre green line. 6. Select the left half of the model up to and including the central spline. 7. Press Ctrl C to copy. 8. Press Ctrl A to select all 9. Press Delete to delete all. 10. Press Ctrl V to paste. 11. Shift click the central spline. 12. Right click and Copy/Flip/Attach. If it did not work, revert to saved and try again. But it usually does work for me now.
-
You could try a material effector: http://www.digitalproducer.com/pages/mater...n_animation.htm It's a while since I did this one, but I remember the render took a long time. I am also not sure if it will eat only the outside leaving the inside whole.
-
I assume you went here: http://www.hash.com/2007web/reference.htm The pdf appears to be online now.
-
Couple of other places might help too: Basic Splinemanship and The Wannabe Way Comic Tutorials
-
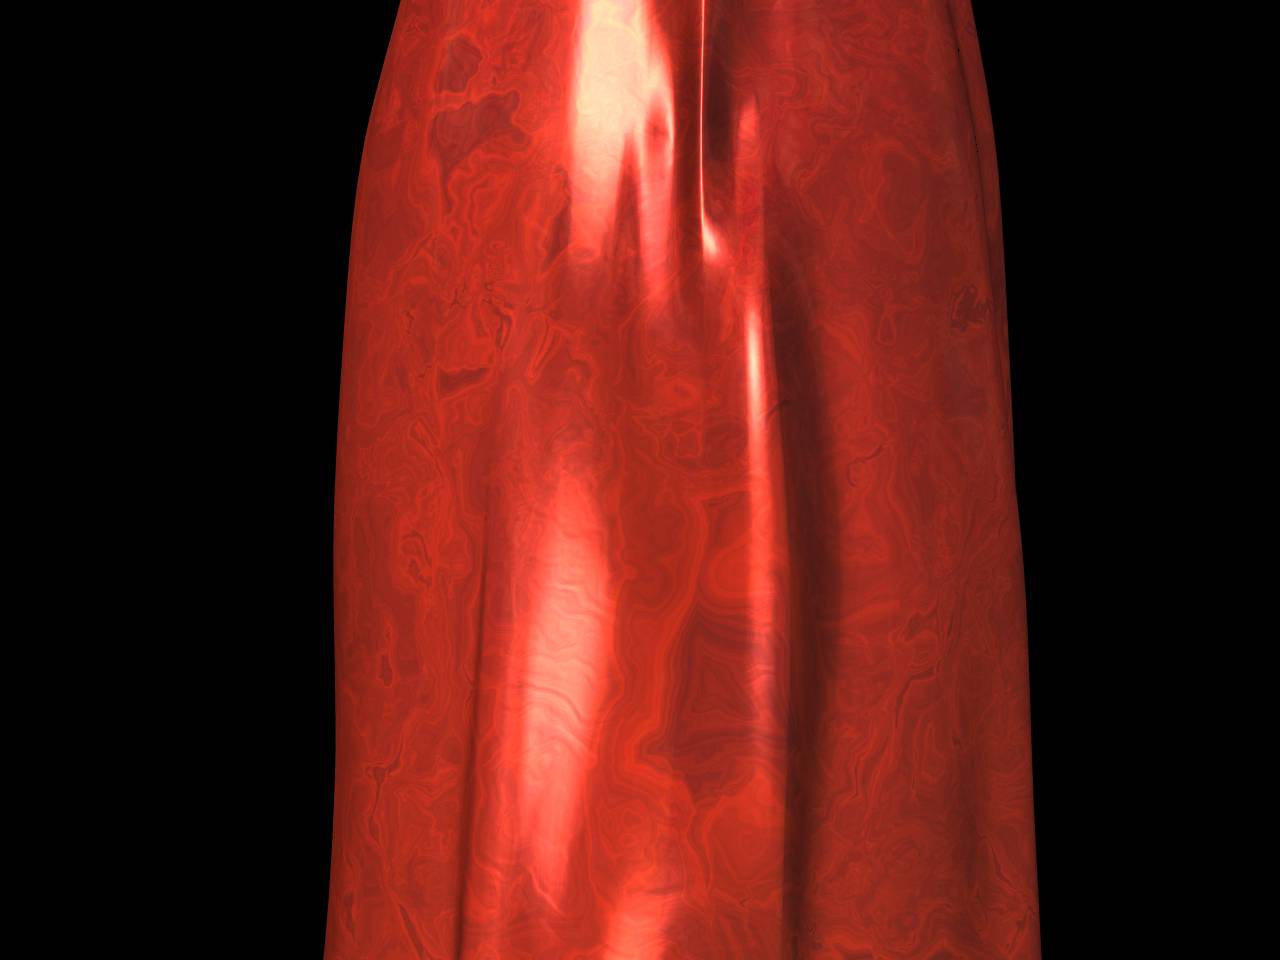
What is your vision of how satin looks? How about this one, if it had a bit of bump in it: This is a Darktree, and takes 10 mins to render, which was 9.5 mins longer than ordinary render. Metal_GoldLeaf.dsts from http://www.darksim.com/, click Download Shaders, then click Metal link. Tweaked colour, Specular 20%, Glossiness 1%, Metal Highlight 25%, but probably needs tweaking so that it's less shiny. I was also playing with the Specular shaders, with experimentation you might find something you like.
-
Have a look at this tutorial from johnl3d for animated materials: http://johnl3d.blogspot.com/search?updated...p;max-results=1 It's quite tricky, but very doable. You will probably need to be aware of this "Show More Than Drivers" allows you to see more properties in chors and actions, so you can animate them over time.
-
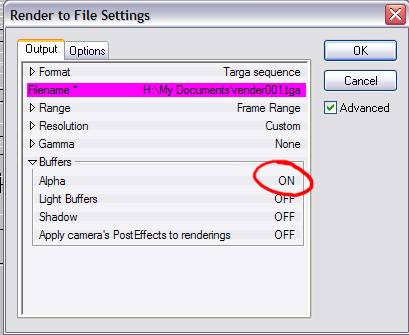
Yes, sorry Rodney - I uninstalled WebRender today, and it messed up some A:M setting, and corrupted my render output screen I thought I was dead in the water there, but the forum search saved me. What a fab forum this is Just to confirm, the png transparency is the same as the tga transparency, change Alpha to ON.
-
I had difficulty finding a gif converter that recognised the tga alpha, except for that one I mentioned, and that one did not seem to want to animate, but I did not spend a lot of time on that part of it. I did not manage to render a transparent png. There did not seem to be an option in A:M to do that - do you know how, Rodney?
-
Tricky. eugene.zip This is a transparent animated gif, but the animation is too slow, and I could not work out how to get it faster - I'm sure you could You can't do this in A:M alone, as A:M does not render to gif. I rendered Eugene to a tga sequence with alpha on, as explained above with the Thom tga. Then I converted the tga sequence to a transparent gif sequence using a trial version of AhaView. Then I dropped the gif sequence into UnFREEz, which created this gif. I tested it in Powerpoint, and it is transparent there. I believe ImageReady will do this a lot more easily if you have it, and I am absolutely sure there are other free conversion programs out there that I have not found. So the key is to render to tga sequence with alpha, and then convert in another program to gif. Hope that helps
-
Is this what you want? to render a movie of a rotating logo that you can then put on top of anything, and it will be transparent around the edges? I don't know of any movie format that will do that. In A:M you can take a tga sequence with an alpha, like in that Thom image I posted earlier, and overlay it onto any other background, like a mov, or a choreography (using layers). Then render the movie. This will be a movie rendered with a background of your choice, but it will not be able to be a transparent background. You would have to rerender the movie each time you want a different background. You would only have to render the image sequence of Thom once, but the movie would have to have a background. I will try and post a movie of what I mean, as I have explained it badly here. Edit: I just realised you could mean a transparent animated gif. I will have to think some more......
-
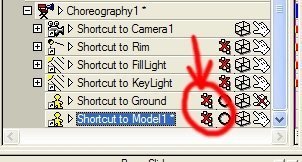
You can render to a tga sequence with alpha on: That alpha channel saved with the tga defines the transparency. All active objects will be rendered, but the sky colour (by default blue) will be transparent. Inside this zip file is a very small tga of Thom rendered out in a default chor, with ground deleted. render000.zip If you take it into Photoshop, you can see the alpha selection, or Photoshop Elements, where you can "load selection".
-
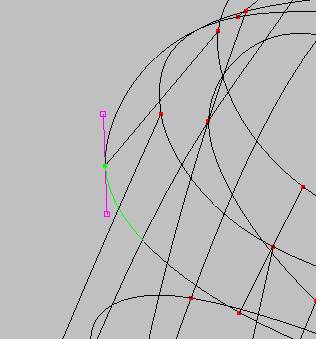
To change the bias of a spline, click this button at the top. When you click on a spline near the control point, that will show the bias manipulators, which you can change. (I hope that was what you are after )
-
Period twice usually works. Or try hiding all those points that you don't want, and use the Lasso tool to select. That one always works for me.
-
Thank you - 10 mins ago I used your previous tutorial - for so long I had been doing it the hard way
-
The subscription means you pay $49. You download v15 from the Hash site. You activate it over the internet. It works for one year then stops working. No CD necessary. Only works on one computer. There's no upgrade price any more, just the two options, $299 for a CD, or $50 for one year. With the CD, you need to have the CD in the drive to run it, with the subscription no CD. I like the subscription method - it loads faster too.
-
I'm not on a Mac either, but you could try Help Menu > Reset Settings, and then restart A:M.
-
You can retrieve your entire manual in pdf form from: http://www.hash.com/2007web/reference.htm The lip poses are on p147 of TaoA:M. And more pics: http://www.3dlessons.com/tutorials/Preston...ries-54854.html If you have Stop Staring by Jason Osipa, then he does lipsync differently - (I have read about it, but not done it). Here's a sample chapter, not lipsync, but eyes, which I guess is part of lipsync too. http://downloads.gamedev.net/pdf/stopstaring.pdf