robcat2075
-
Posts
28,278 -
Joined
-
Last visited
-
Days Won
407
Content Type
Profiles
Forums
Events
Everything posted by robcat2075
-
they don't make bedrooms big anymore, do they. How did you do the rocks on the ground in the well scene?
-
It's the king of the Isle of Misfit Toys! I don'thav a printer yet. i'm getting tempted by some of the low cost ones. If you are want if to create a modeled empty space inside something PushCPs might help.
-
How's the 3D printing doing?
-
This would be a good problem to bring to... Live Answer Time!
-

Planes Trains Automobiles Image Contest Results!
robcat2075 replied to robcat2075's topic in Contests/Challenges
Since I am already getting one I will randomly award it to another entrant. I'm closing my eyes, I'm shuffling the cards... drum roll please... rrrrrrrrrrrrrrrrrrrrrrrrrrrrrrrrrrrrrr...The winner is... Rodger Reynolds! -
Rendering Bug in V 19.0i S SE4 [solved]
robcat2075 replied to Tom's topic in Exploring Animation:Master (v19)
After you render an image sequence in the conventional manner, before you close the render window, you can press the Play button to play the rendered frames, just like you would press Play to see an animation play in Shaded or Wire frame mode in your choreography window. Aside from that, in the PWS you can RMB>Images>Import>Animation or Image Sequence to load an image sequence into your Images folder much as you would if you were going to use an image sequence as an animated decal. Double click on it in the PWS to show it in the Viewport and press Play to play it, as before. Loading all the frames is memory-hungry. Very hi-res or very long sequences may not work well. I also find that the smoothness of the playback improves after two or three plays. It will also play better if the PWS timeline is zoomed out enough so that it doesn't have to scroll as the sequence is played. My own workflow is to always render to targa sequences, then use some video editing tool like After Effects to compress the sequence into a video format that is appropriate for my end purpose. But if you want to quickly check on animate sequence, A:M can load it and play it. -
Is there a patch on the inside of the mouth that is too close to the outside?
-
That is a substantial improvement! i think a big reason the old lighting looked bad was that those creases were forcing hard contours which shaded as sudden color changes on the surface, exacerbated by the flatness caused by the lights.
-
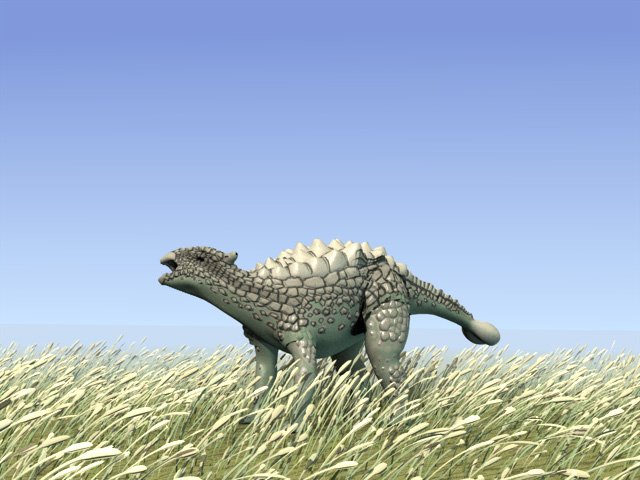
Call of the Wild Ankylosaurus
robcat2075 replied to robcat2075's topic in Work In Progress / Sweatbox

-
Rendering Bug in V 19.0i S SE4 [solved]
robcat2075 replied to Tom's topic in Exploring Animation:Master (v19)
that is weird because MS video 1 should be a standard codec that always works. Or it is? The available AVI codecs are all pretty terrible quality-wise. I'll note that you can still use Quicktime in the 32-bit version of A:M -
Rendering Bug in V 19.0i S SE4 [solved]
robcat2075 replied to Tom's topic in Exploring Animation:Master (v19)
Do you have "uncompressed" chosen as the codec? btw, for just testing you can play image sequences in A:M -
Keep your eyes peeled for the Summer 2019 Image Contest topic announcement! It's coming...
-
I like the softer, rounder look! That kid has knobby knees! He had a lot of creases on him that could probably be remedied.
-
Call of the Wild Ankylosaurus
robcat2075 replied to robcat2075's topic in Work In Progress / Sweatbox
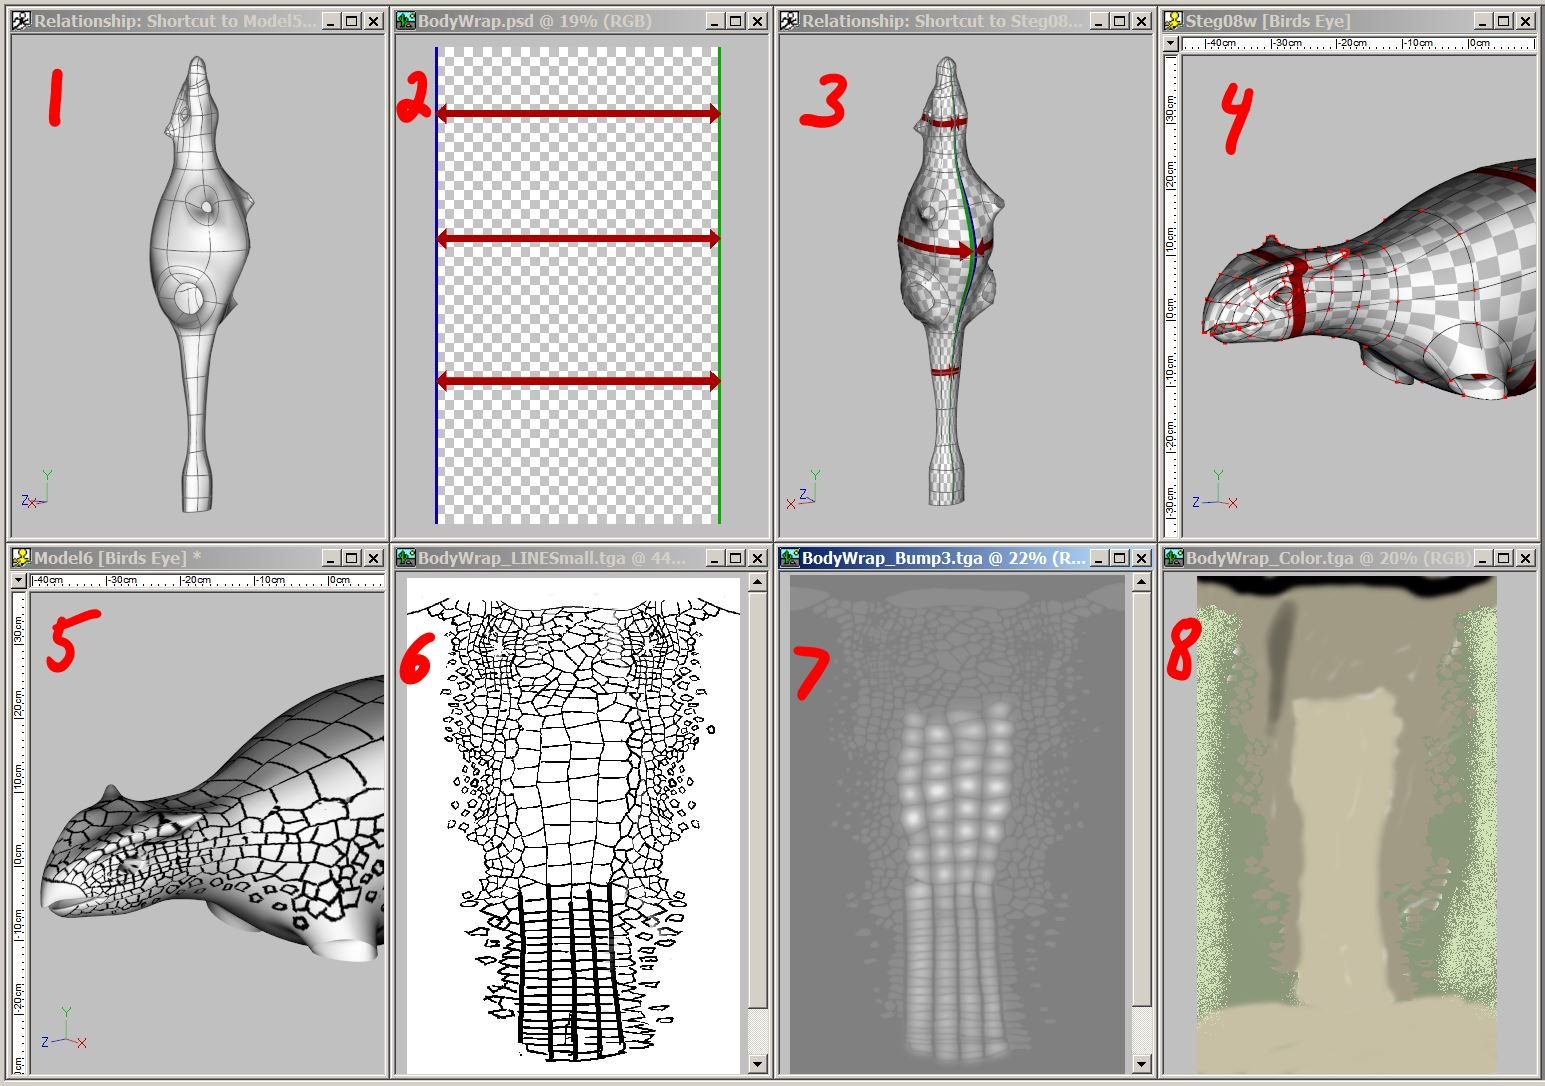
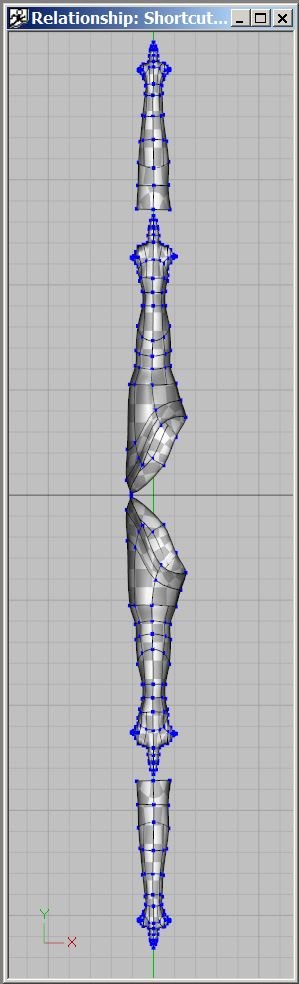
Hi Tom, here is how it works... I made a Pose of the body, minus the legs, so it was centered around the Y axis and I moved some CPs so there were no overlapping patches from the view of that vertical axis.. For example, i pulled out the patches that are in the mouth and flattened the horns. In Photoshop I made a checkerboard with the edges clearly marked. I wanted them clearly identifiable so i could tell where they landed when Back in the Pose window I Applied it as a decal with "Cylinder" application. In the Model window I can see the result and check that i have a reasonably even distribution of pixels with no tears. I could do fine tuning of the map placement in the UV editor, but it has trouble when you move a patch with a hook, so I prefer to just do my tweaking in the Pose and reapply the decal. When that is satisfactory, I drop a same-size plain white map into the Decal image container and turn off the checkerboard map I take the model to AMPaint which lets me draw on the 3D surface of the model. I drew the biggest scales first and drew the smaller ones around them. Why did i do Steps 1-4 when AMPaint can create a decal map for me? The decal map that AMPaint can create is basically a separate tile for each patch with a seam at every border. To paint over a seam in AMPaint you have to freeze your view, paint and then tell A:M to "accept" it before you can turn the model to see a new angle. With my cylinder wrap method I have one giant tile with only one seam on the underside of the creature to maneuver around. With my method i can freely paint and turn and paint and turn... having one big Cylinder wrap is 100x easier. After I've sketched in my scales and armor plates the map looks like #6 in Photoshop. In Photoshop I used tools like Fill and Blur and Curve adjustments to manufacture my Displacement map (#7) from that original line drawing. At this point I'm still in 8 bit color which means only 256 values of gray. It looks very stair steppy when you use that as a displacement map. In Photoshop I switched it from 8 bit mode to 16 bit mode and applied a 2 pixel blur to fake more gray values between the stair steps. Unfortunately Photoshop has almost no tools for normal painting in 16 bit mode, that's why I did the main work in 8 bit mode. I save the 16bit image out to OpenEXR format and add that to the Image container in A:M. The displacement map "Percent" is set to about 1500. I think I went back to AMPaint to do the color map #8. click to enlarge... I made a separate pose for the legs, stacked them vertically and did another big Cylinder wrap to cover them. There is actually one ring of patches at each leg that gets decaled by both the body map and the legs map so i could try to hide the join but i didn't pursue that much for this test.
-
i was working on this for one of the Mascot contests but never quite got it finished. This is mostly an experiment with displacement maps. DinoRoar.mp4
-
Do I send my AMAIndex.txt to Steffen and then somehow it would get merged?
-
Happy to hear you are alive!
-
I think we could improve this if we looked at it.
-
I have to believe that something is drastically mis-adjusted to be creating that very severe and unnatural lighting and shading effect. Is this look really what you are seeking?
-
I get a clean result either way when i render it. Rustry000.avi
-
It looks like a corrupted AVI file. Was that rendered straight to AVI or was it an image sequence first? If you render it again does the same problem happen?
-
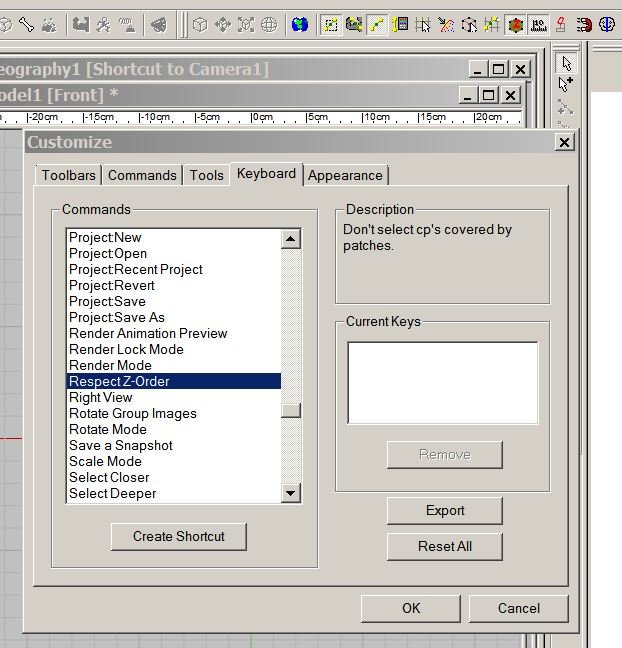
Respect Z-Order! I'm pretty sure that's a Euro Boy Band. In the case of most menu commands and buttons that you can hover over to get an official name, you can look it up in Tools>Customize>Keyboard to get a text description of its function . That sounds handy! I don't think I've ever tried that one! I'll be using that. In the case of properties parameters you can and select "Display help for current property" and the text from the manual will be displayed. However, some properties have no entry.
-
What is the procedure for updating the "Display Help for current property" feature in A:M? Many basic items are still "Not documented yet" There is an "edit" button, but how does an edit I make get incorporated into the regular distribution and how do we know that it even should be?
-
Hi Edward, An updated manual is something that is needed. Can you point me to where you find "respect z order"?
-
I'm impressed that you got it to simulate at all!