robcat2075
-
Posts
28,277 -
Joined
-
Last visited
-
Days Won
407
Content Type
Profiles
Forums
Events
Everything posted by robcat2075
-
"Reference" would be any pictures you are using as examples and models to follow
-
👍 There is probably a Material solution we can pursue to get a less striped appearance. However, at this distance and scale, representing the individual stones may not be what we need. What do you have for reference for those areas?
-
And there was much rejoicing.
-

How to: Facebook's Depth images... and A:M
robcat2075 replied to John Bigboote's topic in Animation:Master
I'll also note that you do need to have a solid modeled background in your image. Even one just big patch to cover the background will be enough. The default camera background is not able to create a proper depth map result. -
How to: Facebook's Depth images... and A:M
robcat2075 replied to John Bigboote's topic in Animation:Master
Here is a clear process, using the OpenEXR format. Note that the screen capture compression makes the grayscale depth buffer look very banded. The actual render will be smooth. Note, also, that my choice of only 640x640 for resolution was a weak one. Although the final image is seen rather small on Facebook, a higher resolution depth map seems to make the Facebook 3D process work better and make fewer mistakes about near v. far. Thank you , Matt for finding this new FaceBook feature! -
You got an email with an activation code, right? You'll need that. Delete the master0.lic file from your AM program folder, then run A:M. This should make A:M ask for your activation code. Enter it and you ought to be up and running. If not, come back and ask more questions. if you have other A:M installation, like previous versions, copy the new master0.lic file that just got created to those other AM folders and they will be enabled on your sub also.
-
How to: Facebook's Depth images... and A:M
robcat2075 replied to John Bigboote's topic in Animation:Master
Edit: see better A:M process in next post If you know how to extract the depth map from an OpenEXR render and scale it into a PNG you are on your way already. A perhaps more intuitive way is to temporarily set all the objects in your shot to full 100% ambient intensity white, no specularity. Set your camera background to black, turn fog ON, and set the fog near and far distances to contain the nearest and farthest objects in your scene. You should get a grayscale image approximation of a depth map. -
I think you should be able to just decal your models and have it come over... According to Fuchur's page on the .x exporters it includes decals in the export, so i would presume that if you are not getting decals there must be something going wrong between the .x and .egg stages?
-
2004 AM review in 3D World magazine
robcat2075 replied to johnl3d's topic in Tinkering Gnome's Workshop
Great review! -
Martin, how would you rate authors as readers of their own work?
-
Here is a comparison of four different values for the noise "amplitude" in the force that disturbs the smoke. Again, you'll probably have to full-screen and HD it to see the smoke well.
-
The star turns decal drawing on and off. You must have added that to your pallete since that is not a default tool. CTRL-D will also toggle decals on and off
-
Hi Gene! Good to see you back. Try this and tell me what doesn't work...
-
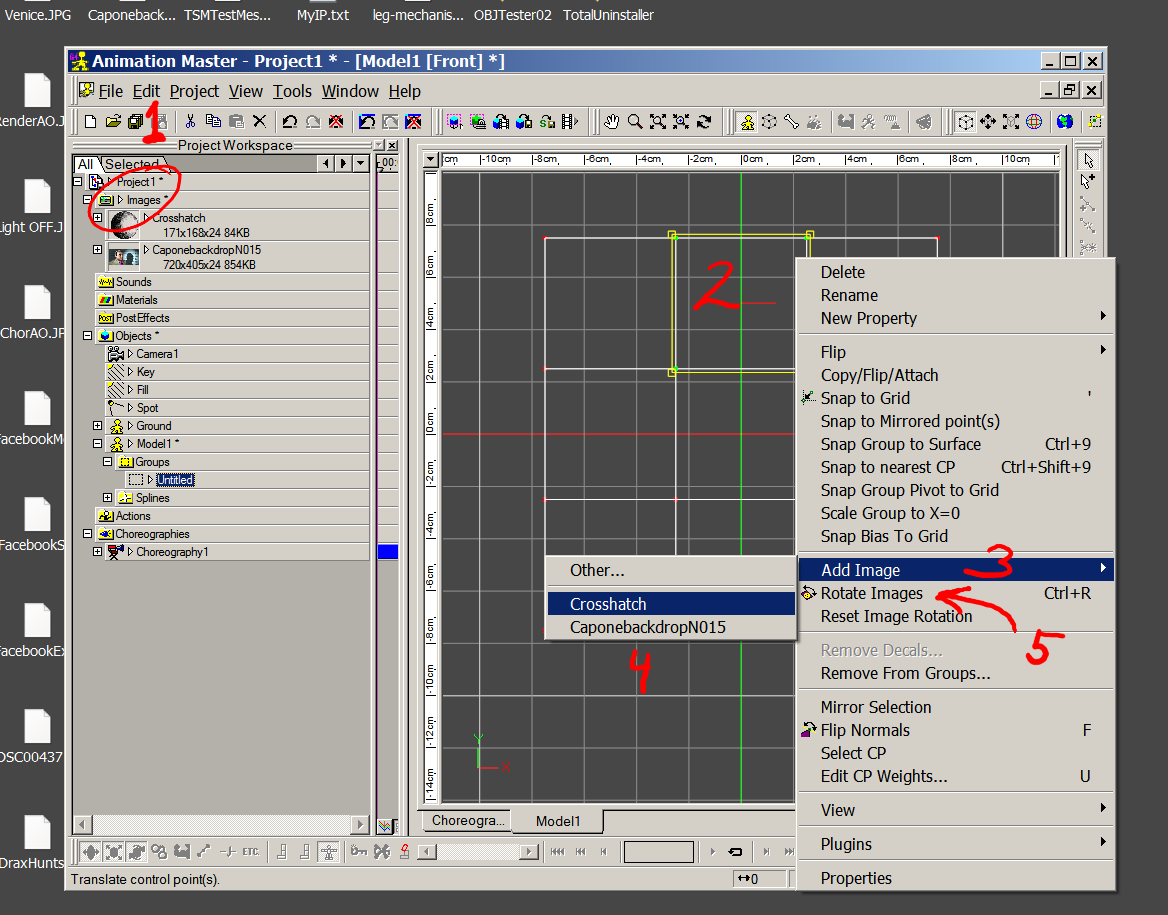
I was asked how to apply a decal to one patch Have images in the Images folder Select the patch on the selection and choose "Add Image" Choose an image from the drop down list The image can be rotated in 90° increments with "Rotate Images" You can select multiple patches in step 2 if you want to apply the image to repeat on multiple patches. Cautions: Patch Images often do not shade correctly when used as bump or displacement maps.

-
How does one encounter the snapcode? What would be the situation where i would get the snapcode for this building?
-
So the video at the end was taken with your phone... which has Snapchat on it... and that adds the spinning logo on top of the image whenever it senses that it is seeing that building. It's like "Augmented Reality"?
-
Are you able to show an example of this in operation?
-
If you look at the movie pic I posted above you can see that the dark parts of the waves are where the surface faces us more and has less reflection so we mostly see the color of the water. The lighter parts are where the surface is tilted away from us and reflects the blue sky and buildings more.
-
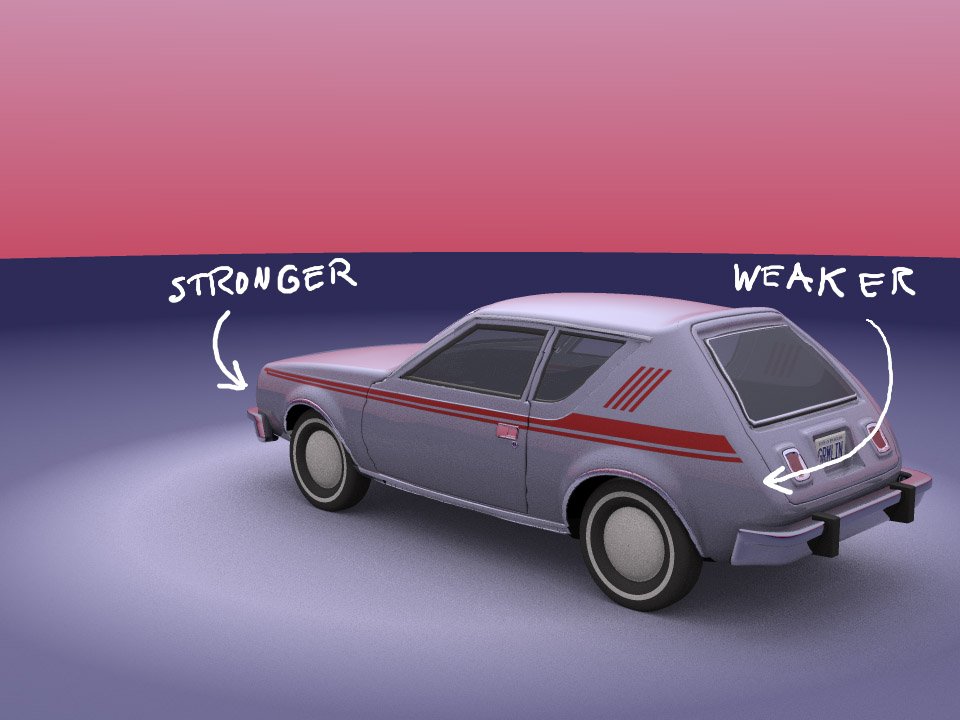
🙂 That is true. We can create the change of reflectivity due to the "angle of incidence" with an "edge gradient" material. The rest we can do with judicious color and lighting choices. On one of my contest entries I used an edge gradient to make the reflection of the horizon line stronger at shallower viewing angles...
-
I was able to download it and play it in Quicktime and Windows media player. Its properties say it is in "Microsoft Video 1" which used to be a standard codec but I'm not sure if it is anymore. We need to find a better video choice for A:M users.
-
We must be talking about some other parameter because 1% reflectivity is next to no reflectivity at all, and there is way more than no reflectivity there. I am also doubtful that the normal map has been set to type "Normal" . It should be distorting the reflections like waves would, but the reflections are still undistorted. notice how the lines of the columns are still straight.
-
Ruscular, what does it mean on your screen capture where is says the "Volume conservation" is 110%. I'm wondering how it could conserve volume any more than 100% which would already be completely conserved.
-
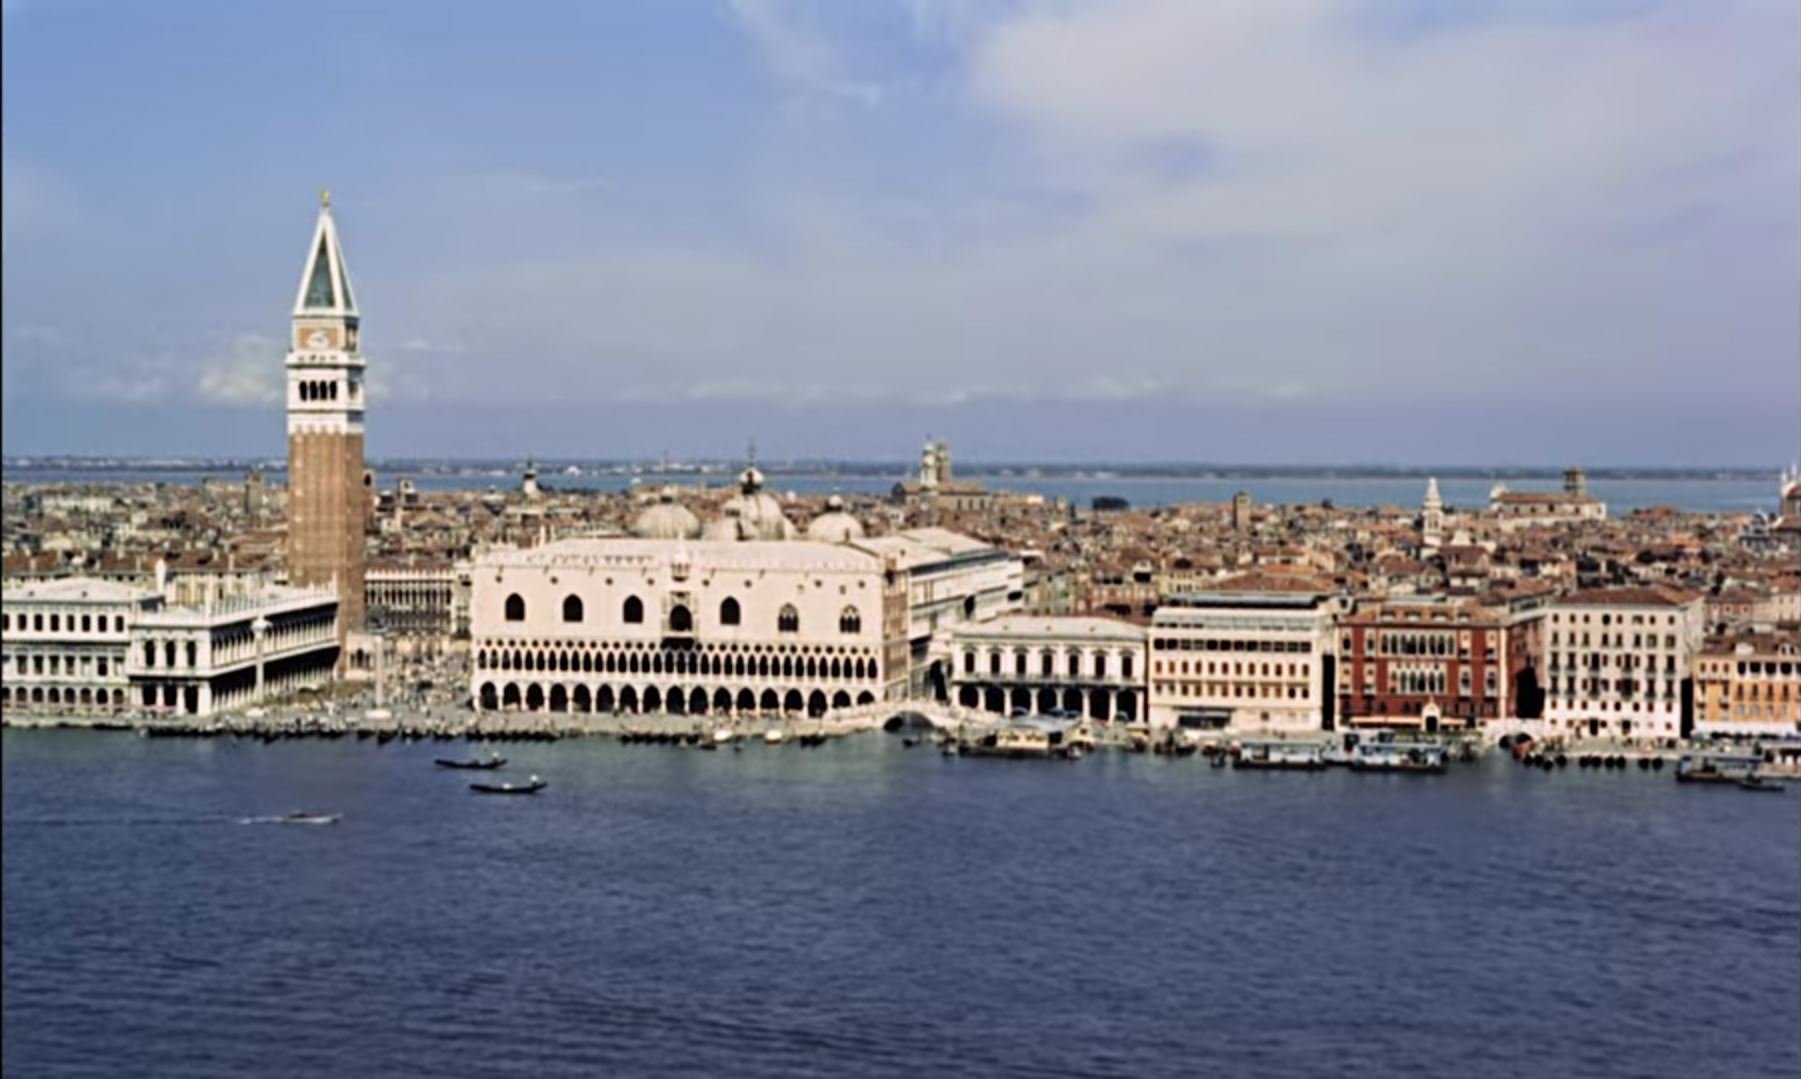
Here is a shot of Venice in "From Russia with Love" that is very similar to your scene's view point. Notice the refection of the buildings near the water's edge. For now, take the normal map off and see if you can find a reflection amount that approximates that amount of building seen in the water. I'm guessing the reflection level is somewhere between 25-50%. Notice how the amount of reflection decrease as we look more directly into the water at the bottom of the frame. Later on we'll make a gradient that does that for us.
-
You won't need the transparency. At this distance the canal water is pretty much opaque. You could set the surface color of the water to a dark greenish brown as a first gambit. But you do need the reflection. That is most of what makes water look like water. You can reduce your testing time by turning off the AO and going back to conventional lighting long enough to see if your reflections are looking watery
-
Test of Bullet friction. The three tablets are all the same, but the planes they slide on have different friction settings. The friction is in the object's "Bullet Static Object" properties. Bullet seems to be better at stopping than Newton was. on the Chor in the PWS and choose Simulate Bullet to try it yourself. SlabSlide07 unsimmed.prj