mouseman
-
Posts
1,182 -
Joined
-
Last visited
-
Days Won
1
Content Type
Profiles
Forums
Events
Everything posted by mouseman
-
Fun stuff!
-
What about a slight variation on Monster Audition ... just an audition? The benefit of that would be that you could use any model (including but not limited to monsters). Participants animate a character doing an audition ... for anything. Then the camera goes to a panel of 2 or 3 judges that react to what they just saw, preferably with some off-the-wall remark, and then on to the next audition. Maybe somewhat similar to "[Your Country's Name Here] Idol" or "[Your Country's Name Here]'s Got Talent" or "Siskel and Ebert" (am I showing my age?) or the Muppets Statler and Waldorf. We could use either the stage that the Can-Can exercise in TAoA:M uses, or the one with the Bugs dancing and Marvin clapping/stamping foot. The panel set could be very simple, just a single chair model duplicated many times, and maybe a table or desk in front of them, and a wall in back. This would require some people to write dialog for the judges, do the voices, and animate the judges after everyone did their own individual audition animation. Title: "Animation:Master Idol"
-
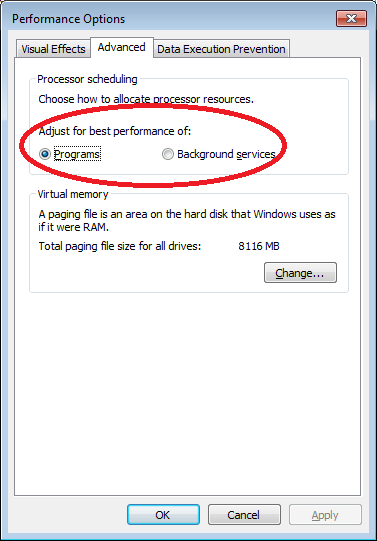
I wonder if this setting makes any difference. (as seen on Win7 Home Premium 64bit)

-
Wow, I've never had these kinds of problems. As I recall, I usually just remove (or rename) my old license file, run A:M, and then when starting up the software it goes through fine. I'm sorry you had such problems!
-
Nice progress. What are your plans for hair?
-
I just now saw this for the first time. Very useful! Thanks to you both!
-
Out of curiosity ... Are there separate objects assembled in a chor, or are you modelling one big object for the set? Or modelling separate objects, and then importing them all into one object? P.S. I am completely fascinated and in awe, but feel repetitive if I say that each and every time you post something new.
-
New tagline ... Runs with Scissors => Queen of all Charming
-
Escape from the Mines of Titan
mouseman replied to Glob Studios's topic in Work In Progress / Sweatbox
Hey, Vance, Nice jump test to show scale! Two quick suggestions on the jump action: 1. For the jump, the legs currently straighten very slowly. It probably shouldn't be too much slower than it would be on Earth. It would be easier to jump up except for the suit. Once he's in the "air", maybe you can have his feet and legs dangle a bit. 2. Have the arms start out low and go up as he jumps, and then hover while in the air, and then come down as he lands. Also, if you are using IK arms and legs, be sure not to let them get too close to their maximum position from their pivot (shoulder or hip), because that causes popping. I really like your vision! This will be exciting to see the project develop! -
If there is a finer birthday wish than that, I can't think of one.
-
Thanks. I could not figure out how to rotate decals and not have to apply them individually (that seemed like a lot of work), so I went ahead with this method when I read about Robcat's approach ... it didn't give step-by-step instructions, so I figured out how to do it in my circumstance. This is a little embarrassing, but I've never much used poses for anything other than ... well, posing. I've avoided doing anything but basic rigging from scratch all these years. So this was an exercise for me in using them effectively. It was funny hearing myself switch back and forth between saying "zee" and "zed".
-
Duration: 12:02 Suggested viewing size: 480p Shows how to do cylindrical mapping using the tire treads of a school bus as an example. NOTES: 1. See rodger_r's suggestion for another way of doing this. I have not yet tried it. http://www.hash.com/forums/index.php?showt...dpost&p=... The method I used is probably a little better in cases like mine where you have multiple object (e.g. tires) to map at once. 2. Around , I said the first approach was to drag the image on top of the tires. Specifically, it was dragged on top of the "Tire Treads" group. 3. The URL for the tire tread texture is: http://www.coroflot.com/micjwelch/textures/5 It is by Michael Welch. 4. Around , I could have been slightly more efficient by moving both front tires in the Z direction at the same time. Similarly with the rear tires beginning around . 5. Around , I select points that are not the treads, hit the period, then hit "H" and "H". This worked fine, but I could instead have selected the "tire tread" group I already had and hit "H" and "H". 6. Around , it didn't render at first because of the bug xtaz recently reported with rendering in the live view under Windows Vista + Windows 7. 7. At the end around , I was looking for the property and didn't find it. Just select the model, in the model's Properties window open up "User Properties", and select the property, right-click, and delete. Here's another thread on texturing a tire: http://www.hash.com/forums/index.php?showtopic=37279 Here's a thread where MMZ_TimeLord creates geometry for tire treads. Yves has a great description of the difference between bump and displacement normal maps. http://www.hash.com/forums/index.php?showtopic=21535
-
I went ahead and posted my tutorial to YouTube. Some resolution was lost Make sure you select 480p, but I think it's still easy enough to see what is going on. Enjoy.
-
As soon as I have an A:M Films account made, I will upload a video tutorial on this. It is using the approach that Robert suggested in post #2.
-
I'm in awe of all your modelling skills, perseverance, and attention to detail. Any idea what the render times of a full scene are going to look like? I suppose it would vary greatly depending on the textures.
-
That's never happened to me, no sir-ree, no, no, no, no, no ... oh, okay, yes it has. The good thing is there are fewer of those as you learn more.
-
Especially good facial expressions!
-
Maybe this will give you what you are looking for, though I suppose it depends on exactly what kinds of shapes you are creating ... Highlight a bunch of points in the model window. Right click -> Plugins -> Wizards -> Duplicator You can specify how many times to repeat, and how much to rotate. I haven't used the "Tumble" side before.
-
I would also guess they spent a lot of time in Photoshop on the textures. Not necessarily a huge amount of time on any given texture, but I think they tended to put time into creating quick textures on almost everything to hint at geometry instead of actually creating geometry. For example, in picture 4, look at the clothing on the character in the foreground on the right, especially the collar and the back. I bet those subtle shade-like shadows do not come from lighting and geometry. Same with the clothing on the vendor in the same picture.
-
... And where his/her limbs are.
-
It's quite beautiful!
-
Good idea. I think they are usually intended to keep the windows clear of fog and/or frost, but I'm sure the drivers are not above turning them on themselves! Thanks! And I've been thinking of wipers, but hadn't yet put them on the list. They are added! It's good getting back to doing something on it after 2 months away. I think the door and the stripes and the "SCHOOL BUS" lettering and the treads on the tires really added a lot to the overall impression. Still a lot of work to go, but I'm going to have to cut corners to get back into things and move on to other parts of the project.
-
Current Progress: 8839 patches, 18 5-point patches Bus doors Worked on decals ("School Bus" and lines on the side; thanks to mtpeak and robcat for pointers) Tire tread texture Improved metal texture and stairs Some work on the driver's console, but slow going; I will probably simplify it greatly TODO: Grille Headlights Driver's console and window [ In progress ] Emergency door windows, handle Misc lights and mirrors More Texturing Rigging [ in progress ] Add edge to the fender Under-carriage Windshield wipers, frame