mouseman
-
Posts
1,182 -
Joined
-
Last visited
-
Days Won
1
Content Type
Profiles
Forums
Events
Everything posted by mouseman
-
Great find, Rodney! Thanks for posting this!
-
I'm mostly happy with the spline layout, except the eyebrows. I went through a number of iterations. I was somewhat particular about the line from the side of the nose to the side of the mouth, as well as the area between that line and under the eyes, hoping to get a layout that could be used for a variety of characters of multiple ages. The next step is shaping the head to get the dimensions I want for the character in question, then start on the body. Here's the incremental development: This time I used ImageMagick to create the animated GIF. The command-line is imply: convert -delay 100 -loop 0 Rick0*.png RickAnim2.gif

-
Great stuff! Very straight forward when you set it up so well! The only thing I thought of ... could you make the Crank a child of the Secondary Gear and save creating the expression to rotate Crank.Rotate.Y to be equal to Secondary Gear.Rotate.Z?
-
Really good discussion, with really good ways of thinking about the task, Rodney! I think you are effectively talking about creating the storyboard (minus text) within A:M, which will plan out the entire shot. I think I will base my approach for the upcoming "Rear Window" project on top of what you've written here. I probably should have been doing this all along, however! The only difficulty I can foresee is when you have multiple characters and multiple chor actions, and you want to start adjusting the time between key frames, it requires visiting every chor action and dragging the keys over.
-
It is extraordinary, isn't it? Begun by Paul F, continued (and by the looks soon to be finished) by mtpeak2. It's been an honor following the set's progress. Top notch work. It will be very exciting working on a piece for it. What do you say, are you in?
-
And make sure you're using the newer cloth simulation. Older versions of TAoA:M use the old cloth sim.
-
15 steps is a lot of steps! I bet it would be hard to find a movie where a character takes 15 steps in one shot. Maybe something about your shot needs to be rethought? I did exaggerate a bit. I think I just haven't done enough of it, and I will get better over time. I am really looking forward to doing the 2011 project, especially since my own project is going so slow!
-
I've not had particularly good luck with blocking and then going to breakdowns. There are always problems with things not being where they need to be. I don't mean problems with keyframes in wrong places or anything like that. But rather logistical things like, "Hmm, the character has to take 15 steps to get from point A to point B in the current set; if he gets there in the time allotted, he will be running." Of course, straight ahead animation is problematic, too! Sometimes I'll do stupid things like animate from one position / camera location, and then when I get him to where he needs to be and look at another angle, I find out that my character is leaning to one side. As others have said, the important thing is to keep at it. The "A-ha" moments will come in time. I think doing the forum projects really helps develop skills. Thumperness and Vertexspline, you guys should both jump into the next forum project! It will be hard, but it will be worth it.
-
Hi Everyone! Old user back from the dead.
mouseman replied to rusty's topic in Work In Progress / Sweatbox
I noticed thumperness's suggestion about the shirt, as well. The other thing that strikes me is that his nose appears smoothly textured, but the rest of his face is bumpy. I usually notice the bumps and pits on someone's nose and the cheeks beside the nose before similar things on the rest of their face. Also, for the age I suspect he is, I'd expect to see a little more crease in the line between the side of the nose and the side of his mouth. Overall, a really good model. I'm glad to see you return to the forum! (As well as Jody!) It's great to have you all back. -
In general, I think a library would be most useful where you have numerous projects with assets that are common among projects. For example, I think working on a web comic would be great to just select a scene from the library, select three or four characters from the library, and then tweak the lighting and set up the cameras and the characters. I imagine that this pipeline would be helped greatly by libraries. I think, however, that most people do one-off projects, and the reusability (and thus payback) from creating libraries in these situations is debatable.
-
The people here are incredible. I'm really impressed with so many people, each with different talents. I wish I had more time and knowledge to answer questions. Occasionally I get to help out. I knew I had made at least a little progress when I answered a question that the guru Robcat had!
-
The InstallRig plugin is explained in the video tutorial I put together a few years ago...here (it explains how to build a rig that uses the plugin and what it will do). The 2008 Rig and the Squetch Rig both use this plugin for the installation process. While the plugin is included in the current version, you will have to add it for v13...it is available in these forums. I added some of this information to the InstallRigPlugin wiki page.
-
Awesome set, and very impressive modelling progress! For the lighting, a bit more shadow would be good. Maybe the ambiance is too high? Or perhaps you could try ambient occlusion or FakeAO?
-
A little more done (click for animated gif). I did a lot of resplining. I'm going with some rings/loops around things that didn't have rings/loops before. I think he's starting to look older than I wanted and a bit more feminine, I'll have to undo some of the things that had that effect.
-
As someone who modeled a bus, I shall follow your progress with great curiosity. Whenever I see a bus I think about what it would be like to model it, and feel an urge to verify who the manufacturer is, whether their body is on another manufacturer's frame or their own custom built, how old it may be, front or rear engine, type A (van/truck conversion), B (custom front-engine), C (common, door behind front wheel) or D (transit/coach style, engine in front or rear), and so forth.
-
Great progress for one day!
-
You are confusing front projection and image based lighting. They are separate things.Thanks, Nancy. I've tried to straighten out the description in the Wiki (mostly removing incorrect references to IBL). Feel free to correct anything I put there, and/or add a section on IBL.
-
I was thinking they were going to do a high-five when they passed.
-
I love seeing your finishing (texturing and lighting) skills! So awesome!
-
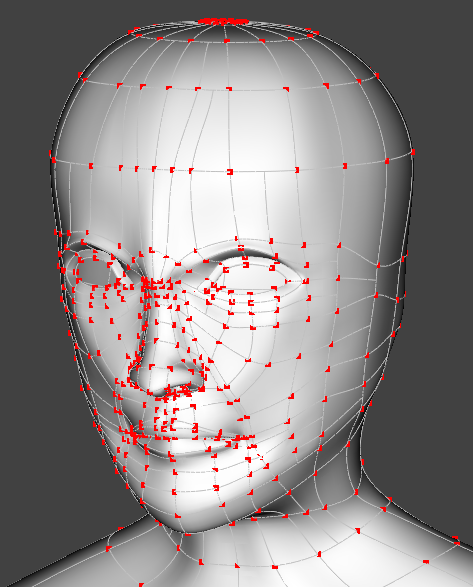
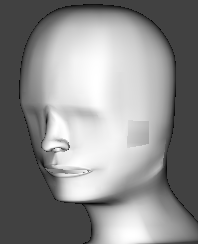
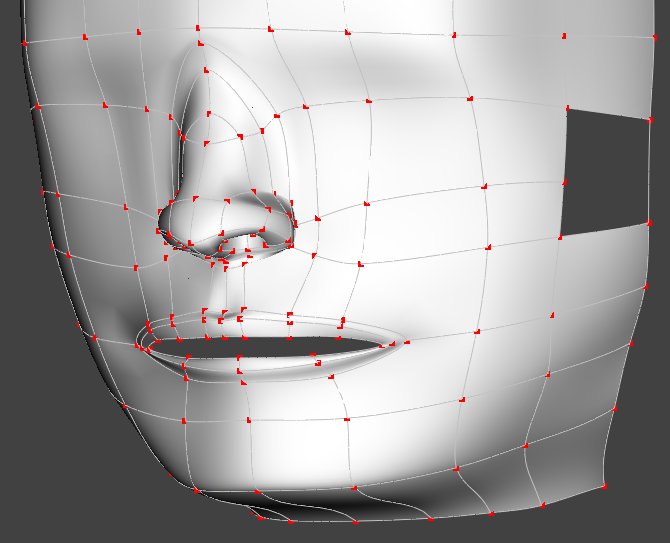
468 patches; 18 5Point patches. Leaving the bus behind for a while. Starting on the main character/protagonist, Rick. The photo reference is for someone a little older than the character, I'm hoping it will work out by messing around a little with the proportions. Nose is getting close to done; mouth is not bad but needs some work, as do the jaw line and cheeks (esp the line from the nose crease to the edge of the mouth). No eyes or ears or hair yet. (Or arms or legs.) The face is still a bit too broad, but that will get fixed as I put in the eyes and redo the cheeks. The wireframe probably isn't clear enough to tell how I did it. A little more detail: Side note: it feels really creepy finding reference photos by doing Google images searches for "teenage boy". I half expect police to come through the doors within 15-20 seconds after doing a search. All questionable search queries are flagged and immediately reported to the police, right?
-
I get the same thing. Unless I turn Multi-Pass on, even with just 1 pass, Multi-Pass seems to "fix" it.
-
You are correct, Chris. I finally remembered an old post on this where Nancy talked about the same method but adding Image Based Lighting. It works on models that are textured. After playing with it for an hour figuring out how to get it to work again (including getting that old project and going over it about 12 times), I finally got it to work again in a new project, and I updated the wiki page. (The part with the word "IMPORTANT" is what I kept doing wrong when trying to reproduce it.) That was with passes=4, AO sampling=20%. Here is with passes=16, AO Sampling = 70%.
-
Note that you can still use the 32-bit version of A:M (as well as the 64-bit version). If there are any plug-ins that require 32-bit, you can always use the appropriate version. Of note is that on Windows, the 64-bit version does not deal with creating Quicktime videos because Apple has not released a 64-bit version for Windows.
-
Yes, that helps! I tried the settings on a quickie chor with my bus. It seems this technique requires no existing textures on your model, right?
-
EggBot walking through Distortion Box
mouseman replied to robcat2075's topic in Work In Progress / Sweatbox
I thought of a subtle use for distortion boxes. For a vehicle, use a distortion box to make the tires flatten slightly on the ground. If the distortion box stays still, the part of the wheel touching the ground is always distorted a bit. Variations can be done to simulate a tire that is slightly low on air. Edit: I wikified some of the info above in an existing page.