JohnArtbox
-
Posts
1,303 -
Joined
-
Last visited
Content Type
Profiles
Forums
Events
Everything posted by JohnArtbox
-
Superb as always When do we see the Saturn movie? Is there anywhere we can download your shorts rather than streaming them? They're great reference.
-
I think Hutch has got the way of it Bill Deselectand then paste mirrored. Just looked in on this thread for the first time, and it looks pretty cool. For what it's worth I'd add teeth, they're necessary(or at least add a lot) for some expressions and sounds. The eye test looks good, although I'd up the specularity and add reflection on the eyeballs to differentiate them from the marshmellow.
-
Gotta say that's a pretty cool look. For a full on anim, would you get enough antialiasing if you gave everything a distinct colour, rendered it without antialiasing at three times the resolution and then used that one render to key all your mattes off the colours? thanks for sharing
-
That should work Once you have what is effectively a pre TSM version, make sure you do further changes on that
-
Sorry bad news... Running the model through TSM is always the last step. smartskinning and posing is done beforehand. To add a new pose or more smartskin you go back to your pre-rigged model, add the pose and then put it through TSM again. You can sort through the hidden bones and unhide them for the purposes of adding smartskin/fanbones, but it's a lot of work, ie don't do it again.
-
great little character Hutch, I like the different change's of proportion. And who cares if it's physically impossible, it's animation
-
Lots of cool characters being done at the moment. He's got lots of style and the materials look great. This should give the bulls a fighting chance.
-
He looks great. Are the seriously freaky eyes part of his super power? I'd probably have put the eyes a bit lower, but that's a stylistic thing. If you want to have the semi-real eyes I'd suggest modelling some extra detail into the eyeball so that the highlights and reflections work properly. Great proportions and trendy uniform...plus you've gotta love the modelled rivet surface.
-
Grubber: I really like that little candle holder I've got a stylised pine tree you're welcome to. I've already donated it for the 2004 cd. it looks like this:

-
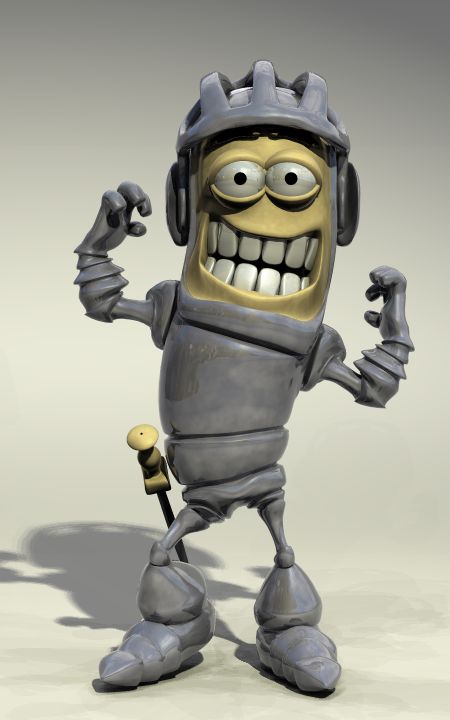
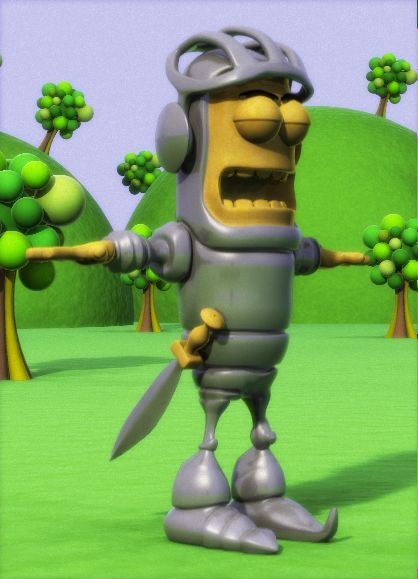
and now he's rigged Bill: The asymmetry of the armour was due to laziness, I built the knight by modifying Jack, that way I get to keep a lot of the rigging and the facial expressions built into the Jack model. I just hadn't finished copying the leg across.
-
very cool... He does have that Seussian feel
-
One of the main characters for Investigating Jack is this knight. There's more work to do to finish modelling and then I have to rig the new geometry, but it's been so longsince I posted any 3d I thought I'd show the progress.
-
Great looking project, and a cool little story. It'd make a great little children's book Watching with interest
-
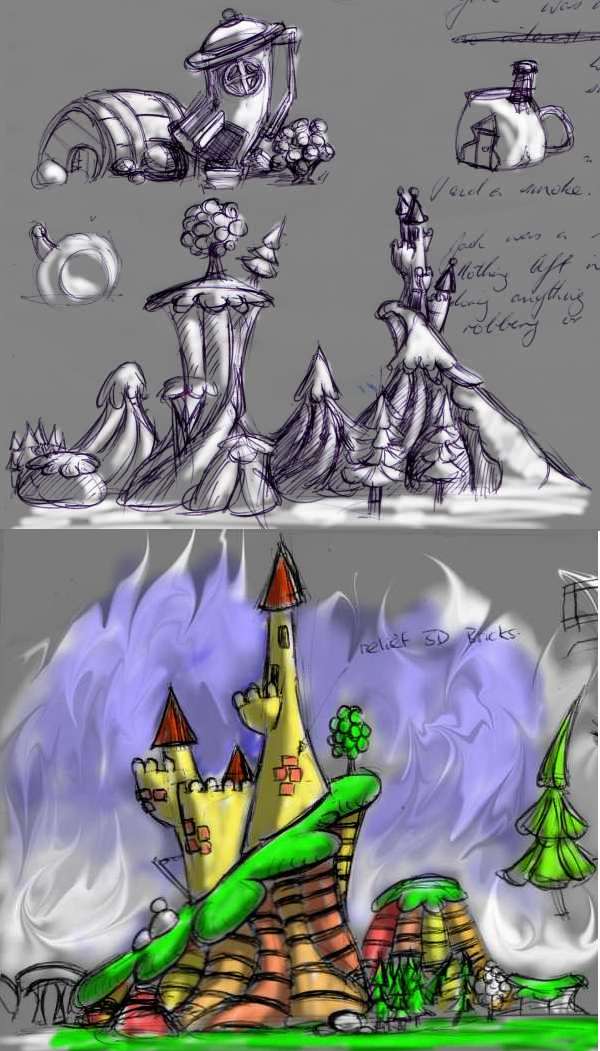
Sorry for the absence...worked went truly berserk for a while and for the last few weeks i have..as Rodney said...been eating, sleeping and dreaming Kapsules. The script, design and storyboards have been consuming all my time, but they're almost done. William I use a very simple facial rig designed for fast animation. The eyes, eyebrows, mouth and hands have a bone each with a translate relationship that weights different shapes An example is the mouth shapes here mouth shapes Move the bone left and right to make the mouth narrow or wide, backwards and forwards for happy to sad, and up down for open closed. Then combine in any combination. It has the advantage of allowing you to smooth any problems within0 the relationship, rather than at animation time. I'll post a bit more detail in the coming weeks. for now here's some bg design
-
Xtaz, almost missed the develpoment of this strand, great lighting and composition on the lounge and porch scenes. I really like your technique, now I need to go back and reread it all over again.
-
beautiful renders Yves..Now we just need to wipe a zero of the end of the render times and we can all be happy Thanks for the detailed setting information.
-
interesting take on the sub of the future BionicDolphin This is a working sub that was shown at the big boys toys exhibition in Christchurch...under the design section there's some great variations..and it exist now How I'd love one of these
-
Nice image Nerrazzi. Add the fog and my suggestion would be too add some particle matter using a sprite emitter. Not sure if it occurs deep down( It does it lower depths),if the tower's been under the water for more than a couple of weeks, it would have some form of growth occurring in the crevasses as well.
-
That's pretty cool. The blinks will definitely add to it. A blink when the character raises his eyes is probably a good bet. Likewise when he changes direction to turn back. Also the expression when he say's "Can you keep a secret?" seems a bit vapid, with the eyes just a little too wide and perfectly symmetrical. But I love the finger movement and the expressions at other times.
-

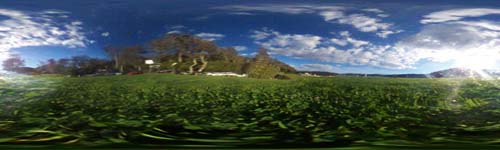
Any Advice on Making Spherical Maps
JohnArtbox replied to Gene's topic in Work In Progress / Sweatbox
I used ornament for all of my Skycast environment maps. By taking 4 photos of a reflective sphere at 90 degrees I could paint through to get a relatively good environment map. Panorama software gives a better result but it takes a lot more images & time. If you are just talking about something like a cement texture you can cylindrically paste it onto a sphere with a vertical seam. Then create another image with a softened circular alpha and use that to stamp the texture on the top and the bottom of the sphere. Create an action which unwraps the sphere at the seam and render it to get your spherical map.
-
I've been on holidays for a week, so I hadn't picked up this thread until the last couple of days. I can state categorically that I would have learnt as much in six months on a project with a professional as it took me 2 years to learn on my own. So much of the learning process is reinventing the wheel, and then checking to make sure it's bolted on correctly. I won't stop contributing to the forum, but I expect to interact with apprentices on a more constant and critical basis. I won't work on their projects but I will give feedback on them, I expect any other mentors would too. Personally I don't think the balance is as tilted to the mentor as many people seem to think. In many cases they will spend more time explaining to the apprentice than it would take to do it themselves. And kudos to Ob...getting it all started is a big committment.
-
reflection maps are a material. Overall it looks pretty good but... The main light source used in your render coming out of the wall on the right, from the image I'd say the light source is more frontal (looks like a flash is the main light source. Other ways to improve it would be the throwing the objects slightly out of focus to match the image, adjusting the specular and reflective materials, and (not sure if this is possible) making the tabletop a soft reflection.
-
Great littlespaceship you've got developing Mark.
-
Adding an addendum from the knowledgeable David Rogers and then the bit of missing knowledge that allows you to do this.. It's a great timesaver, once you know how to do it
-
Kenh: I just copied and pasted the keyframe "Ctrl C" "Ctrl V" and I've resolved a problem with using a balanced audio device with the unbalanced audio in my laptop. I just bought a buffer thingy(the guys in the broadcast shop know its real name) that makes everything work properly. Real sound on the way.