JohnArtbox
-
Posts
1,303 -
Joined
-
Last visited
Content Type
Profiles
Forums
Events
Everything posted by JohnArtbox
-
Discofish asked me some questions about facial animation, and since I was in the middle of setting up my Knight I thought I'd post the base expressions I use. I use a very simple musclepose setup with a basic setup of three pose sliders for each major body part, and then drive them by smartskin. Eg for the mouth I have: Open Narrow Happy The Eyes have Right Eye Open Left Eye Open Happy and the brows have Up with tilt variation for Happy

-
Step by Step I loaded the print logo in as a rotoscope and lathed a simple tube shape for the beams. I then duplicated the beams and positioned them over the edges I wanted emphasised. Next I switched into bone mode and added a bone for each tube, with the z direction travelling along the tube. The logo pieces were created with the AI wizard. I used Flash to trace the bitmap logo and seperate the different piece. Then it was back into AM to use the AI wizard with a small rounded inner bevel. I scaled the model to the correct size and seperated the pieces into different object files. Animation of the tubes was through a simple action which started at z -4 and finished a z +4. created the keyframes by selecting all the tube bones and entering -4 at frame 0 and + 4 at frame 20. Then I went into the timeline editor and offset the bones into different sets. Once I was happy with the transition streaks I simple dropped all the objects into the choreography, added the streak action to the streak object, and turned all the other objecs inactive until the streaks for that object intersected. When the streaks for an object intersected I made the object active at 90% transparency. Six to eight frames later I set a key turning the transparency to 0. Finally I added a camera move and targetted the camera to a target null. The final stage was to go back into the AIWizard-based models and clean up a couple of edges that had crossed splines. From beginning to end it took about five hours to model and animate. Rendertime was another three to four hours.
-
Great job. Congratulations on finishing your short.
-
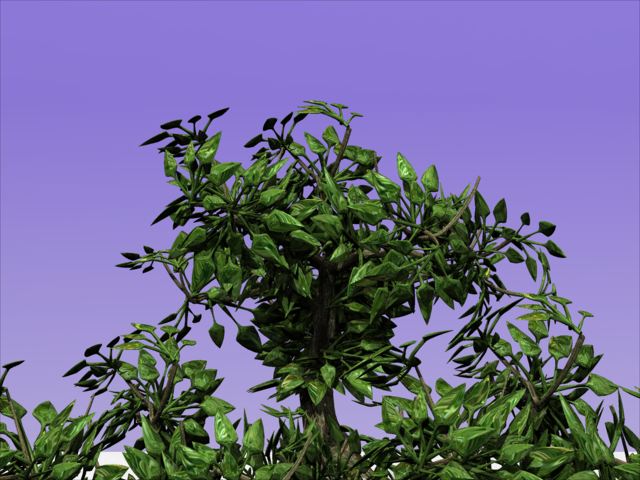
Thanks for the comments. I've posted a screen capture of the process here. Tree Capture I don't have time to clean it up or annotate it at the moment, but it should be reasonably easy to follow. Patch Count....Lots but I'm not sure exactly how many. I started with a base tree trunk and a very simple branch model. The tree trunk was stripped back from one of the trees I donated to the hashcd and I think both the images are on the hashcd as well.
-
Once or twice a year I donate a logo or some design to a worthwhile charity. This time around it was NETS, which provides mobile intensive care for transferring sick babies and children. [attachmentid=9831] NETSLogo.mov
-
A quick tree test built in half an hour with Sweeper textured in 2 minutes with BitMapStyle and rendered in 4 minutes with SkyCast.[attachmentid=9740]
-
As far as I can tell AM splits each patch into an 8x8 grid of square surfaces and then smooths them using porcelain. This means that some areas, like the nipples, need more resolution. The render above is only done with displacement but there's a render with a matching bumpmap in the BitMapStyle thread here here
-
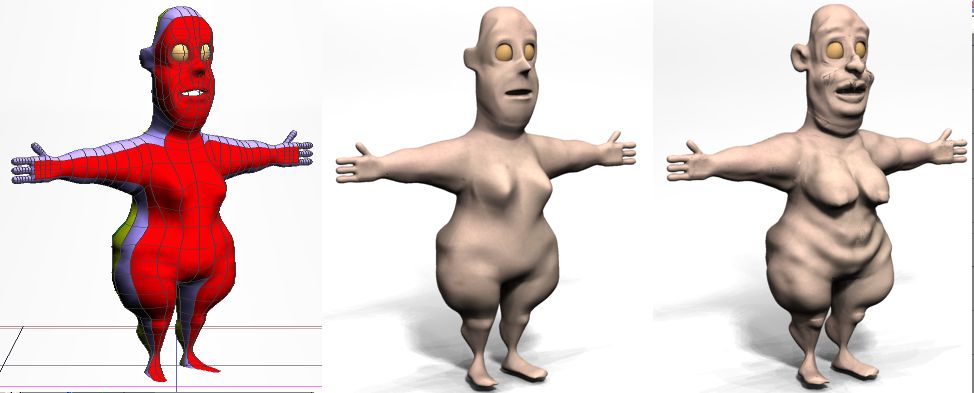
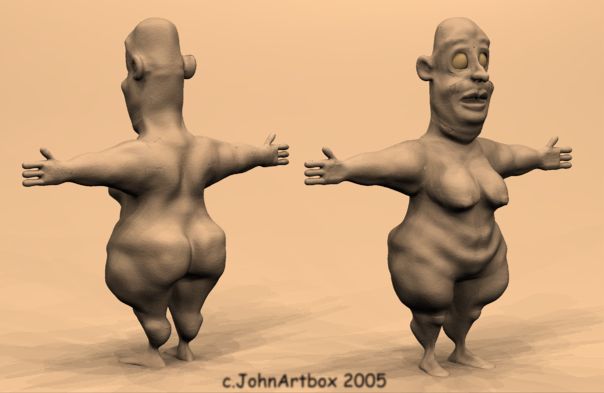
Hi Drvarceto: I can feel your pain I used to use Painter for displacements before Zbrush, it just involves a lot more work. Here's an image of the model wireframe, then rendered with and without displacement. Using Zbrush you can automatically output a bump or normal map to detail the displaced surface, and it adds a lot to the image.
-
I've had this idea of a really fat fairy for a while and it seemed the perfect test for displacement. The skin is just a default map and the displacement is fairly basic, but it's a good start. Because the underlying mesh is really quite simple, it should be easy to rig.
-
New Approach....export a 16 division obj file to zbrush. When subdividing further, select the crease button in the geometry subdivide menu and your models will be subdivided without creating visible holes in the mesh. The 16 subdivision model gives a great mesh to use as a base for normal, displacement bump and colour maps. It matches the AM geometry more accurately than the AVA option. Also as a plus, using this method you can export a posed AM for use as a Zbrush tool. I've tried this on two models with hooks and 5 point patches so far. The mesh is still not perfect, but it's much much better. Also the new displacement exporter allows 8dot8 maps. You can use the major maps for displacement and the minor for bump or normal. Seems to work very well.
-
The images are lovely. The lighting and texturing are beautiful and the design for the reading stump and bookshelves is great. Creating a second bookstump (perhaps a taller thinner version) would reinforce their grown nature. At the moment I like the lower viewpoint of the first image, but I feel it would work better if you shifted the reading stump to the right and shrunk the RHS stump a little. At the moment it seems too symmetrical. Great Design
-
great little model...got plans for the rest of him?
-
I just got back from spending a couple of weeks campervanning around New Zealand. I don't know if there's room in the short for these little guys, but they only took a couple of hours to create,and were lots of fun. Zaryin:Thanks Kenh: all cows should look worried...Kows are just slightly more perceptive. ZachBG: Skycast, a key light and ambient edge gradient materials. The fact is true too. Apparently orthonoligists (is that the word for bird guys and gals?) measure the beak from end to nostril...and kiwis have nostrils on the end of their beaks. Very strange birds in a lot of different ways. Who says the internet rots your brain
-
Small update. Kows for backgrounds. I'll probably paint some simple patterns for the cows rather than using a material. Lots of small things are getting done, admittedly very slowly as I try to fit it in with full time work.
-
Ken: Investigating Jack is still happening s...l...o...w...l...y Life keeps getting in the way. Zaryin: I'd only ever use it in the bacground with modelled detail in the foreground. I figure if I use rendered trees for the images it will be more convincing.
-
Just another method, simple fur system applied to a plane. This is the realtime render, the final render will have to wait... forestA.mpg
-

WIP: GAIL Female Android [SLIGHT NUDITY]
JohnArtbox replied to patrick_j_clarke's topic in Work In Progress / Sweatbox
Beautiful work Patrick. Bladerunner in hot pink . Been out of commission for a while and only just looked at this thread. Sensational. And good tip about the page up/down Phil...I'd been using the keys in the pws too . -
movie file... I need to paint up some different trees, and design a few different ecosystems...but who knows when that will happen 12E.mov
-
Jack and the Beanstalk. The project's been on hold while I did a major contract with one of the national tv stations, but i finished that last week and I'm hoping to do some major work on "Investigating Jack" this month. Interesting that Fee Fi FoFum is used in three billy goats gruff as well as Jack and the Beanstalk. Anyway here's a small update....it's a low res ground plane with a fur system of rocks and trees. Unfortunately there's a bug in the render, but Noel from Hash is on the trail, and I'm confident it'll be fixed soon. The still is pretty average, but if you look at the movie file, I think it looks pretty good, especially for something that's basically a plane with a material applied.
-
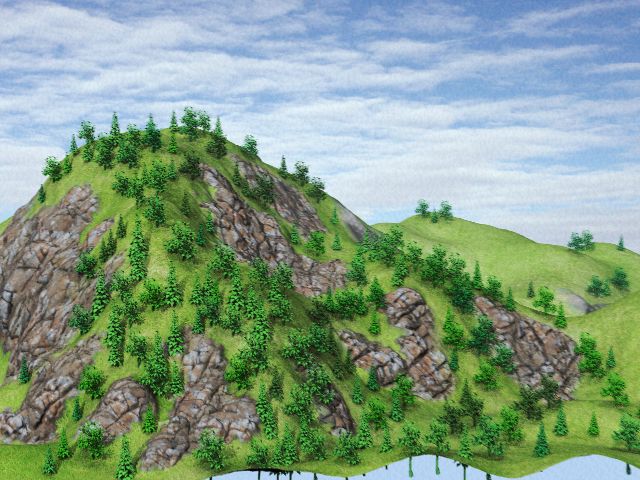
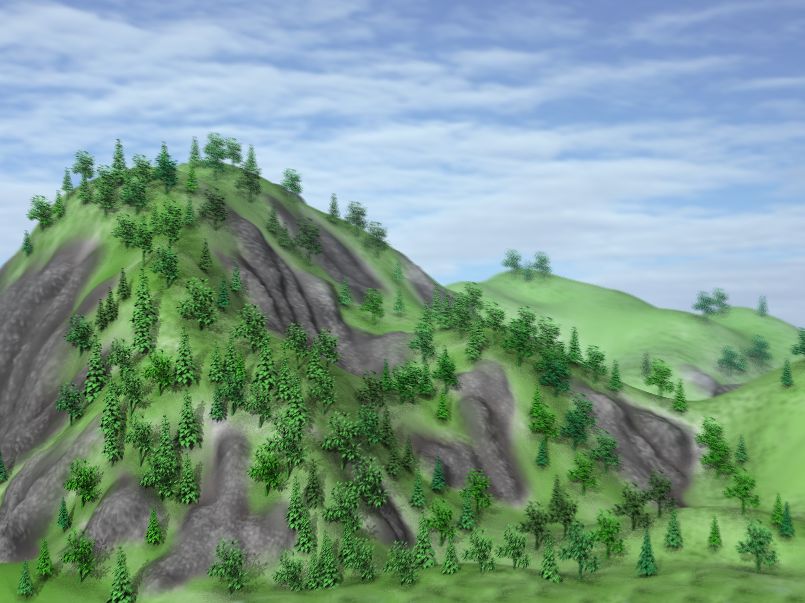
Another iteration...added some extra detail on the cliffs +some bloom and grain. Thanks for the comments all. Bill: just procrastinating on things I should be doing Ken: The screenshots are all white lines The trees and the grass texture are on the new CD. Dearmad: no superheroes....but I'll use some of the techniques for Investigating Jack backgrounds Lazlo: What Paul said Paul: not just from the top view, I dragged and dropped my trees in the camera view. Then scaled to add variation. Pinpoint placement from the one view that counts .
-
Are there tricks to managing a huge choreography?
JohnArtbox replied to luckbat's topic in Work In Progress / Sweatbox
One word guys & Gals FOLDERS If you keep your seperate groups under folders in the choreography you can right click on the folder to select all children. Then any change you make in properties will apply to all models in that folder, colour diffuse ambience et al. at a minimum I seperate my chos into foreground background and midground folders + a sperate layer for animated objects that interact. In this Scene landscape I've used the folders to tint different trees and allow me to keep my choreography heirachy under control. -
Overlayed the old decal with some photographic textures of grass (to add variation to the grass) and overlayed the cliffs with a photo of beach rock from my last holiday in Byron Bay. Dearmad:Thanks Entity: laziness; and more laziness. Because this is more of a technique/practice piece i took the fast option. Darklimit: Good to hear from you man I looked at these on a mac today and the gamma is completely different. Is there a way to make an image work on PC and Mac?
-
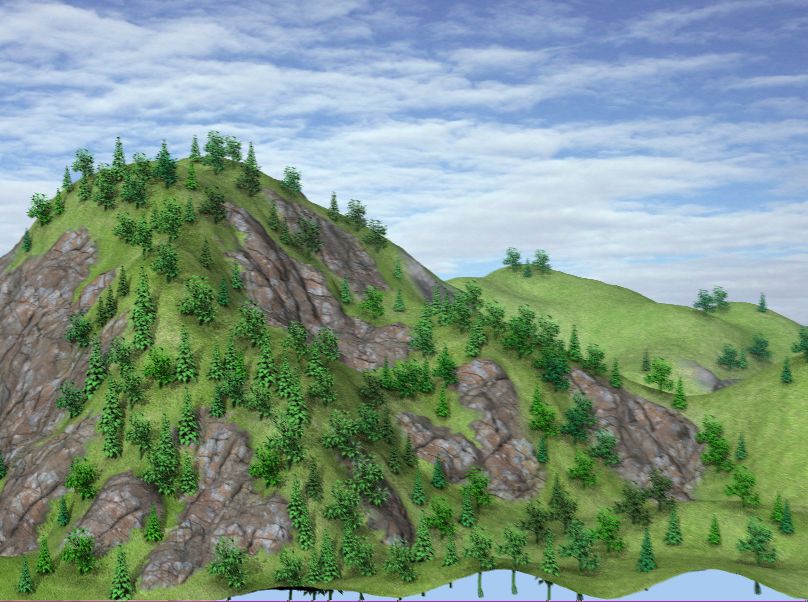
quicktime 1.3 MB Just a small 2 sec test. Ran out of sky so I had to move the plane it's on(yuck), but I've got a couple of high res wrap around skies tucked in the library,so I'll load one of those up. Vern:Thanks. Paul:It's just a technique's test. I may do some work on the landscape to add some extra detail, but that's about as far as it will go I think. Ken:Shucks Korken:The landscape detail comes from a 2048x2048 texture file. Still needs quite a bit of work, but it's a good start. Agep: Lot's of splines and lots of shortcuts. No real tricks, started with a grid generated with noise, used magnet mode to push and pull, then added trees from my library, one by one and through the camera view(love that auto ground placement feature). Rendertime is pretty quick.
-
A small project to explore some ideas for animation backdrops. The image is supposed to look like a miniature set. Enjoy I'm off to bed.
-
Yeah AVA is still the way to go. I was trying to go through a poly 3d ap to weld the vertices on the object file, but it proved an unreliable approach. It's a shame because a 16 poly per patch model provides a more accurate model to work on. Now on to more normal map experiments