-
Posts
7,863 -
Joined
-
Last visited
-
Days Won
15
Content Type
Profiles
Forums
Events
Everything posted by NancyGormezano
-
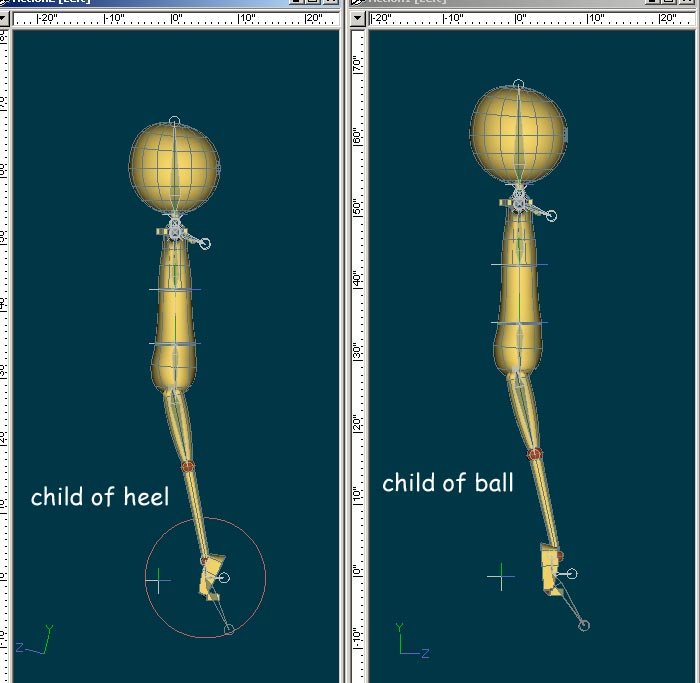
Ok I see - I rotated the heel down - probably way too far - but I did not lower hip null first. When I do the same extreme rotate of heel down (with target the child of heel controller) - the foot will then flip. I can see that it is necessary/important to move hip null down first, and it works better the way you are suggesting. Both ways have problems.
-
hmmmm...-you sure? I just tried it with the roll targets as children of the ball controller - seemed to work fine. When I made the roll target child of the heel controller - thats when the foot flipped (if I rotated the heel down)
-
Nicely Nashed
-
The Euler limits for Robby's left forearm seem to be wrong. They are currently min: -25, -45, 0 max: 45, 45, 0 - and should be min: 0,0,0 max: 180, 0, 0. (like the Right forearm) The bones model is also wrong EDIT: zip file contains modified prj (Bones.mdl) and modified Robby) LeftForearmfix.zip
-
I've looked at your zipped prj and there was a missing image file - however - even so I can see why you are confusing yourself. Your camera angle is strange, your ground patch model is oriented strangely and it appears that the footprint decal (footprint bump) did not get APPLYied to the ground patch model What I suggest is start over to unconfuse yourself. 1) create a new ground patch model - and orient it horizontally in the xz plane centered at 0, 0, 0 In the ground patch model, from top view - do 3 times: decal/new/select footprint bump - scale the image, position the image, select apply. You should then have 3 decal containers and 3 footprints showing. The decals have been applied as color type for now. - later you can change it to bump type. 2) create new default chor. (delete default ground plane) -drag ground patch model into chor. You should see the 3 footprints 3) select ground patch model in the chor - click red thingy to show more drivers - expand the decal containers - you should have 3 - for now just change percentage to 0 - they should all be invisible 4) decide what frames you want them to appear - go to that frame and turn percentage to 100 for that decal container (set interpolation to hold) 5) when you have timing correct - then in the ground patch model - change the decal type to bump
-
Looks to me like one can also just drag the constraints to reorder them so that they appear in the correct order (15e) - This was news to me.
-
I noticed that the Fingers Controller didn't have the ability to "spread the fingers" any more - I also didn't quite understand what the Carpal Controller was supposed to be doing (seemed weird behavior) - so I changed the Carpal Controller Null Manipulator option to Rotate only and only allow rotate on Y, but not X,Z. It had been set to Standard, and to allow X,Z and NOT Y. The change seemed to get the "spread fingers" back. Were you intending the Carpal Controller to do something else ?
-
I also have a suggestion/request for the Torso Translator Null: I think it would be good to change the manipulator option on the Null to standard (instead of translate only). But then don't allow scale or rotate on x, y, z - that way you get more fluid control on stretching of the torso in any direction. Me guste mucho. __________________________________________ I have also been playing around with trying to get an option for a smooth no stretch/stretch of the legs - but something funny is happening that I can't quite figure out using Robbi. What I tried: In the Leg Constraint relationship - I changed the calf to NOT scale to reach with the kinematic constraint to the calf aimer bone. And then I added a new percentage pose relationship which just has the kinematic constraint to the calf aimer bone but allows scale to reach, z axis only. In that new pose, I also made the enforcement linear (0 at 0 percent, 100 at 100%). I can get the switch from unstretch to stretch ok - but it seems to require a toggle of the percentage pose sometimes, and it seems to operate as an on/off switch rather than continuous and smooth. But I can get a smoothly switching "kinematic scale to reach" using a simpler - 1 bone, 1 null model.
-
very very nice Mr. Holmes. Nice instructions as well Amazingly deLITEful. Elegant. The squetchy legs will take some getting use to (when moving the hips) . I haven't really examined the rig in depth, but given it's beautiful simplicity, it seems that it will be easier to modify/customize/hack if one wanted to make an option to "squetch/not squetch" the legs, I suspect. Thanks so much for doing this and Happy new Year!
-
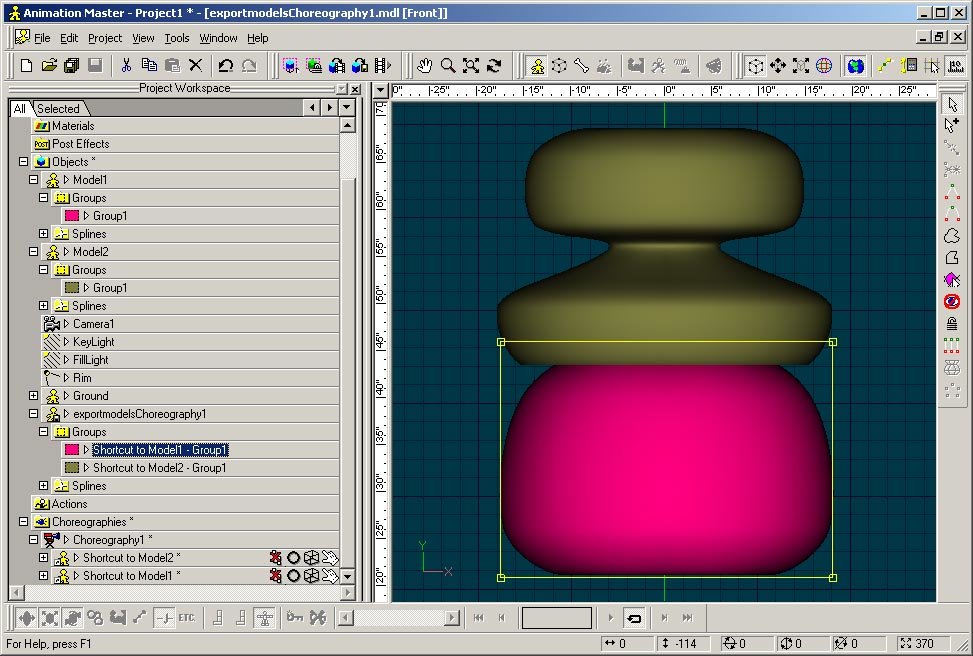
when I export a chor as a model (originally contains 2 different models) - my new model keeps the colors of the groups - Ver 15E - so not sure what you mean - looses the colors.
-
That screen shows the options for rendering (you must have clicked advanced) - it's the best screen to use, rather than the one with presets. Turn off depth of field and the "blurriness" will probably clear up. Or else change your depth of field parameters.
-
That's great storytelling, great camera work - excellent - bravo! I like the ending, very clever, did not see it coming. I also did not see your first version - This version to me was very satisfying - start to finish, held my attention.
-
Nice image. If you are curious to see how long the render would take on others PC's, macs then post your project as well as the details of the options you used for rendering. - eg - how many passes, reflection levels, soft reflections, rays per light, type of shadows, etc, etc. It might help you to decide to go to a PC or not - if that's still up for consideration.
-
If you apply translate to and orient like constraints from a bone in the hand to a bone (or null) in the rifle (the target) - then you can move the bone (null) in the target and effectively move the pivot. I think? that's what you're asking? but not sure.
-
zip up the image and model file and post them to the forum - tis the best way ...
-
Yes - loved the SSS - so I peeked at the settings - looks like extinction values for everything was 32,16,8 (for RGB) and 200% sampling, which produced the blue tone ...so I tried (8,16,32) and produced a pinker tone - so now perhaps I can conclude that the lower the setting on extinction value, the more the component contributes? In my test of rendering this terrific character - I noticed IRC, about 35 secs/pass to render (simple lighting) with sss, about 2-3 secs/pass without sss. Also noticed I believe that lower numbers on extinction - makes for faster rendering (but don't know) - but perhaps produces artifacts? I also tried it with decals to see what influence sss had - very nice - but so hard to predict intuitively what the results will look like. TRY IT, y'all! He gave ya the model to play with. Thanks Cronos - got me to explore sss.
-
How to build a flexible cable.
NancyGormezano replied to Kelley's topic in Work In Progress / Sweatbox
Tutorials:Simcloth Tutorials: Dynamic Constraints -

Help ! How do I create icons for models in my library ?
NancyGormezano replied to a.quaihoi's topic in New Users
You betcha - model file won't open. I was just randomly getting images to use as the preview image (testing only) - and had picked random, probably large tgas, not sure if they had alpha channels - I had not realized that they should probably be small jpegs. I had added the shortcut of model to A:M's library. So I was also seeing how librarys worked. I was changing the preview image to test to see if the image in the library would also change - it did, but only after I saved the model (or so it seemed). Eventually A:M crashed, and when I restarted A:M, I found that I was not able to reopen the saved model file. Corrupted. We Dumb Monkeys are the best stress testers. -

Help ! How do I create icons for models in my library ?
NancyGormezano replied to a.quaihoi's topic in New Users
Right click in the model window - and voila! select "create icon" (after Create shortcut in Library) - ver 15e -

Help ! How do I create icons for models in my library ?
NancyGormezano replied to a.quaihoi's topic in New Users
Warning - when just testing this - be careful about changing images used for icon if the model shortcut is already in your A:M lbr (and I assume the library is open) - I just corrupted a test model .... luckily it was just a test. What I wonder - Is there a way to save (or get access) to the icon image created when invoking the "create icon" cmd... Very nice - don't have to render anything. But it looks like that is embedded in the model data? It would be nice (for lazy twits such as moi) to have that image (ico? jpeg?) external to the model...just wondering ...not requesting anything. For as long as I've been using A:M - I have to shamefully admit, I've never really fooled with the library feature, as I have my own system. Its called guessing. -
Those are really excellent. I am very very impressed with how well these animations demonstrate the processes so clearly. I would imagine that your client is very pleased with these.
-
I do not know how accurate this is - but how's this? (googled images: mig 17 vietnam) http://www.scalecraft.com/browseproducts/Mig-17---NVAF.html I don't believe there is only 1 camouflage design that was used? You will probably have to approximate. EDIT - this model maker specifically mentions Col. Toon http://www.historicaviation.com/product_in...cKNcM5?ID=10936
-
I love the look you've got going there...great to see your progress..
-
That turned out nicely - You can sorta do a projection of an image by adding a rotoscope to a klieg type light - however it won't be a rectangular shape projection, but an elipsoid shape (depending on angle that cone of light intersects the plane). But my guess is that you might be able to fake it some by positioning the light (with animated rotoscope) behind a rectangular opening in a "fake double wall", but not in view of the camera. Have not tried it - so I'm not sure.
-

Nimmee Aimee ... in a pool hall.
NancyGormezano replied to HomeSlice's topic in Work In Progress / Sweatbox
nope - not by me - don't know who.


