-
Posts
7,863 -
Joined
-
Last visited
-
Days Won
15
Content Type
Profiles
Forums
Events
Everything posted by NancyGormezano
-

There a way to make toon outline with out surface shading?
NancyGormezano replied to captainrex's topic in New Users
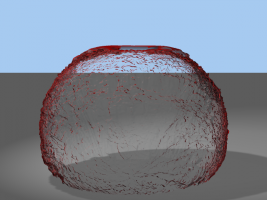
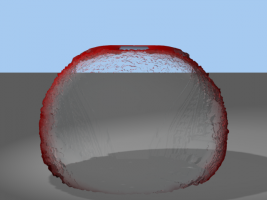
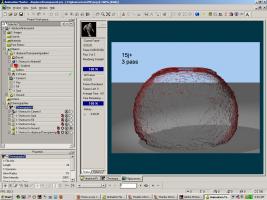
I just tried in 17a/32 using a gradient material (color & transparency) with a displacement decal. It renders with both multipass and No multipass (a little differently, but not major) 1st image is 3 pass, 2nd is Multipass OFF EDIT: tried same project in 15j+, works similarly I guess we'd have to know more about your gradient material and displacement method (decal?) -
No. This model is messed. It would probably require some mesh reworking, group properties reassignment, redecaling. To test, and eliminate that it was decaled funny, I deleted all the decals, renamed the offending group to wholehead, & model appears to come in "fine", in 17a When I set the group transparency of "wholehead" = 0%, just in the model window, patches that have hooks, turn white. These patches are also in the group flesh (located above wholehead) which has some color, and should not turn white. There are also patches in the hair that behave funny. If you try to set the transparency of wholehead back to unset, the patches still stay white. HOWEVER, for a quick workaround, to avoid reworking of model, best bet would be to manipulate the transparency of the decaled Head MODEL surface property in the chor (not the group surface property), and have the brain be a separate model, that is constrained to the head (translate, orient like), that rotates with the head. Here's the model without decals, tested in 17a. So at least we know it's not a problem with 14c. I suspect this is a really old model (done by Den Beauvais, and I think it was a model used in 1999 in the original Hash Animation Master printed reference guide). DexNodecals.mdl
-

problems with SSS in v17a?
NancyGormezano replied to kikiriki's topic in Work In Progress / Sweatbox
Also, in case you need more data for SSS - I did some testing in this thread (probably done in 16b) It becomes obvious there is no one set of values for SSS. Values you choose will depend on the size of your model (real life size is best), which should have thick and thin surfaces (therefore sphere, cubes are not good for testing), as well as your lighting setup, and tolerance for longer rendering time. -

problems with SSS in v17a?
NancyGormezano replied to kikiriki's topic in Work In Progress / Sweatbox
FakeAO is a posteffect created by Jenpy - you enable it when you render via camera/Output/buffers/Apply cameras post effect to render = ON. It adds minimal to no additional time to the rendering time. Quite amazing. You must also set the depth buffer = ON (important) when rendering Works great in 16b PC. Currently there is problem with rendering with FakeaoCPU in ver 17 (32). It is reported to work in 64 bit (by a fluke). I don't think it is available for Macs. (not sure). There is also a fakeaoGPU version. I can't get it to work, but I believe others have (not sure). Depends on your graphics card, drivers, I believe. -

problems with SSS in v17a?
NancyGormezano replied to kikiriki's topic in Work In Progress / Sweatbox
Ooooo...purty -

magic vase ..based on Rodney's idea
NancyGormezano replied to johnl3d's topic in Tinkering Gnome's Workshop
yeah that's a good one - excellent for clouds! -
Most definitely. I have the dvd, and 14c and noticed: The original Dex model off the dvd looks corrupted to me. It comes in with 2 groups both named head. That's a no-no. Not sure how that was even possible. When I isolated just the neck/head area (deleted all other splines), resultant model looked weird, corrupted. This would be the best place to start with fixing your model. I suspect A:M was getting it's widdle brain all confooosed when trying to make the head transparent.
-

It was a dark and stormy night.
NancyGormezano replied to Simon Edmondson's topic in Work In Progress / Sweatbox
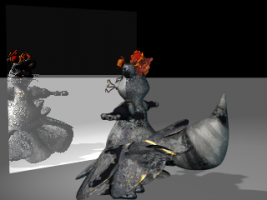
Exr is this weird format that anybody can define how to interpret. The format from A:M requires plugins (I believe?) to be used in PS, aftereffects, or it did at one time. The way to manipulate A:M exr files is via composite in A:M. Is that png image coming directly from A:M?or are you bringing it into PS and saving from there? It looks like it got saved as "interlaced"? Did you try turning OFF alpha for the png (do that) ? Are you rendering with multipass ON (don't do that)? and trying to switch between jpg, png and exr? Remember there's still a bug in your version - unless you tried 17a (do that)? Make a simple chor with just the transparent/reflective window, and your lighting setup, model to reflect in window, and rendering setup. Render 1 frame. There may or may not be a bug, but a simple project would be needed to send to A:M reports if so. EDIT: AND I might add version 17 has added the ability to save individual files for each of the buffer types (depth, shadows, ambiance, diffuse, specular, etc) for the image types png, tga, jpg. No need to fool with exr anymore in PS, AE, etc - whoooo hoooo! And they can be used in A:M composite as well! Muy bueno! EDIT2: I just tried rendering to png with 1) alpha OFF and 2) alpha ON (vers 17). Transparency for the window in the final render cannot be computed correctly when there is no background model (must take into account color, intensity of background). I also downloaded your png file - it definitely was rendered with alpha ON. Turn alpha OFF for your pngs, or put in some dome model for the background. Leave alpha = ON if you intend to add a background in post (aftereffects, PS) -
Video drivers have nothing to do with A:M FINAL rendering. And I highly doubt that the registry does either. Even for version 14c. (I assume that's what you're using?) I am willing to bet it is more likely your project settings and/or model (ordering of groups) is doing something funny. The other likely candidate is vers 14c didn't do transparency so well, or had a bug in it. In that case, there may be a work-around or you're outta luck. Upgrade. You will definitely see a difference in resultant renders, especially with transparency, if you are comparing a final render, with an onscreen "render lock" in most every version of A:M (including 17). Show us the group settings in your model, and your render settings. Post 1 still of the final render which has a problem.
-
Make your ground plane: Front projected & Flat shaded Start with 1 light that has shadows, a default width Klieg type with z buffered shadows., use default softness of shadow, or tweak to taste, tweak darkness of shadow. Add other lights, if you must, but you will have to retweak. For this image: I believe I had chor/global ambiance Type = global Color = white, Ambiance intensity = 50-75-100?%, with 1 white Klieg probably 50-100%, shadow softness = 6.25%? darkness = 80%, color = black. Rotoscope image is all white (could be any image). I also used jenpy's fakeaocpu post effect for more darkening of "creases" on model. EDIT: If you use ray trace shadows (with any kind of light), then the ground should NOT be Flat shaded, or else the shadows won't show. The shadows won't be as dark either.
-
AS Mark said you should see the channels in the user properties for the phoneme poses. I just tried this in 15j PC
-
Not sure why this thread is in a private forum? It's a good topic, with valuable question and information for everyone. (Mod: Agreed!)
-
I might also add, I thought you were asking about the mechanics of blocking within A:M. I did not, in any way, shape or form, address the art of blocking, ie how/why one determines those golden poses, nor the best, most artful creative breakdowns/transitions, nor good timing with good easing, anticipation, follow-thru, overlap.
-
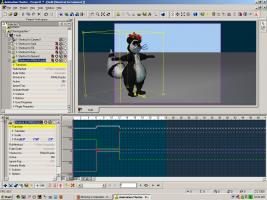
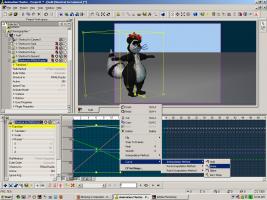
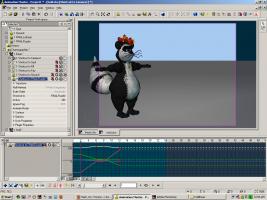
Not sure what kind of example you're looking for, but here goes: I started first with 3 keyposes where I had the Curve interpolation method set to HOLD, 2nd is where I changed curve interpolation method to LINEAR (could also, and probably more preferable, have chosen ZERO SLOPE). My third example shows linear interpolation of the curves, but added holding of each of the keyposes for 2 frames. I did this by copying the pose and pasting it 2 frames later. 4th example shows zero slope interpolation, which gives some ease in ease out to curves, with holds. (EDIT: Changed linearwithholds.mov, as I uploaded wrong file first time, added zeroslope with holds) hold.mov linear.mov LinearwithHolds2.mov ZeroSlopewithHolds.mov
-
To what issues are you referring? You can set the curve to "Hold" requiring only 1 blocking pose per interval or as some prefer, "Linear", using 2 poses for each interval (start & stop). I prefer Linear because you can also setup intermediate poses to show transitions.
-

magic vase ..based on Rodney's idea
NancyGormezano replied to johnl3d's topic in Tinkering Gnome's Workshop
wonderful! -
(yes I know this started as a treez thread) Just thought of 2 other things that can be done in action window that can change the model data: CP weighting, smart skinning. There must be more.
-
Ooooo...that sounds interesting...me guste.
-
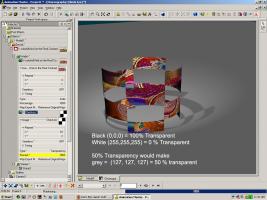
Yes. Use a transparency map along wiith your color map. The transparency map should be shades of gray (or just black and white) where Black = 100% transparent, and white = 0% transparent (100% opaque)
-
My guess is that it was done in an action because of the special way it uses sliders to determine the Treez special properties: Thickness, branch length, locality and regularity. See page 6 of the pdf for more explanation. Clever. It could have been done differently of course, but probably Marcel wanted to make use of some functionality that already existed in A:M, ie accessing pose sliders via an action. The pose sliders, defined by the user, for those 4 properties, can be used to refine and give more variation for the shape of the tree trunks, branches. However, it is not necessary to define these sliders, if you want to stick with the default or more automatic way the trees get created.
-
The treez tutorial also causes me to have MORE questions about the interconnectness of actions and models, and what manipulations in the action window will cause changes to the model itself. It is not always clear what will or will not actually change model data/structure when working in an action window. We more commonly think of actions as being reusable in a chor (eg walk cycle, etc), not as a means to modify a model. Besides making reusable actions, the normal things that one can do in an action window which will cause a change to a model without exporting to a new model (ones that I know about) are: one can decal a model in an action window, and one defines relationships/poses for a model in an action window. And as mentioned before, one can export from the action window a new model. From what I can tell tho, the Treez wizard seems to be a special case in how it uses the "A:M windows/modes". It seems to go way beyond the above. But I suspect it does this only because it was designed that way, and that it has gone rogue. I don't think it follows any standard philosophy of what you can do in a action window versus model window.
-

Bitmap Plus materials working with imported props!
NancyGormezano posted a topic in Animation:Master
I don't know if this is new or not, but I just found out that bitmap plus materials work with imported props! AND so does the matcap shader. I did not try other shaders - but I'm guessing they work as well. -
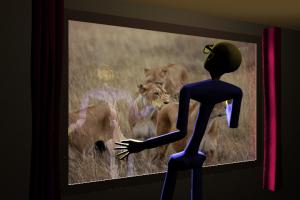
Very interesting effect! It looks like a walking raised relief image on the wall. I am curious tho as to how/why there is a solid black outline on stickguy? And that it changes as he walks across screen/wall? Makes the "walking inside wall" look strange (confuses the illusion). Is that a result of the post effect or are you using toon lines?
-

It was a dark and stormy night.
NancyGormezano replied to Simon Edmondson's topic in Work In Progress / Sweatbox
I have received notice that the jitter % property will be implemented in next release of 17, and that positioning of lights will be fixed. Thanks Steffen! -
I don't exactly know what's happening with you (did you fool with alpha buffer ON/OFF...or key color??? - that might account for the different background colors) but, more likely: My experience with Composite has been that it's been very, icky touchy (in all versions, in different ways), and that it is very hard to get consistent results if you start deleting effects, changing their order, changing parameters, doing things in the wrong order. Very frustrating. I have found that if things start acting weird & inconsistently, it's best to start from scratch: ie, new project, import image sequence, new composite, and go from there adding posteffects.


