-
Posts
7,863 -
Joined
-
Last visited
-
Days Won
15
Content Type
Profiles
Forums
Events
Everything posted by NancyGormezano
-
I'd say: Brute force wins! - simplest, quickest, directest, terrificest!
-
Fabulous look! terrific models! Very interesting with your render style. How did you do the spider web? Excellent.
-
Fabulous character!
-
I'm duly impressed that I could understand it and don't speak any German!. (btw, at first, I thought Robert was doing an old rerun of )
-
Didn't quite understand what you were saying with respect to using a Mac or PC? However... Why pre-roll of 20 frames? That will complicate your life, & make working with hair more difficult, time consuming (computationally a pain). I know others do the pre-roll thing, but I have no idea why, other than I suspect they are wanting the hair to settle due to gravity (makes like a wet noodle), but I choose to groom the hair in the model and set the USE gravity = OFF, but USE forces = ON. That way the resting look of the hair is exactly how I groomed it, not how A:M computes it to look after "coming out of the shower". The hair will still be dynamic according to how the head moves. I also like to up my drag to 20% (to make the hair less floppy responsive, and make the dynamic stiffness = 30%) - You can tweak to taste. Also - important if you don't want flickery stuff going on, then "set face camera = 0%". If you have it on, it will also impact your grooming look. I like to keep things as simple as possible (not necessarily as realistic as others prefer)
-
First, I'm not familiar with how well or not hair works in vers 15j+ on Mac. You do not NEED to bake hair(particles). I suspect something else is going on. Baking of particles/hair has NOTHING to do with how grooming might get altered in a model file. It only has an impact on how it behaves in a choreography, and usually one only bakes hair/particles if the hair has dynamics turned ON. Baking is an option in the chor, and the baked hair files will be created and saved to the same folder that the project has been saved to. The "baked" files (extensions with pai, and par) - contains the data as to how the hair will move, so that one can tweak the animation with the actual dynamics of hair pre-computed, and that one hopefully will get consistent results if one is Net rendering (using multiple computers). Try a test case with a simple sphere model, add hair to some of patches, groom it, save the hair material as an external file (don't embed it), save model as external file (don't embed). Then reopen A:M and bring in model with hair. If something has changed with the grooming then there is a bug in 15j+ with macs. I have found that sometimes I need to create a hair material, add the hair to the model, save material, save model, close A:M, then bring it back. THEN groom the hair (and resave model) - As sometimes the first grooming doesn't take (or something like that), but from then on it does. So it may be you are running into something similar
-
Great character!
-
wow! that's a wunnerful, wunnerful polar bear!
-
You can also render with final, multipass ON and number of passes = 1.
-
He's such a great character. Seems a wonderful character to work with. In general, for me, I would push each pose more. I feel these poses are generic, and don't say enough about this particular character's state of mind, nor his personality. From his stereotypic body type I might guess a variety of his personality traits, but I would more than likely be wrong. I would try to identify his state of mind, and personality type. Is he a goof? meek, milquetoast? Intellectual? neurotic, scaredy-pants? I would for each pose, work on the facial expressions: eyelids, eyebrows, eye direction, mouth shapes, etc. He has the same facial expression in each pose (default?). I would give him asymmetrical facial expressions to augment and push the body poses, mood, character traits. I would also make his fingers and hand poses more extreme, exaggerated. In the first pose - if he is supposed to be off-balance, then I would push it further. For example, I would make it clear that he is caught mid struggle, desperate to not fall over. Or, if he's supposed to be balanced, then I would make it a funny extreme, eg - maybe a delicate and unlikely dainty pose (remember the "Perk" character pose - a past A:M mascot?), or maybe an extreme manly pose worthy of a body builder. In current pose, I would move his left hand, so as to not be tangenting his leg. I would also experiment with angling the model (or camera) so that the general orientation of the pose is not so straight on. For the "thinker" pose - I would again try to make it clear his mood by exaggeration. As it is, I don't know if he's just being reflective, or staring at something on the floor. Is he about to lean over and pick it up? I would try to make it more obvious. Is he dejected? scheming? dazed? daydreaming? For the leaning on wall. Is he trying to be cool? just thinking? It seems an odd pose to me. I can't ever remember seeing someone holding their head up while leaning on the wall like that. Maybe he's trying to be aggresive and block someone? I would try and make it more comical, exaggerated, more arc to the general body line from head to crossed leg. I always have a hard time figuring out poses for my own characters, and because I don't ask myself the same kinds of questions and push it further: "what are they thinking, feeling? What's their personality? Where are they and what is the scene setup?" - I end up with very bland poses. So this was an interesting exercise for me to learn something that I need to do.
-
It was a dark and stormy night.
NancyGormezano replied to Simon Edmondson's topic in Work In Progress / Sweatbox
hmmm..the title seems too difficult to read - probably because 1) not on screen long enough, and 2) the placement in lower left half causes confusion for viewer by the passing road sign combined with flickering lightning. Makes me want to read the sign, which also goes by too fast. Anytime you have text, and make it difficult to read, it will distract the viewer from the flow of your story. I even question having the title show on this sequence. Too much movement going on. I like the road sign going by, as well as the lightning. Have this as your opening, and then maybe cut to another sequence, with just the title (against black only) or against another scene with less movement going on. Or if you really want title on this scene, maybe move title to center upper half of screen. Have it stay on but perhaps fade in and slowly enlarge, then eventually fade out (2-3 seconds for title sequence?), with less stuff passing by as the title is on screen. -

problems with SSS in v17a?
NancyGormezano replied to kikiriki's topic in Work In Progress / Sweatbox
That looks great! Excellent job on the candle, drips & wick model. The lighting & flame gradient works better as well. As you said in other posts: you're done drinking...uh...dinking...with this project. Any more dinking & drinking is up to those who download the porject...uh project (and I haven't even started yet). Thanks for the project, Matt! -

Quick Idea With Sound Control Added
NancyGormezano replied to johnl3d's topic in Tinkering Gnome's Workshop
You need to steal some more MMT from those Evil Overlords at work. MMT= Mandatory Me Time That's a great one, O Great One! -

problems with SSS in v17a?
NancyGormezano replied to kikiriki's topic in Work In Progress / Sweatbox
Wonderful! very, very luvley! I like how the lighting flickers. Luuvley drips. SSS looks terrific. (But, to be a luvley butt, it could use some blue core in the flame, and a more irregular, charred wick as camera gets closer. Might look better if the light behind wick didn't become so obvious as camera approaches. That's the problem with trying for realism...the work is never done) -
There is no sss o, the hat. Just velvet shader. Hi Ludo - what version A:M, platform? Rendering with multipass? (ON or OFF?) what is velvet shader? (show us the material? or is it a shader? - I don't see velvet as a choice for shader) Is the decal on hat just color map (with alpha)? Do you have a bump map on hat? At one time in vers 13? 14? there was a problem with rendering with materials, bump maps on the same surface and with either multipass ON or OFF (I forget which). Does problem still happen if you turn SSS OFF (in render settings)? We need more info about hat. Can you delete everything but hat and upload project?
-
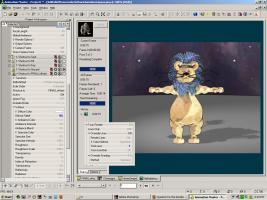
If you need more "detailed edge lines", you can also decrease the bias for the toon line. I left the line bias in this render to the default (20), but you could make it lower. I decreased the line width to 1 (from 1.5), made the Lion's diffuse falloff surface property = 0 % (from 100%) for sharper shadows, and made the shading method = standard (not toon). This is only 3 pass, with default lighting setup in 17a. You could play with lighting, shadow darkness as well.
-

2d Game Assets / Pop's Face Project
NancyGormezano replied to tbenefi33's topic in Work In Progress / Sweatbox
Oh poo, sorry to hear that. Here's wishing you a speedy recovery! Take care, rest, relax, and may you heal as quickly as possible! -
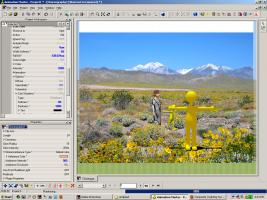
For me, the self shadowing on Thom (and other character) is too soft, compared to the dark, sharp shadows on the plants. And it does not appear that Thom is casting any shadow on the ground. The self shadowing also seems to be "wrong color". For my taste, I would also say that the color of Thom is not as saturated as the colors in the background image, so it looks odd, unbalanced. Something to try to make the colors look more consistent: use Image based lighting, and use the background image as your source. The colors on the models would have a better chance of blending in (would have to try to see if so). EDIT: This may not suit your taste, but I made the global ambiance color more orangey, to make Thom more match the bright sunflowers in the bright sunlight, and the shadow color on the flowers is more consistent with Thoms self shadowing. We now have Thom with dark black shadows on the ground. The ground is flat shaded, front projected & there is only 1 white klieg overhead casting shadows. It could use some tweaking. I tried using your image for the Global IBL, but it didn't do what I was thinking it would do. I thought the orange global color worked better (for my taste).
-
wonderful!
-

There a way to make toon outline with out surface shading?
NancyGormezano replied to captainrex's topic in New Users
He did that. See Capt'nRex uploaded project above (post #13). -

There a way to make toon outline with out surface shading?
NancyGormezano replied to captainrex's topic in New Users
So I'm gathering you are happy with this? (and yes transparency doesn't work with gradient materials, that also have displacement turned on in the material - you would have to find a workaround) -
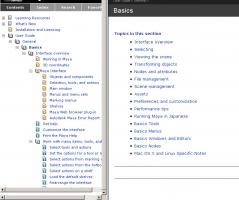
This is a fabulous new feature, and I have used it already and have picked up new info. Excellent! I definitely feel that this would be the way to go. It also helps in that each version (from here on) could be kept current if features change from one version to next (yes, requires someone to document/change document new/changed feature, in each release) The task remaining with the ver 17 interactive techref, so far is that the info is incomplete, and it's not clear how to contribute, or to hyperlink to additional info, tuts that probably exist already (in some online doc, forum discussion?). Info in current techref, if available, could be copy/pasted? perhaps? If any standalone document is to be created fresh: It should be a QUICKSTART manual with the Basic concepts of A:M. And like any good quick start, it explains the user interface first thing, then perhaps launches into an overview/quick easy of the steps for creating that first Project. Identify the Inputs (external assets), the Processes (modeling, texturing, rigging, animating, lighting, special effects) and the Outputs (rendering). BASIC stuff only, with perhaps links to more detail. Perhaps also introduce A:M unique spline concepts as well. Assume people just want to know about how to use A:M only. They do not want it to be mixed (at this new user point) with the subjective, art stuff, that pertains to every software package: eg., What makes good animation, good characters, good texturing, good lighting, good story, etc, The Maya Outline table of contents is an example of subjects, not necessarily the endall outline. And I agree when I go to investigate their topics, I am not that impressed with the content. Documentation, writing User Manuals is an art.
-
I can be more specific with my gripes about the tech ref. Even knowing the terms, it's very difficult to find the information. Number 1 complaint is that there is no discernible organization of categories. Seems like a random brain dump obtained when some sadistic alien abducted and tortured an alcohol infused programmer. The printed copy is especially difficult to use, as one can't do a search. The pdf at least comes up with search results. But still difficult to wade thru the results. And for a new user, they don't know what to search for. The table of contents, and actual contents is just one big laundry list, with no apparent chapters, sub chapters. Worst Table of Contents, organization EVER. The index is alphabetical, but is most often wrong. That is, the page reference is usually wrong. Once you find the section (I usually scan, flip thru book, until I find something that might resemble what I'm looking for), there is minimal information as to how one would use the feature. For a new user, I would imagine it to be confusing, frustrating. Even for an old user, I wonder, why? why? why? would the organization for this valuable information be like this? EG: p 49 is talking about Model properties, then p. 50 launches into ANIME EYEBROWS??? huh?, then attaching Control points, then importing/exporting Models, then the duplicator Wizard? Wha???? The contents for some subjects are spread out all over the place. Can find it in multiple places, sometimes saying the same thing, sometimes additional new info. Horrible horrible organization. But good good information once you can find it. You asked.


