-
Posts
7,863 -
Joined
-
Last visited
-
Days Won
15
Content Type
Profiles
Forums
Events
Everything posted by NancyGormezano
-
yes - if your subscription is current/not expired
-

Transparent materials don't display transparent (v17)
NancyGormezano replied to pixelplucker's topic in Animation:Master
Hooo hooo! You guessed that right. I have figured out what I was doing wrong. Yay! It seems I did not have the little new "snap to surface" icon depressed BEFORE I started splining the new model (somehow I missed that crucial step in your video). When I did that - all became wonderful! The clouds parted and the birds began to sing. The problem I had been running into (and still) is that I would create some new patches close to the obj template model, then select those patches, right click (while patches were selected) and select "snap group to surface" option. Not a good idea. That is when things get weird. Some of the cps snap to a far surface, and some don't. It's not clear how to control that. But at least the original laying down of splines on top of a 3D obj template/prop seems to work better. It's the post-"snap group to surface" that works wonkily. -

control glow with surface diffuse fallout
NancyGormezano replied to johnl3d's topic in Tinkering Gnome's Workshop
Nice! -

FakeaoCPU not working in 32 bit v17?
NancyGormezano replied to NancyGormezano's topic in Animation:Master
ugh. I am confused: It works in 64 bit version but not in 32? Was it recompiled for the 64 bit version and not the 32 bit version? -

Transparent materials don't display transparent (v17)
NancyGormezano replied to pixelplucker's topic in Animation:Master
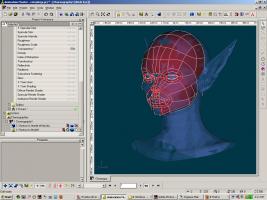
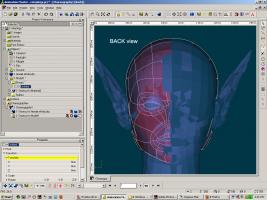
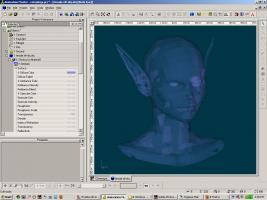
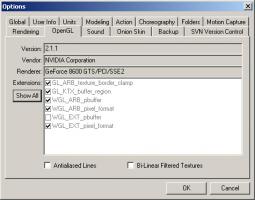
here's my views: Birdseye, backview in the chor - note that only 1 side of the prop appears transparent. Also in the model window view of the prop, one of the eyes changes from visible to not visible as I navigate around the model EDIT: I have old drivers, only puny 256MB RAM on card, so I could expect my system to not be right...but Pixelpucker has new drivers and a big new whoopdedoo graphics card -

Exporting a frame of animation to a model
NancyGormezano replied to John Bigboote's topic in Animation:Master
There is the ability to export a chor as a model...but I'm not sure how you pick a frame of the chor (other than zero). There is also the ability to export an action as a model - but again - I'm not sure how you pick a frame other than zero. -

Transparent materials don't display transparent (v17)
NancyGormezano replied to pixelplucker's topic in Animation:Master
My understanding is that Direct X is not the same as Direct3D. Does your card support Direct3D? I experience the same transparency problem with PROPS and transparency that you do, when trying to see the patches of A:M models thru the PROP. I have not tried Direct3D yet with 32 bit ver17. However I just don't get this retopo stuff...Whenever I select patches in the chor of the model I am trying to create using an .obj prop as a 3D template - and I select "snap to surface" - I invariably get CPs that jump to the wrong surface. Some are correct - others are wrong. I must be doing something wrong, or not understanding the process at all. -

It was a dark and stormy night.
NancyGormezano replied to Simon Edmondson's topic in Work In Progress / Sweatbox
-

It was a dark and stormy night.
NancyGormezano replied to Simon Edmondson's topic in Work In Progress / Sweatbox
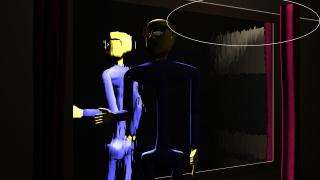
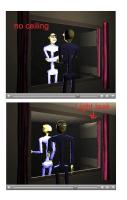
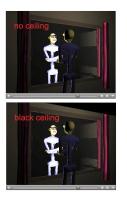
Hmmm. Now I definitely prefer it with the ceiling (either black or whatever color the 1st image is). The one without the ceiling and the way you currently have the light aimed, produces a weird illumination of the thickness at the top of the wall. -

It was a dark and stormy night.
NancyGormezano replied to Simon Edmondson's topic in Work In Progress / Sweatbox
I also think either works. And probably prefer the ceiling removed as well since the light leak with the wall doesn't show. This shot is being taken out of context, is very short, and won't be examined in the same excruciating detail in the final short, as we have been doing. I take this as an exercise to figure out what is happening as mainly for learning more about how to control A:M, and being able to get what you want out of it. (light leak will more than likely go unnoticed in final short). If you want to remove any lingering doubts about window versus mirror, something outside the window, like lightning bolts (good idea!), or trees, landscape, then it being a window, will be more convincing. As for versions, I do believe that Mac users have reported significant speed ups in rendering in ver 16b & 17 versus results in version 15. I can't verify my suspicions. I am curious: removing the ceiling works of course, but why didn't making the ceiling black work? It should have looked the same. No? If you made the color something other than 0,0,0 then it would probably still show up. EDIT: hmmm...just tried to imagine why black ceiling would look different from removing ceiling - now I think I know why -
Looks absolutely great!... Why is the grass scintillating? Does it have a dynamic system?
-

It was a dark and stormy night.
NancyGormezano replied to Simon Edmondson's topic in Work In Progress / Sweatbox
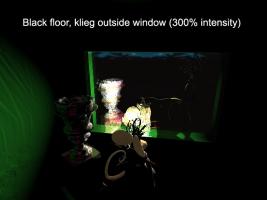
I don't think you need to make a light list for this case. I believe you can get away with just making your ceiling black. I tried your config - put the klieg outside the room (made it 300%), and made the floor surface color black (0,0,0) so that it would be excluded from the reflection, ie it would not be illuminated. For your case, you could make your ceiling black, if you decide you don't want it to show in the reflection. You do not need to fool with ambiant intensity of the ceiling (wrong advice on my part), nor the reflectivity falloff of the window probably. Not sure why your renders are taking so long, but I have found that doing final, multipass off, is usually quicker than FINAL 5 pass. You definitely don't need 64 passes! That's overkill for that kind of low detail models, textures. And yes each pass does change and seem to darken, but eventually I find that additional passes makes no real difference. My renders (640 x480) are taking 20-30 secs at final multipass off. It may be different for Macs (or your particular mac), it may be a A:M version difference as well as to why you are taking 20 minutes/frame. It may be some other setting that isn't obvious yet. In addition to tooooo many passes, Soft reflections will add time and # reflectivity levels? and what are allllll those lights!!!! doing in your chor? -

It was a dark and stormy night.
NancyGormezano replied to Simon Edmondson's topic in Work In Progress / Sweatbox
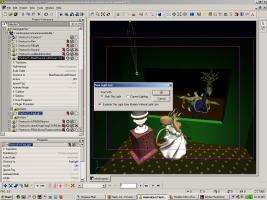
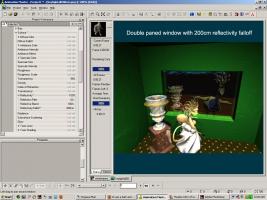
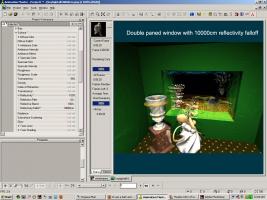
Ok. Now I'm not so sure that a light list would work for you, However, one would: Drag the klieg light and drop it on top of the outside models (uh...the trees?) - A dialog should pop up - and you would select which option you'd like - usually it's to just to include the light for this model and exclude it from lighting any other models. (see first image) The light will now only illuminate those models which have it in their light list. BUT In your case - it sounds as if you have the ceiling illuminated by the klieg (perhaps aim it differently?) OR you haven't set the reflectivity falloff low enough? or some combo of the 2. I believe we are seeing the ceiling reflection in the glass. In my example the first render is with the double paned glass having a falloff of 200 cm - and we don't see a reflection of the floor. In the 2nd example, the falloff is 10000 cm and we see a reflection of the floor. (my double reflections are a result of there being 2 panes of glass, and the waviness is due to the bump map. Unfortunately the peacock, which is outside the window - doesn't seem to get wavified...whereas I thought it should....hmmmm....) EDIT: And a simpler solution for you - might be to make the ceiling a dark/black? color for this shot (only?) - and 100% ambiant if you don't want to see the reflection of it in the glass. -

It was a dark and stormy night.
NancyGormezano replied to Simon Edmondson's topic in Work In Progress / Sweatbox
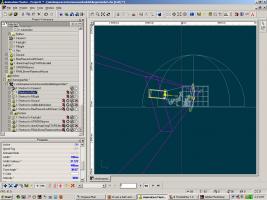
You may have to use a light list (that contains only the lightning lite) for the outside, if you don't want the inside of room (ceiling) to be lit up. You can use a different light for the inside of room. Show us your chor setup (PWS, top down, side, wireframe, etc), and we could help better...maybe...I'm having a hard time guessing what your setup is. What kind of light are you using for the lightning? (klieg? bulb? sun?). EDIT: Just saw your previous post: which way is your klieg pointing? and are you sure it is outside the room? _________________________________ And yes, a wireframe render will more likely have a larger compressed file size, than a shaded render when compressed, because there is more information in the imagery. The more variation in the imagery (from frame to frame), the harder it is to compress and get a smaller file size. How are you compressing your movs? The best way is to generate uncompressed image sequences of pngs or tgas (eg: image001.png...image00N.png) - and then import & compress the image sequence in QT Pro (or some other editor) with h264. -

FakeaoCPU not working in 32 bit v17?
NancyGormezano replied to NancyGormezano's topic in Animation:Master
I had already done that earlier today. Was checking to see if we could narrow it down to 32bit. Thanks for testing. -

FakeaoCPU not working in 32 bit v17?
NancyGormezano replied to NancyGormezano's topic in Animation:Master
Thanks Matt - That is very helpful to narrow this down to 32bit version! -

FakeaoCPU not working in 32 bit v17?
NancyGormezano replied to NancyGormezano's topic in Animation:Master
yes I still crash. No matter what settings (default) I try with Fakaocpu. -

FakeaoCPU not working in 32 bit v17?
NancyGormezano replied to NancyGormezano's topic in Animation:Master
Can you try it in the 32 bit version to see if you crash? I do not have 64bit. Nor do I have SSE4 (I don't think...how would I know?) Yes that aotexture moving does look weird - but I never noticed that in 16b. Could be an artifact of FAKEAO since it is based on screen space depth, and not real raytracing type. Probably never noticed it in my animations because I texture the sh..t outta things I don't like to increase sampling levels, #samples too much, makes things too slow on my machine. But yes, I can increase the gamma, as well as focal length. EDIT: I'm guessing you have waaaay more memory than me, and are using win7. Perhaps that is why there was a delayed crash for you? memory leak maybe? (me: 4GB - but only 2GB available to programs?, winxp pro sp3) -

FakeaoCPU not working in 32 bit v17?
NancyGormezano replied to NancyGormezano's topic in Animation:Master
Yes I usually have my Focal length cranked to 250 (makes the effect darker for some reason) Did you test with 32 bit A:M? or 64bit? And I do not have the GPU version, only CPU version of FakeAO. I am 32bit. (weird about the peacock image - I don't have that crop up in either 16b or 17) EDIT: just looked at text file for project - and yes the reference for the peacock image is there, but it does not bring it into the project for me in either 16b or 17. I had used that image in testing at one time for testing Image based lighting with an image. Seems to be leftover garbage. -
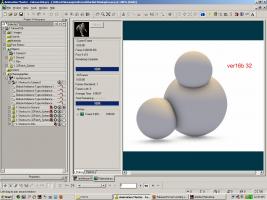
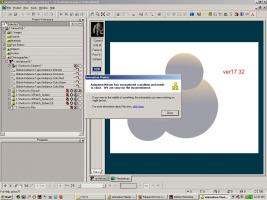
I get a crash everytime - with fakeaoCPU with ver17 32bit (most recent release), even with a simple chor (1 sphere) Anyone else getting it to work? Is it just me? EDIT: I've added a test project (created in 16b) that crashes in 17. I tried creating project from scratch in 17 - still crashes. fakeao16b.prj
-

It was a dark and stormy night.
NancyGormezano replied to Simon Edmondson's topic in Work In Progress / Sweatbox
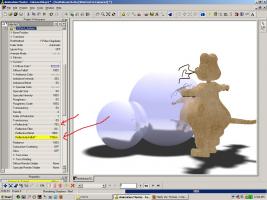
Reflectivity falloff is found in surface/refelectivity/falloff The default is some big number (don't know what it is - comes up as unset?) First, try with a test case without decals to see what it does. Make something reflective, give it something to reflect. Then start decreasing the falloff (try 10cm - note that anything further than 10cm won't reflect). You must set reflectivity percent in group surface property, before those additional properties show up. -

It was a dark and stormy night.
NancyGormezano replied to Simon Edmondson's topic in Work In Progress / Sweatbox
Works for me. Both this QT and the effect. A compressed 182kb QT is good enough to get a feel for what's going on. A 6.2Mb is overkill for a 2 second movie. If you don't want to see the reflection (of what I presume to be) the room in the window, you can try lowering the reflectivity falloff of the glass window so that only the man, or anything standing close to the window will be reflected. If that is supposed to be a courtyard outside the house or you want to see the reflection of the whole room, then never mind. Nice effect! -
Ditto. I haven't done the TAOAM, nor seen Zundel's tuts. I personally prefer Malo's way of thinking, modeling and he did an excellent character modeling tut, that is more intermediate to advanced. (won't point you to it now) Mikes questions are basic. Those questions can be addressed simply. I do not have time now, as I am going out, but others can address them. Part of the problem I believe, is typical when switching programs, having to unlearn the other programs conventions, habits. A:M modeling tools are not that complicated. You pretty much asked all the questions. The methods to achieve the same results, are such that one does NOT need to follow only one formula.
-
here's the link I haven't seen them, but many people here seem to feel these are quite good.
-
Nice! There's lots of character in that walk. I specifically like that the walk is asymmetric, and that he has slight "limp". Makes it feel more interesting.


