nimblepix
-
Posts
838 -
Joined
-
Last visited
Content Type
Profiles
Forums
Events
Everything posted by nimblepix
-
What a great idea! I'm looking forward to this. I hope I can make the time to do it along with everyone.
-
Nice job! Looking forward to the animation.
-
Nifty!
-
WOW! Now that's what I call inspired character design! B-E-A-U-T-I-F-U-L!
-

"Little Ditty" ... New Animation
nimblepix replied to wedgeeguy's topic in Work In Progress / Sweatbox
Very Cool! Great Job! -
Try working out more esthetically pleasing ratios. Right now there are a lot of measurements that look the same.
-
Jason, I like what you've done. I especially like that you haven't just made the ball bounce straight up and down. The hair really adds to the personality!
-
Basic Ball Bounce - Crit Please
nimblepix replied to Heath_Naylor's topic in Work In Progress / Sweatbox
Good job Heath! To me it looks more like a jumping ball than a bouncing ball. I can almost hear it's enthusiasm. : ) -
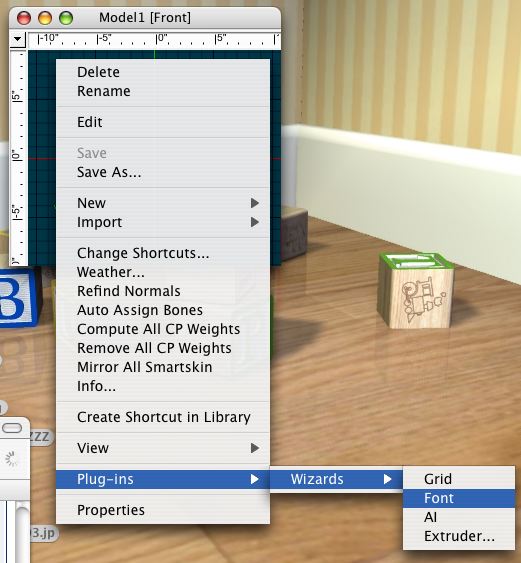
right clicking - can't right click on Mac
nimblepix replied to Wing_gundam_zero's topic in New Users
Yes, Dhar is right of course. Using the control key is the same as right clicking. But, Apple's new mouse can right click. http://store.apple.com/1-800-MY-APPLE/WebO...plm=MA086LL%2FA Go into system preferences and see if it's set up wrong. -
I've found that in a case like this, it's actually easier to not even use an alpha. Make your paint layer above your template in your paint program. Be sure to paint farther than you think you need to. Save that top layer as a TGA file. For your transparency, make a white layer above your template and paint with a black brush. The black indicates where the color will show up. Then inverse it so that white becomes black. Save that layer as a TGA file. Bring both of these files into A:M. Use the color one as the decal and use the black & white one as the transparency map. Attached is a quick and dirty project in A:M 13 to show you how. You have to render to see it. transparentguy2.zip
-
Go to My Controls, then down to Edit Avatar Settings under Personal Profile Settings.
-
Check out "The Door's Stuck" chapter in The Art of Animation Master.
-
Wow, looking forward to hearing more about this system.
-
Wow!
-
Generally speaking, the fewer the splines, the smoother the surface.
-
Wow!! A huge, ambitious project! How long did that take?
-
Let me guess. The ribbon had boolien cutters at the front and back ends?
-
You don't need the close up on the "will it blend." No need to pause so long while holding the little guy over the blender. Get more anticipation, action, reaction shots. Show us how the characters feel about the situation. The reaction by the guy at the booth is too long. The hole in the "desk" isn't obvious enough. Some very good animation. Could be a bit more snappy. You're going to be an animation star. : ) By the way, I hope you're rendering out to targas so that you can just re-render the rough parts.