R Reynolds
-
Posts
176 -
Joined
-
Last visited
-
Days Won
47
Content Type
Profiles
Forums
Events
Everything posted by R Reynolds
-
For an extra $300, FormLabs claims you can get finer detail and better resolution, albeit with a smaller volume. Let the battle of cheap 3D printing begin.
-
can't get automatic keyframes in an action
R Reynolds replied to R Reynolds's topic in Work In Progress / Sweatbox
Thanks for everyone's help and I doubt it's worth pursuing further but this has just moved from frustrating to totally weird. I clicked my bookmark to the A:M forum, clicked on this topic and then clicked on Rodney's link and I got the correct page. Hooray! Then I clicked on Robert's link and also got the right page; UNLIKE EVERY OTHER TIME PREVIOUS! The only parameter that was different was that I wasn't logged in to the forum. So I logged in and clicked Rodney's link and got the error page. I clicked Robert's link and got the error page. I logged out and both link's worked perfectly. I went to Robert's web page and used that link; worked like a charm. I went to the forum, logged in, went back to Robert's page; no joy. I suspect that somehow this may be connected to something that happened when I upgraded my PC and moved to Win7/64. On the old hardware with WinXP whenever I'd visit the forum with Firefox I was always logged in. Now I'm never logged in even if I ask the forum to "remember" me. I really don't know, it's just one more goofy internet thing. Thanks for everyone's help to get me the info. -
can't get automatic keyframes in an action
R Reynolds replied to R Reynolds's topic in Work In Progress / Sweatbox
Now we've moved from funny to frustrating; if I select your link I still get the attached forum error.
-
can't get automatic keyframes in an action
R Reynolds replied to R Reynolds's topic in Work In Progress / Sweatbox
That's funny. If I click on the link shown in the attached screen grab I get a forum message that says the "page is either out of date or broken".
-
can't get automatic keyframes in an action
R Reynolds replied to R Reynolds's topic in Work In Progress / Sweatbox
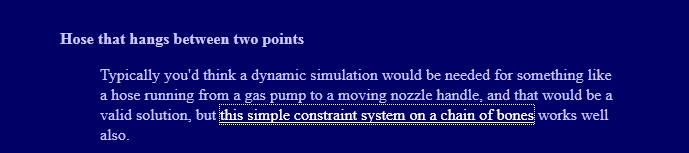
Bingo! I find solace in that this was a common enough problem. I tend to go a long time between animating my models so when I stumble over the process I tend to kick my self for forgetting the basics. This has been added to my personal list of A:M tips. Thanks Robert. BTW Robert, While searching for solutions for this problem, I came across your tutorial web site which had a link for a sample rig of "hose that hangs between two points" which is exactly what I'm after. Unfortunately that link leads back to the forums and is a dead end. Can you put up the link again? P.P.S. I just did a quick search for the above tutorial on the forums and discovered your birthday wishes to me which I totally missed. Thanks again. -
I could use some help with setting up a simple rolling action. Up to and including v13 I could set keyframes by typing in a frame number, then rolling a bone to the desired position and upon release I got a keyframe. Now In v16b I can only get a frame if I hit the key button but the "keyed" roll value is always zero regardless of the bone's displayed Z rotation value. Referring to the attached screen grab; as I roll the bone the entire horizontal green timeline moves up and down as a solid line while the vertical scale stretches with it. I can only get a non-zero roll value at a key frame by manually moving the cp on the timeline. I'm assuming that there is another parameter that needs to be set.
-
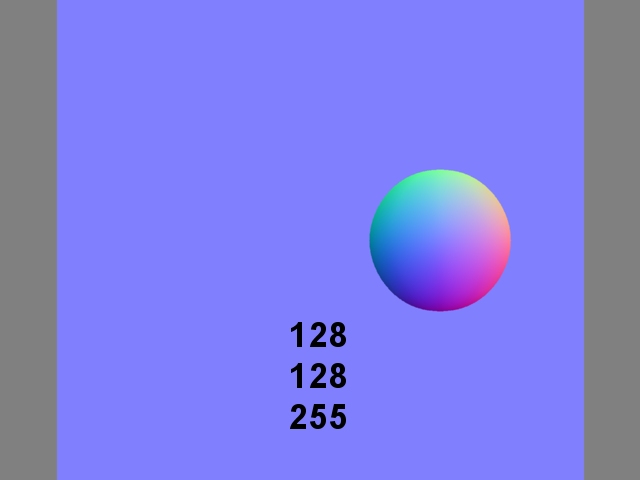
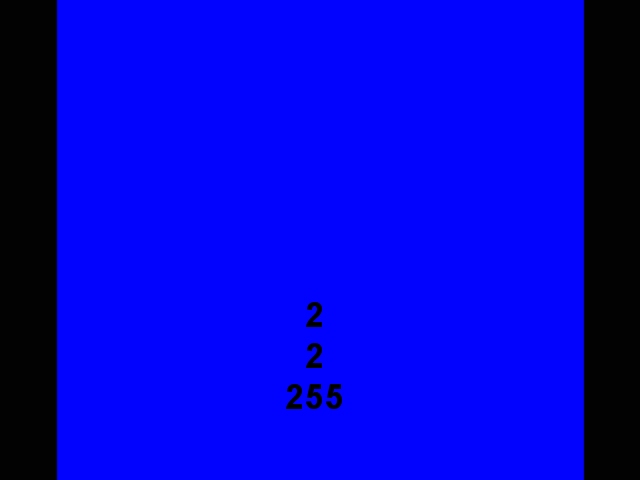
In this thread Robert showed me how I can generate an image suitable for normal decals. The image of a cylinder and sphere on a flat plane is his example. Note that the flat plane RGB value is 128, 128, 255. The image of a series of troughs in a flat plane is my first attempt. The problem is that the RGB value for the flat plane is now 112, 112, 255 which shows up as a difference in shading at the decal edge. So I started to debug this and I got an unexpected result. I moved the cylinder out of the field of view in Robert's example, re-rendered and the flat plane RGB is still 128,128,255 but when I put back the cylinder and moved the sphere, the flat plane is now 118, 118, 255. When moved both the cylinder and sphere and rendered only the flat plane it now has a value of 2,2,255. Now I don't pretend to know the first thing about generating normal buffers but shouldn't a flat plane, normal to an orthogonal camera generate 128, 128, 255 every time? This is not a show-stopper, it's relatively easy to fill in the surrounding with the correct RGB and do some filtering to blur the edges. So I have the decal I want but I'd like to understand this phenomena for potential future work arounds.
-
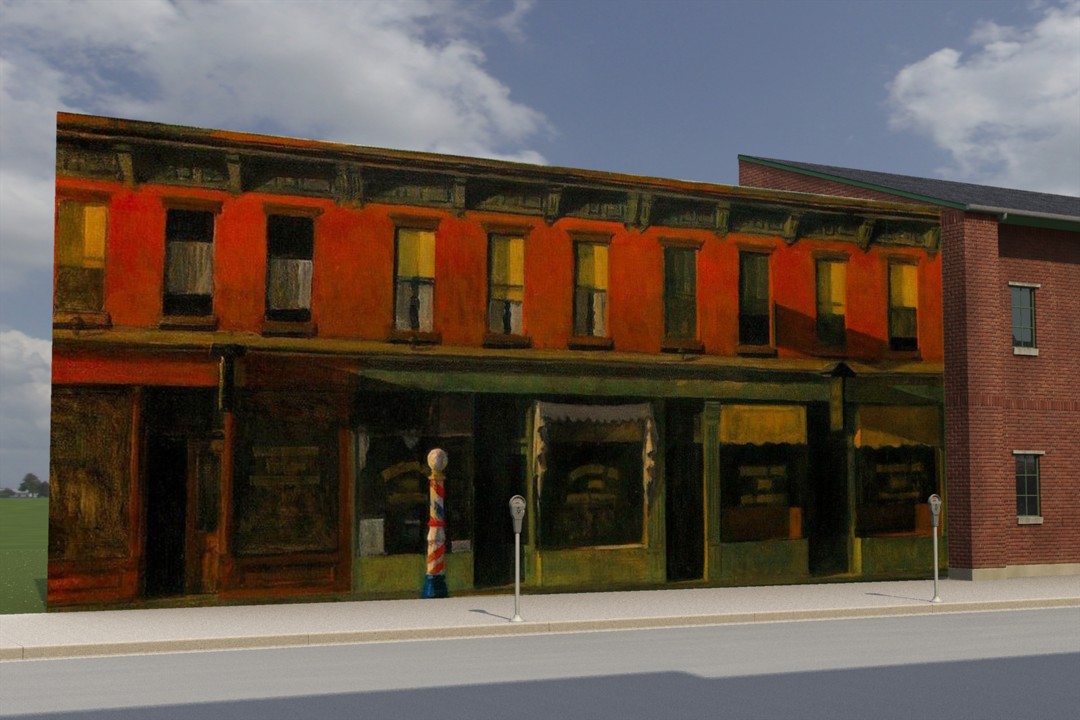
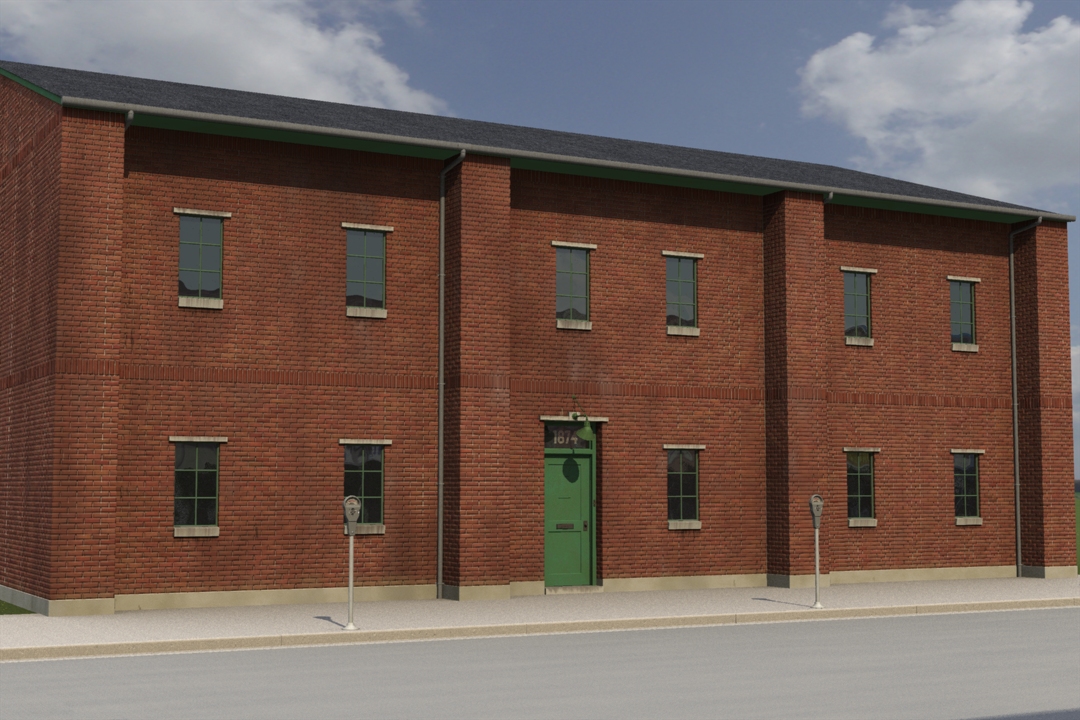
It's as simple as pasting a downloaded Hopper JPG to a flat plane. In PSPro I straightened up some of his less than orthogonal store fronts, erased the fire hydrant, mirrored it and decaled it to a flat plane that I had bowed to match the curve in the entire facade. Then I unbowed the plane and placed it on the same street as the warehouse.
-
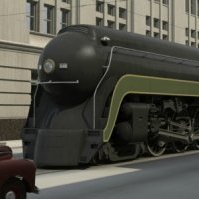
Unfortunately, it's unlikely that I'll ever try to match Hopper's "look", my only motivation is to approximate photo-realism (see colour attachment). I'm way ahead of you Simon. I have one of his books and a bunch of downloaded images. Earlier in this thread I attached three inspirational b&w photos; the center one is by Link. And that locomotive of mine bears a striking resemblance to the "star" of many of his photos, the Norfolk & Western Class J (see b&w attachment).
-
But...but...literal's what I do. It's all I know. Although the configuration of my steam locomotive never really existed, I shamelessly stole features from three real prototypes. Worst description for a prototype reference image, EVER! I need something to ground the model in reality so at least I know how big it is and the overall shape. Fortunately there is one person in the world who obsessed over the "actual" location for Phillies and, thanks to the world wide web, has shared their conjecture. Clearly Phillies never existed, but if it had, the lot at the corner of Greenwich and 7th Ave. in New York would be as good a location as any. And now, knowing the size and shape of the lot, I have something to guide my somewhat limited imagination.
-
There's just under 100 of them so it shouldn't take too long. Basically I plan on building back-lot sets that represent parts of railroad life that I would have liked to experience. For instance, referring to the three B&W images, I feel deprived that I can never walk out of store and watch 3/4 of a million pounds of steam powered iron moving by just across (or down the middle of) the street. This seems almost magical to me. The only way I can even come close to this is to render it myself. Well, I'd never do it for the possible financial reward. Nothing can take the fun out of a hobby faster, since money equals deadlines and satisfying someone other than yourself. However the idea of modeling Phillies from Nighthawks (see colour picture) is genius. All I'd have to do is expand the street sufficiently to accommodate both cars and a railway track. But looking at Phillies with my "how do I build it" eye I wonder about its shape. The counter on the redhead's left is obviously not parallel to the counter nearest the viewer. Is the building triangular? Does the street upon which the viewer is standing not perpendicular to the far street? Are there any obsessive Hopper "fans" who try to answer these questions?
-
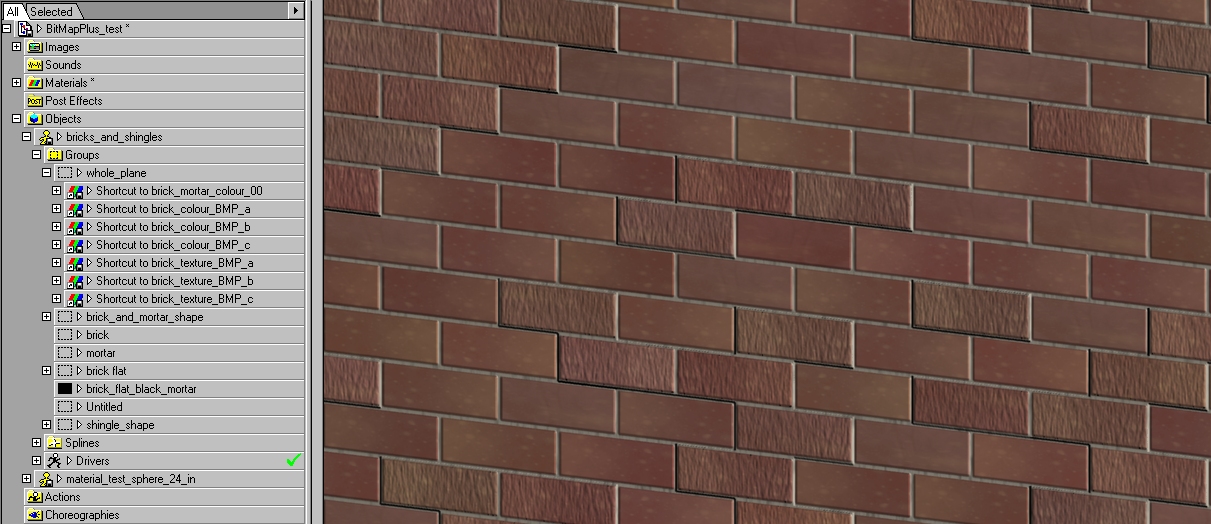
A:M has been my main hobby for almost 19 years. (My oldest copy of the render module, render.exe, is dated Feb. 26, 1993). Over that time A:M has improved and I've learned a lot about modeling, texturing, lighting and observing the real world. Now that I'm getting comfortable with my new hardware, Win7_64 and v16 I've decided to go through every one of my models to bring them to a consistent level of craftsmanship. The first model to get an upgrade is the brick facade of a warehouse-like building. I don't usually keep old renders but in this case I have the warehouse from: 2001 - Toonation Brick Plug-in, simple lighting model, procedural sky, incredible day-glow colors (I can't believe I ever found this convincing) 2004 - purchased 3rd party procedural bricks, purchased image for the sky dome, clean orange(!) bricks 2012 - BitMapPlus bricks and shingles, ambient occlusion, better colors, dirtier with more details
-
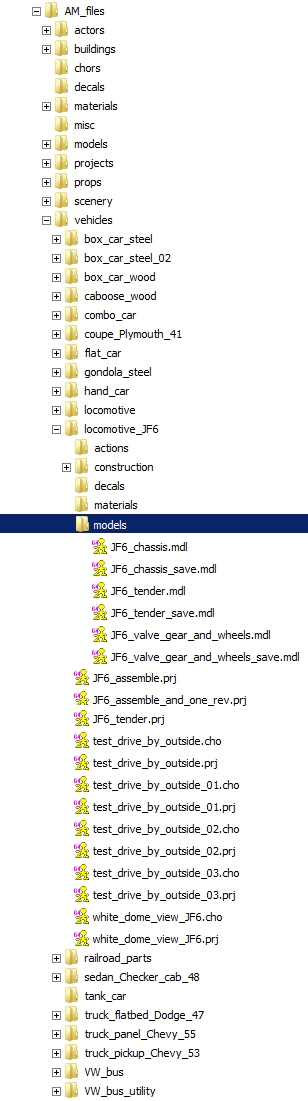
In my world; everything gets its own folder.
-
3rd party material combiners
R Reynolds replied to R Reynolds's topic in Work In Progress / Sweatbox
The symptoms made me suspicious that there was some confusion in the registry. At one point in the process, when I had both 32 and 64 bit versions installed, I tried using the more thorough Revo Uninstaller but it only "saw" one A:M to uninstall and it didn't say which version. I try to avoid using regedit but when you say "cleared registry entries" do you just search for all occurrences of "Hash" and delete every entry from there down? I ask only out of curiosity since I'm making good progress in grunging up a building's facade using native A:M materials as graphically manipulated decals. So I've overcome my desire for the 32 bit materials. 32 bit is dead! Long live 64 bit! -
3rd party material combiners
R Reynolds replied to R Reynolds's topic in Work In Progress / Sweatbox
I'm declaring the experiment to have V16_32 running on the same machine to render 32bit atx and trb files as decals to be used in v16_64, a failure. Although I successfully loaded v16_32 in its own set of folders in C:\Program Files (x86) it was still looking for plug-in files in C:\Program Files. I manually re-directed it to look in Program Files(x86). When I opened v16_64 now it couldn't find its files since it was looking in Program Files(x86)! There appears to be some unanticipated cross-pollination when you have them both installed on the same machine. I'm not going to waste any more of my time debugging this and write off the loss of EnhanceAM as the price of the inevitable march of technology. Once again thanks for the helpful suggestions. -
3rd party material combiners
R Reynolds replied to R Reynolds's topic in Work In Progress / Sweatbox
Thanks for your help Robert. I set up the folders as you suggested and I'm almost there but as shown in the screen grab, Windows thinks there's a distinct version for everything but Netrender and it's pointing to the 32 bit version; probably because I installed it last. I assume to invoke 64 bit Netrender I need to start Netrender.cmd file in the C:\Program Files\Hash Inc\V16.0 folder.
-
3rd party material combiners
R Reynolds replied to R Reynolds's topic in Work In Progress / Sweatbox
Thanks for the tip, Robert. So I save my current copy of master0.lic and then copy it into the V16.0 folder (both 32 & 64 bit) after the installs? Does this also apply for someone such as myself who paid the premium for a "permanent" copy? And speaking of saving files; I know *.sch files are the color schemes but where are the custom keyboard shortcuts saved? And while we're talking about fresh installs, during the first installs there are check boxes pre-selected with "Register Extensions" and "Don't install additional plug-ins". Since they were checked by default I went with them but I'm curious; what in blazes do they mean and why are they optional? -
3rd party material combiners
R Reynolds replied to R Reynolds's topic in Work In Progress / Sweatbox
Thanks for the tutorial Robert. That will serve my purposes nicely. Maybe not in this case but I do have a confusing file structure in C:\Program Files\Hash Inc\v16.0. I loaded v16b_64 first and I got a desktop icon for A:M64 and Netrender64. After I loaded v16b_32 the Netrender64 icon was replaced by the the icon for A:M32. Now there's two versions of most files ( e.g. Master.exe & Master_64.exe) all in the same folders. (I'm no expert but I'd have expected the 32 bit version to be in it's own folder in C:\Program Files (x86)\..) I have separate versions of RenderMessenger, RenderServer and RenderSlave. Ominously there's only one version of some routines (e.g. Netrender.cmd, master.log, uninstall.exe). Once again I'm no expert but this doesn't seem proper. I was anticipating 16b_64 and 16b_32 to exist as completely separate applications with no shared files. Did I install v16b_32 incorrectly? -
3rd party material combiners
R Reynolds replied to R Reynolds's topic in Work In Progress / Sweatbox
I used a number of 3rd party atx files successfully in v16_32bit but after putting Ander's MakeNormalMap001.atx in the same Textures folder, I started v16_32 and I got an error "Unable to load plug-in...MakeNormalMap001.atx". Does this mean this useful tool is no longer available or am I missing something? -
Since the term retopolgy seems to define a specific process to polygon users and thus brings with it a set of expectations and possibly disappointment, may I suggest it would be wiser to rename this tool to something like "rotoscope3D" or "3Droto" which are, in my opinion, far more accurate, descriptive and uses existing A:M terminology (which Hash borrowed from Max Fleischer).
-
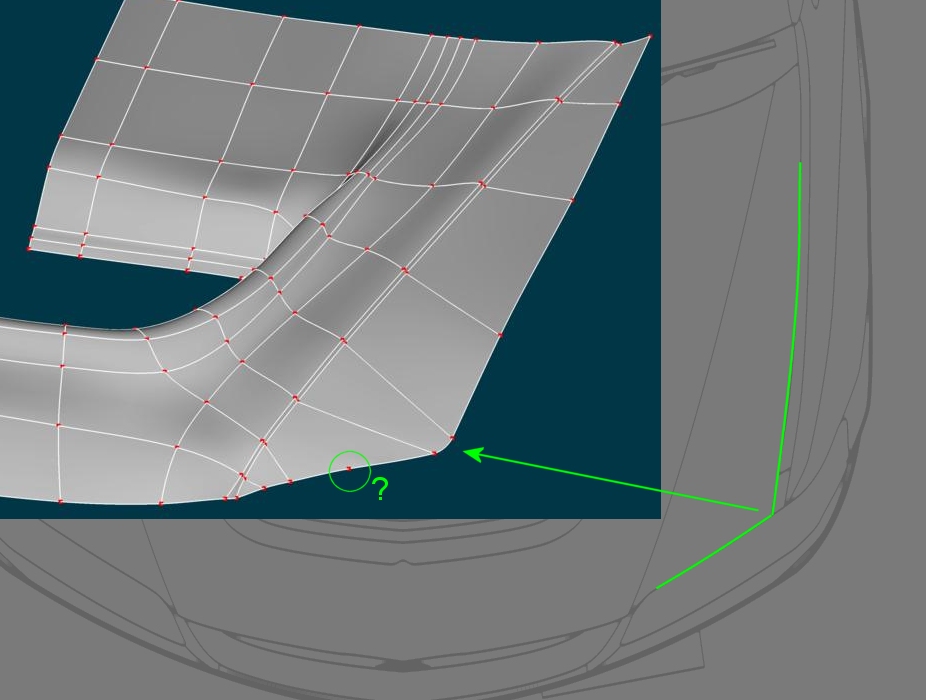
If you're satisfied with it, so am I. With reference to the attached image, I'm curious what purpose the circled, leading edge cp serves. If it's to change the curvature of that spline section you can easily do that with bias control at both ends. I'd suggest you get rid of it or make it the start of another spline running to the trailing edge. You may also want to re-think the front corner. Based on the roto top view, it's much sharper than the radius you've modeled.
-
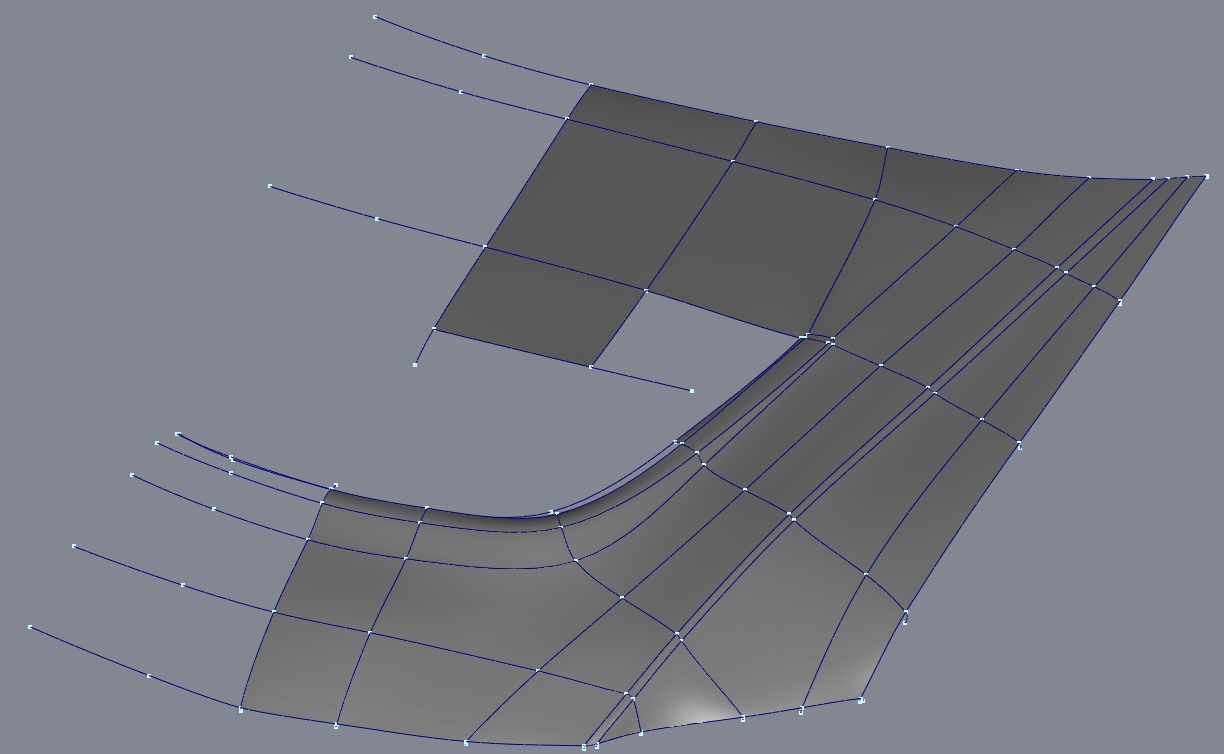
Don't even bother. Do it manually; in my experience you'll be happier with the result since copy-flip-attach tends to mess up bias handles even more than when you do it by hand. And adding the other half of the model is the next to last thing you should do on any part (re-tweaking the unavoidably messed up bias handles is the last thing ). If you want to get a good idea of what your half model looks like, continue the splines that cross the center line for another two cp's and put them more or less where their mirrored brothers are (see image). This way the shape of the surface at the center line will be really close to the final shape after the other half is added. If you must see the whole part before your done, make a copy and flip it but don't attach it. Your new hood model looks good but I'd suggest you only use two splines to define the trim line and try to space your cp's more evenly near the front edge. Your going to get a ton of creasing otherwise. I'd also suggest you try different splinage at the trailing end of the air dam. For instance, I tried wrapping the dams' outer perimeter spline around the end and back down towards the center and it seems to work OK.
-
Expert craftsmanship, as always! I'm curious to see your splinage for the wheel hubs to see how you solved the problem of cutting round holes in a conical surface.
-
Inspired by Mark's impressive re-creation of the "Rear Window" set, I've started experimenting with using BitmapPlus for building bricks and shingles. In an attempt to add more variation to the bricks I added three materials with three different decals and set their visibilities so each one only shows up one-third of the time. Worked like a charm. Then I ran the same play with three bump decals. This time only the first decal is visible, no matter what the other two material's parameters are. There's an easy work around (live with one texture) but I'm curious if there's something I'm missing.
-
I'd suggest that you put two splines (similar to the red one's in the image) running along each crease or feature line to define the start and stop of the bend in the sheet metal. Then add cross splines to define the bend shape.