Rodney
-
Posts
21,649 -
Joined
-
Last visited
-
Days Won
119
Content Type
Profiles
Forums
Events
Everything posted by Rodney
-
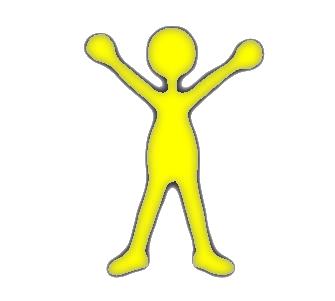
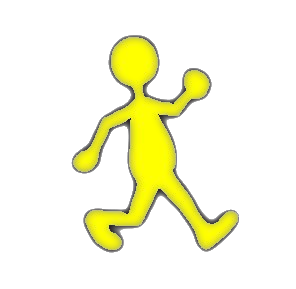
The only thing that looks odd is Thom's arms.... they look a little malformed. I suppose that could be the charm of it. I like the over all look of the shirt! I've attached a render of reg'lar Thom in hands up pose (lifting the logo?) as well as one of him walking.

-
I hear you. Better documentation is always going to be welcome. The best method to get up and running quickly is to run through the exercises from The Art of Animation:Master which I assume you are already digging in to right now. While it just scratches the surface in many ways I've yet to see anyone that has ran through all those exercise that hasn't gone on to greater success. That foundation of basic exercises will serve you well and if nothing else help to formulate questions. Have fun with that! (Note that the current Simcloth is much more powerful than the previous one when David's book was published).
-
There is an old saying, "If it's not documented it didn't happen.' There is something of a problem with documentation in that once a process is documented folks tend to follow that path to the exclusion of other paths. This may even include better paths. Complicate this with the fact that paths do change and (hopefully) improve and you've got folks following the old paths and even discouraging others from following the new. A very minor case in point is the old (Shift click of the Lathe icon). In the distant past Shift Clicking the lathe icon would bring up the Tools/Options panel to allow setting the number of lathe sections. Several releases ago this changed to Control Clicking the Lathe icon and I found that old habits die hard as I still occasionally find myself Shift Clicking that icon. It's a better thing for the command to be Control Click because that mirrors other similar functions but I cringe at the thought of how many times I know I typed out the instructions here in the forum to others to Shift Click that icon. If they Shift Click now will they only see that I'm wrong and wonder why I'm such a blundering blithering idiot for getting it wrong in that documentation? Ah, the price of progress. Robert hits the nail on the head when he says you've found the right place to ask questions. This forum will not only answer your questions but more often than not we'll whip up tailored documentation (video tutorials even) to address the issue at hand.
-
Here's a moving example of that shader style:
-
Not that this is anything like the style but I wanted to post a quick test I put together using a basic diffuse gradient shader. I don't recall ever using one of those before... I'll have to experiment more. Disclaimer: The model is just a bunch of pieces quickly put together to (very roughly) capture the look of who I presume to be the main character. I'd like to create more of this character and add the sword etc. but I think I'd better sleep instead.
-
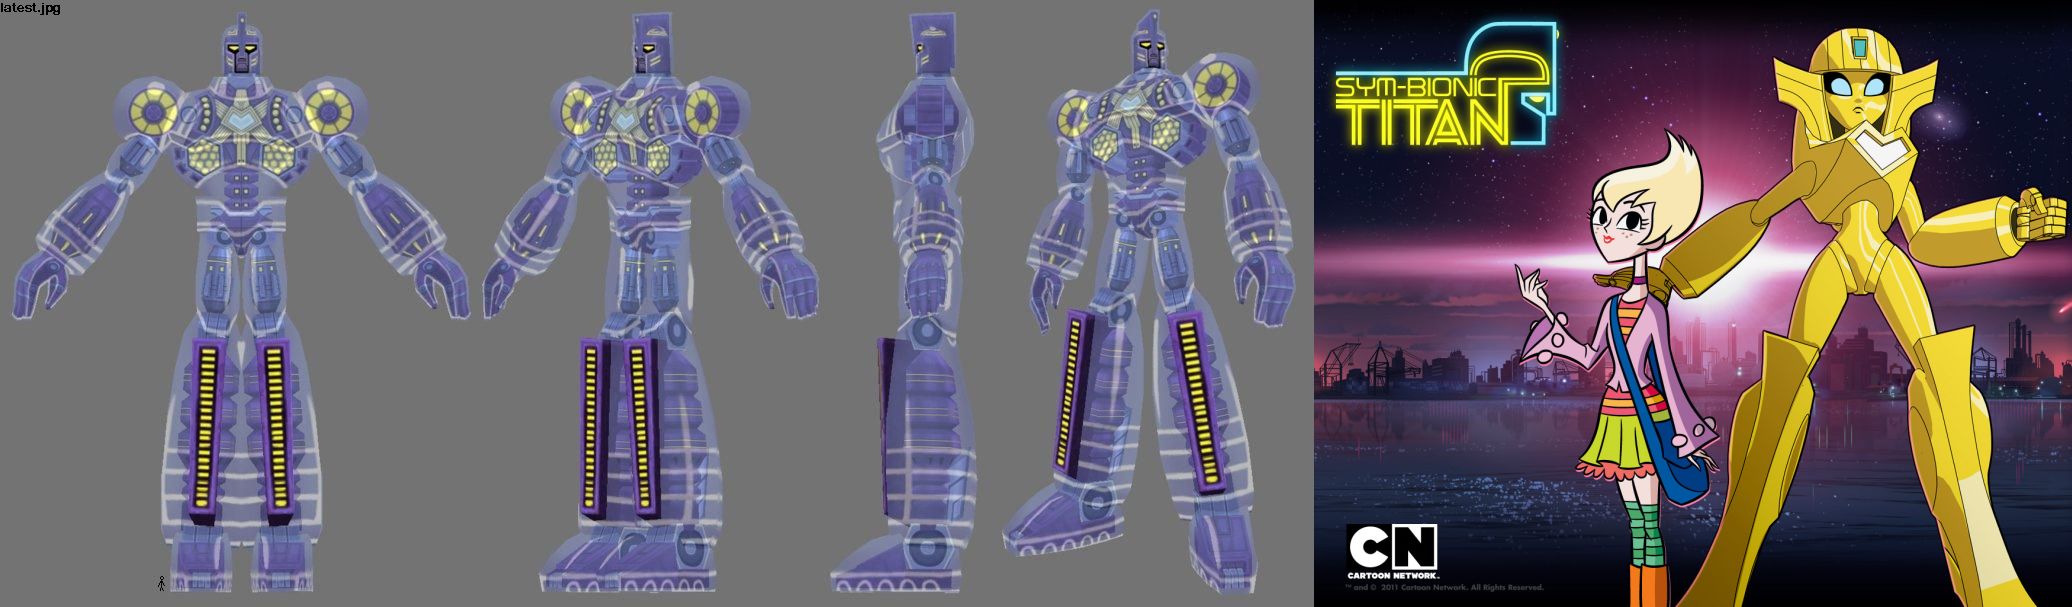
Ah! Quite a difference. Although I think you mean 'bionic'? I like the style! I'm thinking a composite will work best mostly in order to achieve the clear lines. The composite would also give you total control of the colors (of lines and forms) in post rather than at initial render time. I wouldn't say you couldn't get away with some ideal renders straight out of A:M but the models would have to be created in such a way as to create the 2D lines and that generally means a 3D shape that is oriented to the camera rather than ideally modeled for all views at all times. (I may have to demo what I'm talking about there).
-
You may need to post an image of the specific look you want to target as the range of styles within anime is very broad. Your examples of Batman and Titan A.E. subject a likely composite of flat shaded (cel shaded) color overlayed by a separate pass of the line work. You can get a lot of this same look via A:M's Toon setting by specifying the color of he line to be in the neighborhood of 60-70 percent of the underlying (flat shaded) color. I like to use other methods such as compositing mainly to get a variable width to the line but there are other tricks to achieve the same effect such as manipulation of lighting. Shaders also work quite well depending on the style you are after. Matthew Krick's site is down but his is one of the classic tutorials on 'anime'. I don't the specific look is quite what you want but it should demonstrate the approach. See attached for the collected tutorials: (They are also on the Extra CD if you have access to that) MatthewKrickAnimeTutorials.zip
-
You should check out the collected topics of the water effects forum: https://www.hash.com/forums/index.php?showforum=198 I assume if you are after babbagepatch related infomation you are primarily interested in underwater. For surface water definitely check out Mark Skokacek's 'Ocean Generator'. To keep it from getting buried the subject of water probably shouldn't be in the Materials Laboratory but a whole lot of water effects do rely on materials (particle or otherwise).
-
Everyone thinks its worth it (they'd love to see it in action if it was already made) but no one would be willing to pay for it be be made. Hash Inc likely doesn't see the value in it because if they did it would already be created. I would think that this would be more of a case of using the iPad to control a Mac/PC. Example: https://itunes.apple.com/us/app/microsoft-remote-desktop/id714464092?mt=8 Most of the remote control apps I've seen of this type are from 2012 so they should be much improved after 2 to 3 years. Where there is a will, there is a way.
-
I was thinking of you when I did it.
-
I believe when we think in terms of porting A:M (or recoding A:M) to other systems we are missing the boat. There are better ways to work with Android, MaciOS and A:M. Just because A:M itself cannot run on those platforms does not mean A:M files cannot be used. The secret sauce to success (on those platforms) is to write applications that accomplish tasks that are easier (on mobile platform) to do. As a for instance, entire productions can be organized anywhere without the direct need for A:M. Then once the production is accessed by A:M off and away you go. Want to replace a model with something updated/new... just move the file to the right location. A viewer app would be ideal of course and one that takes advantage of spline technology would be even better but folks have a whole lot more trouble organizing their projects than they do actually producing them. Unlikely for reasons Robert alluded to (see also discussions of the issues upgrading to Mavericks etc.). But, if an application to run the full version of Windows on iPad is ever produced... The good news is that very few things are impossible.
-
It's been a long time since those days. Suffice it to say that I broke my A:M CD on one of those trips and Hash Inc replaced it, proving once and for all that one should never sleep with their A:M CD and that the folks at Hash Inc are really great (they let me keep the broken CD). Thus far I've found the digital subscription considerably harder to break.
-
Fairly difficult I'd say. In essence you are suggesting a rewrite of A:M code from the ground up on two new platforms. Something like a HAMR viewer would be a lot easier but see the last topic about HAMR for challenges to that. Now if the A:M app in mind didn't have to do everything A:M can do now that'd simplify the process considerably. My take at the moment is that it would be more realistic to code an emulator for Android/Mac iOS that will run full Windows/Mac applications and then find a way to securely port A:M to that. Let's let the experts chime in.
-
I can't recall what they were called but I think the two main differences between the older clylindrical 360 panarama films and the 360 globe films is 1) The are stitched together so that there is something to view everywhere (top, bottom, etc. etc) 2) They are interactive and the viewer/audience can change where the camera is looking. I do recognize this latest VR trend as a return to those 360 degree panaramas. I recall visiting one at either Disney World or Six Flags when I was a kid. I'm going to guess it was Disney World Florida and similar to your experience everyone stood in the center of the room and the 360 degree scenes where played out on the screens all around the room and to watch something behind us we just had to turn around. Pretty nifty setup he had there. Of more interest to me personally would be how to composite those various views together to form a 360 sphere. I know of software that stitches together still imagery but the stitching together of video is something I haven't yet experimented with. The closest I came to something like that was an experiment in Iraq where I stitched together about 200 miles of terrain into one very long image. That attempt wasn't entirely a success but it worked a lot better than I thought it might.. and... it wasn't 360 degree panaramic.
-
Here's a random doodle... I guess you could call it a test of mouth shapes. What I find interesting about stuff like this is how emotion can be conveyed with no other change other than the jaw/mouth. Adding some eye and eyebrow animation would yield even more interesting results and of course yield that wonderfully expressive emotion 'anger'. randommouthshapes_sm.mov
-
I saw that Jason posted a link to video outlining Youtubes plans to allow 360 degree videos to be played on youtube. 360 degree videos that we can scroll around in and zoom in/out are certainly an interesting technology. My interest of course is more on animation so I'm curios about the potential for creating 360 degree animated short films and movies. The basic premise is to create have six or more cameras all record the same event and then stitch those video streams into an interactive 360 degree video. If anyone has more info on how we might set this up in A:M I'd be interested to know. I assume that rather than use multiple cameras each rendering the same set from multiple POVs a reflective surface might work too. Here's the link that Jason posted: https://www.youtube.com/watch?v=2q7AiNEjwFE#t=170 I assume this relates to tech like Occulus Rift and other virtual reality experiences. Here's an article that has an onscreen demo of a 360 theater experience Dreamworks revealed back in November: http://www.roadtovr.com/dreamworks-reveals-video-360-degree-virtual-reality-super-cinema-format/2/ Examples here: https://littlstar.com/videos/64660861
-
Very nice! Not that I know anything about the timing of dances... The only seems off to me is the very end of the dance where it seems the audio has drifted off by a frame or two. I am also wonder what (if I was animating) I might do to make the male and female character slightly more masculine and feminine to further differentiate the two. By the color alone we might assume that the blue is the guy and the red is the lady but in watching again I'm not so sure. How might the performances be exaggerated further to really up the ante in personality... that'd be my question. At a guess I'd say the guy might have more stop motion/straight movement and the lady more fluid movement with arcs and curves? This is not to say that both characters wouldn't have both but that one trait would be dominant in one while slightly suppressed in the other. I suppose the question would be, "When looking at the reference footage what if anything stands out that would be ideal to incorporate to further enhance who these characters are?" Without seeing the reference I can't say for sure. I really have no place to crit here... but those are the thoughts that came to me... I really enjoyed the performance!
-
Here is a direct link to A:M Reports: http://www.hash.com/reports/login_page.php
-
The good thing about that is that this prompted me to watch Episode 1 again. More please!
-
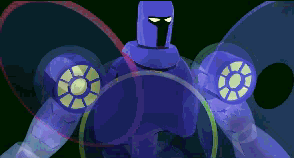
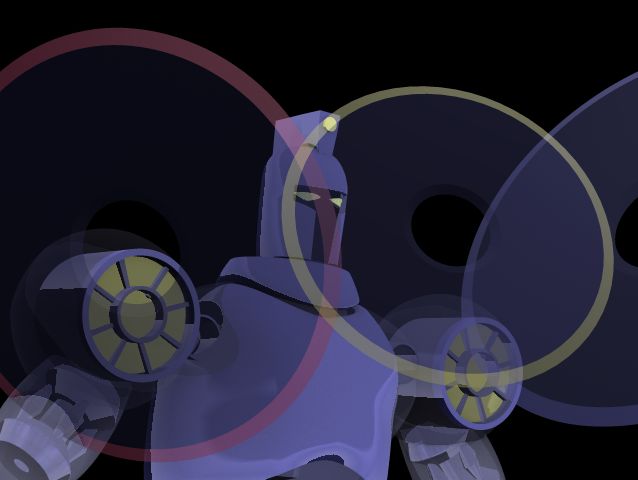
I'm hoping to see this guy animated!
-
Chris, I took the liberty to correct Will's patreon link in his signature (so it should work now). I'm not sure where his youtube channel has gone (so couldn't fix that one). Most of what you are after can be found via Will's blog but I think the first episode of Tar was hosted on Youtube and that appears to be down. Over to you Will.
-
Give us a few days to brush off the dust from the manual and we'll start 'er up anew. As an introduction to the course I will suggest reading through at least to the first exercise of the manual and skimming through the rest to see what areas of interest particularly stand out to you. Having a notebook (pen/pencil and paper) handy to jot down questions, insights or to make note of areas that you'd like to dig into greater depths is a good idea as well. While the certification is designed to acknowledge the ability to follow the manual (enough to be able to apply the principles to your own projects) this is meant to be a fun experience so reserve lots of imagination to go beyond the exercises too. Exercise 1 is entirely too simple so... do that and then dig around for some variations on the theme of the execise. For instance, open up another model provided by Hash Inc and explore their settings/poses. Knowing more about the models earlier can help later when you want/need to use those.
-
The only thing we need now is a few more folks to join in with a desire to work through the manual. The timing is certainly right, with it being the beginning of a new year. (In this way there'd be good way to recognize the 2015 alumni) It's always going to be more fun when those in the trenches... actually doing the work... can compare their notes. I expect Robert would be open to the idea as the experience of those working through the current manual would provide feedback which would aid in the next iteration of TaoA:M (which might not actually be called TaoA:M). It should be noted that anyone can embark on working through TaoA:M at any time. There just hasn't been an official online certification for a few years. I suppose the question now would be, "Are you still up to it?"
-
There was a certificate awarded at one time for completing the all the exercises in the manual. I've toyed with the idea of bring it back.but are some considerations... first and foremost would be that I want the experience to be the most rewarding possible for anyone making the attempt. The subforum is private mainly because there is nothing to see there. The idea being that enrolled students might have access to resources/information not publicly available. (i.e. some resources considered 'fair use' might not be outside of educational channels) If there is interest I'd love to see the online TaoA:M return.
-
You should file this as an issue in A:M Reports. It may already be a known issue but through the report it will be a known issue with documentation.