Search the Community
Showing results for 'snap to surface'.
-
Is there a way to keep Snap to Surface from jumping point to the opposite side of a model?
-
I have heard alot about it,but never really knew what it was for ,surfing on youtube ive seen alot of programs exporting from one program to another and back,and I saw John Bigboote had just posted something about it for v17 ,and is it new in v17? ( Most videos were just timelapsed and did'nt explain anything)
-
Right now I am working quite a lot with snap to surface, because i am recreating one of my bigger polygon modells. I found some minor problems : Snap also reacts to hidden geometry. That should not happen. Snap has a tendency to snap to geometry on the other side of the model. The bluprint modell as well as to the spline geometry. In case of the blueprint it should be not so hard to fix that by checking the orientation of the surrounding normals. In case of the spline geometry i dont know ... Maybe it is posssible to look in these issues (at least its issues to me). Regards Heiner
-
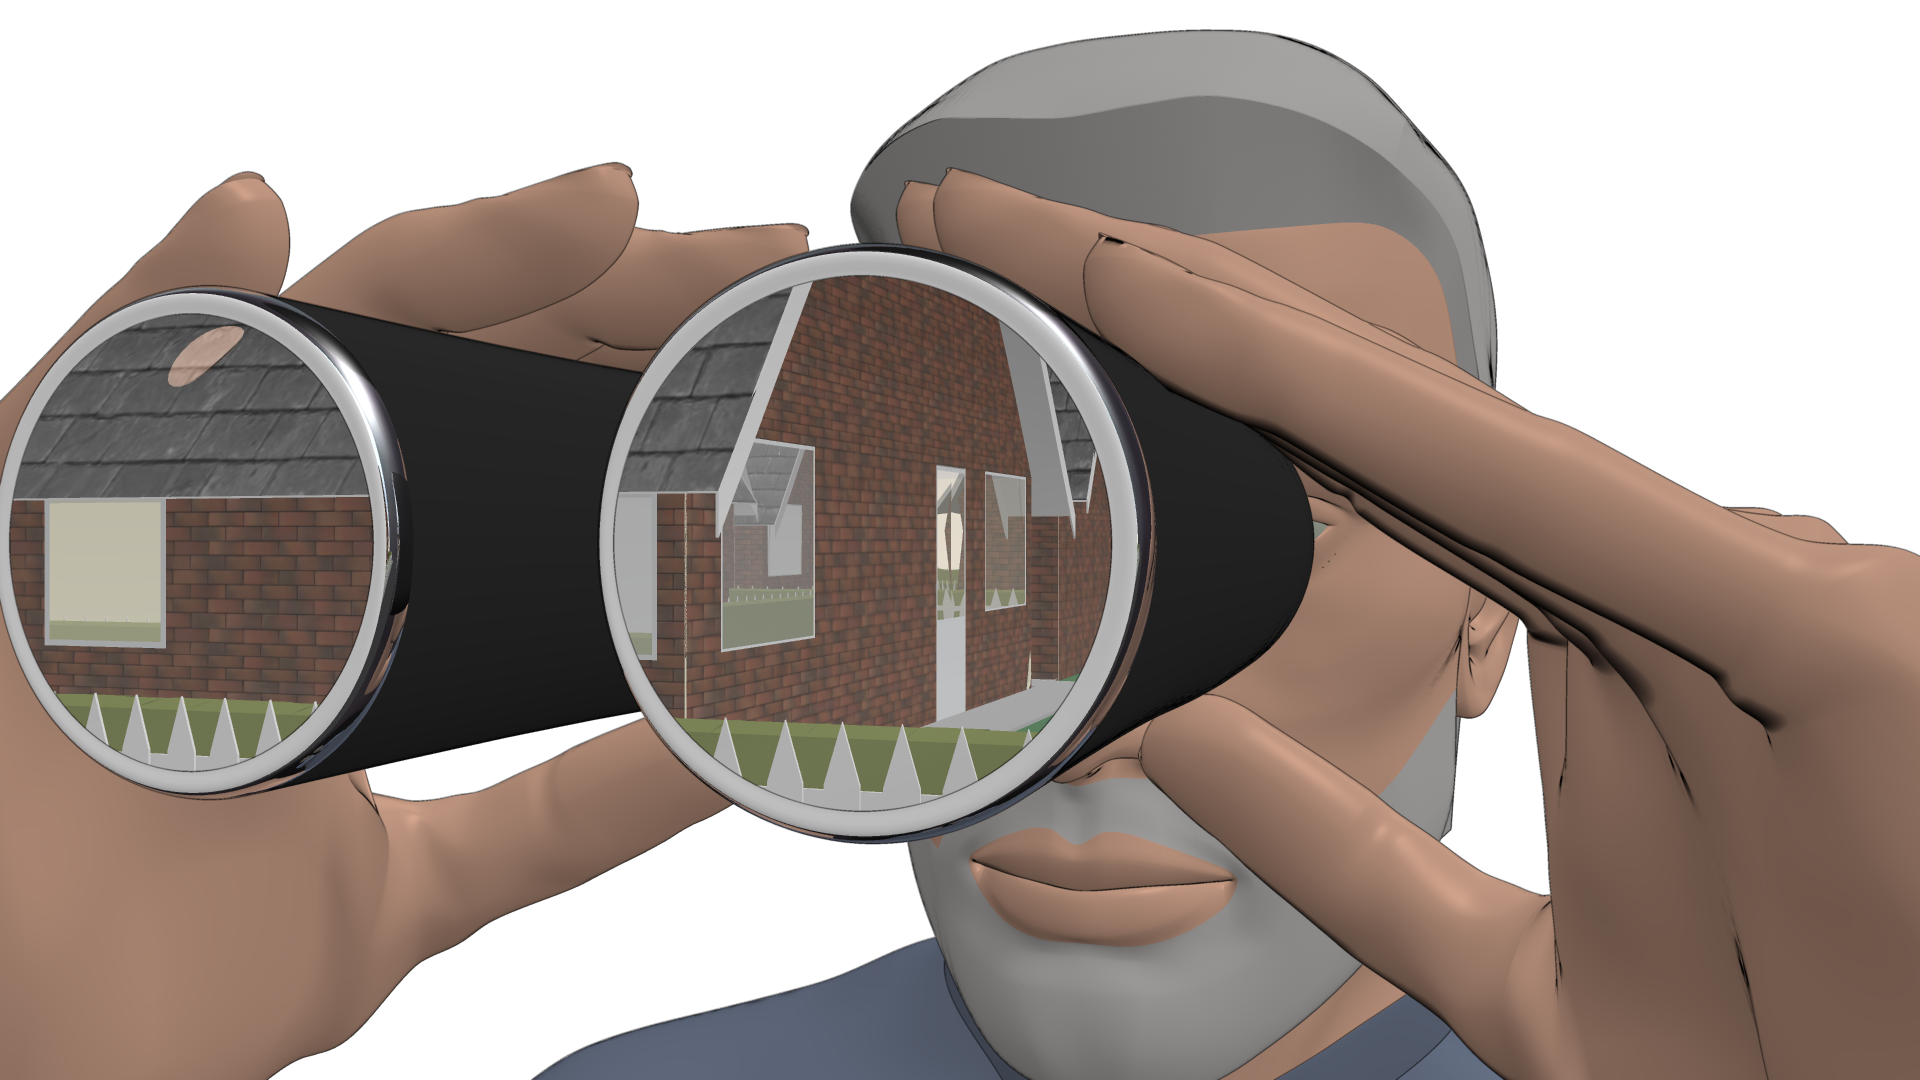
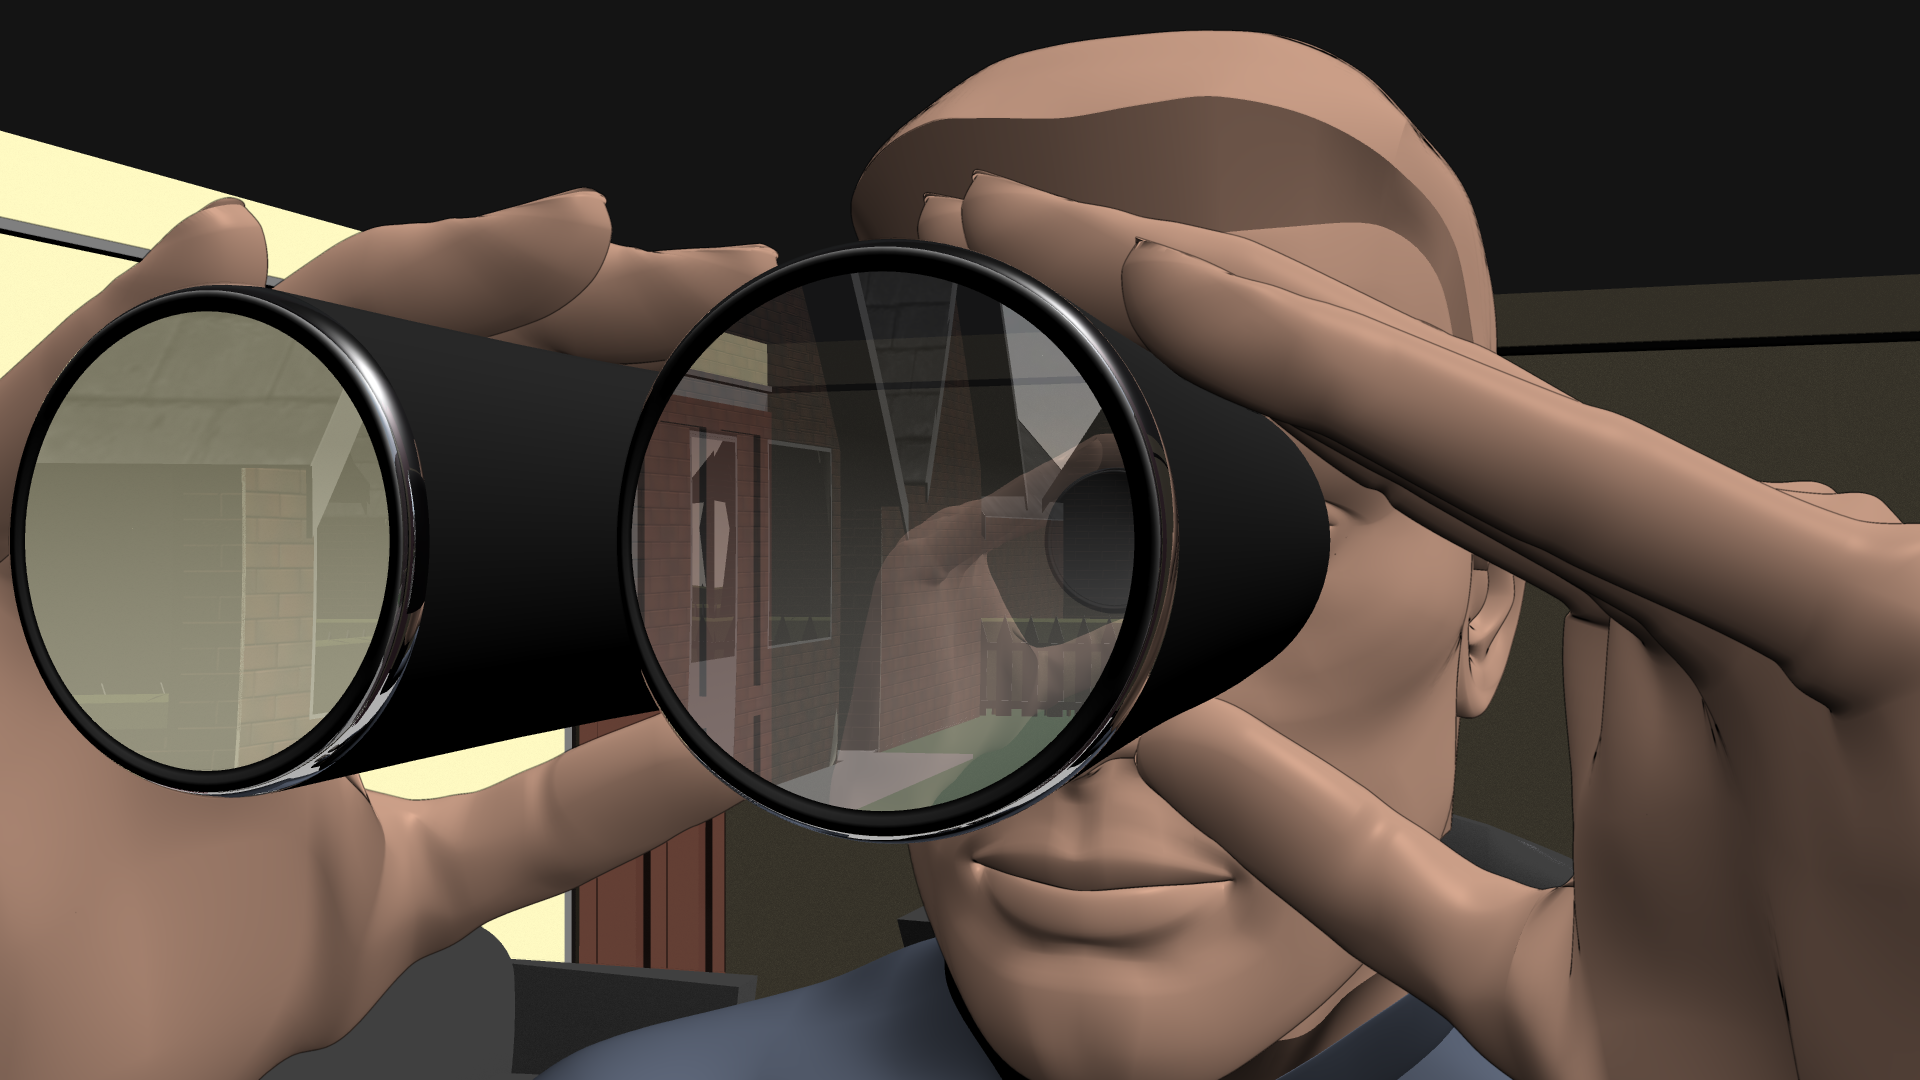
Hello esteemed Spliners! I am working on getting 'game-ready' assets out of A:M- hoping to get them into Snapchat, and have made good use of Gerald's(Fuchur) 'A:M to Unity' video tutorial where models and actions are exported from A:M to Ultimate Unwrap via the .X file format... and as always I figure that Sketchfab is a great place to view, test and share your UU exported FBX file. However- I am finding that when I employ my 'Bake Surface' option in A:M- it looks good there but in Sketchfab I see overspill or some anomoly that I would like to lose or lessen. Take a look here at my Sketchfab model with animations: https://skfb.ly/6JSDM Latest rev: https://skfb.ly/6KtZW You will see what I am talking about... lots of lines everywhere especially around the mustache area. Is there a setting or trick to get better UV mattes when I Bake Surface?
-
I can't get Snap to Surface to work in a Pose window? Does it? The cursor occasionally displays the Snap to Surface icon but I'm not getting any snap.
-
In this PRJ, Model 1 has two groups, "target" and "original" SimpleSnapTest02.prj I want to Snap the CPs in "original" so they are on the surface of "target" and I want to do it in a Pose. They don't have to be in some exact spot but i do want to get them on the surface of "target" What is the proper way to use Snap TO Surface for that? I haven't had much success with it.
-
Snap Group to surface is "view dependent" which I take to mean that it will move the CPs in what ever direction you are viewing from, right? However, i can only get it to move in one direction. I filed this as an A:M report which is why it's in German but maybe someone here has an answer before Steffen gets to it... SnapGroupToSurfaceQuestion.mov SimpleSnapTest02.prj
-
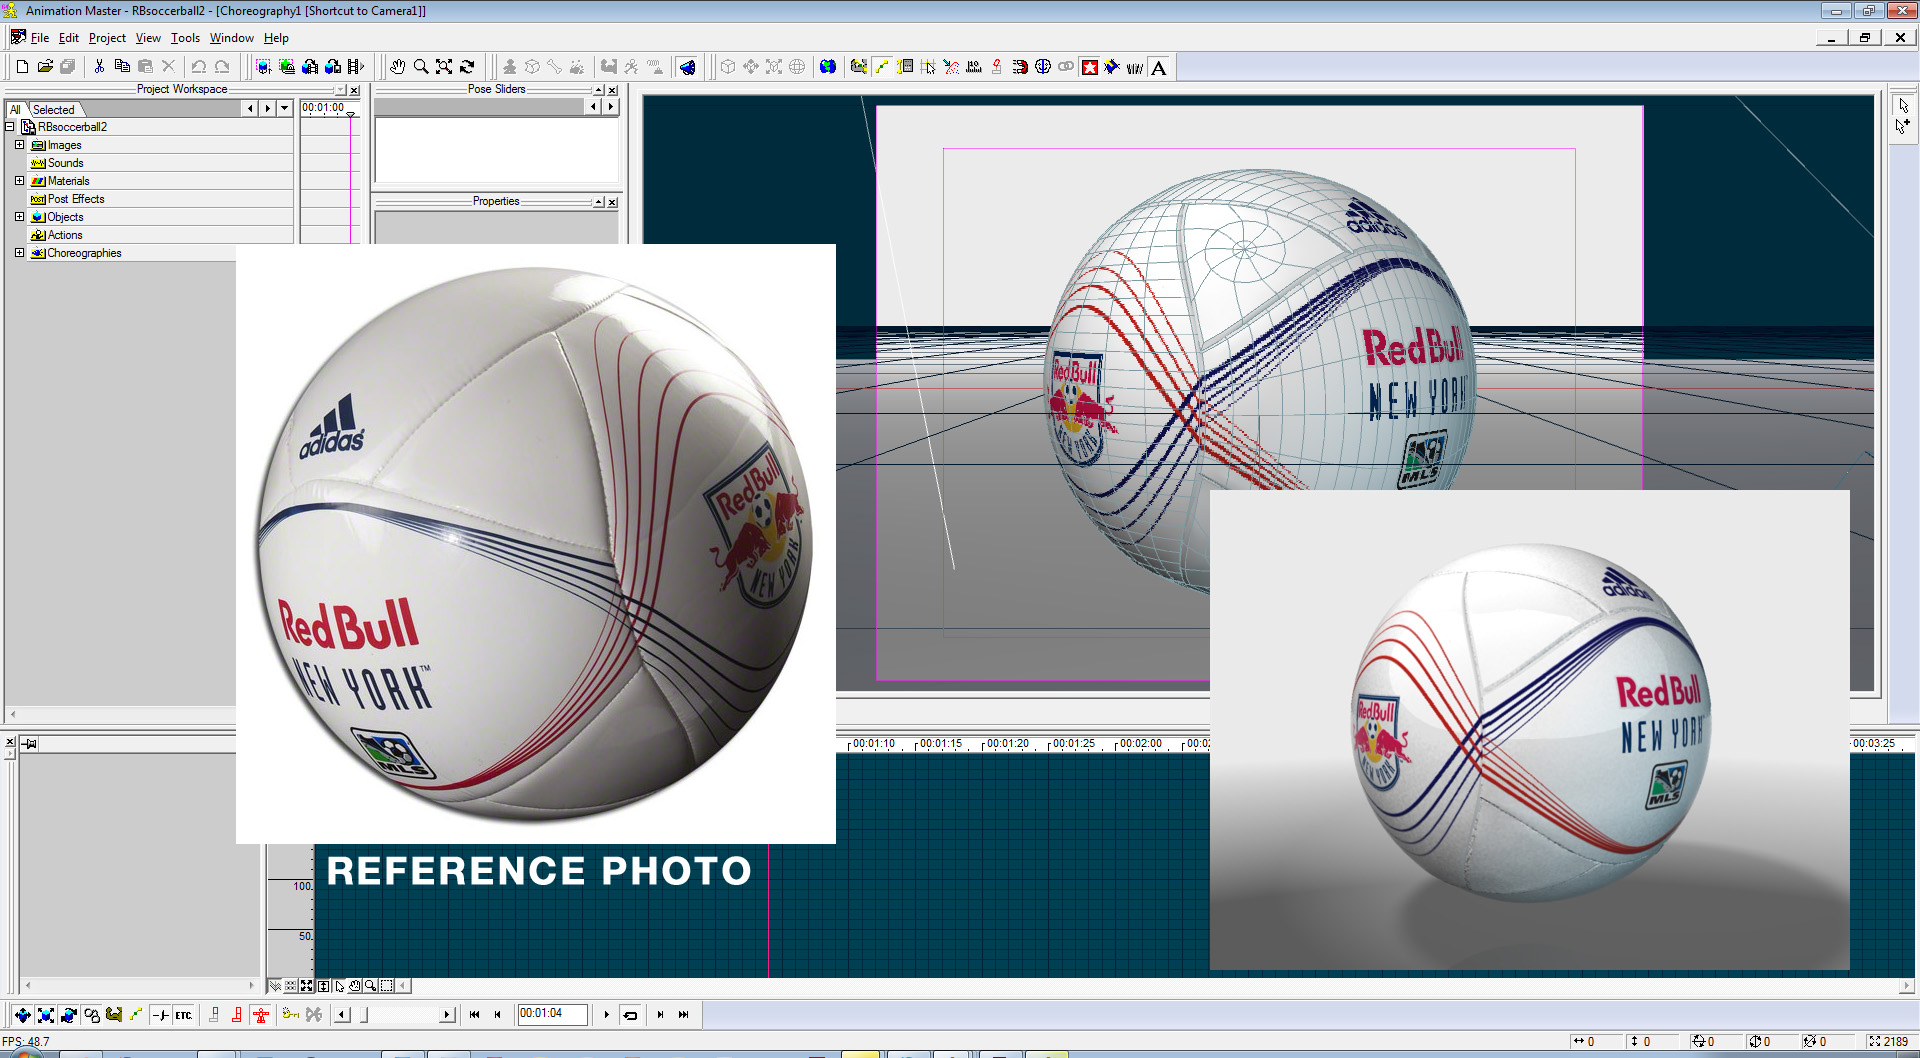
Hey - I took a chance to do a job today with the new 'Snap To Surface' tool, and it saved the day! Don't know how I woulda done this without it. Shawn Rogers asked if I could model this 'NEWFANGLED' soccer ball(ref photo) for him... at first I though- NO WAY, but then figured the S2S tool may help in the process and it could be a good test for it. Plus I love the challenge, the ball looks SO simple, yet it is really QUITE a modeling dilemma. 1st- I lathed a really dense sphere and exported it as an OBJ. Then imported it into the chor as a prop... this was to be the surface for me to draw on, activating the S2S function. A couple false starts, a couple rounds of 'make it bigger-make it smaller' and I had a good workable base. The tool and the 'snap group to surface' option worked really well, a couple of times it would snap to the backside surface- but the undo got me back. Whats REALLY nice is when you have the tool ON, you can slide CPs around and they adhere perfectly to the surface. I will post a 360o render when it finishes. The Snap To Surface tool will be available in Version 17.

-
Reference: [bug]6102[/bug] I'm wanting to explore a few of the reports filed away in A:M Reports in order to better understand what the user was/is looking for and so that in v18 they will be more likely to see what they are looking for. Obviously my exploration will stop short of any coding or programming... but in the exploration who knows what might be found! Report 6102 looks like one worth exploring because it is likely the reporter hasn't yet fully explored the Snap to Feature tools in light of other tools currently available in A:M. General Data: 6102 DJBREIT moderate beta0 Modeling 3/26/2012 Windows 7 64-bit Sevice Pack 1 i7 960 3.20GHz Description: Some extra tool to round out the Snap to Surface This is a new and unassigned report. In the exploration I hope to learn more about what the current implementation of Snap to Surface can do. My focus has been within the Modeling window and with use of models/structures created in A:M but I am not averse to using imported Props. I am just more personally interested in a purely A:M-centric workflow.
-
I am not understanding how to use the snap to surface feature? This is my first time trying it. Can someone walk me thru the steps to get started, please. I have made a SIMPLE obj in A:M (model exported as obj) I imported that obj 1) as a prop, and 2) imported that obj into a blank model. I have tried to use the snap to surface feature both in model window, as well as in chor (with prop) If I try to do it in the chor, and use the Add cp's - I get a path object If I try to create CP's in model that has prop imported in it (used plugin - import, obj) - I can't seem to control how the cps snap to surface. No comprendo. Que pasa?
-
I’m trying to get to grips with Sub Surface Scattering, but at the moment I’m at a loss on how to get it to work properly. What I cant quite understand is that the sss effect seems evident in the modelling window when rendered out in final, however not all evident in the default choreography window. I’ve been using some of Yves Possaint’s sub surface scattering value examples and testing them out on basic primitives with no luck. I was told by Robcat that John Bigboote uses sss a lot, any help from anybody would be greatly appreciated.
-
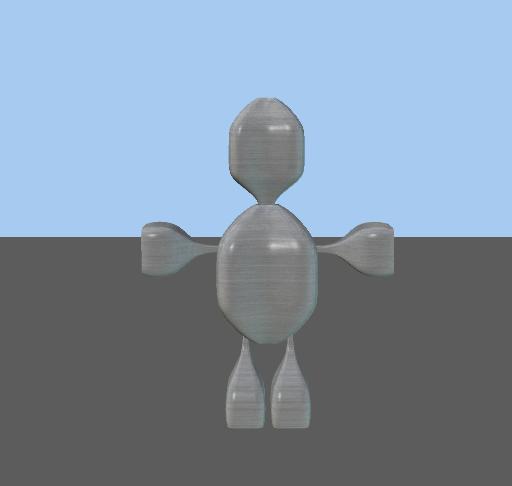
Made a simple robot
-
Hi there, the new forum design looks great! I didnT find a section for techincal questions though, so i put it here. and wheres the whats new button now? I am still on AM 15h and discovered surfacebaking bbut: sometimes it works sometimes it doesnt. Any ideas what factors might influence that. Ram and grapics and render power shouldnt be the problem. Maybe some oldtimeuser has made similar expiriences and found the solution? Thanks for any help
-
Hello, Is there a way to baked surface for a selection and not on the whole object?
-
Hey everyone. I'm considering trying to transfer a very dense figure model into A:M. I was hoping that the re-topo tool would help out, but I was not able to find much on what others had been able to get out of it. Has anyone been successful in "retopo'ing" a high dense mesh, human figure in A:M?? William
-
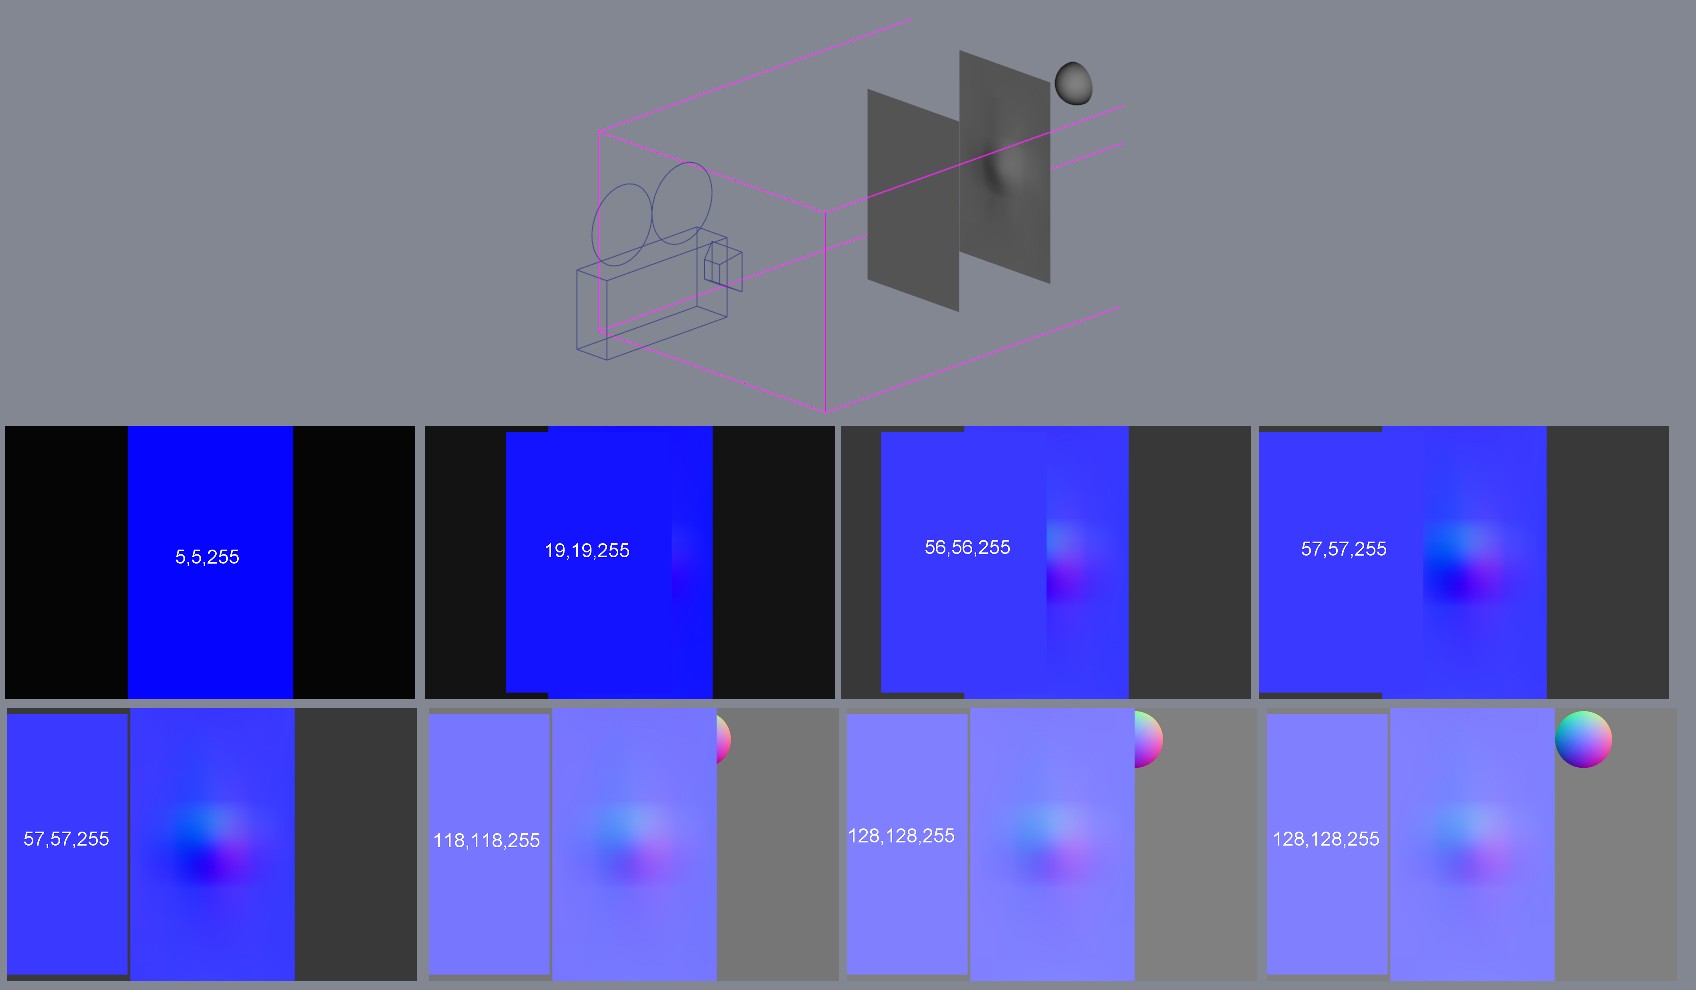
Ever since the MakeNormalMap.atx material was replaced by the Surface Normal buffer in the render engine I've always had unpredictable results. I couldn't seem to get a flat plane that was orthogonal to the camera to return a consistent color of 128, 128, 255. Sometimes it did but many times a flat plane would come up short on the red & green channel. So in the course of generating wrinkle maps for the seats in the street car, I ran more than a few tests and have found the answer; to get the correct colours the algorithm needs a full range of surface normals in the image. The following images are my proof. The top image shows the chor layout; a camera orthogonal to a flat plane. Behind the flat plane is a mildly deformed plane and behind that is a hemisphere. The first image is the normal buffer output looking at just the flat plane. The normal buffer assigns a colour of 5,5,255 Moving the flat plane to the left to expose part of the deformed plane produces the second image. The normal buffer assigns a colour of 19,19,255 The third image has half the deformed plate showing and the normal buffer assigns a colour of 56,56,255 With 75% of the deformation showing in the fourth image the flat plane registers as 57, 57, 255 as it does when the entire dented surface is showing in the fifth image. In the sixth image the hemisphere is moved out from behind the plane to expose about one quarter of it and the flat planes now register as 118, 118, 255 With half the hemisphere exposed to the camera (seventh image) flat surfaces now have the correct value of 128, 128, 255. As is the case when the entire hemisphere is exposed. So my suggestion for generating correct normal maps from any surface is to have a "calibration" hemisphere within the field of view. But keep it fairly large, if it's too small (like about half the size shown) the red/green channels start to fade.
-
I find myself playing tug-of-war with Version 18 of A:M more than I used to with Version 15. There seems to be a lot more snap. I pull a control point to a position when I am modeling, and the computer snaps it back to where it was. How can I turn the snap off or adjust it to a level that is helpful?
-
I have heard alot about it,but never really knew what it was for ,surfing on youtube ive seen alot of programs exporting from one program to another and back,and I saw John Bigboote had just posted something about it for v17 ,and is it new in v17? ( Most videos were just timelapsed and did'nt explain anything)
-
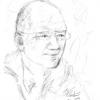
I was just about to start celebrating after Robert helped me mix Toon and normal on the same model in a render. It was going to save a lot of time. Then I saved the project and odd things happened. I had modified one of the models, Delivery Man, that came with AM, giving him a beard and a dress shirt. This is what it looked like with Normal render. V17, OSX When I did a Toon render ( before he new modifications ), I noticed some mesh penetration, I tried Robert's suggestion and was really pleased with the result, except I noticed some more penetration and spent a while fixing it. Saved it and went out to do some analog 3D while it rendered away. Came back and checked it, only to find that his beard , and other surface values had reset to the default ones of the original model. The mix of styles was there but the colours had gone. I then spent about 90 mins trying to get it back to how I wanted it because, very foolishly, I'd trashed the earlier files and couldn't get them back. But, every time I reset the values then tried to save it, it would crash out. Tried it in V18 but with no greater luck. The original model is far better than I can manage but, I only wanted to use a small proportion of it and change the colours.( not trying to take credit for someone elses work ). Is there any way to reset the surface values to the default settings so I can go back and modify them without the originals showing through ? Thank you for your timeand help simon Neighbour Two A.mdl
-
I don't know about other folks but I've been using the heck out of the new Snap to Control Point feature. I was using it before to match up splines and CPs but today I used it in a Pose to assist with precision placement at 0%, 50% and 100%. My project here was to create a modular monster whose belly can match to 'small', 'medium' and 'large' sizes as well as (manually through the pose slider) other settings. If you'll pardon the cheap graphics from this POC... I'd say it worked rather well. I meant to render a wireframe to show the three target zones for the modular monster's waists. Edit: Mov replaced with shaded wireframe render. (the three ovals being the three target sizes for monsters' waists) A:M has gained a substaintial improvement in precision modeling through this addition in v18. SnapToCP.mov
-
Hey Everyone. I tried to find my old thread about this but could not locate it. I inquired previously as to if there is a way to snap a bone's base to a cp. Has that been figured out? Or is it still not possible? Sorry about the re-posted subject. Cheers, William
-
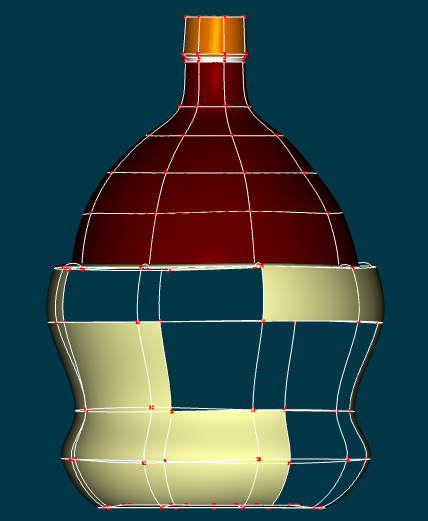
I have been trying to make a chianti bottle. For whatever reason the 4 point patches are not filling in. I have tried rendering, but the patches don't fill in there either. I am not sure what I am doing wrong. Any ideas? A picture of the bottle as it exists now follows:
-
Still plugging away at ska dance project when time allows. Presently redoing the head in the light of the example David posted a few weeks back. Have encountered a strange problem though. It still needs lots of tweeks and readjustments but, the model doesn't want to acept the surface colour properties assigned to it? For example, the lips have an RGB setting of 208.180.160 assigned to the group but it doesn't show up in shaded mode or quick render. Can anyone kindly suggest the problem and possible soution ? simon OSX 10.68 V17g DH 001.mdl
-
Snap group pivot to grid video tutorial Enjoy Snap_Pivot_to_grid_video_tutorial.mov
-
A review of the Surface Pro 3 I didn't even know there was a 3 yet.